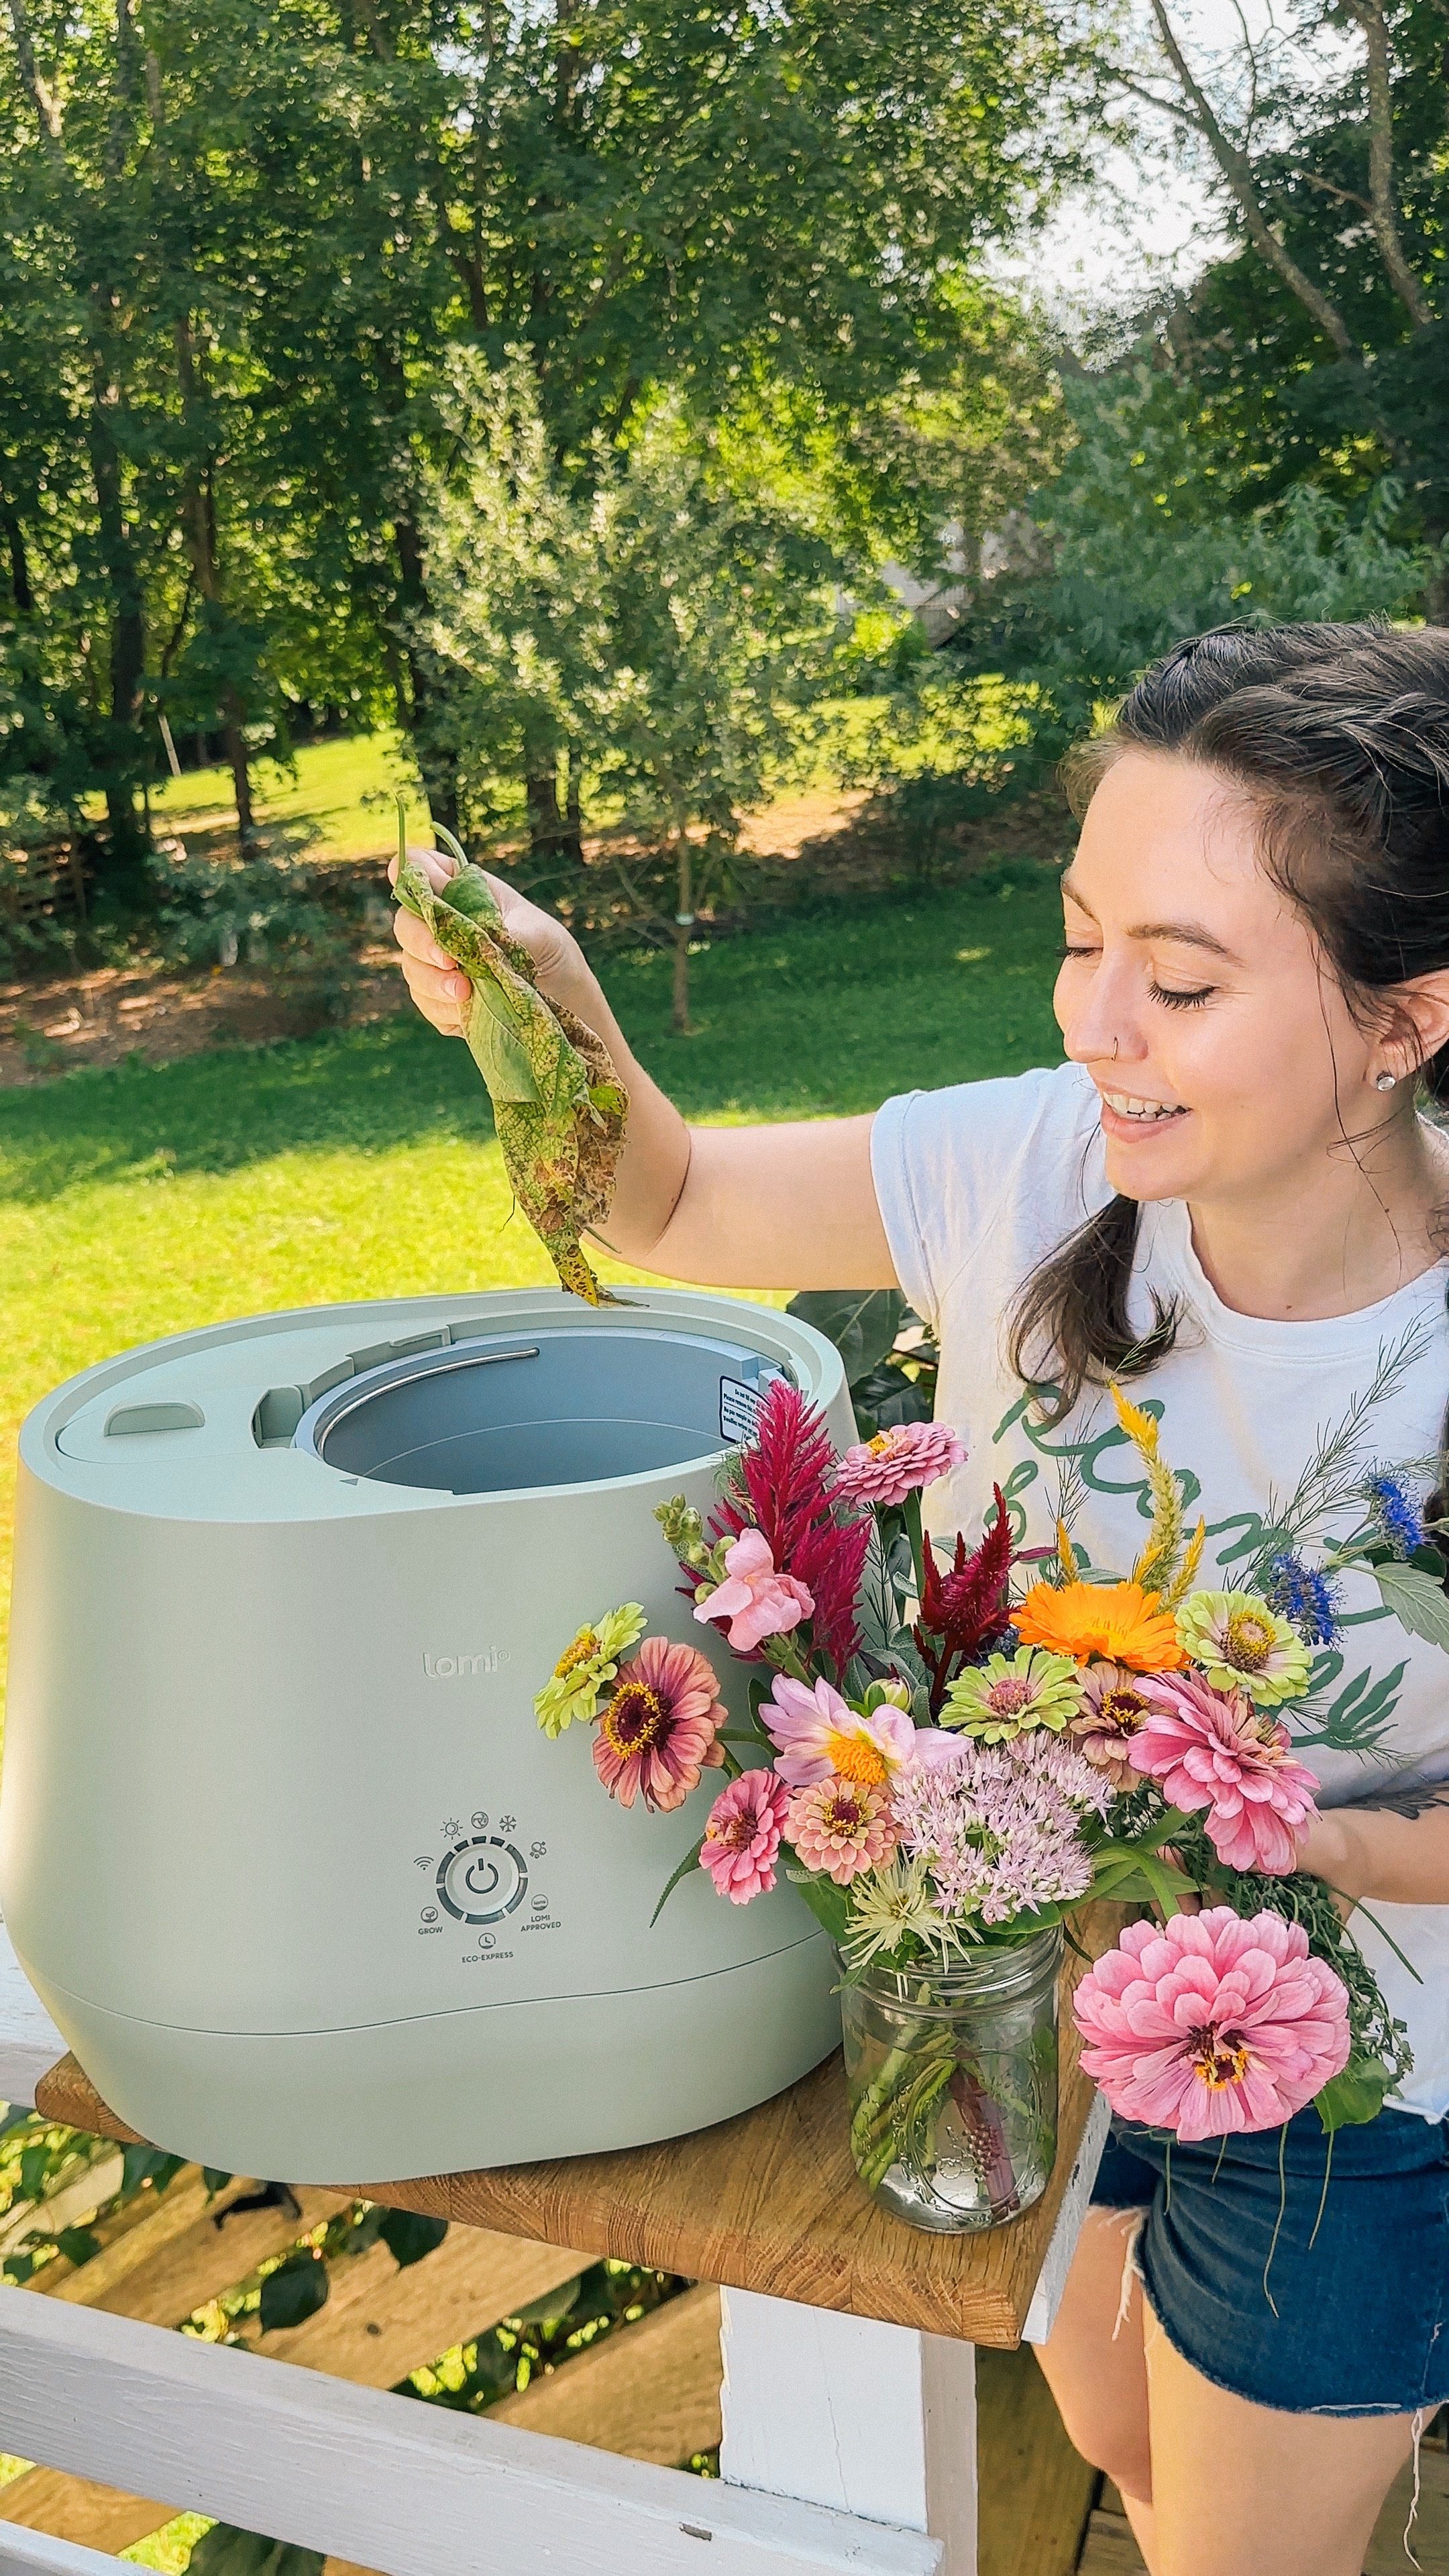
BACKYARD GARDENING MADE SIMPLE
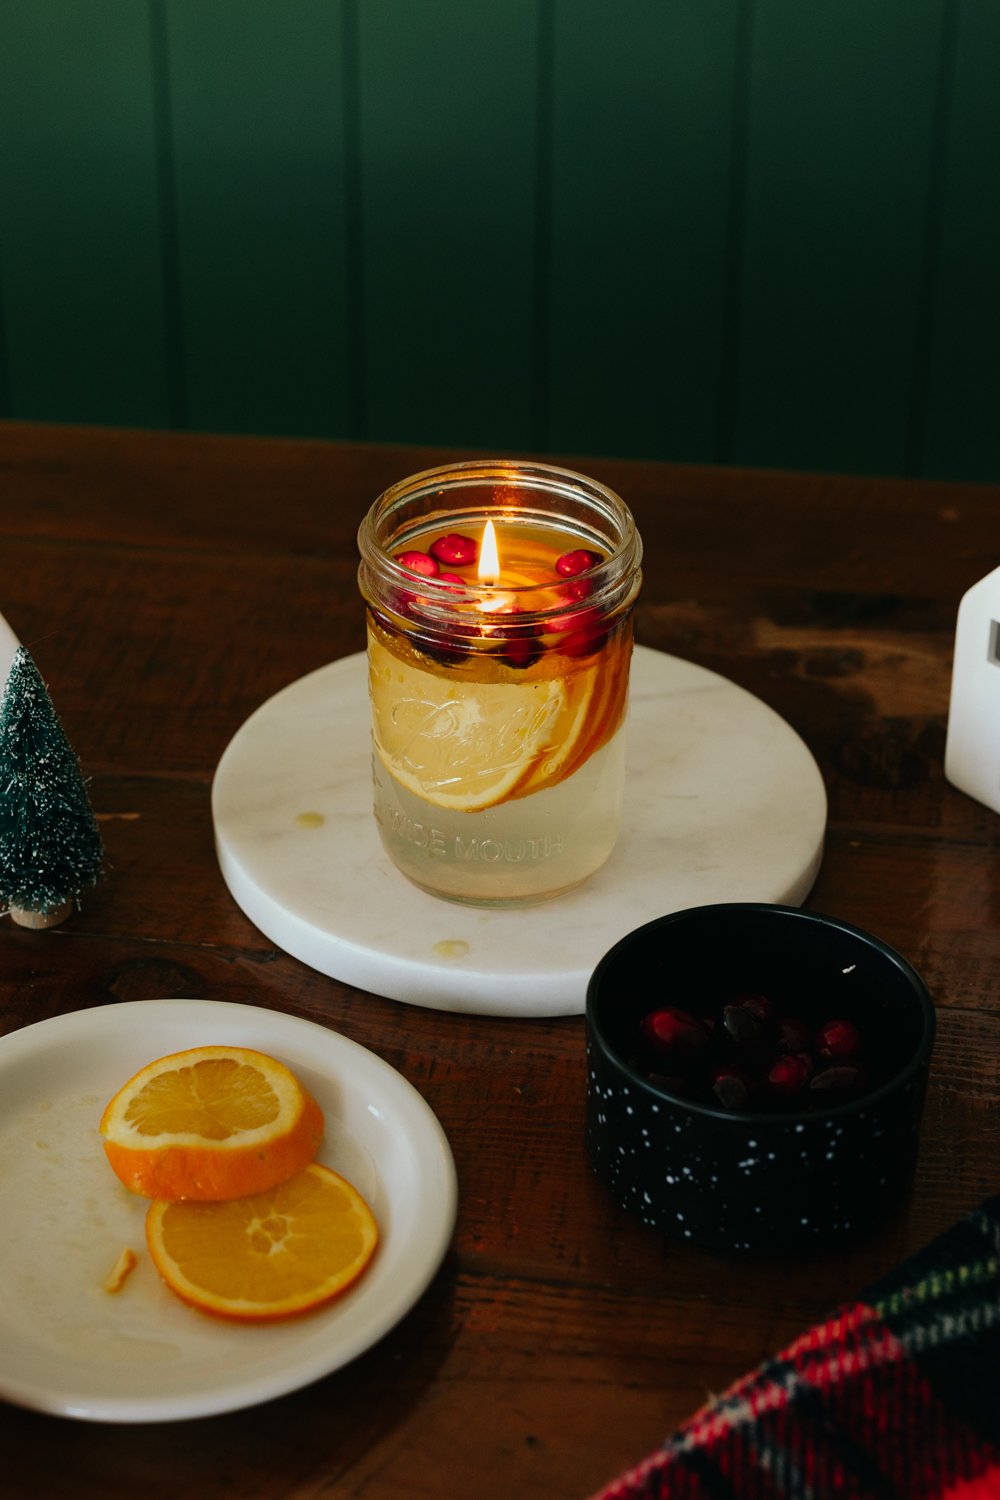
![Make This Safe Oil Lamp With a Mason Jar and Olive Oil [Tutorial]](https://images.squarespace-cdn.com/content/v1/60e85024dc86d643da81c96a/4b41f060-48ac-4a43-9513-da483e392f3b/December+2022+The+Cottage+Peach-8.jpg)
Make This Safe Oil Lamp With a Mason Jar and Olive Oil [Tutorial]
February’s of my childhood often are filled with dim memories of snow storms and subsequent power outages, leading to inevitable candlelight dinners cooked over the fireplace. The warmth and flicker of the various fires we had lit both small and large reign in my recollection of those times. I can still smell the matches burning off after being extinguished, the light smoke wafting through the air to settle on clothing and blankets. Despite the bitter weather outside and the temporary lack of electricity, we were never cold. We had hats, sweaters, blankets, and each other.
Nowadays like many others in this community I find solace in the light of a candle. The eternal dance of flame is grounding and comforting, a reassuring hand when things feel like they may never warm back up again. I’ve experimented with candle making of all kinds - dipped beeswax tapers, pillars and hand poured jars of soy wax to name a few. So it was about time to try my hand at perhaps the easiest DIY flame source you can create - the DIY mason jar oil lamp.
The Cottage Peach is reader-supported. When you purchase through links on our site, we may earn an affiliate commission at no additional cost to you. All opinions are our own.

While the days may be slowly but surely lengthening, we are still very much in the winter season here in New England. February’s of my childhood often are filled with dim memories of snow storms and subsequent power outages, leading to inevitable candlelight dinners cooked over the fireplace. The warmth and flicker of the various fires we had lit both small and large reign in my recollection of those times. I can still smell the matches burning off after being extinguished, the light smoke wafting through the air to settle on clothing and blankets. Despite the bitter weather outside and the temporary lack of electricity, we were never cold. We had hats, sweaters, blankets, and each other.
Nowadays like many others in this community I find solace in the light of a candle. The eternal dance of flame is grounding and comforting, a reassuring hand when things feel like they may never warm back up again. I’ve experimented with candle making of all kinds - dipped beeswax tapers, pillars and hand poured jars of soy wax to name a few. So it was about time to try my hand at perhaps the easiest DIY flame source you can create - the DIY mason jar oil lamp.
Olive oil lamps are ubiquitous at archaeological sites across the Mediterranean region. Unsurprisingly, the most common oil used in the Mediterranean region was olive oil. In 2022, a 2300 year old olive oil lamp was unearthed in the West Bank. Clay lamps that used oil as a fuel source appeared during the Bronze Age around the 16th century BC and were ubiquitous throughout the Roman Empire. Thanks to all this evidence, there’s reason to believe that oil lamps appeared at the very dawn of human history. But we don’t need to go back in time to make our own DIY oil lamp. In fact, this simple mason jar craft can be made in minutes using items you may already have at home.
How oil lamps work:
Floating wicks come in a pack with the floating portion separated from the wick. You’ll place the wick in the hole in the center of the floating disk piece with half the wick on each side of the disk. This way, when you place the wick in the oil lamp, the oil will be drawn up through the wick and be vaporized and burned by the flame.
Are oil lamps expensive?
Not at all. Since one tablespoon of oil can burn for two hours in your lamp, it is much cheaper than most candles. This is a great addition to your emergency supplies, as well as being a beautiful addition to your table. For storm prep, all you need to make sure you have is a pack of the floating wicks, some olive oil, a mason jar and water and you can keep your home safely lit without electricity during a power outage.
Are oil lamps safe?
The danger of oil lamps comes from the possibility of spilling. If the lamp were tipped over while burning, the spilled oil would all catch fire all at once on whatever surface it spilled onto. Thankfully, olive oil has a very high flash point which means it’s not super flammable. Plus, we’ll only be using a small amount of oil - the rest of the liquid in our mason jar will be water. If our DIY oil lamp tipped over, it should extinguish itself immediately. That said - it’s always important to practice fire safety around any type of open flame. Always burn within sight, keep away from pets and children and away from any flammable materials. Never move your oil lamp while still burning. I assume no responsibility for any damage that may occur due to misuse of your diy olive oil lamp.
How to make a DIY Mason Jar Olive Oil Lamp:
The options are endless when you make your own olive oil lamp, and you’ll find inspiration below for different ways to turn your lamp into beautiful mason jar decor. But let's cover the basics first!
Supplies:
Mason jar (any size, I used a pint jar)
Floating wicks
Olive oil
Water
Decorative items to submerge in the water
Instructions:
Fill your mason jar until there is about half an inch of empty space at the top
Add any decorative items that you can submerge in the water - just be sure not to choose anything that will float too close to the surface and disrupt the flow of oil to the wick.
Pour olive oil into the mason jar on top of the water until the oil layer is about a quarter inch thick
Gently place the floating wick on top of the oil surface, light and enjoy your olive oil lamp.
Ideas for how to decorate your mason jar olive oil lamp:
Christmas mason jar olive oil lamp
Red holly berries, pinecones, cranberries, vintage ornaments and evergreen clippings are great for the holiday season. Choose materials in natural shades of green, red and brown and play with mixing different textures.
Fall mason jar olive oil lamp
Fall foliage in bright oranges, reds and yellows can be suspended in the water. Better yet, replace the mason jar with a hollowed out mini pumpkin!
Winter mason jar olive oil lamp
Birch bark from fallen branches, acorn caps, evergreen clippings and even twigs will capture the chill months of winter in a cozy fashion.
Spring mason jar olive oil lamp
Fresh crocus blooms, dandelions, tulips, eggs and apple blossom branch clippings will all celebrate the season of growth and fertility.
Summer mason jar olive oil lamp
Embrace the season of abundance with fresh herbs from the garden like mint and basil, cherry tomatoes, sunflowers, lavender, fresh fruit and berries.
Beachy mason jar olive oil lamp
Bring the beach bonfire to you with sand, seashells and seaglass (responsibly sourced if you can’t obtain them yourself of course)
Citrus mason jar olive oil lamp
Exactly what it sounds like - but no need to dump a few lemons in chaotically. Shake things up with different shapes, sizes and a variety of citrus fruits including lemons, oranges or clementines (sliced or whole) and a bit of green with sliced cucumber rounds or fresh leaves.
Floral mason jar olive oil lamp
Celebrate whatever is growing most abundantly in your flower beds at the moment and suspend your favorite cut flower in your lamp - try hydrangea, poppies, bleeding heart, sweet pea, roses, peonies or lilies. You can leave them whole, or just use the petals.
Crystal mason jar olive oil lamp
Place your favorite crystals in your oil lamp - just be sure not to use crystals that can dissolve in water - As a general rule of thumb (with some exceptions), crystals ending with “ite” tend to dissolve in water. Try crystals like Clear Quartz, Rose Quartz, Amethyst, Smokey Quartz, Citrine, Agate, Carnelian, Rutilated Quartz, Jasper, Tiger's Eye, Aventurine or Moonstone.
Mason jar decor is one of my favorite ways to update our home decor, because we always have the jars on hand and they are such a great blank slate from which you can creatively experiment with little effort.
Now that you know how to make your own DIY mason jar light, you know the options are endless to modify and customize your lamp to your own style and personality!


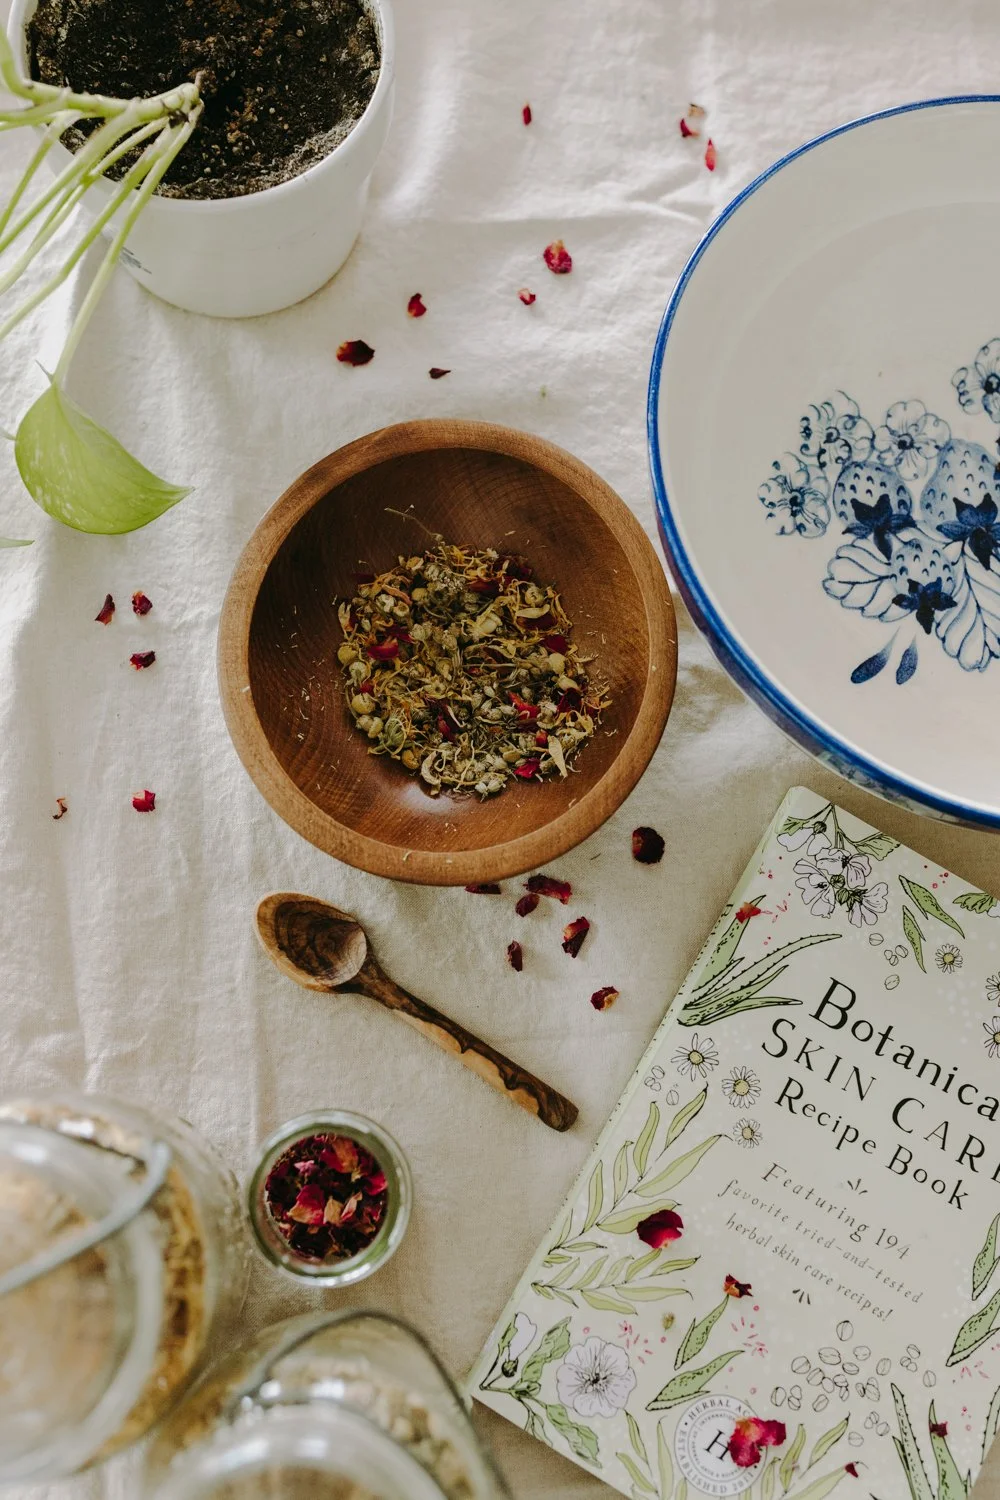
![The Power of Nature: How To Make Infused Oregano Oil for Your Health and Wellness [Recipe]](https://images.squarespace-cdn.com/content/v1/60e85024dc86d643da81c96a/1682625337753-AFI1M6MRRMDQ5CBNY2TX/unsplash-image-Fl2Ki3_GZIU.jpg)

![Make This Natural Herbal Face Steam With Just 5 Ingredients [Recipe]](https://images.squarespace-cdn.com/content/v1/60e85024dc86d643da81c96a/5aa8b75d-bcc6-484a-8f82-d457ecc55806/Herbal+Face+Steam+Recipe+by+The+Cottage+Peach-3.jpg)
Make This Natural Herbal Face Steam With Just 5 Ingredients [Recipe]
Our skin bears the burden of our carelessness on a daily basis - in the driest season, when the air itself is parched of moisture, we still can’t seem to keep up with our eight glasses of water a day, leaving our skin dry and dull - especially when less sunlight is still to be found. And so all sorts of ailments befall us, from chapped lips to premature aging and flaky foreheads. I’ll be the first to admit that as much as I enjoy my skincare routine, it easily falls to the wayside due to my chronic illness or general busyness, my exterior being low on my list of priorities when my joints are aching.
What can we do about dry skin, besides simply hydrating with water and moisturizer? At this point in the season, our skin needs more than simple maintenance. We need a repair. And the best way to jump start this process is to incorporate the spa-like but deceptively simple practice of an herbal face steam.
The Cottage Peach is reader-supported. When you purchase through links on our site, we may earn an affiliate commission at no additional cost to you. All opinions are our own.
Our skin bears the burden of our carelessness on a daily basis - in the driest season, when the air itself is parched of moisture, we still can’t seem to keep up with our eight glasses of water a day, leaving our skin dry and dull - especially when less sunlight is still to be found. And so all sorts of ailments befall us, from chapped lips to premature aging and flaky foreheads. I’ll be the first to admit that as much as I enjoy my skincare routine, it easily falls to the wayside due to my chronic illness or general busyness, my exterior being low on my list of priorities when my joints are aching.
What can we do about dry skin, besides simply hydrating with water and moisturizer? At this point in the season, our skin needs more than simple maintenance. We need a repair. And the best way to jump start this process is to incorporate the spa-like but deceptively simple practice of an herbal face steam.
What does face steaming do?
The heat from face steams loosens oils to aid in the removal of unwanted substances, like excess sebum (oils produced by your skin follicles), dirt and bacteria.
Since acne is caused by excess sebum trapped in your follicles prompting bacteria growth, face steams help combat acne.
When your pores are open and warm, they can more easily absorb hydration as well as any skincare products you apply afterwards.
The heat from the steam also results in increased circulation, promoting healing.
Face steaming is also a meditative, calming practice you can incorporate into your mindfulness routine.
I’ll get into all of the details for how to make your own diy face steam at home below, but first let's talk a bit about the individual plants, flowers and herbs we will be using in this recipe. You’ll only need four herbs for this project, but if you feel like substituting something for one listed below there’s no harm in making the recipe your own. You’ll be able to mix up a batch in less than 5 minutes, and be well on your way to a calming self care ritual that is affordable, natural and zero-waste.
This recipe comes from the Botanical Skincare Course from Herbal Academy and its corresponding book of recipes - you can see my full review of this in depth course here and sign up for classes by clicking here.
Benefits of Chamomile
Because chamomile has anti-inflammatory properties in the form of powerful antioxidants including polyphenols and phytochemicals, it helps to protect against long-term and short-term skin inflammation. Chamomile may also accelerate cell and tissue regeneration, promoting healing. It is also antifungal, antibacterial, and antiseptic. With all these powerful actions, this beautiful apple scented bloom may help to treat an active acne breakout, reducing bacteria and cleansing the skin, whilst also preventing future breakouts.
Benefits of yarrow
Yarrow is a flowering herb that grows in North America, Europe, and parts of Asia. Herbal legend has described that yarrow (Achillea millefolium) was named after Achilles, the Greek mythical hero who used it to stop the bleeding wounds of his soldiers during the Trojan War in 1200 BC. In Medieval times, yarrow leaves were rolled up and stuffed in the nose to stop bleeding. It is particularly beneficial in reducing inflammation; it's effective in speeding healing, reducing the appearance of wrinkles, reducing redness, unclog pores, calm irritation and reduce acne scars.
Benefits of lavender
Aside from its lovely scent, lavender’s anti-inflammatory, antimicrobial, and antifungal properties make it an incredibly useful plant for our skin. It can soothe and calm skin, help fight acne, and even help heal minor cuts and burns. It is useful for rashes and skin irritations caused by medical conditions such as psoriasis, rosacea, and eczema. Some studies have shown that the antioxidants in lavender may even help to reduce wrinkles.
Benefits of thyme
Thyme has been widely acknowledged as one of the most used herbs since as far back as ancient Egypt. Thyme belongs to the Lamiaceae, also known as mint, family. Due to thyme’s high thymol content, it kills bacteria and fungus. Thyme has the benefit of antifungal and antiseptic properties. With its circulatory and medicinal properties, Thyme fortifies the skin and provides relief from itching and tightness caused by dry skin.

History of facial steaming
Face steaming is a part of an Ayurvedic therapy called 'Swedana', that helps to remove toxins from the skin and deeply cleanses the pores. Turkish hammam bathhouses, which were both social and wellness hot spots for cleansing and relaxing in steamy rooms, are one of the earliest examples of steaming as self care—their origins can be traced back to the Roman empire. The first commercial face steamer was produced in 1903, though of course you don’t need any special tools to steam your face - a large bowl and a towel to drape over your head are all that is necessary.
Does steam actually open your pores?
Using warm water to “open” your pores is technically impossible. Since your pores aren't muscles, they can't voluntarily open and contract, so hot water and steam won't open your pores. What steam can do is loosen the sebum (oil) in your face, allowing it to slide out of the pores easily when you wash with cleanser. So why do your pores look “smaller” when you apply certain treatments? It’s actually caused by tiny blood vessels expanding in your skin, causing minor swelling that pushes the pores closer together. The size of your pores is dictated by the amount of collagen in your skin, genetics and many other factors. It cannot be permanently altered.
Face steams are so easy to make and use - in their most basic form, all you need is hot water! Of course, adding herbs, aromatic oils and other compounds to the hot water can result in a supportive infusion with multiple benefits. I encourage you to experiment with different herbal combinations that you are drawn to. If you don’t like one of the scents of the ingredients listed below, sub it out for rose petals or something else. Herbal steams for your face also make sweet and thoughtful gifts for birthdays and holidays alike - blended together they can create a beautiful rainbow effect. I have blended cornflower, rose and lavender for a blue red and purple confetti that looked amazing packed into tiny clear glass test tube vases with a little cork topper.
If you are just learning about herbalism, facial steams are a great easy beginner DIY skincare project and introduction to herbal remedies, using plants that are considered generally safe for most. And if you find you have sensitive skin that can’t tolerate many products directly applied to your face, a steam can be a gentle way to incorporate these herbs into your routine without a direct topical application.
You will need a large bowl that is glass or ceramic. We don’t want to use plastic or anything that may contain other harmful chemicals that could vaporize and be released into the steam through the hot water. You will also want to grab a lightweight small towel to cover your head with and trap the steam inside a little makeshift tent. I wouldn’t use a heavier bath towel as it could place undue strain on your neck and the last thing we need is a sore neck from what is supposed to be a relaxing experience! I do also recommend choosing a spot where you can comfortably sit at a height where the bowl is resting on a table you do not have to stoop or bend to relax in front of, and (though I know how tough this can be!) eliminate all distractions - you don’t want a child asking where their favorite bear is or TikTok notification to startle you into splashing yourself with the hot water!
Once your blend is ready, put your phone on silent and unplug, allowing yourself to fully embrace these few minutes of peace and tranquility in your busy day, unwinding and resetting your face and heart for the challenges to come and giving yourself permission to just be.
Herbal face steam by Herbal Academy
An herbal steam with antimicrobial and antiseptic herbs can be a lovely way to pamper and support irritated, acne-prone skin.
Ingredients
2 tbsp chamomile (Matricaria chamomilla) flower
2 tbsp lavender (Lavandula spp.) flower bud
2 tbsp yarrow (Achillea millefolium) aerial parts
2 tbsp thyme (Thymus vulgaris) aerial parts
2 quarts (64 fl oz) water
Directions
● Combine herbs in a wide glass or ceramic bowl.
● Heat water to boiling, then pour over herbs.
● Sit comfortably with face positioned 10 inches from the bowl—close enough to feel the steam, but not so close as to be burned by it.
● Cover head with a towel, creating a tent over your head and the bowl.
● Steam face for approximately 5 minutes.
● Splash cool water on face and gently pat dry with a clean towel.
Will you try this recipe? Learn herbalism with Herbal Academy by clicking here
![Make This Easy + Natural Botanical Hand Salve [Recipe]](https://images.squarespace-cdn.com/content/v1/60e85024dc86d643da81c96a/b57698b0-de70-4101-afaf-7af57788237d/Herbal+Face+Steam+Recipe+by+The+Cottage+Peach-1.jpg)
![How to Build a Bird Feeder [Tutorial]](https://images.squarespace-cdn.com/content/v1/60e85024dc86d643da81c96a/1674059559898-89P7CA2E2E9QRBF8WBHT/unsplash-image-_m66w5WWVO4.jpg)
How to Build a Bird Feeder [Tutorial]
Like many young people, I thought my grandpa might have some kind of magic. You see, he was one of those people who seemed to be friends with the birds in a way not many of us are. He could merely step out into his yard and with a few quick whistles summon all varieties of backyard birds to his palm or his shirt pocket, where they would enter into a conversation of chirps and intense eye contact that fascinated me. To be honest, looking back I’m still fairly certain that it was some sort of magic. Even through the rose colored glasses of childhood, I know deep in my bones that he understood something of nature that many people do not. Could he have known that these moments he spent with me and the birds, carving whistles from fallen horse chestnuts, would become a part of my own origin story as a naturalist? Far from an expert though I might be, he showed me what it meant to be a student of nature long before I grew my own garden or made my own companions in the rabbits and toads that keep me company as I sow, weed and water. I learned from him that all wildlife has value, no matter how small. That bird song deserves our attention. And of course, I learned that feeding birds is just plain fun.
Why have a bird feeder? Here’s some of the benefits of backyard birds in your yard:

The Cottage Peach is reader-supported. When you purchase through links on our site, we may earn an affiliate commission at no additional cost to you. All opinions are our own.
Like many young people, I thought my grandpa might have some kind of magic. You see, he was one of those people who seemed to be friends with the birds in a way not many of us are. He could merely step out into his yard and with a few quick whistles summon all varieties of backyard birds to his palm or his shirt pocket, where they would enter into a conversation of chirps and intense eye contact that fascinated me. To be honest, looking back I’m still fairly certain that it was some sort of magic. Even through the rose colored glasses of childhood, I know deep in my bones that he understood something of nature that many people do not. Could he have known that these moments he spent with me and the birds, carving whistles from fallen horse chestnuts, would become a part of my own origin story as a naturalist? Far from an expert though I might be, he showed me what it meant to be a student of nature long before I grew my own garden or made my own companions in the rabbits and toads that keep me company as I sow, weed and water. I learned from him that all wildlife has value, no matter how small. That bird song deserves our attention. And of course, I learned that feeding birds is just plain fun.
Why have a bird feeder? Here’s some of the benefits of backyard birds in your yard:
Pollination
Backyard birds do much of the same work as the insect pollinators we are all familiar with when it comes to spreading seed and supporting plant growth - both good and bad. For example, the reason you almost exclusively find poison ivy along fences and underneath trees is because birds eat the berries, digest them and then “plant” them while sitting on branches or fence posts.
Pest control
Birds eat bugs - the largest ones eat rodents too. Aside from the beloved garden worm, they also eat flies, ants, moths, aphids and ticks…and if you’re luckier than me, they’ll even help with your cabbage moth problem by eating the larvae before they have a chance to totally decimate your kale crop (ask me how I know)
Weed control

Birds eat seeds, including weed seeds! Birds can help manage invasive species that you do not want growing on the land with their snacking. This is also why it is so important not to completely clear-cut your dead garden for the fall and winter - leave it up as a vital food source for the local wildlife and cut back in the spring before new growth forms instead.
Conservation
Creating an environment that is inviting and safe for backyard birds offers us the chance to give back through conservation of these important species. The more trees and shelter your can provide throughout the land, the better for all your neighborhood birds (and other wildlife!)
Education
What better way to teach your children the importance of wildlife than to observe it in your own backyard, as I did as a child with my grandfather.
Bird song
I have yet to meet a person who doesn’t enjoy the warbling, chirping, sing-songing symphony of bird song in the summertime.
What is a bird feeder?
A bird feeder is some type of container hung from a high up spot and filled with bird food that allows birds to land and eat safely. A bird feeder can be made of many different things - read on for some of my favorite DIY bird feeder ideas!
So you want to know how to build a bird feeder. Thanks to decades of experience, I’ve made my fair share of zero waste bird feeders for free, with repurposed materials you probably have in your house right now. Here are some of my favorite DIY bird feeders you can make today:
Fruit string garlands: This is a simple bird feeder. Pop some popcorn the night before and leave it out so it gets a bit stale since it’s easier to thread this way. The next day, cut up various fruits (apples, oranges and blueberries work well) With a needle and thread, pierce through your fruit chunks and popcorn in an alternating pattern until you have a good length of garland. Simply drape your finished garland over a couple of branches and you’re done.
Empty can on its side: Create a bird feeder station by piercing a hole in the bottom of your empty tin can and thread a piece of sturdy twine all the way through the inside of the can, through the opening and the hole you created, making a large loop over the top. Secure the twine so that the can can lay on it’s side when hung and add a layer of birdseed to the “floor” of the can.
TP roll covered in peanut butter + seeds: Kids love this easy bird feeder! It’s a little bit messier, but easy and fun. Spread a thin layer of peanut butter over the exterior of the toilet paper roll. Pour your birdseed into a tray or baking sheet and then slowly roll the tube in the seeds to coat the outside with seed. Thread a piece of sturdy twine through the interior of the tube and secure, making a big loop from which to hang your TP roll!
Cookie cutter ornament bird feeder: Combine 2 envelopes of gelatin with ⅔ cups boiling water. Stir 2 cups of birdseed into this and press firmly into your cookie cutters. Use a toothpick to form a small hole that you can pass twine through to hang your ornament outside. Allow to dry overnight.
Pinecone bird feeder: Similar to the TP roll craft above, you’re going to spread a thin layer of peanut butter over the pine cone and roll in seeds on a tray. Securing a piece of twine may be a little trickier on this one - but just try and wrap it around the top of the pinecone and form a loop for hanging.
Hollowed out orange with toothpick ledges: Cut your orange in half and scoop out the inside. Save for a snack for later, or incorporate into the fruit garland idea above. Poke 8 holes evenly around the cut edge of the orange. Thread twine through 4 of these holes and have them meet at the top to form a hanging basket. Poke toothpicks in the remaining 4 holes to serve as ledges the birds can stand on. Fill the empty orange with seed and hang.
Egg carton: Take the lid off of an egg carton and poke holes in the four corners of the bottom piece. Thread twine through the four holes you just made to create hanging loops. Pour bird seed into the divots that the eggs would normally rest in and hang! I think this is the best bird feeder you can make with minimal effort.

It’s important to be mindful about choosing a bird seed blend that is meant for birds in your area when considering a bird feeder DIY. If possible, choose an organic variety to avoid exposing your bird neighbors to unwanted pesticides or other chemicals. Bird seed is the safest thing to feed your backyard birds. Here are some foods that aren’t safe for backyard birds:
Bread
Spoiled seed
Chips
Anything with sugar
Honey
Salt
Milk
How to keep squirrels away from bird feeders

Let’s be honest; you’re going to have a tough time finding any bird feeder that is completely squirrel-proof, and DIY bird feeders do not have any extra cages or protection on them to help in that regard. I accept that squirrels will probably take more than their fair share from the snack I create, but you can try a couple of things to deter squirrels from investigating your bird feeder: Switch up your seed to see if there’s a variety they aren’t interested in (squirrels do not like safflower seed, nyjer seed, and white proso millet), try mixing cayenne powder into your bird seed (birds are not sensitive to the heat of capsaicin but squirrels are!) keep the ground clean of spilled seed underneath the bird feeder and place your bird feeders away from trees.
Where to place a bird feeder
According to Yard Envy, you should hang your finished DIY bird feeder in a place where your visiting birds feel safe from predators. Avoid open and noisy areas and hang your bird feeders at eye level or a little above. Do not hang feeders too close to any place where squirrels can jump on them, or so low that they are within a cat's reach.
How to attract birds to your feeder
According to Wild Birds Unlimited, birds generally find their food by sight. Placing your feeder where it will be visible to them should decrease the time it takes for birds to start feeding. Sometimes sprinkling some seed on the ground or on top of the feeder will let the birds know that you are open for business.
![Decorate with Flowers Year Round Using These Tips [Tutorial]](https://images.squarespace-cdn.com/content/v1/60e85024dc86d643da81c96a/f8300749-3a98-4317-8965-fde98f8f8f19/November+2022+The+Cottage+Peach-25.jpg)
Decorate with Flowers Year Round Using These Tips [Tutorial]
A plan set in motion last March, when I set seeds into soil blocks underneath the grow light in the cold basement. A plan for eternal, dried flower blooms that would last far longer than the warm summer days in which they would stretch and grow and bloom. This is the story of strawflower and statice, poppies and cornflower, aster and lavender. While their scent may fade, the colors we miss so much in deep winter continue on in a vivid show that defies the passage of time.
The Cottage Peach is reader-supported. When you purchase through links on our site, we may earn an affiliate commission at no additional cost to you. All opinions are our own.
When winter has settled on our doorstep and blinding white snow fills the field outside my bedroom window, it is easy to forget the thrill of a vibrant bouquet of fresh flowers on the kitchen table. The muted tones of the season lend themselves to quiet reflection, but also a deep sense of emptiness that can set in with no notice if we leave it unchecked.
It is the time of year where Jeff and I find ourselves drowsy and full, disoriented by the lack of sunlight in the afternoons and finding the effort to keep awake to be challenging. But this year, I promised myself, would be different. This year, I would have flowers in winter.
A plan set in motion last March, when I set seeds into soil blocks underneath the grow light in the cold basement. A plan for eternal, dried flower blooms that would last far longer than the warm summer days in which they would stretch and grow and bloom. This is the story of strawflower and statice, poppies and cornflower, aster and lavender. While their scent may fade, the colors we miss so much in deep winter continue on in a vivid show that defies the passage of time.
Best flowers for drying
An endless variety of flower seeds will leave you feeling overwhelmed as you begin to flip through the catalogs and plan which flowers you’d like to grow for drying. However, with a few simple tricks you can easily set your sights on the best flowers to dry for eternal blooms. My first piece of advice is to ensure you receive the Fedco seed catalog each year - in fact, this is the best place to begin all your garden planning, not just flowers. The reason I suggest Fedco over others is twofold - firstly, you’ll be shopping high quality, non-gmo seed from a private source that isn’t just another subsidiary for Monsanto. Second, it is really a misnomer to call the Fedco book a catalog since the vast amount of educational information contained within really qualifies it as more of a book or guide. A free one at that! This is because the folks at Fedco have gone out of their way to provide useful charts and more to help guide you in your seed selection process. One chart in particular will be useful to us now, and that is the chart denoting the different forms and functions of all the flower seeds available for purchase. You’ll find this chart at the very beginning of the flower section. And no, this isn’t an advertisement for Fedco - just an honest recommendation from a fellow gardener who has utilized this tool for years.
It’ll make more sense once you have the chart in front of you, but there will be a column ticked off just for those flowers which dry well. This is an excellent place to begin making a list of all the possibilities before you do further research.
Don’t want to wait for the catalog to arrive? Here’s what I grew in 2022 for my dried flower garden:
Lavender

A favorite for many reasons, lavender is one of the few dried flowers which will retain its pleasant fragrance after drying. I have lavender bunches from a year ago that still smell incredible if you give them a quick squeeze to release the essential oils within. Known for its calming effects on the nervous system, lavender is an incredibly therapeutic plant to grow. Being a woody shrub however, it is also one of the more difficult ones to grow from seed on this list. You’ll want to do research on how this Mediterranean plant will fare in your own climate, and learn the best pruning techniques to keep it in tip-top shape. Once dried, the delicate purple flowers will make an excellent addition to any arrangement. I like to keep bunches of lavender on my bedroom windowsill.
Strawflower

This eternal bloom is a must for flower crowns and wreaths of all sizes. Strawflower has a long growing season and produce a huge amount of stems. We were picking strawflower all the way up to our first frost. The trick with cutting strawflower to dry is to cut at just the right stage of blooming - too early and the bud won’t open enough as it dries, too late and the blossom will open so far once it has dried that it will be barely recognizable, almost turning inside-out. To time it right, cut when the stem is no longer very wobbly when shaken and only 2-3 bracts of petals are open. This way, as the bloom dries the petals can expand outwards but still leave the very center intact and slightly closed. Strawflower is fun to tuck within an arrangement, but due to the stems tending to dry with bends and curves it is easier to use shorter pieces within a circular craft.
Statice
The variety of color within the purple family you can achieve with statice is remarkable. From our plot, we harvested rich magenta, pale pink, deep amethyst, bright white and even butter yellow blooms. Somehow all of these shades complimented each other perfectly, and made creating an arrangement simple. The long stems go rigid with drying, standing perfectly upright and straight for a large vase arrangement. The tiny individual blossoms are compact and generous, making for a full bouquet. But the best part of statice is in it’s longevity; I had fellow gardeners tell me they have bouquets of dried statice that were ten years old and still preserved their beautiful coloring.
Poppies

Fresh poppies are notoriously difficult as a cut flower - picked at the wrong moment, they “shatter” in the vase, dropping all their petals dramatically within hours. Truthfully, I was only ever able to get the timing right a couple of times last season - they must be picked in the early morning hours, just after blooming, and immediately placed in water. Their stems also leak an unforgiving bright yellow sap that will permanently stain your favorite gardening clothes without a care (ask me how I know). So I found poppies to be best enjoyed fresh in the garden itself, however, the dried seed pods that begin to pop up as the blooms die off in late summer lend themselves to drying very well. The unique shape and neutral brown coloring of these pods means they will look right at home in most arrangements.
Cornflower
They don’t call it cornflower blue for nothing! These small but delightful blue wildflowers will grow with abandon anywhere you can think to spread them. Like their friend the strawflower, they too require careful timing in cutting to dry in order to preserve their coloring and structure. If you are wondering why your dried cornflower has faded or the petals seem to shed just about everywhere, it’s probably because you picked the bloom too late. Cornflower dries best when it is picked just before the bloom fully opens. These small delicate flowers can be tucked in a crown, a small bud vase or bunched together for a wall sash. They tend to be overpowered in arrangements using multiple other flowers, so let these blooms stand on their own if possible.
New England Aster
The wild child of the group, my tiny pink New England Aster flowers offer an autumn finale in the garden, jumping up out of seemingly nothing and taking over for a few short weeks. Each stem branches out with clusters of inch wide blossoms that dry to a deep magenta pink. Though a bit unruly in a vase, I have a soft spot for their unkempt nature and deep coloring with pinks that last through the whole winter season. Easy to grow and requiring no upkeep, they are certainly a worthwhile addition to any garden for the benefits given to pollinators in search of late season food alone.
Goldenrod

This list wouldn’t be complete without the admirable goldenrod. Often confused for its allergy-causing lookalike, ragweed, goldenrod isn’t the reason for your autumn sniffle session. In fact, goldenrod has many medicinal benefits - but that’s another story for another time. Goldenrod’s showy, small yellow blooms are arranged in rich clusters that droop delightfully.
How to preserve dried flowers
Preserving dried flowers is one of the easiest ways to extend your garden season. The most important step begins with ascertaining the best moment to pick your flower based on the breed. After picking, most flowers (aside from larger blooms like sunflowers and roses) may be dried in a similar fashion - tied with string, hung upside down in a cool dry place. The amount of time needed to dry will vary depending on how hot and dry your climate is in that moment and the amount of water within each stem and bloom - thicker stems such as strawflower taking a few weeks to dry while thinner plants such as cornflower drying in just a few days.
How long do dried flowers last
Dried flowers should last anywhere from 3-6 months, with some varieties such as lavender and statice holding their color for a year or more. It’s important to note too that “last” is relative here - since they are dried, they are unlikely to mold or go “bad”, so if you continue to enjoy the look of your dried flowers past their prime, by all means keep them around!
How to store dried flowers
When not in use, it is best to store dried flowers in brown paper bags or cardboard boxes in a cool, dry place.
What to do with dried flowers
With a little imagination, the options are endless. But here are a few of my favorite ways to use dried flowers:

Door wreaths
Candle wreaths
Crowns
Attached to a barrette
Displayed in a vase, crock, pitcher or other container
Bunches on a windowsill
Bunches hung on a wall
Bunches tied to your shower head
Suspended within a glass bottle sealed with a cork
Flatted between two pieces of glass in a frame
Cooking - check to be sure they are edible
Drawer sachets - best for more fragrant blooms
Potpourri
Blended into hand poured candles
Blended into handmade paper
Blended into teas and herbal steams
Where to buy dried flowers
If you aren’t ready to grow your own flowers for drying, I recommend searching on Etsy for flower growers near you who offer the types of blooms you are looking for.
What varieties will you be growing this year? Comment and let me know!


![7 Tips to Survive a Long Winter[Nature Activities]](https://images.squarespace-cdn.com/content/v1/60e85024dc86d643da81c96a/6de8ff70-4e24-4023-9bc0-ca25cc9357e1/PXL_20211209_122333855.jpg)
7 Tips to Survive a Long Winter[Nature Activities]
Winter is a fleeting season for some, but long here in the Northeast. Long enough to require that we adapt and find space in our routines for signals that pass the time, as well as ways to enjoy it for what it is.
New England winters force us to turn inward, to find ways to slog through the darkest days, to connect with nature when that connection is scarce.
How to Survive a Long Winter
Winter is a fleeting season for some, but long here in the Northeast. Long enough to require that we adapt and find space in our routines for signals that pass the time, as well as ways to enjoy it for what it is.
New England winters force us to turn inward, to find ways to slog through the darkest days, to connect with nature when that connection is scarce.

They feel like crunchy snow underfoot, stinging wind on your cheek, and the numbing cold in your fingertips, and sound like the patter of sleet on the windows, slush under car tires, and crackling fires.
There is a hush in the air with the sound of insects and busy birds gone from the land, for the time being.
I can smell the snow on the air, and see it building in the dense shapes of the clouds above.
Snow clouds always look a little bit different than regular clouds. There's a slight glow within the deep gray of them that promises nights when snow muffles the sounds outside, ice coats the roof and we say "winter is here" tucked in and insulated from the chill, mugs full of hot chocolate.
Living in a place where winter is the longest season of our year when I don’t particularly love winter has come with its challenges.
My arthritis always is worse during the winter months, leaving me struggling more often with pain and fatigue that limits my ability to enjoy many activities.
I’ve had to find new ways to pass the time - simple, small things that make the winter more enjoyable without pushing myself. But in a way winter has taught me an important lesson; it really is the little things which matter most, which bring us the most light and joy on our darkest days.
We forget this easily, living in a fast paced and unforgiving world that is constantly telling us we need more more more to be happy. Winter does not play this game. Winter knows that pausing and stepping back forces us to focus on the things that really matter in our lives.
We truly begin to absorb the lessons of slow living when winter arrives to wrap us in her embrace.
With winter being so long, finding ways to pass the time and survive this cold and grey season is essential. Here are my top tips for small ways to survive the long winter this year:
#1 Let’s Get Cozy: Snuggle Up
There are a few non-negotiables required to make a home cozy. The first, of course, is blankets. Lots and lots of blankets! I have a bit of a blanket obsession, to tell the truth. I want heavy blankets, wool blankets, knit blankets, and quilts. Having the choice of a few well made, well chosen and well loved blankets is one way I give myself a little gift, an opportunity to feel cared for.
I love to collect blankets from antique stores, thrift stores, and occasionally even friends’ houses, if they are feeling generous! And, of course, there’s not much nicer than knitting a blanket myself on long winter nights.
We drape blankets over every available surface, just in case a sudden chill takes hold. Every chair arm and couch back, plus the ends of our beds, is covered in blankets in the winter. A blanket ladder, cabinet, trunk or chest are some other great ways you can store or display your blanket collection.
Of course, if you find yourself with an overabundance of blankets, there are many people in need who would benefit from your donation, and animal shelters that need a cozy spot for their four legged friends to find a reassuring moment of peace. Although it may be hard to believe from what I’ve written thus far, I do think there is such a thing as too many blankets. The same goes for coats - don’t forget to dig through your coat closet each year and donate any well-loved pieces that you no longer need. No one should go cold in the winter and this is an easy way you can help.
#2 Add warmth with fire
A flame of some sort will instantly bring peace and warmth to your day. Any sort of flame will do. The flickering of a hand poured soy candle on your kitchen counter, a crackling fireplace filled with wood logs, a pellet stove with a glass front or simply some beeswax candles are all good places to start.
When the sun sets as early as three or four o’clock in the afternoon, the warmth of the light, the dancing shadows, and the opportunity to roast marshmallows are all absolutely necessary to a cozy winter. The ambiance of a flame cannot be matched - just be sure to follow all necessary safety precautions with any open flame in your home.
#3: Drink Your Tea
If you’re anything like me, you have an extensive collection of mugs waiting for you to use them in your cabinet. Embrace these colder months by making a habit of enjoying a cup of tea with your breakfast each morning, or before bed. Experiment with different flavors and types of tea, and even different sweeteners and milks. While I lean heavily on green tea with honey and lemon in the summer, in the winter months I prefer chai and rooibos and rich black teas with raw sugar and oat milk.
#4: Read a Book
What could be more reassuring than a stack of books? I set myself a reading challenge this year, but you don’t need to be so structured about it. If you’re having trouble finding time in your day to read, try to find even five or ten minutes at first - there’s nothing wrong with starting small.
Here are some of my favorite book recommendations from what I read this year to add to your own stack:
Wintering: the Power of Rest and Retreat in Difficult Times by Katherine May: I felt this one in my soul. If you are struggling, read this.
The Hidden Life of Trees by Peter Wohlleben: Read this book and you’ll never look at trees the same way again!
With the Fire On High by Elizabeth Acevedo: I bawled my eyes out reading this book. It isn’t even particularly sad, it’s just that she has a way of making you care about the characters.
Braiding Sweetgrass by Robin Wall Kimmerer: If you love nature, the outdoors, gardening, etc., this is a must read. On second thought, everyone should read this.
Anxious People by Fredrik Backman: This book has a fun twist at the end, and is written by one of my favorite authors. Check out his other books as well!
#5: Use your hands
In the summer it is my feet that guide my activity, padding through the garden barefoot feeling the earth, but in the winter, I lean heavily on my hands.
In winter I am drawn to different sensory experiences, which primarily revolve around fiber + cooking, to keep busy.
I work with my hands to keep my head busy and my heart full. I know this season too will pass, and my thoughts will turn from knit stitches to seedlings and a growing of a different kind. I don’t want to hold my breath until that happens, but rather, enjoy the now.
These pursuits make time stand still even as it seems to whirl past me faster and faster every season.
#6: Get Outside
There is lots to do outside in the winter but so often we forget that there’s no such thing as bad weather – just bad outfits. Gear up to go outside with some wool or fleece-lined leggings, a baklava, alpaca gloves and your favorite wool hat.
Dust of your sled from childhood and find a new hill to careen down, visit a new ice skating rink, take a walk in the woods with your field guide and hunt for animal tracks, put some birdseed on your deck and see what visitors you attract, hike a snow capped mountain or enjoy a quiet night beside a bonfire, wrapped up in one of those blankets you collected earlier and roasting marshmallows.
#7: Experiment in the kitchen
Nothing is more synonymous with winter cooking than baking. As our bodies crave richer foods to keep us warm through the winter season, I try to make a point to experiment in the kitchen with new recipes as well as old favorites. If you’re interested in a baking project, you could try making a spiced gingerbread with whipped cream, pumpkin cookies or sourdough bread. Make soup with whatever you have on hand and freeze some for those nights where you just can’t wait to eat another minute. Use seasonal ingredients such as potatoes, squash, apples, beets, brussel sprouts and carrots. Not every meal needs to be a fancy or extravagant preparation, but cooking from scratch allows you to work with your hands and maybe even learn something new.
Comment below and let me know what your winter essentials are!

Caring For Cast Iron Cookware
Cooking on cast iron is a traditional method that has stood the test of time. Some of the best dishes I’ve ever made have involved cast iron cookware. The timelessness of cast iron pans is outshone only by their innate quality. You would be hard pressed to break a cast iron pan. Consider this your ultimate guide to choosing, maintaining and cooking with cast iron.

The Cottage Peach is reader-supported. When you purchase through links on our site, we may earn an affiliate commission at no additional cost to you. All opinions are our own.
Cooking on cast iron is a traditional method that has stood the test of time. Some of the best dishes I’ve ever made have involved cast iron cookware. The timelessness of cast iron pans is outshone only by their innate quality. You would be hard pressed to break a cast iron pan. Consider this your ultimate guide to choosing, maintaining and cooking with cast iron.
What is Cast Iron?
There are two ways we make things from iron. One is to heat it and work it with tools, the product of which we call wrought iron. The other is to cast it. In casting, melted iron is poured into molds to form a solid piece, such as a frying pan.
Why Cook on Cast Iron?
There are five reasons just about everyone should have a cast iron pan if they are able:
Cast iron pans will outlive you.
Cast iron pans are virtually indestructible. There’s a reason you can easily find them at antique stores and garage sales. Even a rusty old cast iron pan can be revitalized with a bit of work. When handled properly, a cast iron pan can be handed down to generation after generation.
Cast iron handles heat.
A cast iron pan can go from the stovetop to the oven to the table. Cast iron pans can handle heat up to 600 degrees, so have no trouble in a kitchen oven.
Cast iron maintains heat.
Once a cast iron pan is hot, it stays hot. This makes it ideal for searing food, keeping dinner warm, and making pizza.
Seasoned cast iron is non-stick.
With proper care, you can build up layers which will develop into a slick, hard, non-stick surface. Seasoning a pan is not hard. I’ll explain how below.
How to Choose a Cast Iron Pan
The first decision to make is whether you want to buy an older, used pan or a brand-new one.
There are benefits and downsides to either choice.
Benefits of old cast iron pans:
Ecologically, an older pan is the obvious choice.

In the 1940s and earlier, cast iron pans were poured into sand-based molds. They were then polished to smooth their pebbly surface. Because of this, an older pan can be slighter more non-stick than a newer one. People will hunt hard to collect these ‘original’ pans.
A vintage pan may already be beautifully seasoned. It takes time to develop a cast iron pan’s non-stick surface. An old pan that’s been cared for properly is a real find.
Downsides of old cat iron pans:
A vintage cast iron pan will need work if it has been allowed to rust. This can be time-consuming.
An old pan may hair hairline cracks or be warped, so needs to be examined closely before purchasing.
Vintage cast iron, particularly Griswold pans, can be more expensive than buying new. (Griswold pans are thinner, which means they are lighter and take less time to heat up.)
Benefits of new cast iron pans:
A new cast iron pan may be more readily available.
There are very inexpensive options available for new cast iron pans, and there are new pans available that are lightweight and relatively well-seasoned. Field pans are some of the best lightweight cast iron pans you can buy.
Downsides to new cast iron pans:
In the 1950s, a much higher volume of pans was produced than had been in the past. In order to streamline the process, the final step of polishing the pans was dropped. This results in cast iron pans that have more of a pebbly surface. These newer pans can be seasoned to a really nice non-stick surface, but they will never be quite as non-stick as an older pan.
While new pans may be marketed as pre-seasoned, for the most part there will only be a couple of thin layers of seasoning.
Inexpensive new cast iron pans are much thicker, and therefore much heavier. They are also rougher and take longer to season.
A lighter, well-seasoned cast iron pan, like those from Field, come with a higher cost but many benefits to go along with it.
How to Cook in Cast Iron

When you first start using a cast iron pan, even a pre-seasoned one, you may find your food sticks to it. To avoid this, it’s best not to cook with high heat until your seasoning develops.
The more often you cook with oil or butter, the faster you’ll have a well-seasoned pan.
The handle of a cast iron pan can get as hot as the pan itself, so use quality potholders. Silicone sleeves to cover the handles are also available.
It is ok to use metal utensils on seasoned cast iron if that’s what you’ve got. Seasoning is not just a coating on the surface of the cast iron. It is chemically bonded to it. You may not want to scrape hard at your cast iron pan with a metal spatula, but using it in the normal course of cooking is fine.
Acidic foods like tomatoes and vinegar can break down your pan’s seasoning. Once your pan has developed a non-stick seasoning, you can use small amounts of these ingredients, but it’s best not to use large quantities or to simmer acidic dishes for long periods of time in cast iron.
How to Clean a Cast Iron Skillet
Cast iron pans have a bad reputation as being finicky and difficult to clean. You’ll hear that you should never use soap, for example.
It’s true that cast iron should not go in the dishwasher. But there is no harm in using a small amount of soap with a pot scraper or sponge to hand-wash your pan. The advice to not use any soap is from back when soap was a lot harsher.
If you’d rather not use soap, though, you can use coarse salt and warm water to scrub your pan clean.
It’s easiest to clean a cast iron pan while it is still warm from cooking. This is true of just about every kind of pan I’ve ever used.
There are two big no-no’s when cleaning cast iron pans. The first is soaking. Soaking a cast iron pan can cause it to rust. It’s possible to repair a rusted cast iron pan, but it is not a quick process.
The second is that you should never put a cast iron pan away wet. Any moisture can be a problem.
There is one (quick) extra step when cleaning a cast iron pan as opposed to other pans. Cast iron pans should be seasoned after each use.
How to Season Cast Iron
Seasoning cast iron is a process which bonds hot fat molecules to the iron to build up a smooth, non-stick surface. Seasoning also protects the iron from rust and corrosion.

Cast iron is porous and when heated, those pores expand, which makes it possible for the fats to incorporate themselves within the iron.
Cooking with oil plays a part in seasoning the pan, but for best results, you should season your pan after each use.
How to season cast iron after use:
After washing it, put your cast iron pan on a burner over high heat until any water has evaporated.
Once it is dry, spread a small amount of olive, vegetable, sunflower, or grapeseed oil in a very thin layer over the pan with a paper towel or rag. Keep in on the heat for a minute, but remove it before the oil on the pan begins to smoke. Let it cool, and it’s ready to be put away.
How to do a deep seasoning of cast iron pans:
When you first get a cast iron pan, and then 2 or 3 times a year thereafter, you should do a deeper seasoning of your pan. It’s a similar process to regular seasoning, but in this case, we bake the pan in the oven rather than heating it on the stovetop.
What you’ll need:
An oven
¼ teaspoon + ¼ teaspoon oil, divided
Paper towel or rag
Instructions:
Preheat your oven to 200 degrees.
Clean your pan as you would after use, as described above, and dry it by heating it on the stove.
Put your dry pan in the oven at 200 degrees for 10 minutes. This will ensure it is completely dry and also open the iron’s pores.
After 10 minutes, remove it from the oven and increase the oven’s heat to 300 degrees.
Use a clean rag or paper towel to rub ¼ teaspoon of oil onto the pan, using a circular motion.
Using a different, clean rag or paper towel, rub off the excess oil. When you’ve removed the excess, your pan will look dry and dull. It will look as though you have removed all the oil, but a very thin layer will remain, which is just what you want.
Repeat this oiling process on the handle and underside of the pan with the second ¼ teaspoon of oil.
Put the pan, upside-down, on the middle rack of your oven at 300 degrees.
Leave it for 10 minutes, then remove the pan from the oven and increase the heat to 400.
Once your oven is at 400 degrees, return your pan to the middle rack, and let it bake for 1 hour.
At the end of the hour, turn off the oven, but keep the pan in there for an additional hour.
It’s important the heat be consistent, so do not open the oven door during the final two hours of the process.
Cooking Pizza on Cast Iron

As someone who likes each tool to do more than one job, I’m not a huge fan of pizza stones. Luckily for me, cast iron is equally useful for cooking pizza as it is for cooking eggs.
Cast iron is incredibly strong and can withstand very high temperatures. A baking stone is more fragile, and is more apt to experience thermal shock than a cast iron pan.
Pizza develops a crispy, chewy, puffed up crust when cooked on an already heated surface. Because cast iron holds heat extremely well, it is perfectly suited to the job. Pizza can be cooked either in the cast iron skillet or on the bottom of it.
Recipe: Pizza Cooked on Cast Iron
What you need:
Pizza dough
Sauce
Cheese
Toppings
Oil
10-12” cast iron skillet
Instructions: Pizza Cooked on Cast Iron
Put your skillet, empty, into the oven.
Set the oven to 500 degrees.
After 10 minutes, the pan should be hot. Remove it from the oven.
Sprinkle the surface of the pan with cornmeal or flour, and then arrange your dough, being careful not to burn your fingers.
Brush the dough with olive oil and put it back in the oven until the dough bubbles. (You can skip this step and move straight to toppings if you want. It just improves the texture of the dough.)
Add your sauce, cheese, and toppings and cook until golden brown, about 15 minutes.