
BACKYARD GARDENING MADE SIMPLE

Nature's Therapy: Discover 5 Soothing Herbs for Your Spa Shower Routine
Adding herbal and aromatherapy elements to your bathing ritual has been a long standing tradition in cultures around the world, but there’s just something extra rewarding about it when you grow those flowers and herbs yourself. So head out to the garden and clip a few sprigs of whatever calls to you - we’ll go over some of the easiest ways to include plants in your shower routine.
Learning about how different herbs can provide different benefits for the skin and body can bring you closer to nature and yourself, as well as offering a ton of ways you can support yourself through a self care ritual not rooted in consumerism (hard to find these days). You’re probably familiar with using fragrant botanicals like eucalyptus and lavender in your spa shower routine, but here’s a few more herbs and flowers you should consider including next time you’re looking for a soothing sensory experience in the shower:

July brings heat waves and sticky summer afternoons,long days spent outside and probably a sunburn or two even among the most sunscreen-conscious among us. For me there is nothing more satisfying after a long day of work in the garden than taking a long herb-infused shower with botanicals picked fresh from the garden.
Adding herbal and aromatherapy elements to your bathing ritual has been a long standing tradition in cultures around the world, but there’s just something extra rewarding about it when you grow those flowers and herbs yourself. So head out to the garden and clip a few sprigs of whatever calls to you - we’ll go over some of the easiest ways to include plants in your shower routine.
Learning about how different herbs can provide different benefits for the skin and body can bring you closer to nature and yourself, as well as offering a ton of ways you can support yourself through a self care ritual not rooted in consumerism (hard to find these days). You’re probably familiar with using fragrant botanicals like eucalyptus and lavender in your spa shower routine, but here’s a few more herbs and flowers you should consider including next time you’re looking for a soothing sensory experience in the shower:
Best herbs for use in a spa shower routine
Peppermint: Peppermint has a cooling and refreshing scent that can help alleviate headaches, improve digestion, and boost energy levels. Sharp and energizing, perfect for hot days.
Rosemary: Rosemary has a woody and earthy scent that can help improve focus and concentration. It can also help boost the immune system and relieve stress. I love using rosemary in the winter, but for summer showers it adds a deep element that can’t be replicated.
Chamomile: Chamomile has a calming and soothing scent that can help reduce stress and anxiety. It can also help promote better sleep and alleviate skin irritations. This is my go to for chaotic weeks where work seems like it will never be done.
Lemongrass: Lemongrass has a fresh and citrusy scent that can help uplift the mood and relieve stress and anxiety. It can also help alleviate pain and inflammation in muscles and joints. Chronic pain baddies take note: lemongrass is a hard worker in your herbal medicine cabinet.
Frankincense: Frankincense has a warm and woody scent that can help promote relaxation and spiritual well-being. It can also help boost the immune system and improve respiratory health.
How to Create an Herb-Infused Shower
The options for ways to include herbs in your spa shower routine are practically endless. But here are a few simple methods you can make quickly and easily:
Herbs for Exfoliation
Including herbs in your sugar scrubs can support skin health and boost healthy glow while providing antimicrobial benefits that could help reduce blemish and acne. Smaller flower buds work best for blending into sugar scrubs. My favorites are Rosemary and Lavender for this technique. I would avoid brittle leaves that can break into lots of tiny pieces. To make a sugar scrub, combine 1 cup white or raw sugar with ¼-½ cup carrier oil of choice. I like to use almond or jojoba oil. To this mixture, add approximately a tablespoon of your dried herbs of choice and 15-20 drops of essential oil.

To use your DIY herbal scrub, scoop out a small amount and slowly massage into your skin in a circular motion. Rinse with warm water. Be careful - this can make your tub slippery!
Rinsing with Herbal Tea
An herbal tea shower rinse can make your shower feel like a spa instantly, and all you need is herbs and water. Use soothing chamomile for a relaxing shower after a long day or uplifting lemongrass in your shower rinse when you need to wake up and energize for a busy afternoon. To make an herbal rinse, just steep 2 tablespoons of your herbs of choice in 2 cups of hot water and allow to cool slightly so you don’t burn yourself. Pour over your body slowly at the end of your shower, after rinsing off with your usual soap of choice. Don’t rinse this off! Just pat dry and enjoy the subtle effects for the rest of your day.
Herbs for Aromatherapy
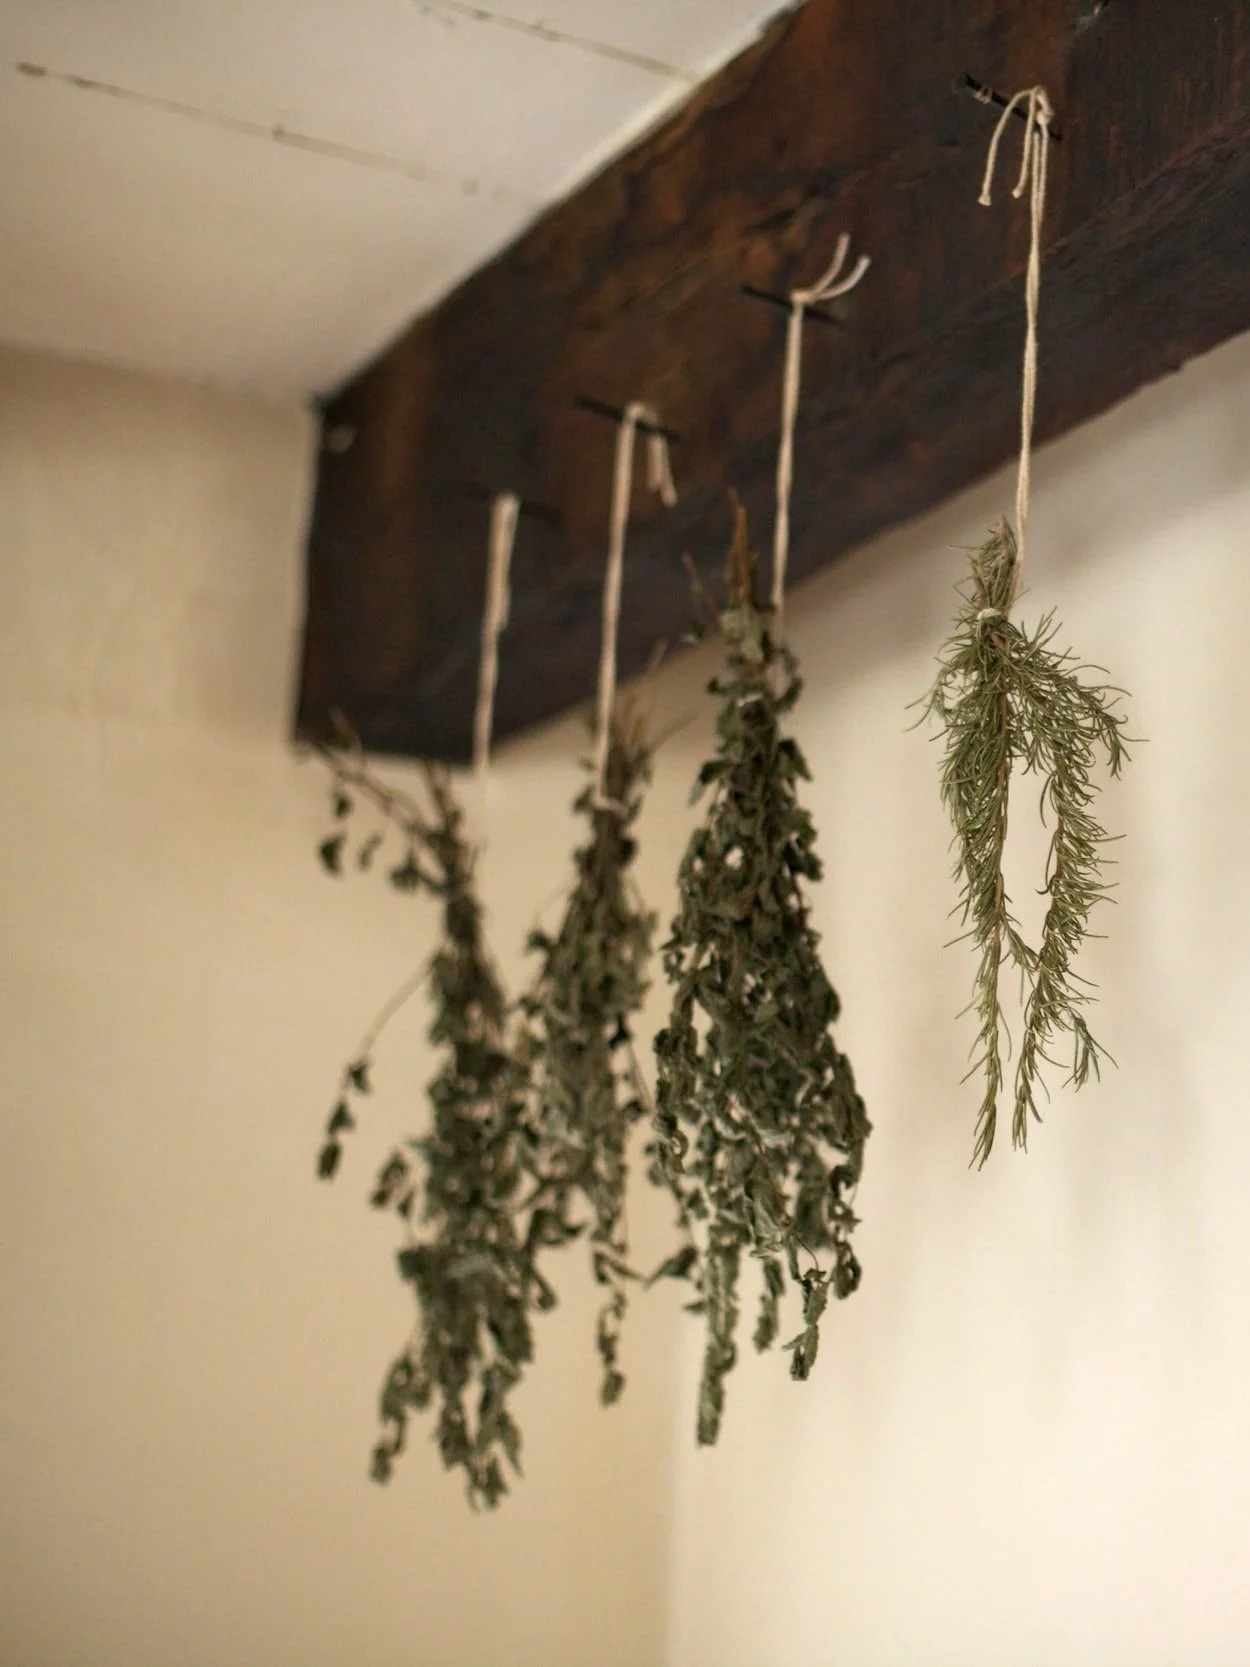
By now, most of us are familiar with the benefits of aromatherapy. This is one of my favorite ways to enhance my shower routine so it really feels like a spa day at home, and one of the longest lasting. In the summer I almost always have a bundle of fresh herbs drying on my shower head, which means I’m almost always enjoying the benefits of aromatherapy in the shower.
There’s a good reason shower aromatherapy is so popular. Botanicals like eucalyptus and peppermint can help alleviate respiratory issues and ease congestion, while the steam from the shower can also help open up the airways and promote better breathing. The use of aromatherapy in the shower can help uplift the mood and improve mental clarity and focus. It can help boost energy levels and promote a sense of positivity and well-being. Overall, aromatherapy in the shower can provide a relaxing and rejuvenating experience that promotes both physical and mental health.
The easiest way to use aromatherapy in the shower is by hanging a simple bundle of botanicals from your shower head using twine. You can also place loose herbs in a cloth sachet and steep this in your tub for a botanical bath with no cleanup necessary. The steam from your shower will release the active fragrance oil compounds in the plants into the air. To reap the benefits of this method, avoid turning on the vent fan in your bathroom if you can so the room can fill with steam (don’t do this often though and make sure you run it when you’re done to avoid mold and mildew buildup on your bathroom walls!)
Maximizing the benefits of the herb-infused shower
Want to go deeper? If you’re in need of a true mental reset, there’s a couple ways you can maximize the benefits of these herbal spa shower techniques
Breath Work
Breath work is a practice that can bring you into the present moment, allowing you to clear your head and fully notice what is happening around you. Box breathing, also known as square breathing, is a deep breathing technique that can help reduce stress and anxiety. Here's how to practice it:
Close your eyes and take a deep breath in through your nose for four seconds.
Hold your breath for four seconds.
Exhale slowly through your mouth for four seconds.
Hold your breath for four seconds.
Repeat steps 2-5 for several minutes, or until you feel calm and relaxed.
Remember to breathe deeply from your diaphragm, rather than shallow breaths from your chest. You can also try visualizing a box or square as you breathe, with each side representing one part of the breathing cycle. With practice, box breathing can become a useful tool to help you manage stress and feel more centered.

Acupressure
Acupressure mats are excellent for relieving joint pain, and if you’re wondering if acupressure for back pain is effective, it is! Two studies were funded by the European Union in 2014. In this study, 97% observed total muscle relaxation, improved posture, and a stronger-feeling spine, 93% observed a total elimination or significant reduction of back pain. But what does this have to do with your shower routine? Acupressure significantly increases the intensity of blood flow in the circulation of the skin and accelerates cell metabolism. Your skin will be bright red for 15-30 minutes after an acupressure session, and a bit hot to the touch as though you’ve already taken a hot shower. You’ll just have to trust me on this one - if you see how my skin looks after using the acupressure mat in this post, you’ll understand why this increase in circulation can improve the intensity and effectiveness of your spa shower experience.
Adding essential oils To Your Shower for extra relaxation and benefits
If you’re experimenting with aromatherapy in the shower using herbs but you’re finding the effect isn’t powerful enough, adding a few drops of essential oil to your herb bundles can dramatically increase the scent and intensity of your aromatherapy shower experience. I always keep a few bottles nearby - orange and lavender are my favorites.
Lastly, I want to encourage you to experiment with different herbs and techniques to find the best fit for your individual needs. The most gratifying thing about herbalism is finding the plants that you personally connect with the most, that resonate with your body's needs, and your list may look very different from mine. I’ve always said if I was a plant, I would be rosemary - it feels like my ultimate plant friend, designed for exactly what I struggle with. But your answer will most likely be different. The herbs I mentioned here are just a few of the hundreds you could grow, harvest and use in your herb infused spa shower routine.
Find these herbs and more by tapping here to visit my favorite online herb shop!

Breathe Easy: Natural Herbal Seasonal Allergy Remedies to Relieve Your Symptoms
Probably the worst thing about beautiful June? Itchy noses distracting us from our garden tasks. Seasonal allergies are here to stay on our homestead, so I find myself turning to herbal remedies to relieve some of my symptoms.

The Cottage Peach is reader-supported. When you purchase through links on our site, we may earn an affiliate commission at no additional cost to you. All opinions are our own.
Probably the worst thing about beautiful June? Itchy noses distracting us from our garden tasks. Seasonal allergies are here to stay on our homestead, so I find myself turning to herbal remedies to relieve some of my symptoms.
What are seasonal allergies?
Seasonal allergies, also known as hay fever or allergic rhinitis, are an allergic reaction to airborne substances such as pollen, mold spores, and other allergens that are present in the environment during certain seasons.
Seasonal allergy symptoms
Symptoms of seasonal allergies can include sneezing, runny nose, congestion, itchy or watery eyes, and throat irritation. These symptoms can affect a person's quality of life and ability to function normally. Seasonal allergies are a common condition, affecting millions of people worldwide. The severity of symptoms can vary depending on individual sensitivity to specific allergens and the amount of exposure to them.
Seasonal allergy causes
Seasonal allergies are caused by an overreaction of the immune system to certain airborne substances that are present in the environment during certain seasons. When a person with seasonal allergies inhales these allergens, the immune system mistakes them as harmful and produces an antibody called immunoglobulin E (IgE) to fight them off. This triggers the release of histamine and other chemicals in the body, leading to the classic symptoms of seasonal allergies, such as sneezing, runny nose, congestion, itchy or watery eyes, and throat irritation.
Some common allergens that can trigger seasonal allergies include:
Tree, grass, and weed pollen
Mold spores
Dust mites
Pet dander
What months have seasonal allergies?
Seasonal allergies are more common during certain seasons, depending on the type of allergen. For example, tree pollen is more prevalent in the spring, while grass pollen is more common in the summer. Mold spores are more prevalent in the fall, especially in damp or humid areas.
How do you know if you have seasonal allergies?
Here are some common signs and symptoms of seasonal allergies:
Sneezing: You may experience frequent sneezing, especially in the morning or during the day.
Runny nose: You may have a runny nose with clear, watery discharge.
Congestion: You may experience nasal congestion, making it difficult to breathe through your nose.
Itchy or watery eyes: You may experience red, itchy, or watery eyes.
Throat irritation: You may experience throat irritation or a sore throat.
Fatigue: You may feel tired or have a decreased energy level.
How do you cure seasonal allergies?
There is no known cure for seasonal allergies, but there are several treatments and lifestyle changes that can help to manage the symptoms. Here are some strategies that may be effective in treating seasonal allergies:
Avoid allergens: Try to avoid exposure to the allergens that trigger your symptoms. For example, stay indoors during peak pollen hours, use an air purifier, and keep windows closed.
Over-the-counter medications: Antihistamines, decongestants, and nasal sprays can help to alleviate symptoms such as sneezing, itching, and congestion.
Prescription medications: In severe cases, your healthcare provider may prescribe stronger medications, such as prescription-strength antihistamines, nasal corticosteroids, or allergy shots (immunotherapy).
Natural remedies: Some natural remedies such as honey, garlic, stinging nettle, butterbur, and Ginkgo biloba may help to reduce inflammation and alleviate symptoms. However, it is important to talk to your healthcare provider before using any natural remedies, as they may interact with other medications or have side effects.
Lifestyle changes: Eating a healthy diet, staying hydrated, getting enough sleep, and reducing stress can also help to boost your immune system and reduce allergy symptoms.
Can allergies make you feel sick and tired?
Yes, seasonal allergies may mimic many of the symptoms found with common illnesses.
Do allergies get worse at night?
Allergy symptoms can be worse at night for some people, depending on the type of allergen and the individual's sensitivity to it.
Here are some reasons why allergies may get worse at night:
Increased exposure to allergens: Allergens such as dust mites, pet dander, and mold spores can accumulate in bedding, carpets, and other surfaces in the bedroom. This can increase exposure to these allergens at night, triggering symptoms such as sneezing, itching, and congestion.
Reduced airflow: Sleeping in a closed room with little ventilation can lead to reduced airflow and increased humidity, which can exacerbate allergy symptoms.
Nasal congestion: Allergies can cause nasal congestion, making it difficult to breathe through the nose at night. This can lead to snoring or sleep apnea, which can further disrupt sleep and exacerbate allergy symptoms.
Circadian rhythm: The body's circadian rhythm, which regulates sleep and wake cycles, can also play a role in allergy symptoms. Some studies suggest that the immune system may be more active at night, which can worsen allergy symptoms.
Remedies for seasonal allergies
These natural remedies for seasonal allergies aren’t foolproof, but considering the low cost and ease of which you can make them they are certainly worth a try.

Garlic
Garlic has been traditionally used in some cultures as a natural remedy for seasonal allergies. Currently there is limited scientific evidence to support its effectiveness in reducing allergy symptoms.
Raw garlic: Eating raw garlic may help to reduce allergy symptoms. You can mince a clove of garlic and swallow it with water or mix it into food like salad dressing, hummus or soup.
Garlic supplements: You can take garlic supplements in the form of capsules or tablets. Make sure to follow the dosage instructions on the label.
Garlic tea: You can make garlic tea by steeping a few cloves of crushed garlic in hot water for several minutes. Strain the mixture and drink the tea.
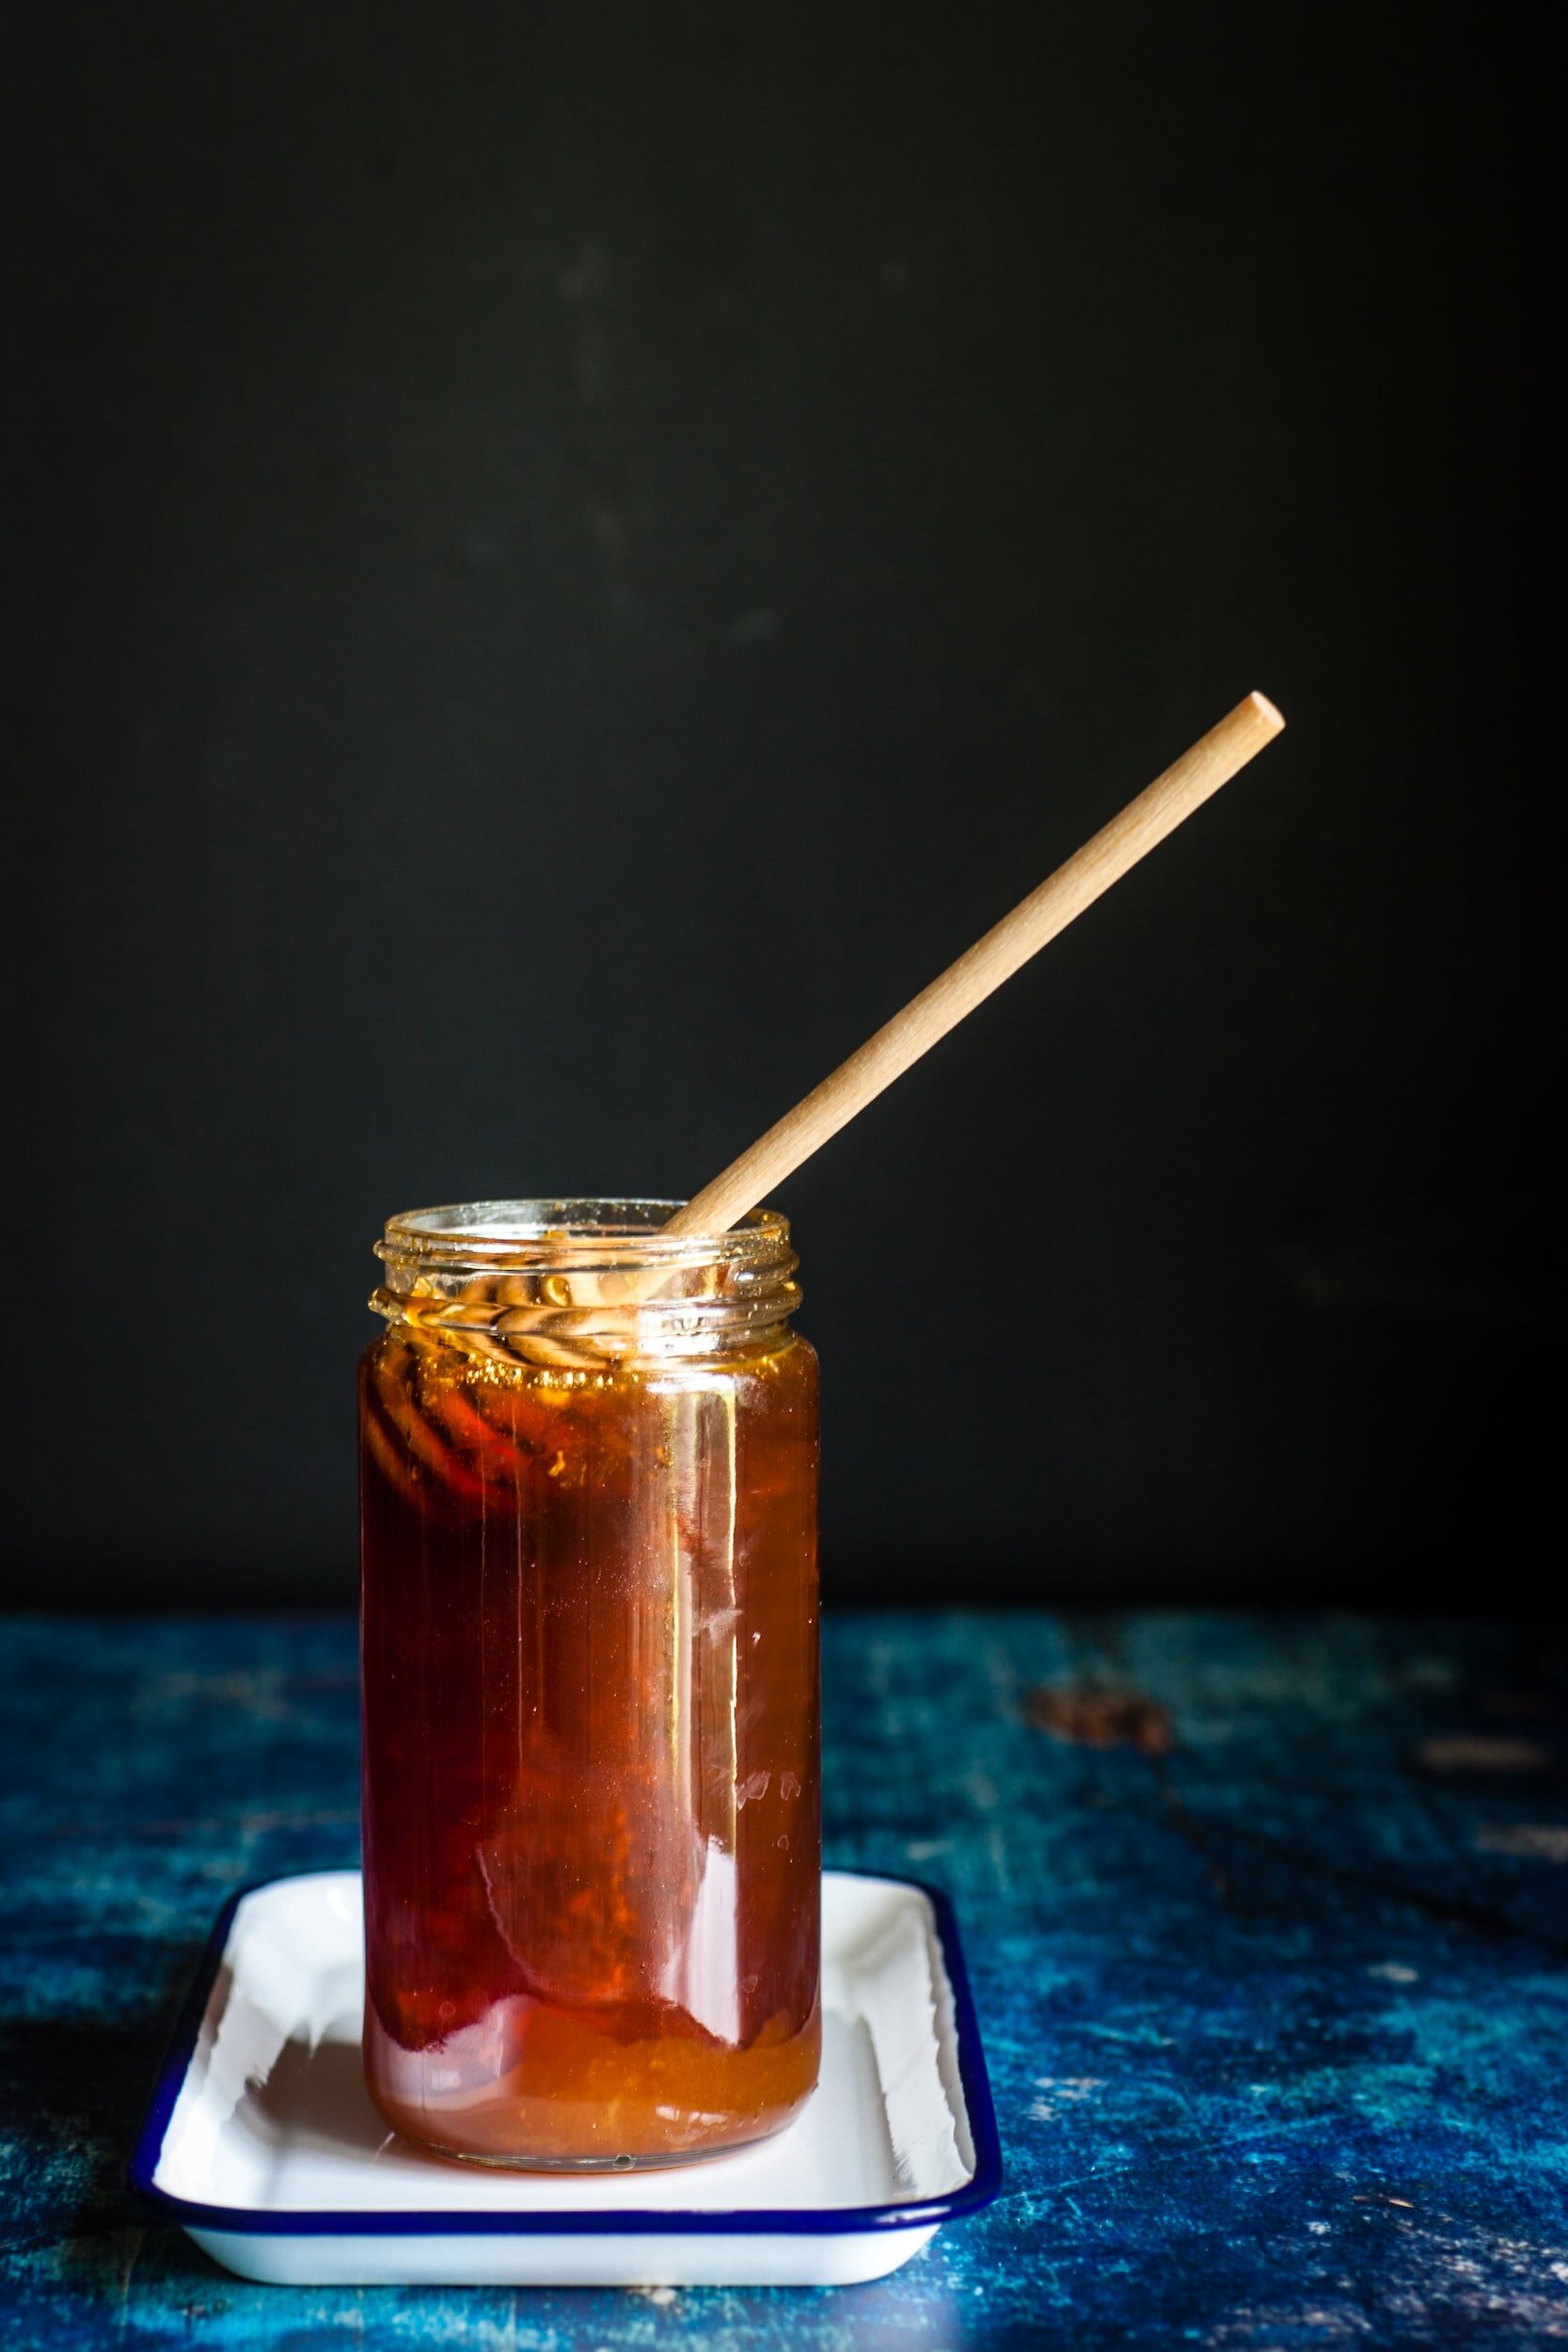
Honey
Honey may help to alleviate allergy symptoms by exposing the body to small amounts of allergens, similar to immunotherapy.
If you would like to try using honey to alleviate seasonal allergies, it is recommended to use raw, locally sourced honey. Here are a few ways to use honey:
Honey and lemon: Mix a tablespoon of raw honey with the juice of half a lemon in a cup of warm water. Drink this mixture daily.
Honey and tea: Add a teaspoon of honey to your favorite herbal tea to sweeten it and potentially alleviate allergy symptoms.
Honey on toast: Spread a teaspoon of honey on a slice of whole grain toast for a healthy breakfast.
Stinging Nettle
Stinging nettle (Urtica dioica) has been used as a natural remedy for seasonal allergies due to its anti-inflammatory properties. It may help to reduce inflammation in the body and alleviate allergy symptoms. Here are a few ways to use stinging nettle:
Stinging nettle tea: Steep 1-2 teaspoons of dried stinging nettle leaves in hot water for 5-10 minutes. Strain the mixture and drink the tea. You can drink up to 3 cups of stinging nettle tea per day.
Stinging nettle capsules: You can take stinging nettle capsules or tablets, following the dosage instructions on the label.
Stinging nettle tincture: A tincture is a concentrated liquid extract of stinging nettle. Follow the dosage instructions on the label.

Ginkgo Biloba
Ginkgo biloba is an herb that has been used in traditional medicine for a variety of health conditions, including seasonal allergies. Although the evidence for its effectiveness in reducing allergy symptoms is limited, some people have reported benefits from using ginkgo biloba. Here are a few ways to use ginkgo biloba:
Ginkgo biloba capsules or tablets: You can take ginkgo biloba capsules or tablets, following the dosage instructions on the label. It is recommended to start with a low dose and gradually increase it over time.
Ginkgo biloba tea: Steep a teaspoon of dried ginkgo biloba leaves in hot water for 5-10 minutes. Strain the mixture and drink the tea.
Ginkgo biloba tincture: A tincture is a concentrated liquid extract of ginkgo biloba. Follow the dosage instructions on the label.
Butterbur
Butterbur (Petasites hybridus) is a plant that has been used in traditional medicine for a variety of health conditions, including seasonal allergies. Butterbur may help to reduce inflammation and relieve allergy symptoms, although more research is needed to fully understand its effectiveness. Here are a few ways to use butterbur:
Butterbur capsules or tablets: You can take butterbur capsules or tablets, following the dosage instructions on the label. It is recommended to use a product that is labeled as "PA-free," meaning it does not contain pyrrolizidine alkaloids, which can be toxic to the liver.
Butterbur tea: Steep a teaspoon of dried butterbur leaves in hot water for 5-10 minutes. Strain the mixture and drink the tea. However, butterbur tea may not be safe as it may contain pyrrolizidine alkaloids.
Turmeric
Turmeric (Curcuma longa) is a spice that has been used in traditional medicine for a variety of health conditions, including seasonal allergies. Turmeric contains a compound called curcumin, which has anti-inflammatory properties and may help to reduce allergy symptoms. Here are a few ways to use turmeric:
Turmeric tea: Mix a teaspoon of ground turmeric with hot water and a squeeze of lemon juice. You can also add honey to sweeten it.
Turmeric capsules or tablets: You can take turmeric capsules or tablets, following the dosage instructions on the label. Look for products that contain standardized amounts of curcumin.
Turmeric milk: Mix a teaspoon of ground turmeric with warm milk and honey. This can be a soothing and comforting bedtime drink.

Red Clover
Red clover (Trifolium pratense) is a herb that has been used in traditional medicine for a variety of health conditions, including seasonal allergies. Red clover contains compounds that may help to reduce inflammation and relieve allergy symptoms. Here are a few ways to use red clover:
Red clover tea: Steep a teaspoon of dried red clover flowers in hot water for 5-10 minutes. Strain the mixture and drink the tea. You can drink up to 3 cups of red clover tea per day.
Red clover capsules or tablets: You can take red clover capsules or tablets, following the dosage instructions on the label.
Red clover tincture: A tincture is a concentrated liquid extract of red clover. Follow the dosage instructions on the label.
Find these herbs and more by tapping here to visit my favorite online herb shop!
Do you struggle with seasonal allergies? I hope some of these natural remedies can help! If you want to learn more about how herbalism you can enroll in my favorite online herbal school by clicking here.
![The Power of Nature: How To Make Infused Oregano Oil for Your Health and Wellness [Recipe]](https://images.squarespace-cdn.com/content/v1/60e85024dc86d643da81c96a/1682625337753-AFI1M6MRRMDQ5CBNY2TX/unsplash-image-Fl2Ki3_GZIU.jpg)
The Power of Nature: How To Make Infused Oregano Oil for Your Health and Wellness [Recipe]
Oregano is probably one of the safest, most widely studied, accessible and effective herbs for any beginner herbalist to begin experimenting with. Not only can you easily grow an abundance in your own backyard, it’s readily available at nearly every grocery store if you can’t grow it yourself. And truly all you need to make an infused oregano oil is oregano, and olive oil.

The Cottage Peach is reader-supported. When you purchase through links on our site, we may earn an affiliate commission at no additional cost to you. All opinions are our own.
Last fall, I woke up with a deep earache - an ear infection the likes of which I had not experienced since I was a child. As a result, I found myself standing in front of the bathroom mirror with my head tipped to one side dripping a mysterious oil from a jar into my ear. Anyone walking by probably would’ve died laughing, but no one was laughing when a few days later I happened to have my yearly physical and asked my doctor to see if the infection had fully cleared as I expected - and it had.
Oregano oil is so trusted and well understood that even this western medicine professional said to me “I’m not surprised that it worked, because oregano is very anti-bacterial”
Oregano is probably one of the safest, most widely studied, accessible and effective herbs for any beginner herbalist to begin experimenting with. Not only can you easily grow an abundance in your own backyard, it’s readily available at nearly every grocery store if you can’t grow it yourself. And truly all you need to make an infused oregano oil is oregano, and olive oil.
Benefits of oregano oil
So what is oregano oil good for? According to the NIH, “Essential oils of oregano are widely recognized for their antimicrobial activity, as well as their antiviral and antifungal properties…recent investigations have demonstrated that these compounds are also potent antioxidant, anti-inflammatory, antidiabetic and cancer suppressor agents.”
Oregano oil is high in compounds that are potent antioxidants, such as carvacrol, thymol, and triterpenes. Antioxidants may protect your cells against free radicals, which may play a role in heart disease, cancer and other diseases. Free radicals are molecules produced when your body breaks down food or when you're exposed to tobacco smoke or radiation.
Oregano oil is also excellent for fighting against fungal and bacterial infection thanks to its antifungal and antimicrobial properties (that’s why it helped me with my ear infection!)
It is known that oregano oil may help with acne, asthma, psoriasis and wound healing. And the best way to get these oregano oil health benefits is through infusing your oregano in olive oil to extract the essential oils packed within.
What is oil of oregano?
Oil of oregano and oregano infused oil are the same thing. They are both, however, different from oregano ESSENTIAL oil, which is much more concentrated and not safe for consumption. Oil of oregano is a more diluted oregano oil that is safe for all applications.
Oregano oil uses
So how can you use oregano oil? The simplest application is to just incorporate it into your salad dressings and cooking. This infused oil is entirely edible and adds beautiful depth of flavor to your dishes while also imparting the health benefits listed above.
Oregano oil for colds
In a lab environment (in-vitro) oregano was shown to kill certain cold and flu viruses. We know that this doesn’t always translate to the same effect inside of the body, but while there is limited evidence outside of a lab environment to support the use of oregano oil for colds it may help with a cough much the same way that Vicks vaporub does - minus the petroleum.
Oregano oil for skin
For certain types of acne caused by a buildup of bacteria, using infused oregano oil as a face moisturizer allows you to experience the antimicrobial effects of oregano oil and help reduce the appearance of blemishes. If you plan to use it in this application, choose a non-comedogenic carrier oil for your infusion so you don’t end up just clogging your pores more.
Oregano oil for ear infections
You’ve probably figured this out by now, but oregano oil is great for ear infections. To use, I just dipped my pinkie into the jar of infused oil and allowed one drop to fall into my ear. I did this 3x a day for 5 days until the pain was gone.
Homegrown VS Store Bought Herbs
Store bought herbs don't just look different, they ARE different. So why are homegrown herbs better for you?
Think about the difference between a bagged, pre-chopped salad and the lettuce you picked up from the farmers market.
They're both still lettuce, but one is darker, fresher, and much more flavorful.
That flavor directly translates to compounds in the plant that are nutritionally dense. It tastes better because it's better for you! The older the produce is, the more those nutrients break down.
Herbs are the same way. When you get store bought herbs, there is almost no way to guarantee their freshness or quality. Yes, even dried herbs can be fresh! It's likely that if you're seeing faded colors or a lot of dust in your herbs indicating it's begun to break down, the beneficial compounds within the herbs themselves are not potent anymore.
Growing your own herbs (here’s my favorite place to get oregano seeds) or buying from a small herbalist shop is the best way to ensure the quality of your final herbal preparation. It also eliminates the great amount of waste and emissions involved in packaging and shipping herbs, since even though many herbs like oregano grow all over the country, when you purchase them from a large store they often come from overseas. If you can’t grow your herbs yourself or find a small local shop, Find these herbs and more by tapping here to visit my favorite online herb shop!
What Type of Oil is Best for Infusing Herbs?
You can use many different oils to infuse herbs depending on your preference, budget and intended use. I used olive oil for this herbal oil infusion, but sweet almond oil, grapeseed oil and apricot oil also will work as carrier oils safe for topical use. Olive oil is by far the cheapest and most easy to find, and has a longer shelf life, but sweet almond oil is affordable as well and has no smell, plus it includes vitamin E and K. Both are good options that I use regularly! I haven’t tried grapeseed or apricot oil myself.
Best Container for Herbal Infusions
When infusing herbs in oil, you should always choose a plastic free container to avoid leaching any dangerous chemicals into your oil. I like to use a glass mason jar to infuse my oil since we always have so many extra on hand and they are durable and cheap, but if you don’t have somewhere dark you can store a clear jar, then a tinted glass jar or bottle is best to keep out sunlight, since UV rays can reduce the effectiveness and longevity of your infused oils.
How to make oregano oil
There are many ways to make an infused oil but my favorite is a simple folk method - this means we won’t be making any exact measurements. You’ll find that many herbalists employ a folk method for their skincare concoctions since accuracy in dosing is not generally a requirement unless taken internally.

To make an infused oil using the folk method, all you need to do is fill your mason jar about halfway with dried oregano, then cover at least an inch above the herbs with your oil of choice. I usually end up filling the jar almost all the way to the top. Tap lightly on a solid surface to make sure there are no air bubbles trapped in the oil and place the infusing oil jar in a cool dark place such as a closet or pantry (somewhere out of direct sunlight) for about six weeks. You can regularly shake the jar to redistribute the oil, and you may notice that after the first day or two much of the oil has been absorbed into the dried herbs and you will need to add more to keep the flowers completely covered in oil. This is normal and to be expected.
If you would rather not wait a full six weeks to have ready-to-use infused oil, you can speed up the infusion process using your stove top. Place your jar in a double boiler on your stove and simmer as low as possible for up to 3 hours. Your oil will be ready to use as soon as it cools, or you can wait a couple of weeks to allow your infusion to develop and grow stronger. You can also simmer your jar in a slow cooker for 3 hours the same way.
Some herbalists allow their oil to infuse on a sunny windowsill - personally I am against this method in most cases as it causes the oil to be exposed to large amounts of ultraviolet light which can break down the beneficial compounds. It may be fine if you plan to immediately move the jar to dark storage once it is done, or if you allow it to infuse only a couple of weeks on the windowsill before moving to a darker spot to finish infusing.
Will you try this easy and fast oregano oil recipe?

Plant a Sustainable Future: Celebrating Earth Day with DIY Wildflower Seed Balls
Seed bombs are one of my favorite nature craft ideas, because they are simple, fast and easy for anyone to do and the result is a more beautiful planet. Since the seeds do not need to be buried to grow, you can just toss your seed bombs into empty and neglected areas, watch and wait and in a few months you should have some beautiful flowers growing! The patch will likely self-seed and continue to develop and grow with each passing year that goes by.

The Cottage Peach is reader-supported. When you purchase through links on our site, we may earn an affiliate commission at no additional cost to you. All opinions are our own.
One of my most loved books from childhood is Miss Rumphius by Barbara Cooney. Miss Rumphius was inspired by the real life "Lupine Lady," Hilda Hamlin, who spread lupine seeds along the Maine coast. The story follows Miss Rumphius through her younger days into old age as she spreads lupine seeds from her bicycle all the way up until she is lying sick in bed and enjoying the view she has created outside her bedroom window after spreading all these seeds over the years. This imagery has always been powerful to me, but it was made even more so after I read The Well-Gardened Mind by Sue Stuart Smith this past winter and learned how patients staying in hospital rooms with a nature-facing window recover 37% faster than patients who do not have this visual access to nature at all. This is leading to more hospitals instituting green spaces throughout their campuses as a real, science-backed method of care.
Reading this fact, it got me thinking that even outside of the carefully date driven measurements within a hospital, surely there must be some benefit to our wellbeing in simply going about our days surrounded by natural beauty. It’s not a far stretch when you picture how much more peaceful you feel outside. The sturdy presence of ancient trees combined with swaying branches, birdsong and the thrill of a flower in bloom stimulates our minds and encourages us to be mindful.
I imagine spreading seeds just like The Lupine Lady herself did, bringing beauty to the landscapes I call home and even leaving a legacy in the form of wildflowers throughout the land. It is the kind of quiet hope we all need these days - a flower popping up where there wasn’t one before. An offering to pause and enjoy our surroundings.
With the arrival of Earth Day 2025, I am feeling the pull even stronger than usual to do something to connect with the Earth, celebrate the natural beauty around us and bring awareness to what needs to change in order to protect our home planet. The first Earth Day took place in 1970, marking the beginning of the modern day environmental movement as we now know it. It offers us the opportunity to promote conservation and sustainability, raising awareness of the impacts our decisions have on the environment. On this day, around 1 billion individuals across more than 190 countries take action to raise awareness of the climate crisis and bring about behavioral change to protect the environment through reducing our energy use, carbon footprint and more. It really is a great opportunity to reflect and find new ways to support our one and only home.
So where do seed bombs fit into all of this? Seed bombs are a fun and accessible way to bring a joyful nature activity into your Earth Day celebrations. Seed bombs are simply a collection of biodegradable materials like paper and clay shredded and combined with a variety of wildflower seeds, molded into a ball shape (or any shape you like really) and dried. Once dry, you can drop them on blank areas of earth by roadsides or parks and the ball will naturally break down in the elements, leaving only the seeds behind which will plant themselves and hopefully grow into beautiful flowers to support our pollinators.
As you’ll see, there are as many ways to make seed bombs as there are hands to make them with. But here are some of the main ingredients you can use in a seed bomb DIY:
Newspaper/paper scraps: any paper destined for the recycling bin will do, although you may want to ensure any dyes used were soy-based if you’re concerned about leaching dyes into the soil. Personally I think newspaper is just fine even if you can’t confirm the inks are soy based, but I wouldn’t necessarily use a brightly colored construction paper for this one since the dyes probably aren’t good for the soil.
Clay: if you’re having trouble with your seed bombs sticking together, clay is an excellent binder that can help give them some structural integrity. You don’t need this for a successful seed bomb though.
Topsoil and compost: Compost and topsoil aren’t strictly necessary for a wildflower seed bomb, but they will provide your seeds a little extra boost and may increase germination rates (or how many of your seeds will actually grow into flowers) since you’re effectively coating the seeds which mimics being buried in the ground. The thing about wildflower seeds is that they spread through landing on the surface of soil all the time, so they don’t really need to be buried to grow usually.
Seeds: You won’t need a huge bucket of seeds here since the majority of the mass of the seed ball is made up of the paper, but it is important to choose wildflower seed varieties or herbs and vegetables that are native to your area and will not encourage invasive species to grow.
The importance of choosing native seeds
Why does it matter what seeds you use in your wildflower seed bombs? Because the last thing you want to be doing on Earth Day is actually planting invasive plants that will crowd out native species. An invasive species is an introduced species that becomes overpopulated and harms its new environment. Invasive species adversely affect habitats and bioregions, causing ecological, environmental, and/or economic damage. Not a good thing! On the other hand, native plants will encourage and support your local pollinators by providing a diverse food source and tend to require less care, watering and other maintenance since they are hard-wired to grow well in your climate.
The easiest way to ensure you’re planting native seeds is to buy a seed mix like this one. If you are outside of the USA, try to find a local garden supply company that can help you. Otherwise I’d recommend just choosing three or four flowers you’d like to grow and using trusty Google to confirm they are native to your area. I could give you a list that would cover the major areas, but you’ll learn better from doing a bit of the research yourself!
One last thing; I’m sure you know this, but it has to be said! Never distribute your seed bombs on private property or protected parks. Stick to civic spaces that have long since been neglected or local public areas that could use a bit of rewilding.
What plants are best for seed bombs?
We’ve talked a lot about wildflowers, but did you know that you can also use edible plants such as lettuce, sage, basil, cilantro and even tomato seeds in your seed bomb DIY? I personally used meadow flowers in my mix including black eyed susan, cornflower, marigold, Californian poppies, cosmos and bachelor button. I think using edible flowers and herbs would be so fun - imagine taking your morning walk through the neighborhood and seeing little patches of lettuce and calendula free for the taking for your afternoon snack! I dream of a day when our wild spaces are full of edible free food to share with our communities.

How to make seed bombs step by step
Supplies
Newspaper/paper scraps
Bowl
Water
Parchment paper
Baking sheet/plate
OPTIONAL: clay, compost, topsoil
Instructions:
Making seed bombs is simple. Shred your paper into small pieces and soak in water, or soak whole pieces and then blend in a food processor. Combine your shredded paper with seeds (and compost/clay/topsoil if you’d like) in a bowl. Form into golf ball sized globes and squeeze tightly to compress and remove excess moisture. Place on your parchment paper on the baking sheet or just use a plate and allow to dry for 24 hours before using. You can even place them into a small drawstring bag and give them out as Earth Day gifts to friends and family!
How do you use seed bombs?
Seed bombs are one of my favorite nature craft ideas, because they are simple, fast and easy for anyone to do and the result is a more beautiful planet. Since the seeds do not need to be buried to grow, you can just toss your seed bombs into empty and neglected areas, watch and wait and in a few months you should have some beautiful flowers growing! The patch will likely self-seed and continue to develop and grow with each passing year that goes by.
If you’re looking for nature walk activities to do this Earth Day, I hope you’ll give this seed bomb DIY a try and bring them along with you on your adventure. And remember: every day should be Earth Day, so if you’re reading this and it’s already come and gone, don’t let that stop you from giving it a try and bringing some beauty to our one and only home!
![Make This Easy + Natural Botanical Hand Salve [Recipe]](https://images.squarespace-cdn.com/content/v1/60e85024dc86d643da81c96a/b57698b0-de70-4101-afaf-7af57788237d/Herbal+Face+Steam+Recipe+by+The+Cottage+Peach-1.jpg)
Make This Easy + Natural Botanical Hand Salve [Recipe]
Although it felt for a moment as though we would never see spring again, suddenly I am waking up to to-do lists filled with seed starting tasks and dirt under my fingernails once more. But what is more inevitable than spring for a gardener? Calluses and dry skin galore from all that time spent working with our hands in the soil. It doesn’t seem to matter what gloves I wear, there is no point in the growing season where I have the hands of a model between the short, practical nails and the constant need to moisturize. Anyone who has struggled with gardener’s hands knows the eternal search for the perfect balm - some are too greasy, some seem to evaporate off your skin within seconds and have no effect, but to find the elusive, perfect hand balm is to discover the holy grail of the gardener’s toolbox.
The Cottage Peach is reader-supported. When you purchase through links on our site, we may earn an affiliate commission at no additional cost to you. All opinions are our own.
Although it felt for a moment as though we would never see spring again, suddenly I am waking up to to-do lists filled with seed starting tasks and dirt under my fingernails once more. But what is more inevitable than spring for a gardener? Calluses and dry skin galore from all that time spent working with our hands in the soil. It doesn’t seem to matter what gloves I wear, between the short, practical nails and the constant need to moisturize there is no point in the growing season where I have the hands of a model! Anyone who has struggled with gardener’s hands knows the eternal search for the perfect balm - some are too greasy, some seem to evaporate off your skin within seconds and have no effect, but to find the elusive, perfect hand balm is to discover the holy grail of the gardener’s toolbox.
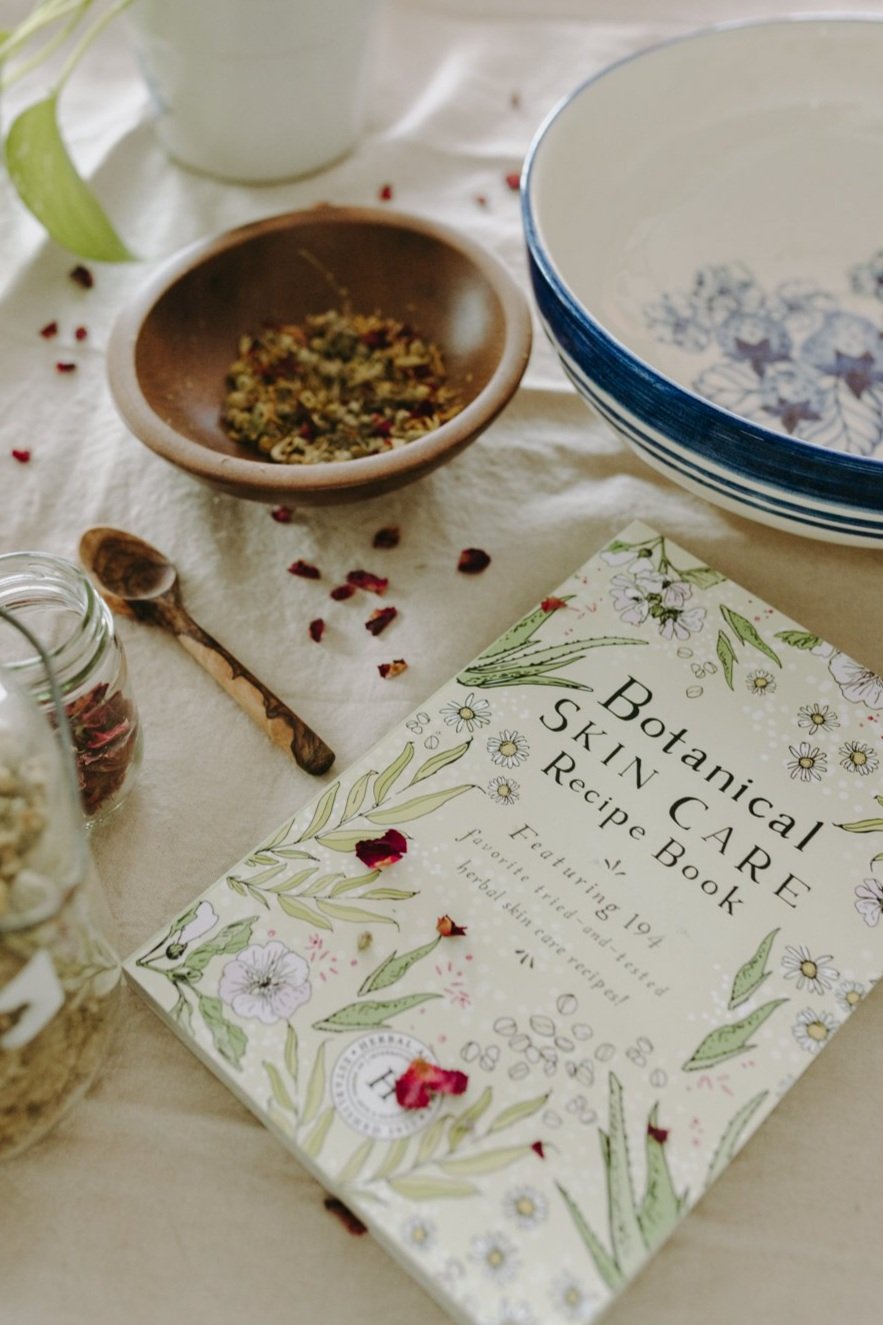
So while I have been enjoying this time of growth and watching my little sprouts join the world and reach upward with their new leaves, the experience would be infinitely better if I had the benefit of a hand salve recipe that would support my skin through this intense part of the growing season. Whenever I find myself with a skin concern I always turn to Herbal Academy’s Botanical Skincare book because it has at least one of every common type of skincare product you could need, with easy to find ingredients and no complicated recipe processes that would leave me wondering if I had actually made the thing I was trying to make. Most of the recipes are so simple they fit on a single page, but don’t let the fact that the recipes are simple fool you into thinking these recipes are “just ok”. In fact, I believe their power lies in their simplicity. We don’t need a hundred different ingredients to achieve most of the desired effects and in the case of skincare I do believe less is actually more. The beautiful illustrations just keep me motivated to discover more.
Since my psoriasis diagnosis I’ve had to become extra careful about what I put on my skin, and so many commercial products available today have harsh ingredients that aggravate my skin condition. I like to be able to pronounce everything I am putting on my body if possible, and going with homemade skincare products helps me do this.
You really don’t need many supplies to make your own homemade hand cream in your kitchen either. As long as you have measuring cups and a repurposed container to store your finished natural calendula hand salve in, a double boiler can be made if you do not have one by placing a mason jar inside of your pot sitting on top of the lid of the jar to keep it from coming into direct contact with the heat source. It’s also a good idea to dedicate a stirring spoon that you don’t need anymore to the task as it may come into contact with ingredients that are not food safe. This spoon can be reused for all of your future skincare DIY projects - trust me, once you start making your own DIY lotion recipes you won’t be able to stop! You can of course purchase all the supplies needed - Mountain Rose Herbs is my supplier of choice for quality ingredients - but what could be more satisfying than creating homemade hand lotion recipes with plants you grew yourself? Growing calendula is easy and will add beauty to your garden before you harvest and dry for your homemade skincare projects. Once you get the hang of the process, these recipes also make one of kind gifts for birthdays, holidays and just-because presents that everyone will enjoy.
I’ll get into all of the details for how to make your own DIY lotion recipe at home below, but first let's talk a bit about the individual ingredients we will be using in this recipe. You’ll only need a few ingredients for this project, but if you feel like substituting something for one listed below there’s no harm in making the recipe your own. You’ll be able to mix up a batch in just a few minutes, and be well on your way to a calming self care ritual that is affordable, natural and zero-waste.
Calendula Flower
This wondrous flower is full of useful properties!
Vulnerary – assists in promoting healing of tissues
Anti-inflammatory – eases inflammation
Hemostatic – helps to stanch bleeding
Topical analgesic – assists in relieving pain
Astringent – promotes tightening and toning of tissues
Antiseptic – helps to prevent or stop microbial growth
Diaphoretic – assists the body during illness by promoting perspiration.
Lymphagogue – assists in stimulating the lymphatic system
*The above information was taken from Calendula Monograph by the Herbal Academy, The Herbal Handbook by David Hoffmann, and Herbal Medicine From the Heart of the Earth by Sharol Tilgner
Licorice root
Licorice root may have potent antioxidant, anti-inflammatory, and antimicrobial effects.
Plantain leaf
Plantain is high in vitamin A, allantoin, apigenin, aucubin, baicalein, linoleic acid, oleanolic acid, sorbitol and tannin which all promote wound healing, speed up cell regeneration and have skin-softening effects.
Beeswax
Beeswax hydrates, conditions, soothes, and calms the skin. It exfoliates, repairs damage, promotes the skin's regeneration, diminishes the appearance of the signs of aging, soothes itchiness and irritation, and creates a hydrating, long-lasting protective barrier against environmental pollutants.
In the case of our salve recipe, it will also help bind our liquid ingredients together in a more solid spreadable form. It is a popular ingredient in homemade salve recipes for that reason.
Sesame Oil
Sesame oil is rich in Vitamin B and E, which help soothe skin rashes and fade scars. It is also very effective in treating skin conditions like inflammation, eczema, athlete's foot, psoriasis, and redness. The natural anti-tanning properties of Sesame oil make it an excellent barrier against the sun's harmful rays.
HOW TO MAKE CALENDULA INFUSED OIL
There are many ways to make an infused oil but my favorite is a simple folk method - this means we won’t be making any exact measurements. You’ll find that many herbalists employ a folk method for their skincare concoctions since accuracy in dosing is not generally a requirement unless taken internally.
To make an infused oil using the folk method, all you need to do is fill your mason jar about halfway with your plant ingredients, then cover at least an inch above the herbs with your oil of choice. I usually end up filling the jar almost all the way to the top. Tap lightly on a solid surface to make sure there are no air bubbles trapped in the oil and place the infusing oil jar in a cool dark place such as a closet or pantry (somewhere out of direct sunlight) for about six weeks. You can regularly shake the jar to redistribute the oil, and you may notice that after the first day or two much of the oil has been absorbed into the dried herbs and you will need to add more to keep the flowers completely covered in oil. This is normal and to be expected. I have more detailed instructions available here.
The calendula + friends oil used in the recipe below is made more precisely, with 1 cup sesame oil, 1/4 cup calendula, 1/8 cup licorice root and 1/8 cup plantain leaves. You can do a hot infusion to speed up the infusion process as well. For the full recipe be sure and grab the Botanical Skincare Recipe Book here.
So are you wondering when I’m going to tell you how to make hand lotion at home? Let’s get to it! This recipe comes from the Botanical skincare course from Herbal Academy and its corresponding book of recipes - you can see my full review of this in depth course here.
Calendula + Friend Salve Recipe from the Botanical Skincare book by Herbal Academy:
This nourishing and richly moisturizing calendula salve recipe is perfect for dry, cracked hands that have been in the soil all day!
Ingredients
1 cup calendula + friends infused oil
2-4 tbsp beeswax
Directions
Place infused oil and beeswax in a double boiler over low heat (or a glass or ceramic bowl or canning jar over a small saucepan of simmering water) until beeswax has melted and ingredients are thoroughly combined.
Dip a clean spoon in to the formula and place it into the refrigerator so the salve will cool quickly and you can determine if its consistency is what you desire. If the sample is too soft, add a little more wax to the warm salve; the sample is too hard, add a little more of the infused oil.
While warm, pour individual portions into appropriate containers and allow to cool at room temperature.
Once cool put the lids on and label.
Store in a cool, dark place for up to 1 year.
Will you try this recipe? Learn herbalism with Herbal Academy by clicking here

Acupressure For Pain And Anxiety: Pranamat ECO Honest Review
When my arthritis spread to my spine last year, it was crippling. I lost sleep every night tossing and turning, completely unable to relax. This vicious cycle of pain leads to stress which releases cortisol, causing even more pain and discomfort. This wasn’t the kind of pain that would go away if I took enough anti-inflammatory pills, it was all encompassing to the point where I’d give up on sleep at 3 or 4 in the morning and just go lie on the couch until the sun rose. It’s hard for me to even type this, remembering how much time I spent crying and wishing for the pain to stop. It felt like my identity had been stripped away and all that was left was my pain. From the outside, I looked “too young to be sick”, but inside I was suffering.
In dark times like this, you learn very quickly that your vulnerability will be exploited by anyone who thinks they can turn your pain into profit. I’ve always been a conscious consumer and didn’t want to fall into any of these traps. But I’ve also always leaned towards the holistic side of things and wanted to find options for pain relief that aligned with my desire for natural alternatives while still providing proof of their effectiveness.
As you’ll see, the benefits of acupressure mats are widely studied and there is plenty of research to back up their claims. So I decided to give it a try. And what I found was life-changing. Or in my case, life-giving.
How does acupressure work?
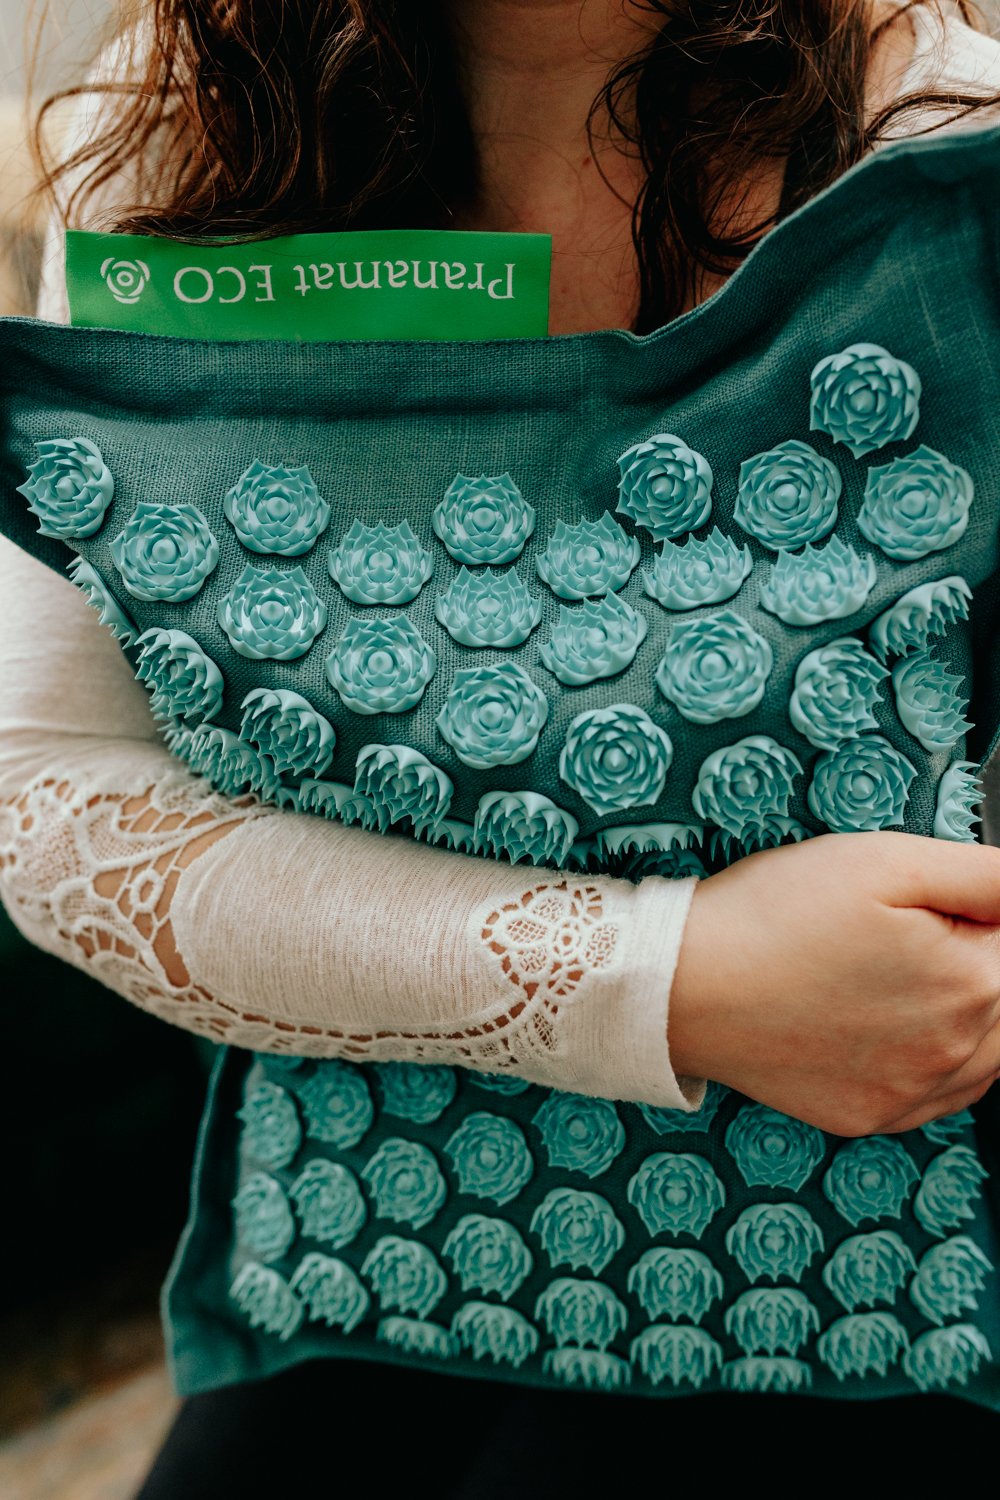
The 10,000+ plastic spikes on the Pranamat ECO lotus flowers help to stimulate blood flow, increasing circulation, releasing muscle tension, opening narrowed blood vessels caused by tension that may result in headaches, spreading soothing heat, kick-starting cell regeneration required for healing and encouraging the body to suppress cortisol (the stress hormone) and release endorphins (a natural painkiller), resulting in a euphoric feeling.
What is acupressure vs acupuncture?
Both acupressure and acupuncture are holistic and drug-free approaches to health. Acupressure uses targeted non-invasive pressure points on the surface of the skin while acupuncture uses extremely thin needles set into the skin. Acupressure can be done at home to deliver an at home massage every day while acupuncture must be performed by a licensed practitioner.
How often should you do acupressure?
Pranamat recommends using your acupressure mat at least once a day for twenty minutes. You can start off at 5 or 10 minutes until you get used to the sensation since it can be quite intense!
Does acupressure Work for joint pain?
Yes, acupressure mats are excellent for relieving joint pain, and if you’re wondering if acupressure for back pain is effective, it is! The effectiveness of Pranamat ECO is clinically-evidenced. Two studies were funded by the European Union in 2014. In this study, 97% observed total muscle relaxation, improved posture, and a stronger-feeling spine, 93% observed a total elimination or significant reduction of back pain and 92% reported that they would continue to use Pranamat ECO.
The first part of the study consisted of rigorous laboratory testing. The team of doctors came to the conclusion that use of the Pranamat ECO acupressure mat:
Significantly increases the intensity of blood flow in the circulation of the skin;
Accelerates cell metabolism;
Reduces inflammation of the muscles and joints;
Reported elimination or dramatic reduction in pain.
In the second part of the study, they showed that after 30 days of using the Pranamat ECO acupressure mat patients experienced:
Improved oxygenation of tissues;
Improved muscle-tone;
Increased cell metabolism;
Improved physical and emotional health.
It’s clear that there are many acupressure benefits for both mental and physical health.
What is Pranamat ECO made from?
The inner padding of the Pranamat ECO acupressure mat is made from sustainable coconut fiber as a supportive filler that is naturally resistant to dust, mold and odor. The removable exterior is made of sustainable linen and uses bespoke natural dyes. All materials used in the Pranamat ECO are natural and ethically sourced, custom-made and have passed rigorous quality tests. The STANDARD 100 certificate independently awarded by OEKO-TEX® guarantees that Pranamat ECO is free from harmful substances and safe for intensive skin contact.
Is Pranamat ECO sustainable?
Pranamat ECO is the only acupressure mat made using energy from only renewable sources and all materials are zero waste and sourced locally. The coconut fiber filler is a by-product from the food industry. The 10,000+ pointed spines on the lotus flowers designed to increase blood and lymph flow from the very first minute of use are made from recyclable plastic that uses less energy and fresh water and produces fewer emissions. This recycled plastic is completely smooth and non-porous and utilizes special heat adhesion technology to attach the lotus flowers to prevent any exposure to toxic glues, acetone or chemical fumes. Even the packaging and user guide are made with recycled and biodegradable materials.

Is Pranamat ECO ethically manufactured?
This acupressure mat is produced by hand using ethical production methods in a creative, egalitarian and diverse work environment in Latvia.
Does acupressure help anxiety?
Yes, acupressure mats may help relieve anxiety. Clinical studies have shown that using Pranamat Eco for 30 days helps relieve stress, improves mood and general well-being.
Does acupressure affect blood pressure?
More research is needed, but one study suggests acupressure mats lower your blood pressure by stimulating blood circulation and relaxation.
How big is the Pranamat ECO?
The surface of the Pranamat ECO acupressure mat is larger than most acupressure mats, allowing it to cover your entire back. This acupressure mat measures 28.7 × 17.7 inches.
How fast does acupressure work?
I noticed the benefits of this acupressure mat within the first few minutes of the first massage, starting with a sensation of warmth in the skin. About ten minutes in, a deep sense of calm and peace rolls over me and quiets my mind.
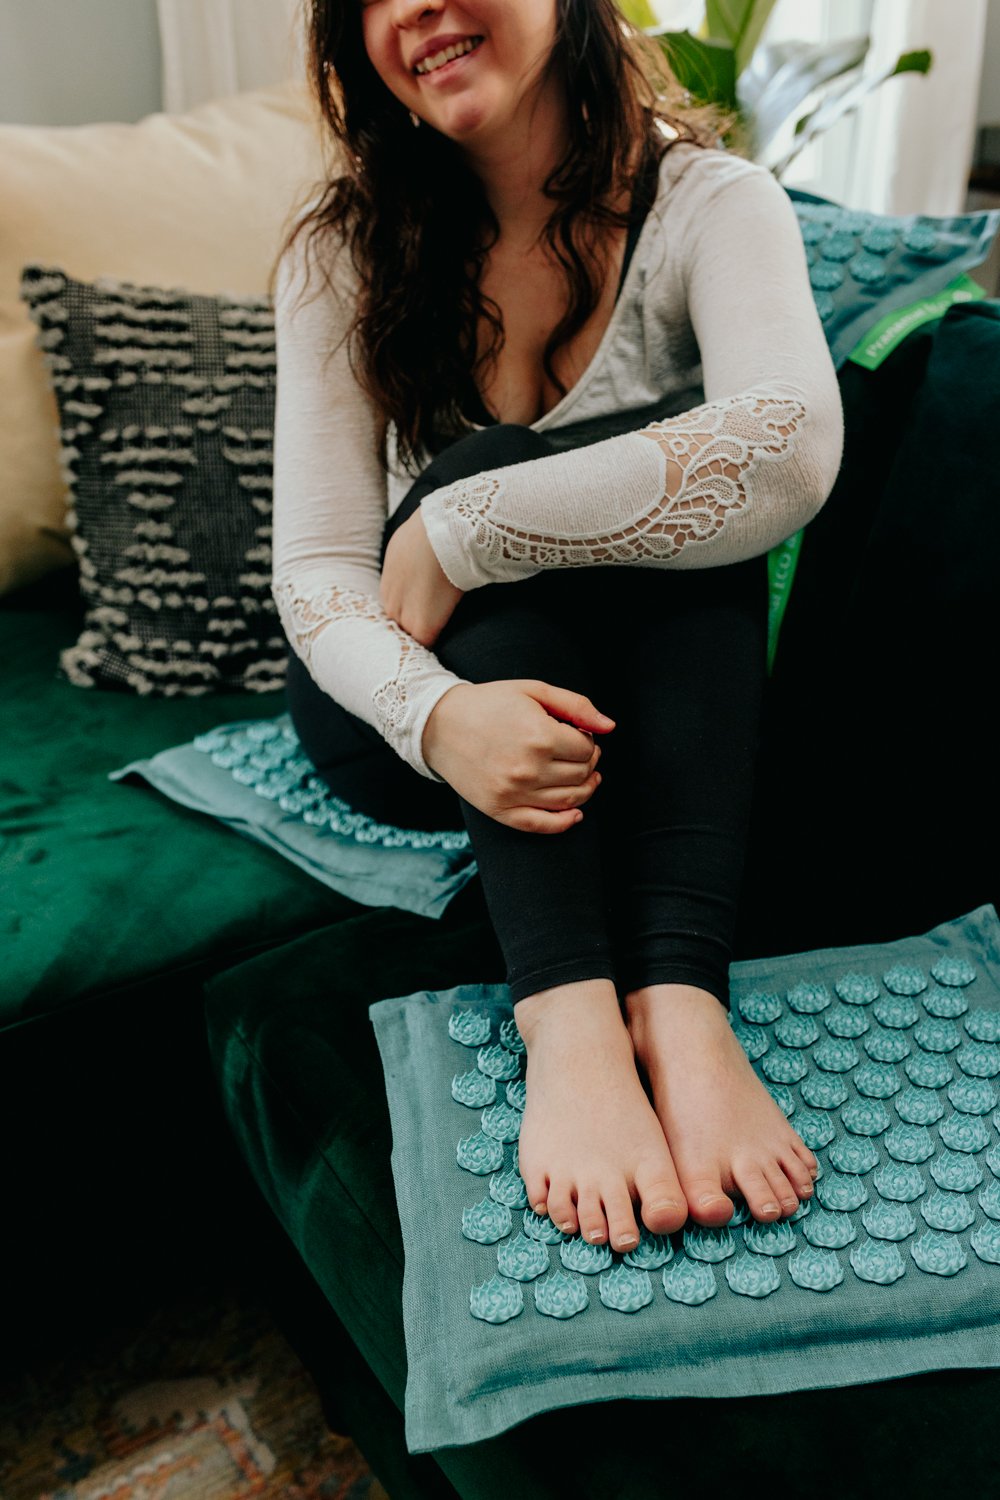
Pranamat ECO Acupressure Mat Review
I’ll be honest; using the Pranamat Eco can be an intense experience at first. When I laid down on the acupressure mat for the first time, the tingling sensation was very strong and I had to take some deep breaths to settle in. At first, my skin felt very hot as the spikes pressing into my back increased my circulation, but after the first two or three minutes this heat transforms into a soothing warmth. If you’re nervous about using the mat directly on your skin the first time, you can try it while wearing a thin cotton t-shirt at first just to get used to it. But once the initial surprise subsides, you will find your mind and body relaxing dramatically. I suffer from back and joint pain due to my chronic illness as well as generalized anxiety, and the near-immediate effects I felt were a release of the muscle tension I hold all day every day in my body and a quieting of my mind. Usually my thoughts are going off in a million directions every minute, but after using the Pranamat ECO acupressure mat for twenty minutes I felt clear headed and calm. The more than I use my acupressure mat, the faster I am able to settle into that calm headspace. The initial sensation is less intense over time as your body adjusts (which doesn’t dull the benefits at all!) so I can truly lean into the experience right away.
I use my Pranamat ECO at night just before going to bed to combat insomnia so I can sleep deeply without interruption. Since acupressure has such a calming effect on my sleep routine, I am more energized and ready to take on the day the next morning.
I also like to keep my mat nearby while I’m working all day or reading in the evenings so that I can get a quick massage while I work or read. You can use this acupressure mat while laying down or place it in your desk chair. I also use the foot mat while sitting at my desk or cooking dinner to relieve foot pain and recharge.
Here’s the thing…there’s a lot of cheap knock-offs of the Pranamat ECO - and I’ve tried them! They don’t compare. It’s like the difference between sleeping on an air mattress and an actual bed. I wanted to share this because while it may seem like a simple thing to replicate (just add spikey bits to a piece of foam and fabric) there’s more going on in the construction of this mat than meets the eye, from the density of the inner coconut fiber mat to the thickness and shape of the lotus spikes. Most important to me is the fact that Pranamat has been awarded the STANDARD 100 certificate by OEKO-TEX®, which guarantees that Pranamat ECO is free from harmful substances - so important for a product that comes in intensive contact with your skin.
USE code 'thecottagepeach
for The best offer on Pranamat + a 5 year warranty and 30 day free trial!
Individual results may vary. Products mentioned and texts written on this website are not intended to diagnose, treat, cure or prevent any disease and do not replace medical advice. Advice on the treatment or care of an individual patient should be obtained through consultation with a physician or trained healthcare practitioner with access to examine the patient and/or is familiar with the patient's medical history.