
BACKYARD GARDENING MADE SIMPLE
Preserving The Garden Harvest: Instructions For Freezing Food
Freezing food for preservation is a method that has been practiced for centuries, although the widespread use of home freezers is a more recent development. Before the invention of mechanical refrigeration, people used natural methods to freeze and preserve food. In colder regions, they took advantage of winter temperatures by storing food in ice houses or caves. Ice was collected during the winter and used to create insulated storage areas where food could be kept frozen.

Freezing food for preservation is a method that has been practiced for centuries, although the widespread use of home freezers is a more recent development. Before the invention of mechanical refrigeration, people used natural methods to freeze and preserve food. In colder regions, they took advantage of winter temperatures by storing food in ice houses or caves. Ice was collected during the winter and used to create insulated storage areas where food could be kept frozen.
The introduction of home refrigerators with freezer compartments in the 1930s and 1940s made freezing food more accessible to households. These early freezers were smaller in size compared to today's models but provided a convenient way to preserve food at home. As technology improved, home freezers became larger and more efficient, enabling people to store a wider variety of foods for longer periods.
Today, freezing is one of the most common methods of food preservation. It allows for the long-term storage of a wide range of foods while retaining their nutritional value, flavor, and texture. Freezing food at home has become a routine practice for many households, providing them with the convenience of having a variety of preserved foods readily available throughout the year.
Is freezing food safe?
Yes, freezing food is generally considered safe when done properly. Freezing slows down the growth of microorganisms, such as bacteria and molds, which can cause food spoilage and foodborne illnesses. It helps to preserve the quality, nutritional value, and taste of many foods.
However, it's important to follow proper freezing practices to ensure safety:
Keep your freezer at or below 0°F (-18°C) to ensure food stays frozen. Use a freezer thermometer to monitor the temperature regularly. Proper packaging is crucial to prevent freezer burn and maintain the quality of frozen food. Use moisture-proof, airtight containers or freezer bags designed for freezing. Remove excess air from the packaging to minimize freezer burn.
Label packages with the name of the food and the date it was frozen to help keep track of the contents and use them within the recommended time frame.
To maintain the best quality, use the "first in, first out" principle. Consume the oldest frozen items first and avoid storing frozen food for excessively long periods. Place newer items behind items that have already been frozen to make it easier to remember which produce needs to be used first.
It's important to note that while freezing can prevent the growth of bacteria, it does not kill bacteria that may have been present in the food before freezing. Therefore, it's crucial to handle and prepare foods properly before freezing to minimize the risk of foodborne illnesses. Additionally, some foods may experience changes in texture or flavor after freezing, so it's important to consider the suitability of certain foods for freezing. If you have any doubts about the safety or quality of a specific food item, it's always best to consult reliable sources or food safety experts for guidance.
Is freezer burn bad for you?
Freezer burn itself is not considered unhealthy or harmful to consume. It refers to the dehydration and oxidation of the food's surface when it is exposed to air inside the freezer. While freezer burn may cause changes in texture, flavor, and appearance, it does not pose a risk to food safety.
However, consuming freezer-burned food may result in a less desirable eating experience. The affected areas of the food can become dry, discolored, and develop a slightly off taste. It's always recommended to trim off the freezer-burned portions before consuming the remaining parts of the food.

How long will frozen foods last?
The storage time for frozen produce can vary depending on the specific type of produce, the quality at the time of freezing, and the storage conditions. Generally, frozen produce can maintain its quality and be safe to eat for an extended period if stored properly.
Fruits: Most fruits can be stored in the freezer for 8 to 12 months. However, citrus fruits may have a shorter storage time of around 4 to 6 months.
Vegetables: Vegetables can typically be stored in the freezer for 8 to 12 months. Some vegetables with higher water content, such as leafy greens, may have a shorter storage time of around 3 to 6 months.
Berries: Berries, such as strawberries, blueberries, and raspberries, can be stored for 8 to 12 months.

Techniques for freezing food
Freezer Bags or Containers: Transfer the food into freezer-safe bags or containers such as silicone bags or mason jars. Remove excess air from the bags before sealing them to minimize freezer burn.
Tray Freezing: This method is useful for freezing individual items, or small pieces of food that you don’t want getting stuck together. Place the food in a single layer on a tray and put it in the freezer. Once the food is frozen, transfer it to freezer bags or containers for long-term storage.
Vacuum Sealing: Vacuum sealers remove air from the packaging, creating an airtight seal around the food. This method helps to prevent freezer burn and extends the shelf life of frozen food. This is my preferred method for storing frozen food, especially produce we harvest from our garden.
Freezer Paper: Wrap the food tightly in freezer paper, aluminum foil, or plastic wrap. Make sure to label and date the package. This method is suitable for foods with minimal moisture, such as meats or baked goods.
Ice Cube Trays: Ideal for freezing small portions, such as herbs, sauces, or baby food. Pour the liquid or puree into the compartments of an ice cube tray and freeze. Once frozen, transfer the cubes to a freezer bag for storage.
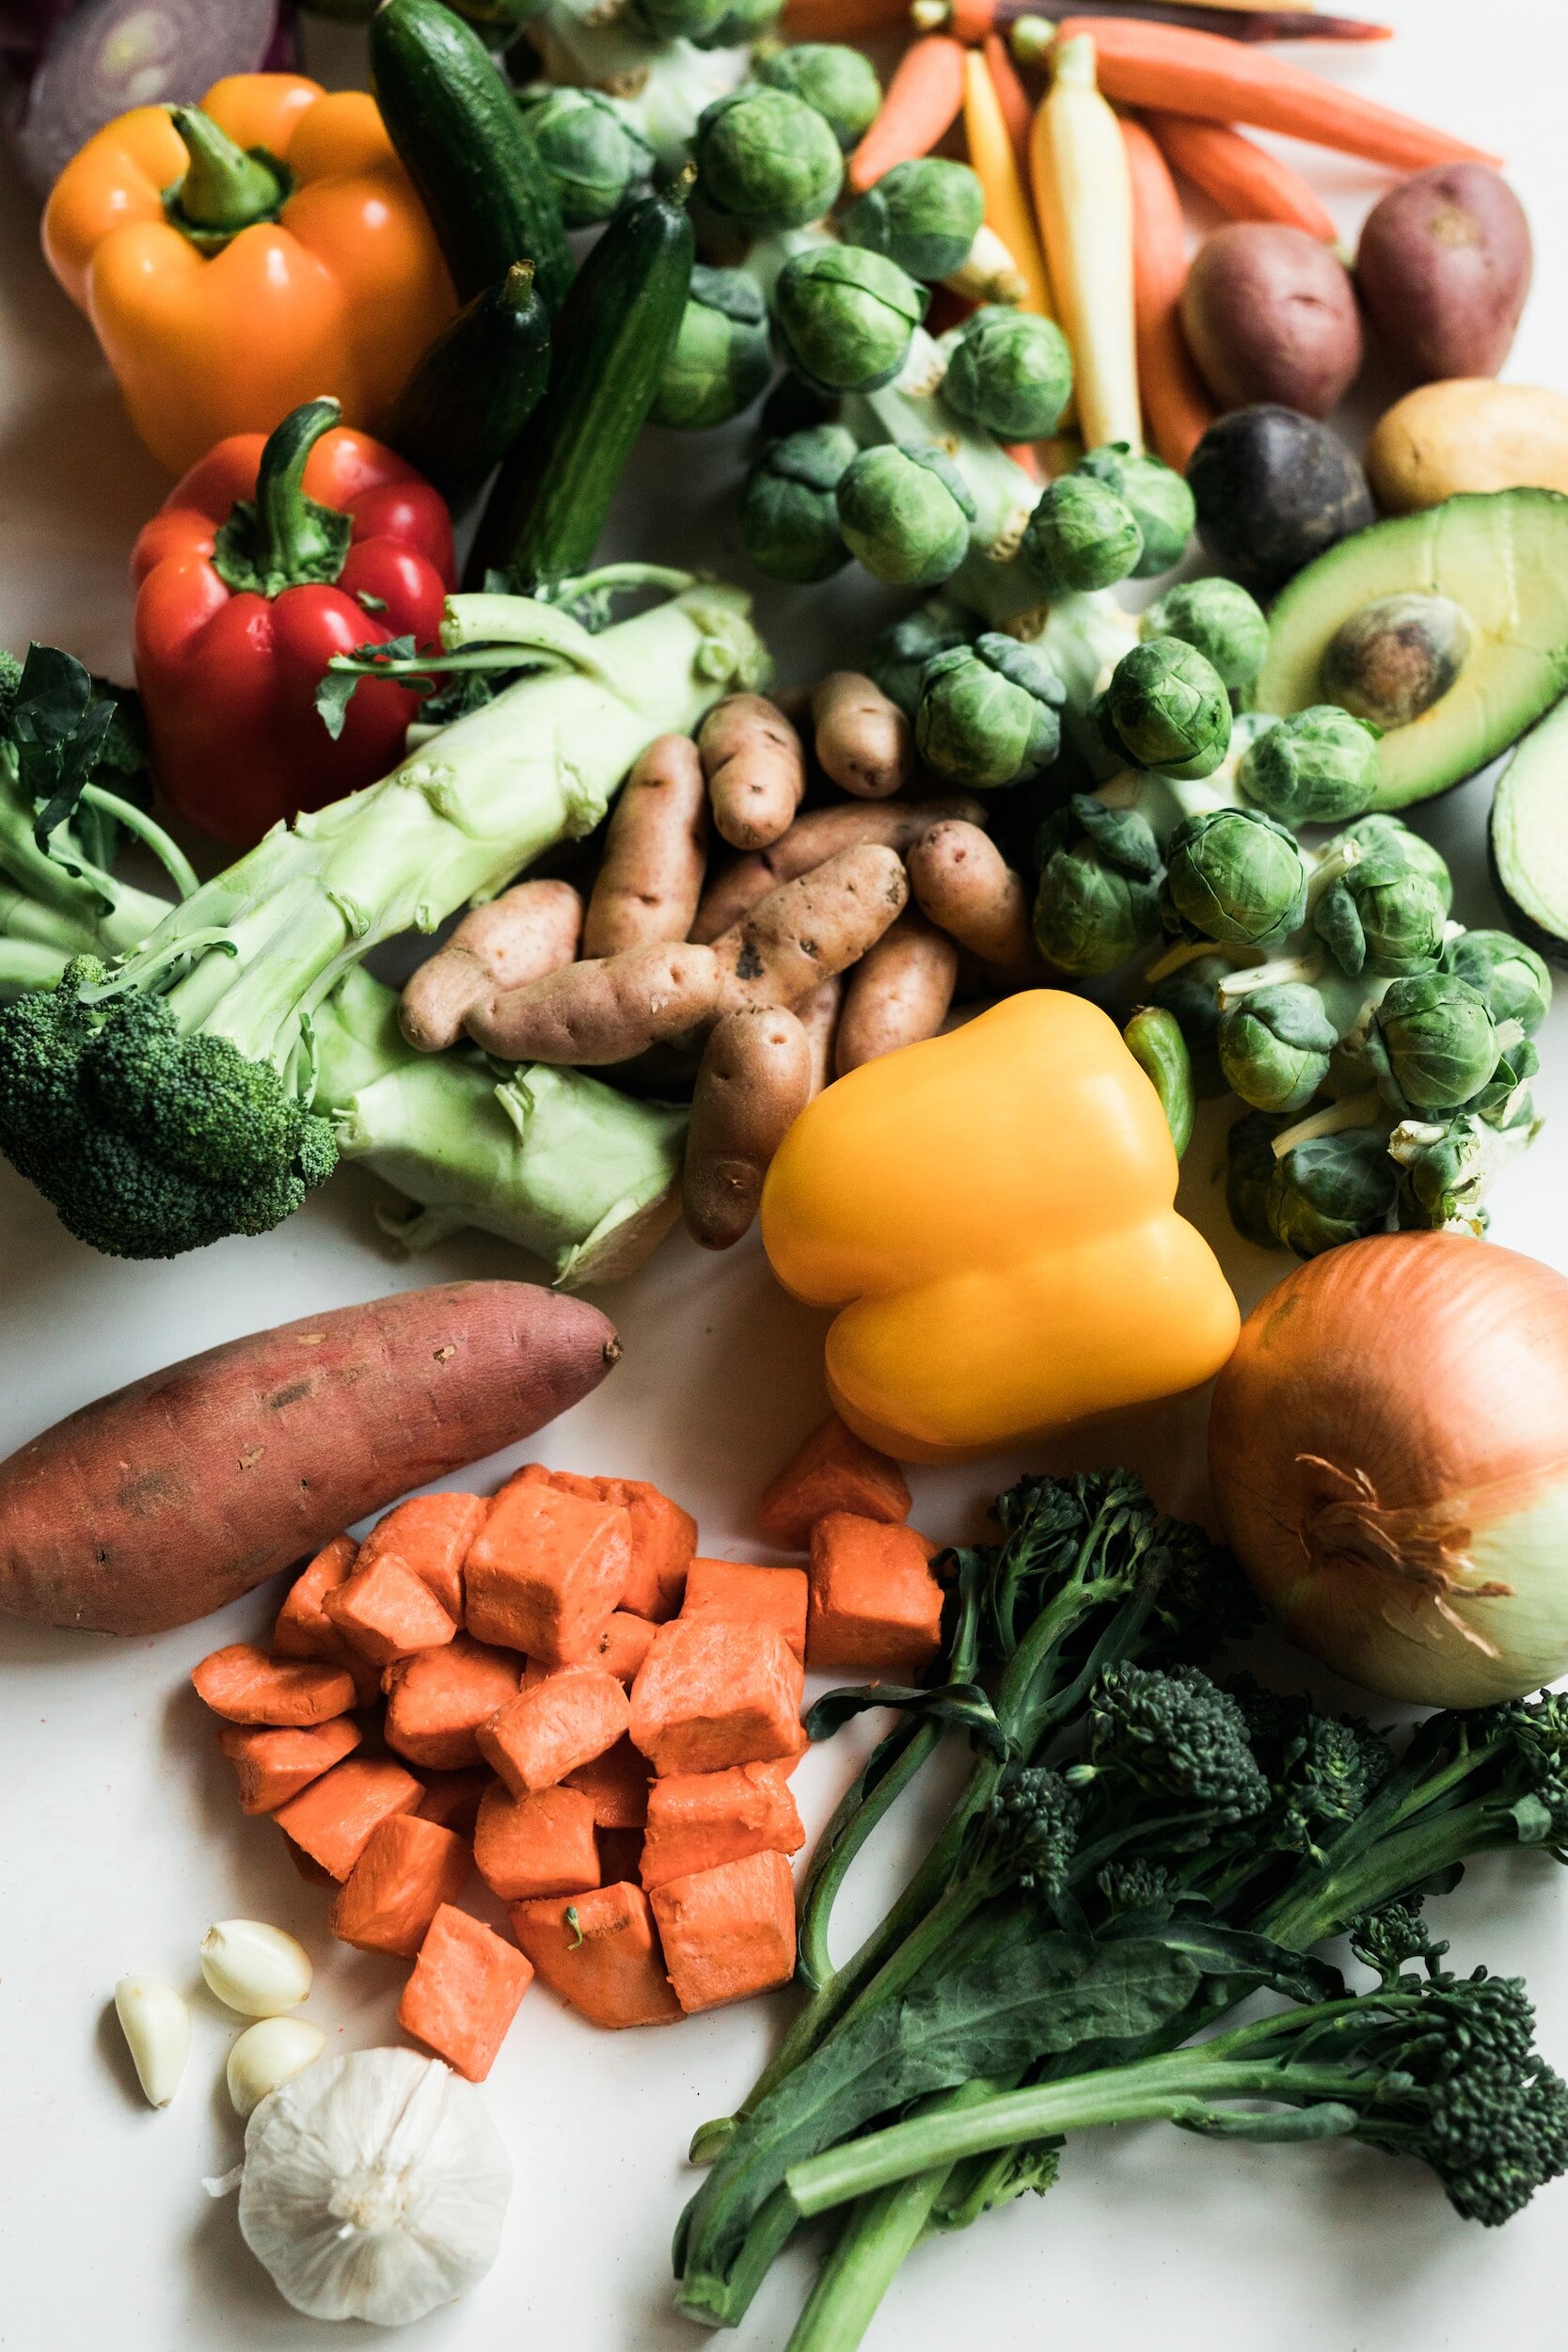
Blanching and Flash Freezing: Some vegetables benefit from blanching before freezing to maintain their texture and color. Briefly blanch the vegetables in boiling water, then plunge them into ice water to stop the cooking process. Drain well, pack into freezer bags or containers, and freeze. Vegetables that benefit the most from blanching include green beans, broccoli, carrots, brussels sprouts, peas, corn, cauliflower, asparagus and spinach.
How to Thaw Frozen Produce
The safest method for thawing frozen produce is to transfer it from the freezer to the refrigerator. This slow thawing process allows the produce to gradually reach a safe temperature without compromising its texture or flavor. Remember to place the frozen package in a leak-proof container or on a plate to catch any potential drips.
If you need to thaw produce more quickly, you can use the cold water thawing method. Place the frozen package in a sealed plastic bag and submerge it in cold water. Change the water every 30 minutes to ensure it stays cold. Note that this method should be used for immediate use of the thawed produce.
Thawed vegetables like peas, carrots, and corn are excellent additions to soups, stews, and sauces. They bring vibrant colors, flavors, and nutrients to your dishes. Thawed fruits like berries, peaches, or rhubarb can be used in baking recipes, such as pies, cobblers, or muffins. For best results, drain excess liquid from the thawed fruits before using them in recipes. Thawed vegetables, such as green beans, broccoli, or cauliflower, can be blanched quickly to revive their vibrant colors and crispness. Use them in salads or as side dishes, either raw or lightly steamed, for added freshness and nutrition. Remember that the texture of thawed produce may differ slightly from fresh produce, but the flavor and nutrients are still present.
Troubleshooting Issues With Freezing Produce
Freezer burn can occur when frozen produce is exposed to air, leading to dehydration and a change in texture and flavor. To prevent freezer burn, make sure to store your produce in airtight containers or freezer bags, removing as much air as possible. Additionally, consider using vacuum-sealed bags for optimal protection. If you notice signs of freezer burn on your produce, simply trim off the affected areas before using them in recipes.
Some vegetables may experience changes in texture after freezing. For example, leafy greens like spinach or lettuce may become wilted or lose their crispness. In these cases, it's best to use them in cooked dishes rather than raw salads. Similarly, root vegetables such as potatoes or carrots may become slightly softer after freezing. They are still safe to consume and can be used in mashed dishes, soups, or stews. Blanching helps preserve the color, texture, and flavor of the vegetables, as well as helps to deactivate enzymes that can cause deterioration during storage. It's recommended to blanch most vegetables before freezing unless they are intended for cooking in recipes where texture changes are not a concern.
Some fruits, especially those with delicate textures, benefit from being frozen in a syrup to maintain their quality. The syrup helps retain moisture and prevents the fruit from becoming mushy. Use a light sugar syrup (made by dissolving sugar in water) or a simple fruit juice syrup. The specific syrup concentration can vary depending on personal preference and the sweetness of the fruit.
Can you refreeze thawed produce?
It's generally recommended to avoid thawing and refreezing produce repeatedly, as it can lead to a loss of quality and potential food safety issues. If you have a large quantity of frozen produce and only need a portion, it's best to thaw and use what you need while keeping the rest frozen.
Freezing is an accessible method of food preservation for just about anyone, and is especially useful during summer harvest season when it can be difficult to keep up with all the produce coming in from the garden. You can even freeze tomatoes whole to process into sauce and can at a later date. Freezing also provides easy access to quick meals for nights when you aren’t able to cook, and prevents food waste.
Read more from this preserving the garden harvest series:
PRESERVING THE GARDEN HARVEST: INSTRUCTIONS FOR PICKLING FOOD
PRESERVING THE GARDEN HARVEST: INSTRUCTIONS FOR FERMENTING FOOD
PRESERVING THE GARDEN HARVEST: INSTRUCTIONS FOR DEHYDRATING FOOD
PRESERVING THE GARDEN HARVEST: INSTRUCTIONS FOR WATER BATH CANNING

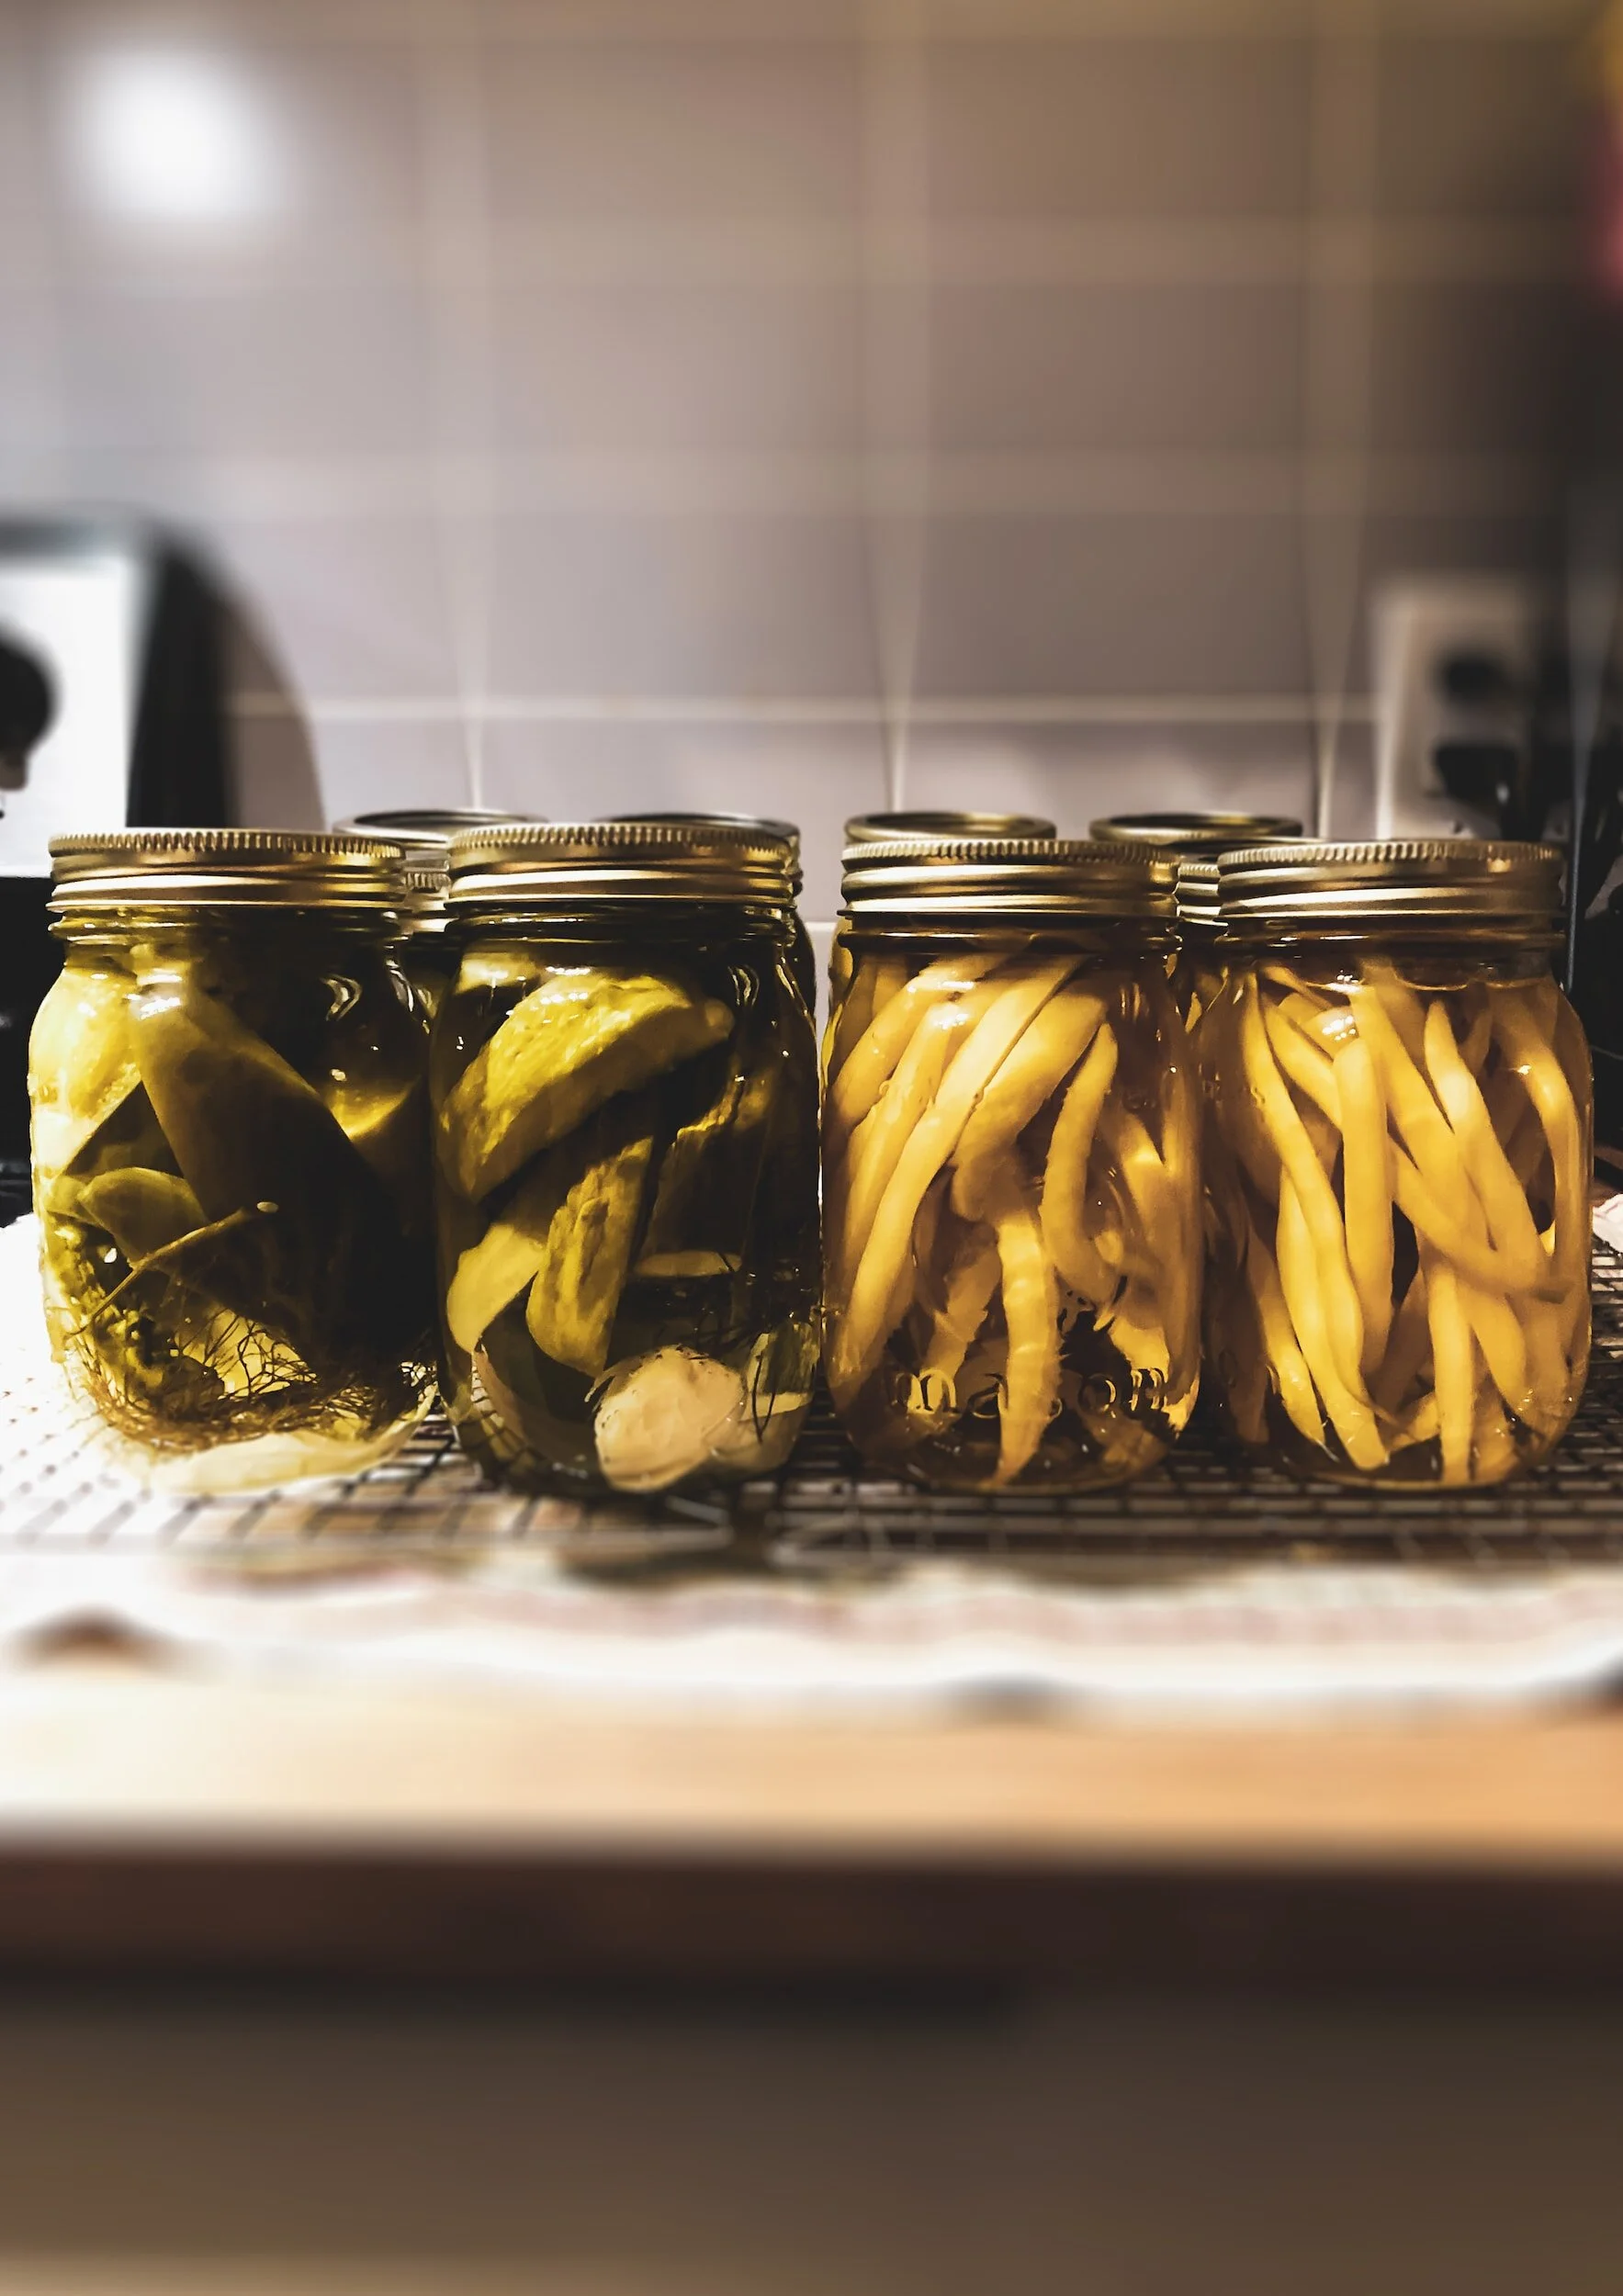
Preserving The Garden Harvest: Instructions For Pickling Food
Throughout history, pickling has been used to preserve a wide variety of foods, including vegetables, fruits, meat, fish, and eggs. In different cultures, specific ingredients and flavorings have been incorporated to create unique pickled dishes. For example, the Chinese developed a method of pickling cabbage that eventually led to the creation of kimchi, a staple in Korean cuisine. In the Middle East, pickled turnips and cucumbers are popular, while in Western cultures, pickles made from cucumbers are widely enjoyed.

Pickling is an ancient method of food preservation that dates back thousands of years. The exact origins of pickling are unclear, as various cultures around the world have independently developed their own pickling techniques. However, pickling has been practiced by civilizations such as the Mesopotamians, Egyptians, Greeks, and Romans.
The preservation of food through pickling was driven by the need to store and consume perishable items for extended periods, especially in times of scarcity or during long journeys. The process of pickling involves immersing food items in a solution or brine made of vinegar, salt, and sometimes spices or herbs. The acidity of the vinegar or the salt concentration in the brine creates an environment that inhibits the growth of spoilage-causing bacteria, molds, and yeasts.
Throughout history, pickling has been used to preserve a wide variety of foods, including vegetables, fruits, meat, fish, and eggs. In different cultures, specific ingredients and flavorings have been incorporated to create unique pickled dishes. For example, the Chinese developed a method of pickling cabbage that eventually led to the creation of kimchi, a staple in Korean cuisine. In the Middle East, pickled turnips and cucumbers are popular, while in Western cultures, pickles made from cucumbers are widely enjoyed.
Before the advent of modern canning techniques, pickling was one of the most common ways to preserve food for long periods. It allowed people to enjoy seasonal produce year-round and provided sustenance during harsh winters or extended periods of travel. Pickled foods were also valuable for sailors and explorers, as they provided a reliable source of nutrition during lengthy voyages.
Over time, pickling techniques have evolved, and different regions have developed their own unique styles and flavors.
Is pickled food safe?
The pickling process involves preserving food in an acidic solution, such as vinegar or brine, which creates an inhospitable environment for harmful bacteria to grow. The acidity and high salt content of pickled food help inhibit the growth of microorganisms that can cause food spoilage and foodborne illnesses. However, it's important to note that the safety of pickled food depends on proper preparation and storage. It's crucial to follow established pickling recipes, maintain hygiene practices, and use fresh, high-quality ingredients. Improperly processed or stored pickled food can potentially pose health risks.
If you are making pickled food at home, it's recommended to follow tested and trusted recipes from reliable sources, such as reputable canning and preserving guides or organizations. This ensures that you are using safe methods and ratios of ingredients to achieve proper acidity levels and prevent the growth of harmful bacteria.
Is pickled food healthy?
Pickled food can have both health benefits and drawbaks. On the positive side, pickled food retains many of the nutritional qualities of the raw ingredients used. For example, fermented pickles are a source of beneficial bacteria that can support gut health and digestion. Additionally, pickled vegetables often maintain their vitamin and mineral content, providing valuable nutrients.
However, pickled foods can be high in sodium due to the use of salt or brine in the pickling process. You should consume pickled foods in moderation and be mindful of your overall sodium intake.
How long will pickled food last?
Homemade pickled foods may have a slightly shorter shelf life than commercially prepared. Refrigerator pickles, which are pickled in a vinegar-based brine and stored in the refrigerator, are usually best consumed within a few weeks to a couple of months. They may retain their quality and flavor for longer, but the texture can gradually change over time. You may can your pickles to extend their shelf life. For fermented pickles, which are pickled through a fermentation process, the shelf life can be more extended. Fermented pickles can last for several months to a year or more when stored properly in a cool, dark place, such as a root cellar or a refrigerator.

What foods can be pickled?
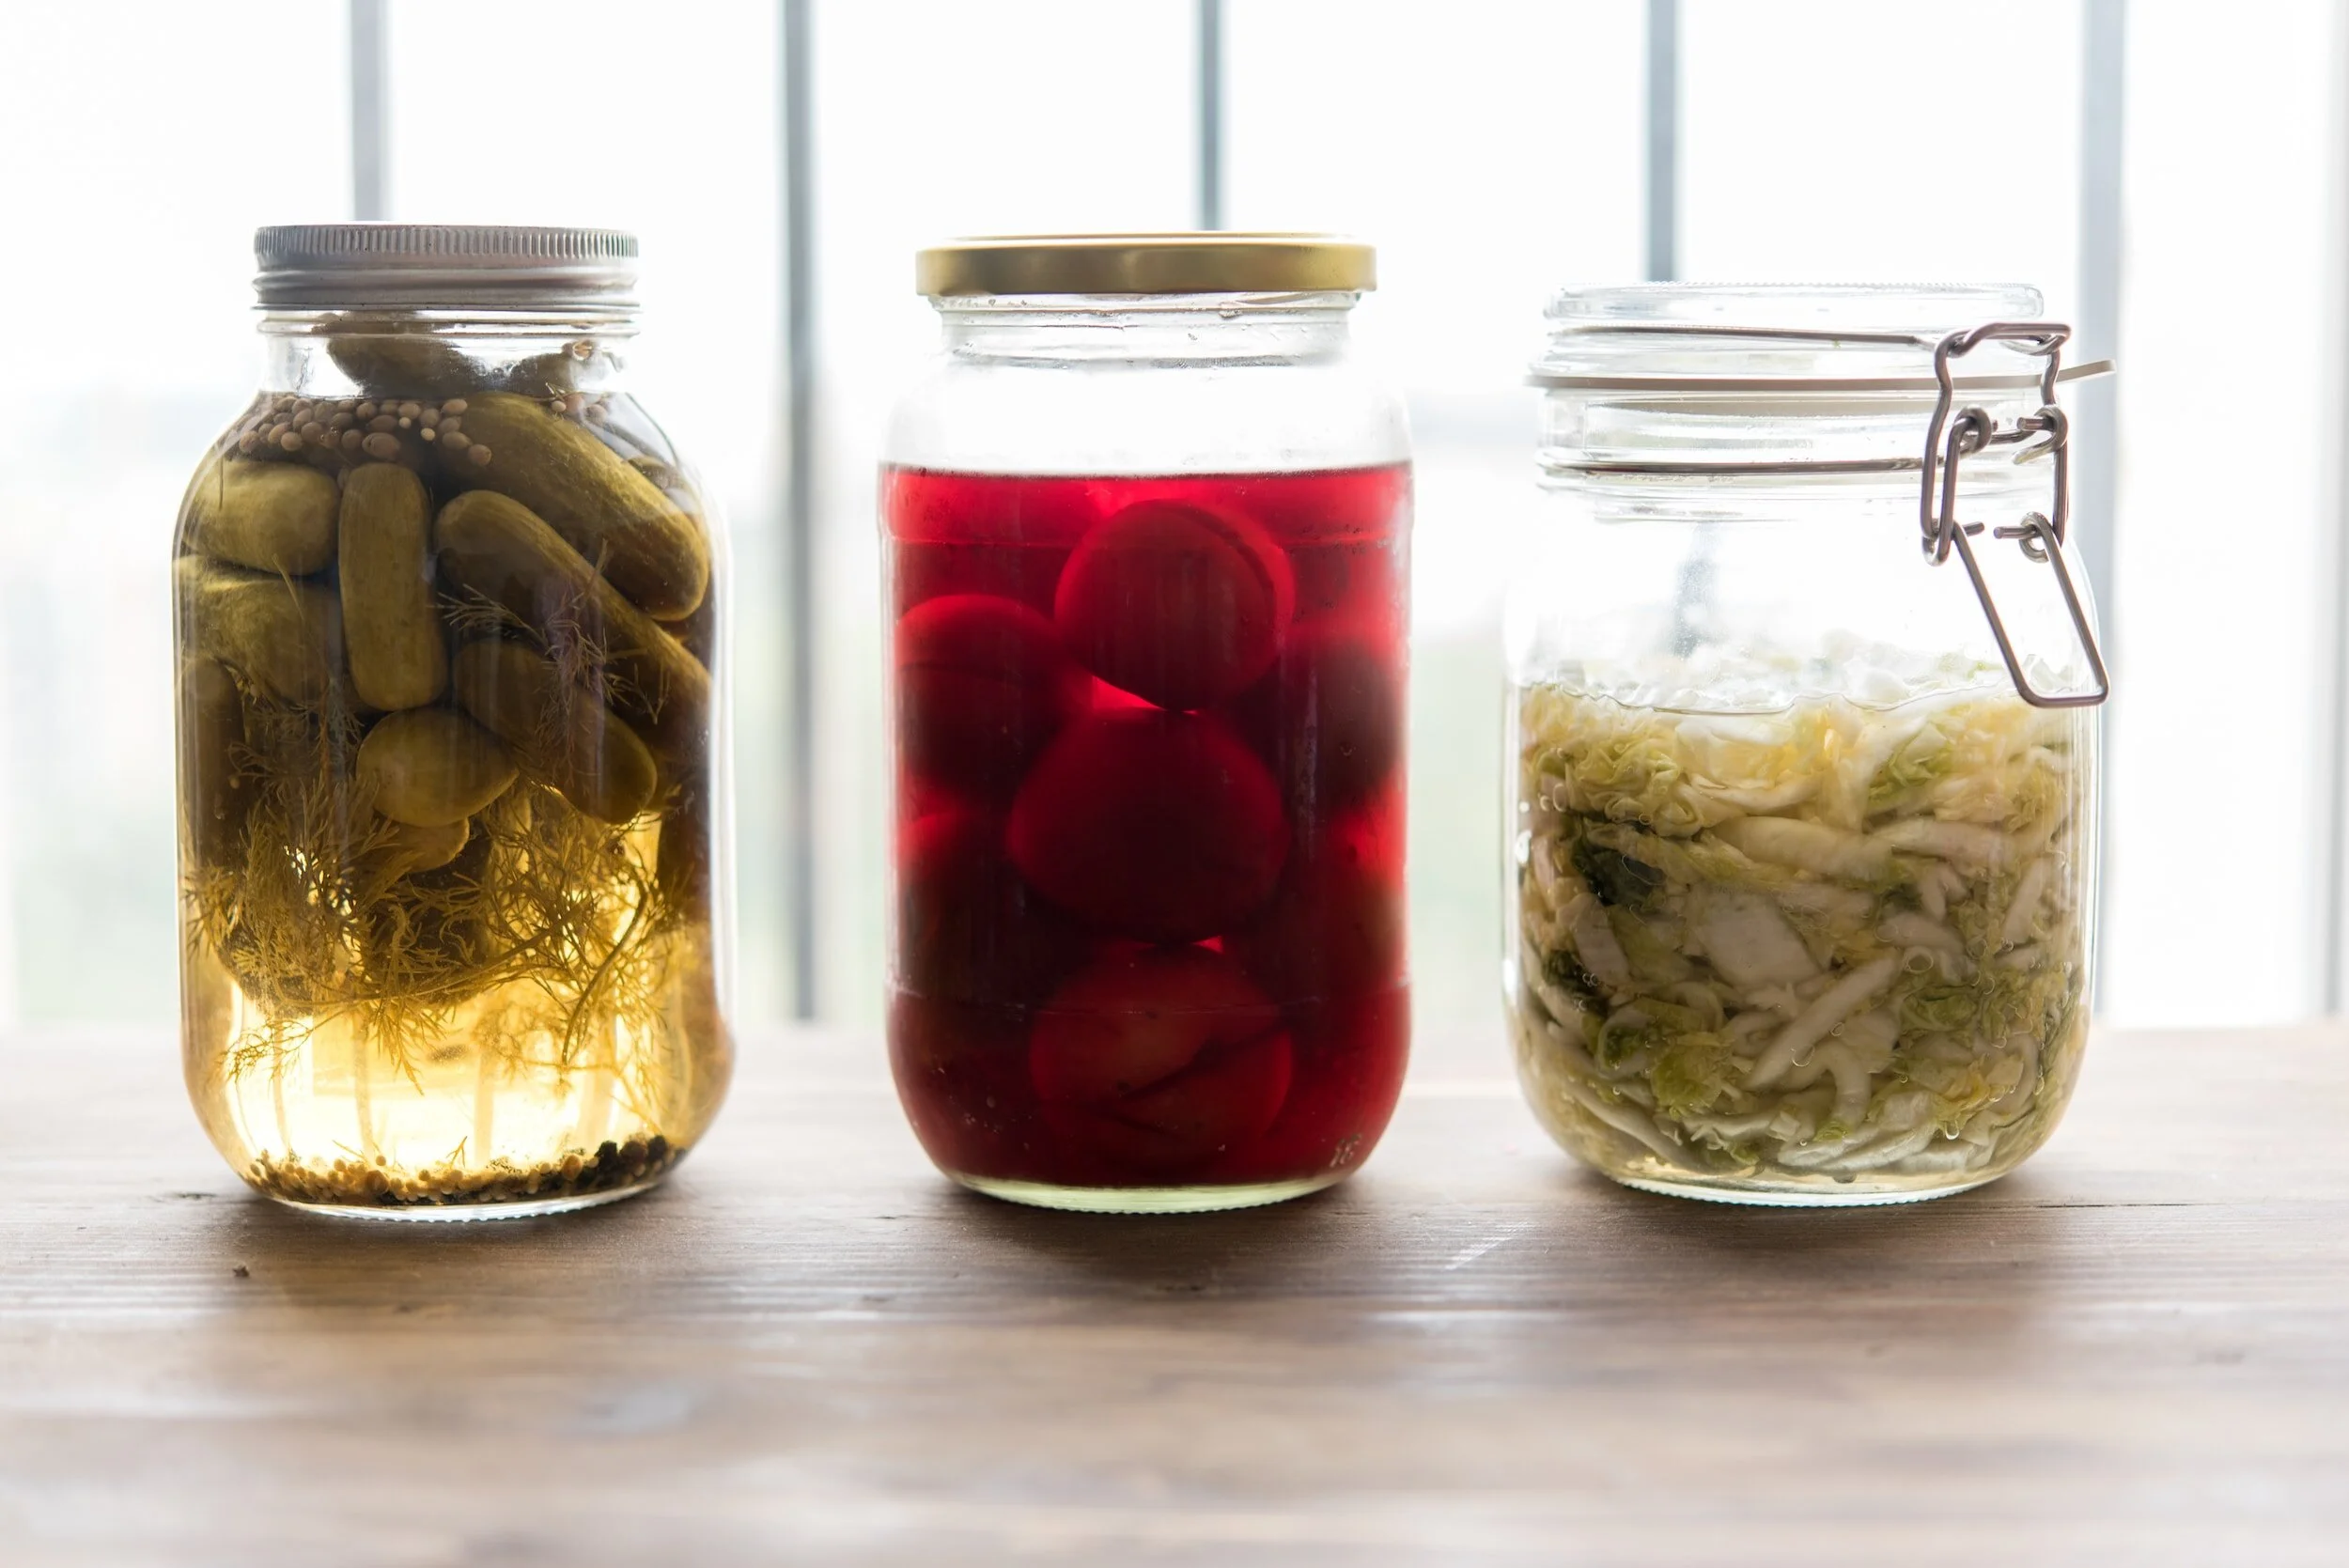
Cucumbers are perhaps the most well-known pickled food, and they can be transformed into dill pickles, bread and butter pickles, or sweet pickles.
Carrots can be pickled to create a tangy and crunchy addition to salads, sandwiches, or relish trays.
Pickled onions are versatile and can be used as a topping for burgers, tacos, salads, or sandwiches to add a tangy kick.
Pickled beets are popular for their vibrant color and sweet-tart flavor. They can be enjoyed on their own or used in salads and side dishes.
Pickled jalapenos add heat and tanginess to dishes like nachos, tacos, and sandwiches.
Various types of peppers, such as bell peppers, banana peppers, or cherry peppers, can be pickled to create flavorful condiments or toppings.
Pickled radishes offer a crisp texture and a tangy taste that complements salads, tacos, or grain bowls.
Hard-boiled eggs can be pickled in a brine solution, resulting in tangy and savory pickled eggs, often enjoyed as a snack or added to salads.
Crisp pickled green beans, also known as dilly beans, make a delightful and refreshing addition to relish trays or as a snack.
Pickled cauliflower florets are not only visually appealing but also provide a tasty and tangy addition to salads, antipasto platters, or relish trays.

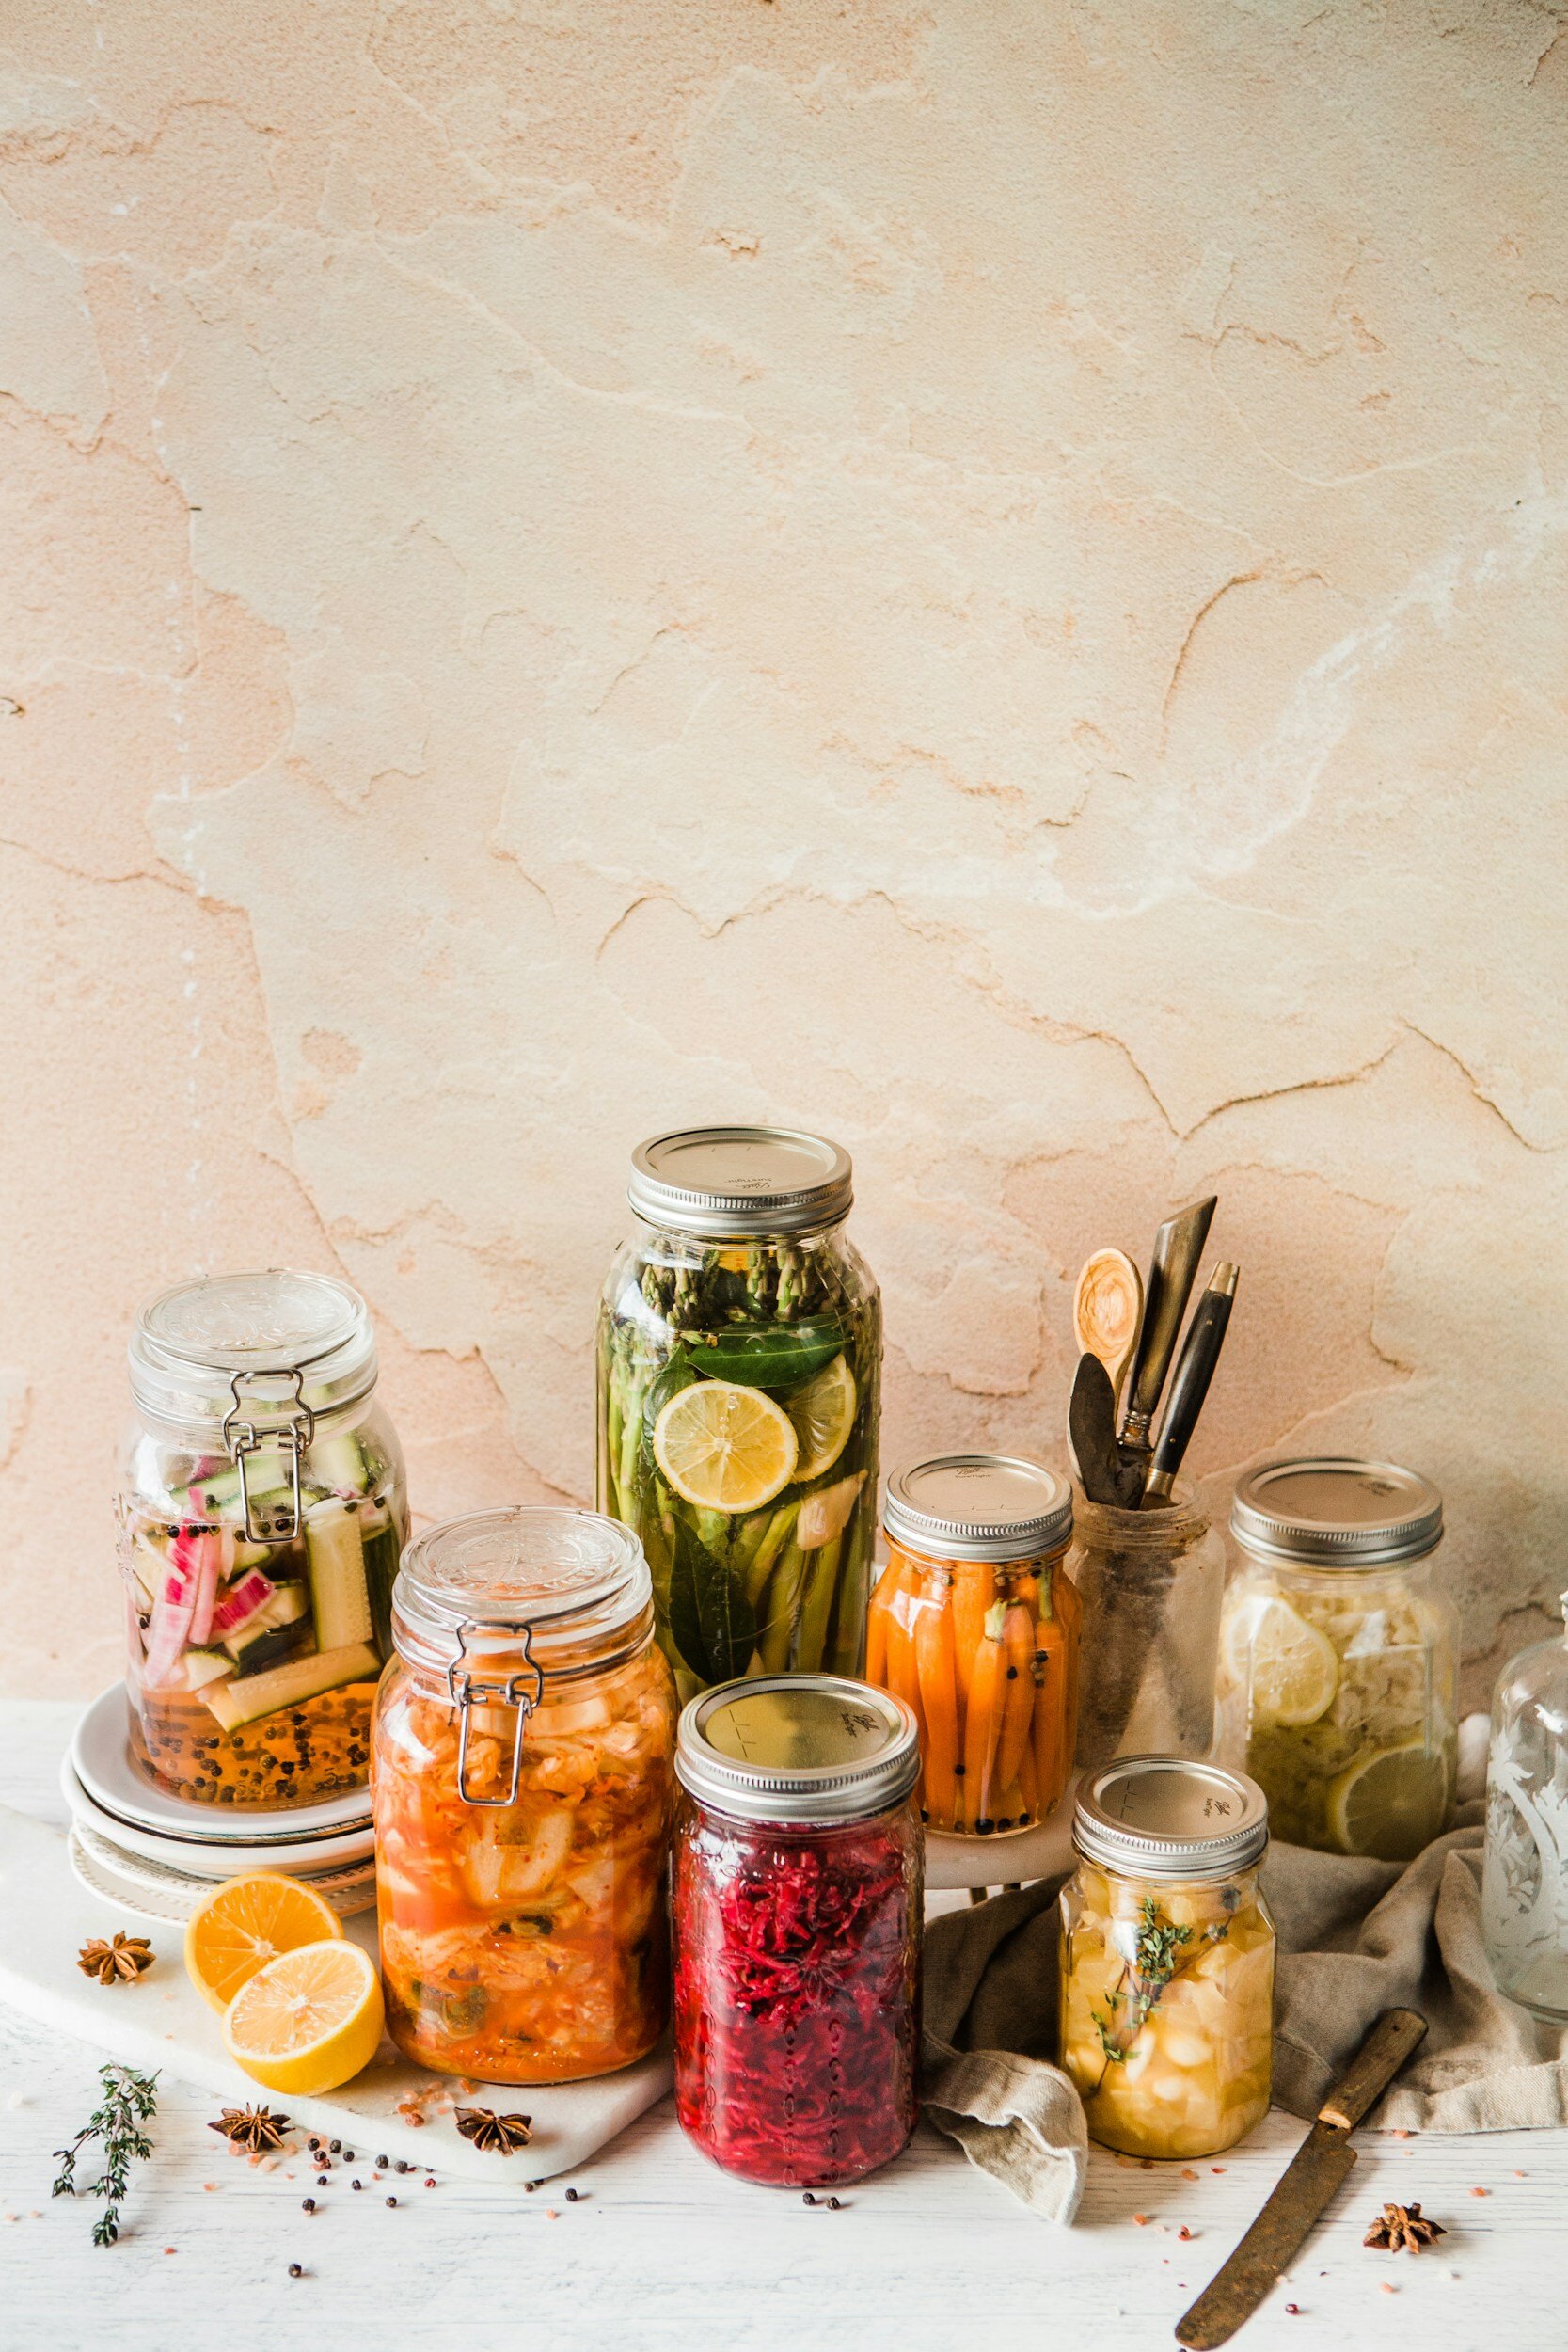
How to pickle food
Start by selecting fresh and high-quality vegetables or fruits for pickling. Wash them thoroughly and trim off any unwanted parts. Cut the produce into desired shapes, such as slices, spears, or whole.
In a non-reactive pot, combine vinegar, water, and salt. The ratio of vinegar to water can vary depending on personal preference and the recipe you're using. Generally, a 1:1 ratio of vinegar to water is common. Add salt to taste, and you can also incorporate other flavorings like sugar, spices, or herbs.
Place the pot on the stove and heat the brine mixture until it comes to a boil. Stir occasionally to ensure that the salt is dissolved and the flavors are well combined.
Meanwhile, sterilize glass jars and their lids by boiling them in water for a few minutes or running them through a dishwasher. Once sterilized, pack the prepared vegetables or fruits tightly into the jars, leaving a little space at the top.
At this stage, you can add extra flavorings to the jars, such as garlic cloves, dill sprigs, peppercorns, or chili flakes. These will infuse additional flavors into the pickled food.
Carefully pour the hot brine into the jars, making sure to completely cover the vegetables or fruits. Leave about a 1/2-inch headspace at the top of each jar. If needed, use a clean utensil, such as a chopstick, to release air bubbles and ensure the brine fills all the gaps.
Wipe the jar rims with a clean cloth to remove any spills or brine residue. Place the lids on the jars and tighten them securely. Allow the jars to cool at room temperature. As they cool, you may hear the satisfying "pop" sound indicating a proper seal. Once cooled, store the pickled jars in a cool, dark place like a pantry or cellar. The flavors will continue to develop over time.
Pickled foods need time to develop their flavors. Most pickles are ready to eat after a few days, but the flavors will intensify and improve over several weeks. Keep in mind that some pickles may require longer fermentation periods.
The difference between pickled and fermented food
Pickling is a process of preserving food by immersing it in a brine or vinegar solution. The food is typically cooked or blanched before being submerged in the pickling liquid. Fermentation, on the other hand, is a natural process that occurs when beneficial bacteria, yeasts, or molds break down the sugars or carbohydrates in the food, converting them into acids or alcohol.
Pickling preserves food through the use of acid, typically vinegar, which creates an acidic environment that inhibits the growth of spoilage-causing bacteria. The high acidity of the pickling solution helps preserve the food's texture, color, and flavor. Fermentation, on the other hand, preserves food through the action of beneficial microorganisms. These microorganisms produce lactic acid or alcohol as byproducts, creating an environment that prevents the growth of harmful bacteria.
Pickled foods have a distinct tangy or sour flavor due to the vinegar or acidic brine they are soaked in. The texture of pickled foods can vary depending on the specific food being pickled, but they tend to retain some crunchiness. Fermented foods often have a complex, tangy, or slightly acidic flavor profile. The fermentation process can also introduce unique flavors and aromas. The texture of fermented foods can range from crisp to soft, and they may develop a slightly "fizzy" or effervescent quality.
Pickled foods have a relatively long shelf life due to the high acidity of the pickling solution, which inhibits the growth of spoilage-causing bacteria. They can be stored for several months or even years when properly sealed and stored in a cool, dark place. Fermented foods also have a good shelf life, but the duration may vary depending on the specific food and the fermentation process. Some fermented foods, such as sauerkraut or kimchi, can be stored for several months in the refrigerator or even longer if kept in a cool environment.
Both pickled and fermented foods can offer health benefits. Pickled foods, especially those made with fermented pickling methods like lacto-fermentation, can contain beneficial probiotics that support gut health. Fermented foods are known for their rich content of beneficial bacteria, enzymes, and other compounds that can aid digestion, enhance nutrient absorption, and support overall gut health.
Read more from this preserving the garden harvest series:
PRESERVING THE GARDEN HARVEST: INSTRUCTIONS FOR FREEZING FOOD
PRESERVING THE GARDEN HARVEST: INSTRUCTIONS FOR FERMENTING FOOD
PRESERVING THE GARDEN HARVEST: INSTRUCTIONS FOR DEHYDRATING FOOD
PRESERVING THE GARDEN HARVEST: INSTRUCTIONS FOR WATER BATH CANNING
Preserving The Garden Harvest: Instructions For Fermenting Food
Fermenting foods is an ancient preservation technique that has been practiced for thousands of years. The origins of fermentation can be traced back to ancient civilizations such as Mesopotamia, Egypt, and China. People discovered that by allowing certain foods to sit in a controlled environment, they would undergo a natural transformation, becoming more flavorful, longer-lasting, and easier to digest.
Fermenting foods is an ancient preservation technique that has been practiced for thousands of years. The origins of fermentation can be traced back to ancient civilizations such as Mesopotamia, Egypt, and China. People discovered that by allowing certain foods to sit in a controlled environment, they would undergo a natural transformation, becoming more flavorful, longer-lasting, and easier to digest.
In the 19th century, scientists began to unravel the science behind fermentation. Louis Pasteur's discoveries on microorganisms and their role in fermentation laid the foundation for our modern understanding of the process. With the rise of industrialization, traditional fermentation methods started to be replaced by commercial food production methods. However, some fermented foods, such as sauerkraut, pickles, yogurt, and cheese, have maintained their popularity and are still widely consumed today.
In recent years, there has been a resurgence of interest in traditional food fermentation techniques. People have rediscovered the health benefits, unique flavors, and culinary possibilities of fermented foods. Home fermentation has become increasingly popular, with individuals fermenting their own vegetables, kombucha, kefir, and other fermented products.
Today, fermentation continues to be practiced worldwide, with a wide variety of fermented foods and beverages enjoyed in different cultures. From Korean kimchi to Indian dosa to German sauerkraut, fermented foods are celebrated for their taste, nutritional value, and contribution to gut health. The history of fermentation showcases the enduring appeal and importance of this ancient preservation method.
Is fermented food safe?
When prepared and stored properly, fermented foods are generally safe to consume. The fermentation process creates an environment that promotes the growth of beneficial bacteria and inhibits the growth of harmful bacteria. The acidic and/or alcoholic nature of fermented foods also helps prevent the growth of pathogens. However, it is essential to follow proper fermentation practices to ensure the safety of fermented foods. Ensure that all equipment, utensils, and fermentation vessels are thoroughly cleaned and sanitized before use. This helps prevent the growth of harmful bacteria during the fermentation process. Start with fresh, high-quality ingredients. Using fresh produce and ingredients free from spoilage or contamination reduces the risk of harmful bacteria being present in the fermentation.
Salt is commonly used in fermentation to control the growth of undesirable microorganisms. The appropriate concentration of salt or brine in the fermentation process helps create an environment that favors beneficial bacteria. Fermentation occurs within a specific temperature range. It is important to maintain the recommended temperature to promote the growth of beneficial bacteria and inhibit the growth of harmful ones. Different foods require different fermentation times. Follow a reliable recipe or guideline to ensure that the fermentation process is allowed to complete fully. Insufficient fermentation time may result in an incomplete transformation of the food, potentially leaving harmful bacteria present.
After fermentation, store the fermented foods in suitable containers and under proper conditions. Refrigeration or cool storage is often necessary to slow down further fermentation and maintain the quality and safety of the fermented products.
Is fermented food healthy?
During the fermentation process, beneficial bacteria, yeasts, or molds convert carbohydrates into acids, alcohols, or gases. This transformative process enhances the nutritional profile of foods and brings forth various health benefits. Fermented foods are a natural source of probiotics, which are live microorganisms that provide health benefits when consumed in adequate amounts. Probiotics help promote a healthy balance of gut bacteria, which is essential for digestion, nutrient absorption, immune function, and overall gut health.
The beneficial bacteria produced during fermentation aid in breaking down complex carbohydrates and proteins in food, making them easier to digest. This can be particularly helpful for individuals with digestive issues or those who struggle with certain foods.
Fermentation can also enhance the bioavailability of nutrients in food, making them more accessible and easily absorbed by the body. For example, fermentation can increase the availability of vitamins, such as B vitamins and vitamin K, as well as minerals like iron and calcium. The consumption of fermented foods can positively influence the composition and diversity of gut microbiota. A healthy gut microbiome is associated with improved digestion, strengthened immune function, reduced inflammation, and even mental health benefits.
The probiotics present in fermented foods can help support and strengthen the immune system. They stimulate the production of immune cells, regulate immune responses, and help maintain a balanced immune system.
How long does fermented food last?
Fermented vegetables like sauerkraut, kimchi, or pickles can last for several months when stored properly. They should be kept in airtight containers or jars and stored in the refrigerator. Over time, the flavor and texture of fermented vegetables may change, but they can still be safe to consume as long as there are no signs of spoilage, such as foul odors or mold.
Fermented dairy products like yogurt or kefir can last for a few weeks to a couple of months. The shelf life depends on factors such as the specific product, the fermentation process, and whether any additional preservatives are added. It is important to check the expiration date and follow storage instructions provided by the manufacturer.
Fermented beverages like kombucha or water kefir can last for several weeks to a few months when stored in the refrigerator. The exact shelf life can depend on the specific recipe, fermentation time, and the presence of any added ingredients. It is recommended to consume them within a reasonable timeframe for optimal flavor and quality.
Fermented condiments like soy sauce or fish sauce can have a long shelf life, often lasting for months or even years. They typically contain high salt or acid content, which acts as a natural preservative. It is important to store them in a cool, dark place and ensure the containers are tightly sealed.
Fermented grains and legumes, such as tempeh or miso, can have a longer shelf life compared to their non-fermented counterparts. When stored in the refrigerator, they can last for several months.
What foods can be fermented?
Fermentation is a versatile preservation method that can be used in a wide variety of food products, making your homestead more self-sufficient. Vegetables like cabbage (for sauerkraut and kimchi), cucumbers (for pickles), carrots, beets, radishes, green beans, and more. Fruits, including apples (for cider and vinegar), grapes (for wine), berries (for shrubs), and other fruits for fruit-infused vinegars. Milk can be fermented into yogurt, kefir, and cheese, and legumes such as soybeans (for soy sauce, miso, and tempeh), lentils, and chickpeas can be transformed into various fermented bean pastes and condiments. If you’re feeling thirsty, fermented beverages include kombucha (fermented tea), water kefir, milk kefir, traditional fermented beers, and of course wines. Even your sourdough starter is technically a fermented food!
Ways to ferment food
There are countless methods for fermenting foods, depending on the type of food to be fermented. Here are just a few of the more common methods of fermentation:
Vegetable Fermentation: This method involves submerging vegetables in a brine solution or using the vegetables' own juices to create an anaerobic environment. Examples include making sauerkraut, kimchi, and pickles.
Lacto-Fermentation: Lacto-fermentation is a process that relies on beneficial bacteria, specifically Lactobacillus, to convert sugars into lactic acid. It is commonly used for fermenting vegetables, such as cabbage for sauerkraut, or making lacto-fermented beverages like kefir.
Wild Fermentation: This method involves allowing naturally occurring microbes present on the food or in the environment to initiate the fermentation process. Examples include using wild yeasts for sourdough bread or fermenting fruits for natural wines.
Vinegar Fermentation: Fermentation can also be used to make vinegar. This process involves converting ethanol into acetic acid using acetobacter bacteria. It can be done with fruits, grains, or alcoholic beverages.
Dairy Fermentation: Fermentation is used to make various dairy products such as yogurt, kefir, sour cream, and cheese. Bacteria cultures are added to milk, which then ferment and transform the milk into these different products.
Alcohol Fermentation: Fermentation is widely used in the production of alcoholic beverages such as beer, wine, and cider. Yeast is added to sugars, which then convert the sugars into alcohol and carbon dioxide.
What is the difference between pickled and fermented?
Pickling is a process of preserving food by immersing it in a brine or vinegar solution. The food is typically cooked or blanched before being submerged in the pickling liquid. Fermentation, on the other hand, is a natural process that occurs when beneficial bacteria, yeasts, or molds break down the sugars or carbohydrates in the food, converting them into acids or alcohol.
Pickling preserves food through the use of acid, typically vinegar, which creates an acidic environment that inhibits the growth of spoilage-causing bacteria. The high acidity of the pickling solution helps preserve the food's texture, color, and flavor. Fermentation, on the other hand, preserves food through the action of beneficial microorganisms. These microorganisms produce lactic acid or alcohol as byproducts, creating an environment that prevents the growth of harmful bacteria.
Pickled foods have a distinct tangy or sour flavor due to the vinegar or acidic brine they are soaked in. The texture of pickled foods can vary depending on the specific food being pickled, but they tend to retain some crunchiness. Fermented foods often have a complex, tangy, or slightly acidic flavor profile. The fermentation process can also introduce unique flavors and aromas. The texture of fermented foods can range from crisp to soft, and they may develop a slightly "fizzy" or effervescent quality.
Pickled foods have a relatively long shelf life due to the high acidity of the pickling solution, which inhibits the growth of spoilage-causing bacteria. They can be stored for several months or even years when properly sealed and stored in a cool, dark place. Fermented foods also have a good shelf life, but the duration may vary depending on the specific food and the fermentation process. Some fermented foods, such as sauerkraut or kimchi, can be stored for several months in the refrigerator or even longer if kept in a cool environment.
Both pickled and fermented foods can offer health benefits. Pickled foods, especially those made with fermented pickling methods like lacto-fermentation, can contain beneficial probiotics that support gut health. Fermented foods are known for their rich content of beneficial bacteria, enzymes, and other compounds that can aid digestion, enhance nutrient absorption, and support overall gut health.
Troubleshooting issues with fermented food
Fermenting food at home can be a rewarding process, but occasionally, issues may arise. Mold growth on the surface of fermented food is a common issue. If you notice mold, it's essential to discard the entire batch to avoid any potential health risks. To prevent mold growth, make sure to maintain proper hygiene by sterilizing utensils, containers, and your hands before handling the ingredients. Additionally, ensure that the vegetables or fruits you use for fermentation are fresh and free from any visible signs of spoilage.
Fermented foods should have a pleasant aroma and taste. If you detect an off odor, such as a strong rotten smell, or a sour taste that is too intense or unpleasant, it may indicate that the fermentation process went wrong. This could be due to improper temperatures, unsanitary conditions, or the presence of undesirable bacteria. To prevent this, ensure that you follow proper fermentation techniques, maintain a clean environment, and use fresh, high-quality ingredients.
In some cases, excessive gas production during fermentation can cause pressure to build up in the fermentation vessel, leading to leaks or even explosions. To prevent this, use appropriate fermentation vessels designed to release excess gas, such as fermentation lids with airlocks. Burp the fermentation vessel periodically to release accumulated gas and prevent pressure buildup.
If the fermentation process is taking longer than expected or there is no sign of fermentation, it could be due to various factors. One common reason is the absence of beneficial microorganisms or yeasts required for fermentation. Using a starter culture or a small amount of a previously successful batch can help kick-start fermentation. Additionally, ensure that the temperature is within the optimal range for the specific fermentation process.
Fermented foods can undergo texture changes during the fermentation process. Sometimes, vegetables can become softer or lose their crispness. This is a natural part of the fermentation process as the enzymes and beneficial bacteria break down the cell walls. If you prefer a crunchier texture, consider fermenting for a shorter period or using vegetables that are naturally firmer.
Fermentation is a fun way to experiment with bringing different flavors to preserving your garden harvest, with added health benefits. Start small and before you know it you’ll be a fermentation pro!
Read more from this preserving the garden harvest series:
PRESERVING THE GARDEN HARVEST: INSTRUCTIONS FOR FREEZING FOOD
PRESERVING THE GARDEN HARVEST: INSTRUCTIONS FOR PICKLING FOOD
PRESERVING THE GARDEN HARVEST: INSTRUCTIONS FOR DEHYDRATING FOOD
PRESERVING THE GARDEN HARVEST: INSTRUCTIONS FOR WATER BATH CANNING
Preserving The Garden Harvest: Instructions For Dehydrating Food
Dehydrated foods have gained popularity not only for their extended shelf life but also for their concentrated flavors and nutritional value. They are lightweight, convenient, and can be used in a variety of recipes or enjoyed as healthy snacks.
Dehydrating food is one of the oldest methods of food preservation, with a history that dates back thousands of years. The process involves removing moisture from food, which helps inhibit the growth of bacteria, yeast, and mold, thus extending its shelf life.

History of dehydrating foods
Dehydrated foods have gained popularity not only for their extended shelf life but also for their concentrated flavors and nutritional value. They are lightweight, convenient, and can be used in a variety of recipes or enjoyed as healthy snacks.
Dehydrating food is one of the oldest methods of food preservation, with a history that dates back thousands of years. The process involves removing moisture from food, which helps inhibit the growth of bacteria, yeast, and mold, thus extending its shelf life.
The practice of food dehydration can be traced back to ancient civilizations. Early methods involved air drying, sun drying, and wind drying. Various cultures, such as the Egyptians, Greeks, Romans, and Chinese, utilized these techniques to preserve fruits, vegetables, meats, and fish. Native American tribes in North America had their own methods of dehydrating food. They used the sun and wind to dry meats, fruits, and vegetables, often employing techniques like smoke drying or utilizing drying racks.
With the advent of the Industrial Revolution in the 18th and 19th centuries, advancements in technology led to the development of more efficient food dehydration methods. The invention of the electric food dehydrator in the 20th century further revolutionized the process by providing controlled heat and airflow.
Today, dehydrating food has become more accessible to individuals with the availability of home food dehydrators. These appliances allow for precise temperature control, ensuring optimal results in drying a wide range of foods, including fruits, vegetables, herbs, jerky, and even making fruit leathers.
Is dehydrated food safe?
Yes, when done properly, dehydrated food is safe to consume. Dehydrating food removes moisture, which helps inhibit the growth of bacteria, yeast, and mold that can cause spoilage. It effectively preserves the food and extends its shelf life. However, it's essential to follow proper food safety practices when dehydrating food to ensure its safety. Begin with fresh, high-quality ingredients. Wash fruits, vegetables, and herbs thoroughly before dehydrating to remove any dirt, pesticides, or contaminants. Keep your hands, utensils, and dehydrator clean during the entire process.
Different foods have different optimal drying temperatures and times. It's important to follow guidelines specific to each food type to ensure proper dehydration. Make sure the food is adequately dried to a point where it is crispy, brittle, or leathery, depending on the desired texture. Properly dried food should not feel moist or have any signs of moisture when stored.
Once the food is fully dehydrated, store it in airtight containers or vacuum-sealed bags to protect it from moisture and air. Proper storage helps maintain the quality and safety of the dehydrated food.
Is dehydrated food healthy?
Dehydration primarily affects the water content of food, so many of the nutrients remain intact. However, some heat-sensitive vitamins like vitamin C and certain enzymes may be slightly reduced during the dehydration process. Dehydrated foods are lightweight, compact, and often require no refrigeration. This makes them an excellent choice for on-the-go snacks, camping trips, or emergency food supplies.
How long will dehydrated food last
When properly dehydrated and stored in suitable containers, dehydrated food can have an extended shelf life. Here are some general guidelines:
Dehydrated fruits and vegetables: When stored in airtight containers in a cool, dark, and dry place, dehydrated fruits and vegetables can typically last anywhere from 6 months to 1 year. Some fruits with higher sugar content, like raisins or dried apricots, can have an even longer shelf life.
Dehydrated meats and jerky: Dehydrated meats, such as beef jerky, can last for several months to a year when stored properly. It's important to ensure that the meat is fully dehydrated, free from moisture, and stored in airtight containers or vacuum-sealed bags.
Dehydrated herbs and spices: Properly dried and stored herbs and spices can maintain their quality for up to 1-3 years. Store them in airtight containers away from heat, light, and moisture to preserve their flavor and potency.
To maximize the shelf life of dehydrated food, ensure complete dehydration: Make sure the food is thoroughly dehydrated to remove all moisture. Moisture content is a key factor in determining shelf life. Store dehydrated food in airtight containers, such as glass jars, food-grade plastic containers, or vacuum-sealed bags. This helps to prevent moisture, air, and pests from entering. Keep dehydrated food in a cool, dark, and dry place. Avoid exposure to direct sunlight, heat sources, and humidity, as they can degrade the quality and shorten shelf life. Clearly label containers with the date of dehydration and use the oldest items first. Rotate your stock regularly to ensure you consume the oldest items before they start to lose quality.

What foods can be dehydrated?
Fruits: Apples, bananas, strawberries, blueberries, mangoes, pineapples, apricots, peaches, cherries, and more.
Vegetables: Tomatoes, bell peppers, carrots, onions, mushrooms, green beans, peas, corn, kale, spinach, zucchini, and more.
Herbs and spices: Basil, oregano, thyme, rosemary, parsley, mint, cilantro, dill, garlic, ginger, turmeric, and more.
Meats: Beef, poultry (chicken, turkey), fish, and jerky (made from various meats).
Dairy products: Cheese can be dehydrated to create powdered cheese for extended shelf life.
Snacks: fruit leather, kale chips, and more.
Ways to dehydrate food
Air drying: This is the simplest and most traditional method of dehydrating food. It involves placing sliced or chopped food on drying racks or screens in a well-ventilated area, preferably with good airflow and low humidity. It is a slower process compared to other methods, but it requires no special equipment.
Sun drying: Similar to air drying, sun drying involves placing food in direct sunlight to remove moisture. It is a popular method in regions with hot and dry climates. However, it requires consistent sunlight and protection from pests.
Oven drying: Using your oven is a convenient way to dehydrate food. Set the oven to its lowest temperature (ideally around 140°F or 60°C) and place the sliced or chopped food on baking sheets or wire racks. Keep the oven door slightly ajar to allow moisture to escape. This method is faster than air drying but not as energy-efficient.
Dehydrator: A food dehydrator is a specialized appliance designed for efficient and consistent food drying. It uses low heat and airflow to remove moisture from food. Dehydrators have multiple trays or shelves where you can place the food in a single layer. They often come with adjustable temperature settings and timers for precise control.
Microwave drying: While not as commonly used for dehydrating food, a microwave can be used for small quantities or quick drying. Place the food on microwave-safe plates or trays and use the microwave's defrost or low power setting to dry the food in short intervals, checking frequently to prevent overheating.
Troubleshooting issues with dehydrated food
Inadequate drying: If your food is not fully dehydrated, it may spoil or develop mold during storage. Ensure that you follow the recommended drying time and temperature for each type of food. Adjust the drying time if needed, considering factors like the thickness of the slices, humidity levels, and your specific dehydrator or drying method.

Over-drying: On the other hand, over-drying can result in food that is overly dry and brittle. This may lead to loss of flavor, texture, and nutrient content. To avoid over-drying, monitor the drying process closely and follow the recommended drying times. You can conduct periodic checks to determine the desired level of dryness.
Uneven drying: Sometimes, certain pieces of food may dry faster than others, resulting in uneven dehydration. This can happen if the food pieces are not of uniform size or thickness. To overcome this, try to slice or chop the food into consistent sizes and arrange them on the drying trays accordingly. Rotate the trays during the drying process to ensure even airflow and consistent drying.
Sticking or clumping: If the food pieces stick together or form clumps after drying, it may be due to excess moisture or inadequate spacing during the drying process. Ensure that you space the food pieces evenly on the drying trays, allowing sufficient airflow around each piece. If necessary, separate clumped pieces gently after drying.
Loss of color or flavor: Some foods may experience color or flavor changes during the dehydration process. To minimize these issues, consider pre-treating the food before drying, such as blanching vegetables or soaking fruits in lemon juice or other acidic solutions. Properly storing the dehydrated food in airtight containers or vacuum-sealed bags can also help preserve color and flavor.
How to use dehydrated food
Dehydrated food is incredibly versatile and can be used in a variety of ways. Dehydrated fruits make for delicious and healthy snacks. They can be enjoyed on their own or mixed with nuts, seeds, or granola for a homemade trail mix. Dehydrated vegetables can be used as crunchy and nutritious snacks too. Dehydrated vegetables and meats are perfect additions to soups, stews, and chili. Simply rehydrate them in hot water or broth and add them to your favorite recipes. They will infuse the dishes with concentrated flavors and nutrients. Dehydrated herbs, spices, and vegetables can be ground into powders and used as seasonings to enhance the flavor of your dishes. Sprinkle them on roasted vegetables, pasta, popcorn, or homemade sauces.
Read more from this preserving the garden harvest series:
PRESERVING THE GARDEN HARVEST: INSTRUCTIONS FOR FREEZING FOOD
PRESERVING THE GARDEN HARVEST: INSTRUCTIONS FOR PICKLING FOOD
PRESERVING THE GARDEN HARVEST: INSTRUCTIONS FOR FERMENTING FOOD
PRESERVING THE GARDEN HARVEST: INSTRUCTIONS FOR WATER BATH CANNING

Preserving The Garden Harvest: Instructions For Water Bath Canning
Water bath canning is a home food preservation method that involves processing jars of high acid foods in a large pot of boiling water. The process helps kill any bacteria, yeasts, or molds present in the food and creates a vacuum seal to prevent spoilage. It is a safe and accessible method for canning fruits, jams, jellies, pickles, and other high acid foods. And it doesn’t have to feel intimidating! In this guide, I will show you exactly how to water bath can your garden harvests for long term food storage.
What is water bath canning?
Water bath canning is a home food preservation method that involves processing jars of high acid foods in a large pot of boiling water. The process helps kill any bacteria, yeasts, or molds present in the food and creates a vacuum seal to prevent spoilage. It is a safe and accessible method for canning fruits, jams, jellies, pickles, and other high acid foods. And it doesn’t have to feel intimidating! In this guide, I will show you exactly how to water bath can your garden harvests for long term food storage.
Water bath canning has a long history that dates back to the early 19th century. The method was developed as a way to safely preserve and store food without the need for refrigeration or other modern preservation techniques.
The practice of using heat to preserve food can be traced back even further, with evidence of similar techniques being used by ancient civilizations. However, the specific process of water bath canning as we know it today began to take shape in the 1800s.
One of the key figures in the development of water bath canning was the French confectioner and brewer Nicolas Appert. In 1809, Appert invented a method of sealing food in glass jars, which he called "appertisation." He discovered that by heating food in sealed containers, it could be preserved for long periods without spoiling. His work laid the foundation for modern canning techniques.
In the United States, water bath canning gained popularity in the mid-19th century with the publication of various cookbooks and guides on home canning. One of the most influential figures in promoting canning methods was Maria Parloa, a renowned cookbook author and educator. Her book "The Appledore Cook Book" published in 1872 included detailed instructions for water bath canning.
During World War II, home canning experienced a resurgence as people sought ways to preserve food during rationing and shortages. Government programs and educational campaigns were launched to encourage home canning and provide information on safe canning practices.
Is water bath canning safe?
Yes, when done correctly and following recommended guidelines, water bath canning is a safe method of food preservation. Water bath canning is suitable for high acid foods, such as fruits, jams, jellies, pickles, and some tomato products. The high acid content in these foods creates an environment that inhibits the growth of harmful bacteria, such as Clostridium botulinum, which can cause botulism.
To ensure safety when water bath canning, it is important to follow tested recipes from reliable sources, such as government extension services, reputable canning guides, or trusted cookbooks. These recipes are specifically designed to provide the necessary acid levels and processing times to destroy any potential bacteria and ensure the safety of the preserved food.
Additionally, proper preparation and handling of jars, lids, and equipment are essential. This includes sterilizing jars and lids before filling them, using new lids for each canning session, and carefully following the instructions for filling and sealing the jars. It's also important to monitor and maintain the correct water bath canning temperature throughout the processing time.
WHat’s the difference between Water Bath Canning and Pressure Canning?
Some things like low-acid vegetables and meats can only be pressure canned due to their pH levels or density. These types of foods require the high temperatures and pressure generated in a pressure canner to ensure their safety. On the other hand, water bath canning is a suitable method for preserving high acid foods like fruits, pickles, and jams. The acidity in these foods inhibits the growth of harmful bacteria and makes them safe to can using the water bath method. It's important to note that you cannot substitute water bath canning if a recipe specifically calls for pressure canning. The two methods differ significantly in terms of temperature and pressure, and swapping them can compromise the safety and shelf life of the preserved food. To ensure food safety and quality, always follow the recommended canning method indicated in the recipe and consult reliable canning resources for guidance.
Water bath canning safety tips
Hot Food, Hot Jars
This means that your canning jars should be properly sanitized and preheated before filling them with your prepared hot food. Preheating the jars helps prevent thermal shock and ensures proper sealing of the lids. Additionally, using hot food minimizes the time that the filled jars spend at lower temperatures, reducing the risk of bacterial growth.
Be Clean To Be Safe
Cleanliness is key to prevent any contamination that could compromise the safety and quality of your canned goods. It is essential to have clean hands, clean jars, clean pots, clean utensils (preferably metal), and clean towels. This includes properly washing and sanitizing your hands before handling any food or equipment, thoroughly cleaning and sterilizing your canning jars, using clean pots for heating water, and using metal utensils that are easier to sanitize.
Trust Your Source
When it comes to canning, it is important to trust your source of information and recipes. Canning is a precise process that requires specific pH levels, processing times, and techniques to ensure food safety. It is not recommended to "wing it" or rely on untested recipes. Choose reliable and reputable sources that have a good understanding of the canning process, such as government extension services, trusted canning guides, or reputable cookbooks. Following tested recipes from trusted sources will give you peace of mind knowing that you are preserving your food safely.
Why should you use bottled lemon juice when canning?
Many canning recipes will call for lemon juice to increase the acidity of the recipe when the food itself does not have a high enough acid content to safely can. Bottled lemon juice will ensure you meet the specific acid levels required, since these acid levels can vary in fresh fruit. Vinegar may also be used to increase the acidity of foods. Prepare the recipe as written and do not improvise the amount of acid used.

SUPPLIES NEEDED FOR CANNING
LARGE POT + RACK
This will be your water bath canner. The rack keeps the jars off of the bottom of the pot. There are canning specific pots available to buy but any pot large enough to hold your jars and be covered by at least an inch of water will work.
POT TO PREPARE YOUR FOOD IN
Often the food you are cooking may expand as it boils, so choose a pot much larger than you think you’ll need to allow a lot of extra space. Since we are canning high-acid foods, you should not use aluminum or cast iron as they are reactive. Stainless steel is the best choice, with a thick bottom to prevent sticking and burning.
JAR LIFTER
This tool makes it safe and easy to move your extremely hot and full jars from counter to canner and back again.
WIDE FUNNEL
For filling your jars without making a mess on the outside of the jar or rim.
TOWELS
A stack of very clean dishtowels for spills will make all the difference.
CANNING JARS
An obvious one, but there are many sizes and brands, and each size will require a different processing time. Jars can be used but canning lids usually are not.
TWO PIECE CANNING LIDS
You will have a flat lid which may only be used once and a ring which can be reused for as long as it is not rusty or damaged. Flat lids can be purchased separately from rings and jars, so you can reuse last years jars and rings and just replace the lid.
BASICS OF WATER BATH CANNING
The exact steps you follow will vary depending on the recipe you are using, but the fundamentals will stay the same. Preparation in advance will make all the difference in whether your first canning experience is chaotic or calm.
Set aside your rings and lids, and place your empty jars into your canner. Cover the jars with water, at least one inch above the top. Bring this to a boil and then simmer to sanitize the jars.
While the jars are simmering, prepare your recipe.

Remove the jars from the water and using your wide funnel fill the jars with the prepared food. Leave the appropriate amount of headspace (empty room at the top) specified in your recipe for expansion.
Use a non-metallic tool, such as a bubble remover or a plastic spatula, to gently remove any trapped air bubbles in the jars.
Wipe any food splatter from the rim of the lid with your clean dishtowel and cover the jars with the lids and rings, twisted just finger tight.
Place your full jars back in the water bath, cover it and bring back to a boil. The processing time will depend on the type of food being canned and the altitude of your location. Follow the processing time indicated in the recipe to ensure the food is safely preserved.
Remove the jars from the water bath and place them on a towel-lined area of the countertop where they can cool for 24 hours, so as not to disturb the sealing process. The jar lids will pop as they seal.
After 24 hours has passed, check the seal by removing the ring and holding the jar by its lid. The lid should be on very firmly. If it didn’t seal - your food is still edible, but it is not shelf stable and must be kept in the fridge and eaten right away.
Label your jars with the contents and date and store in a cool dark place. You should not put the rings back on at this point - they aren’t necessary once the jar has formed a proper seal, and could prevent you from noticing a false seal.
High acid canned food is good for about one year when properly stored.
Read more from this preserving the garden harvest series:
PRESERVING THE GARDEN HARVEST: INSTRUCTIONS FOR FREEZING FOOD
PRESERVING THE GARDEN HARVEST: INSTRUCTIONS FOR PICKLING FOOD
PRESERVING THE GARDEN HARVEST: INSTRUCTIONS FOR FERMENTING FOOD
PRESERVING THE GARDEN HARVEST: INSTRUCTIONS FOR DEHYDRATING FOOD

5 Tried-and-Tested Techniques for Preserving Your Garden Harvest
Preserving excess produce not only helps reduce food waste, but it also allows you to save money by avoiding buying produce out of season. With a little planning, you’ll even be able to create heat and serve convenience foods for busy nights when cooking isn’t an option, giving you healthy options to choose from. Additionally, preserving produce allows you to enjoy the fruits of your labor long after the growing season has ended. It's also a great way to ensure that you always have healthy, homegrown ingredients on hand for your favorite recipes.
One of the best things about gardening is the daily access to fresh, nutritious fruits, vegetables, and herbs. However, in the height of summer it is easy to become overwhelmed by a harvest that is more than you can consume, so it's important to learn how to preserve excess produce for later use.

There are many different methods of preserving fruits, vegetables, and herbs, but today we’ll be covering canning, freezing, dehydrating, pickling, and fermenting. These preservation methods allow you to enjoy your homegrown produce all year round and reduce food waste. Food waste is a problem for several reasons. Firstly, it contributes to environmental issues such as greenhouse gas emissions, as uneaten food in landfills decomposes and produces methane gas. Secondly, it wastes valuable resources such as water, energy, and labor used in producing, transporting, and preparing the food. Thirdly, it contributes to food insecurity, as there are many people who do not have access to enough food. Finally, it is a waste of money for individuals and businesses, as they are essentially throwing away the money they spent on the food. By reducing food waste, we can help address these issues and create a more sustainable food system.
Preserving excess produce not only helps reduce food waste, but it also allows you to save money by avoiding buying produce out of season. With a little planning, you’ll even be able to create heat and serve convenience foods for busy nights when cooking isn’t an option, giving you healthy options to choose from. Additionally, preserving produce allows you to enjoy the fruits of your labor long after the growing season has ended. It's also a great way to ensure that you always have healthy, homegrown ingredients on hand for your favorite recipes.
This post will give you a broad overview of the different ways to preserve foods, but if you’re interested in diving deeper into the specifics, let me know in the comments which method you’d like to learn more about.
Canning Homegrown Food
Canning is a popular method of preserving fruits, vegetables, and even meats. Canning is a great way to preserve high-acid fruits such as berries, peaches, and apples, as well as tomatoes and some types of pickles. Low-acid foods such as green beans, corn, and meat require pressure canning to prevent the growth of harmful bacteria.
The basic process involves heating the food in a jar to kill bacteria and create a vacuum seal. This prevents spoilage and allows the food to be stored for long periods of time. To get started with canning, you will need a few pieces of equipment, including a water bath canner or pressure canner, canning jars, and lids.
To prepare fruits and vegetables for canning, it's important to start with fresh, ripe produce. Wash and trim the produce, removing any stems, leaves, or bruises. Follow a trusted recipe for the type of food you are canning, as different foods require different processing times and methods. The best resource for this is The National Center for Home Food Preservation. Once the food is packed into the jars, process them in a water bath canner or pressure canner according to the recipe instructions.
To store canned foods, keep them in a cool, dry place away from direct sunlight. Check the seals on the jars regularly to ensure they are still airtight. Canned foods can last for up to one year, but it's important to use them within a reasonable timeframe to ensure optimal flavor and quality.
Click here for my full guide to learn how to water bath can food.
Freezing Your Garden Produce

Freezing is a convenient and easy method of preserving fruits, vegetables, and herbs. Freezing is an excellent method for preserving vegetables that you plan to cook later, as well as fruits such as berries, peaches, and mangoes. Most vegetables and fruits can be frozen, but some may require blanching (briefly boiling and then cooling in ice water) before freezing to prevent enzyme action and maintain color and flavor.
The basic process involves blanching the produce to stop enzyme activity, then freezing it in airtight containers or bags. Freezing can preserve the flavor and nutrients of the produce for up to six months or longer, if you vacuum seal your bags.
To get started with freezing, you will need a few pieces of equipment, including a large pot for blanching, a colander, airtight containers or bags, and a freezer. A vacuum sealer is optional.
To prepare fruits and vegetables for freezing, start with fresh, ripe produce. Wash and trim the produce, removing any stems, leaves, or bruises. Blanch the produce by dipping it in boiling water for a brief period, then transferring it to ice water to stop the cooking process. Drain the produce in a colander, then pack it into airtight containers or bags, removing as much air as possible.
To store frozen foods, keep them in a freezer at 0°F or below. To thaw frozen foods, move them to the refrigerator to thaw slowly. Avoid thawing at room temperature or in the microwave, as this can lead to uneven thawing and loss of texture.
Click here for my full guide to learn how to ferment food.
Dehydrating Herbs and More
Dehydrating is a method of removing moisture from fruits, vegetables, and herbs to create shelf-stable, dried foods. Dehydrating is a great way to preserve fruits such as apples, bananas, and mangoes, as well as vegetables such as tomatoes, peppers, and zucchini. Herbs and spices can also be easily dried and stored.
The basic process involves slicing the produce, arranging it on a dehydrator tray, and allowing it to dry at a low temperature for several hours. You can also dehydrate at a low temperature in your oven, but this will take longer and use more energy.
To get started with dehydrating, you will need a dehydrator and a knife or mandoline for slicing the produce.

To prepare fruits, vegetables, and herbs for dehydrating, start with fresh, ripe produce. Wash and trim the produce, removing any stems, leaves, or bruises. Slice the produce into even pieces, then arrange it on a dehydrator tray. Follow the instructions for your specific dehydrator model, as drying times and temperatures may vary.
To store dehydrated foods, keep them in airtight containers or bags in a cool, dry place away from direct sunlight. Dehydrated foods can last for up to a year or longer, but it's important to use them within a reasonable timeframe to ensure optimal flavor and quality.
Click here for my full guide to learn how to dehydrate food.
Pickling Garden Picks
Pickling is a method of preserving fruits and vegetables in a brine made from vinegar, salt, and spices. The acidity of the vinegar helps to prevent spoilage and enhance flavor. Pickling is a great way to preserve cucumbers, beets, carrots, green beans, and other vegetables. Fruits such as peaches and pears can also be pickled.
To get started with pickling, you will need a few pieces of equipment, including a large pot for boiling the brine, canning jars, and lids.
To prepare fruits and vegetables for pickling, start with fresh produce. Wash and trim the produce, removing any stems, leaves, or bruises. Follow a trusted recipe for the type of food you are pickling, as different foods require different brine ratios and processing times. Once the food is packed into the jars, pour the hot brine over the top, leaving a small amount of headspace.
To store pickled foods, keep them in a cool, dry place away from direct sunlight. Pickled foods can last for several months, but it's important to use them within a reasonable timeframe to ensure optimal flavor and quality.

Fermenting for Health
Fermenting is a method of preserving fruits, vegetables, and even dairy products by allowing beneficial bacteria to grow and multiply. The bacteria convert sugars and starches into lactic acid, which gives fermented foods their tangy flavor and helps to prevent spoilage. Fermenting is a great way to preserve vegetables such as cabbage, carrots, and cucumbers, as well as fruits such as lemons and limes. Fermented foods such as sauerkraut, kimchi, and pickles are also great sources of beneficial probiotics.
To get started with fermenting, you will need a few pieces of equipment, including a fermentation crock or jar, weights, and an airlock.
To prepare fruits, vegetables, and herbs for fermenting, start with fresh produce. Wash and trim the produce, removing any stems, leaves, or bruises. Follow a trusted recipe for the type of food you are fermenting, as different foods require different salt ratios and processing times. Pack the food into a fermentation crock or jar, adding salt and any desired spices or seasonings. Place weights on top to keep the food submerged in the brine, then attach an airlock to allow gas to escape during fermentation.
To store fermented foods, keep them in a cool, dark place, such as a basement or refrigerator. Fermented foods can last for several months or longer, but it's important to use them within a reasonable timeframe to ensure optimal flavor and quality.
Growing and preserving your own food can feel overwhelming as you are getting started, and it can be difficult to know which preservation method is best for you. Each method has its own set of benefits and considerations, and the best method for you will depend on the type of food you are preserving, your energy levels and your personal preferences. Because of my chronic pain, I tend to avoid intensive projects like canning. My favorite method of preserving food is to freeze in vacuum sealed bags or jars in our chest freezer.