
BACKYARD GARDENING MADE SIMPLE

Composting for Beginners: Lomi Bloom Smartwaste Appliance Review
Lomi Bloom not only reduces your waste footprint, it also rewards you for getting rid of your waste the right way and enables you to actually track your impact and get rewarded for it. We all create food waste, but now - Lomi Bloom turns your trash into cash with Lomi Rewards. Earn points every time you run a cycle + redeem for free products from Lomi + other great brands. Save money on expensive store-bought fertilizer, reduce your carbon footprint, and get rewarded for upgrading the way you deal with waste.

The Cottage Peach is reader-supported. When you purchase through links on our site, we may earn an affiliate commission at no additional cost to you. All opinions are our own.
What is Composting?
Composting is a method of breaking down food waste and other organic matter into usable, nutrient dense soil by creating an environment which encourages decomposition through a microbial process. Composting creates a valuable fertilizer that can support and feed plant life. Most compost is made with a combination of kitchen scraps, paper, grass clippings, leaves, small twigs and brush, which when exposed to water, oxygen, heat, worms and other organisms create the conditions necessary for decomposition.
Benefits of Composting
So why should you compost? It all comes back to the kitchen.
24% of solid waste in landfills today is food waste, making it the most common material found in landfills
22% of solid waste that is incinerated is food waste
50% of the volume of waste that North Americans send to landfills each year is compostable materials.
80 billion pounds or 30-40% of the food supply is discarded every year in the United States.
Why does it matter if we waste food? Landfills are anaerobic and do not have the right conditions to properly break down food, and food waste in landfills releases methane, a potent greenhouse gas up to 36 times more effective than carbon dioxide at trapping heat in the atmosphere. In the harsh sunlight of the upper atmosphere, methane can react with other gasses to form water vapor, which then breaks down into other chemicals that destroy ozone.
Different Composting Methods
You can compost in many different ways, but the top three are:
Outdoor Composting Bin or Pile System
This is my preferred method because there is little to no set up cost, but it does require enough space for at least one 4x4 foot pile and must be manually turned in order to increase oxygen and encourage decomposition. You are also limited in the types of food waste you can put into your compost. This means no meat, dairy, eggs, citrus peels, fat or grease, and if you don’t have the space or energy this won’t be an option.
Tumbler Composting Barrel
This is a popular system with a moderate upfront cost which can be used even in more urban settings as long as you have some amount of land to work with. Since the compost is contained, the smell and sight won’t offend any neighbors and it is less likely to attract animals. You are also able to easily aerate the compost by turning a handle on the side of the barrel. Like the pile option, you are also limited in the types of food waste you can put into your compost. This means no meat, dairy, eggs, citrus peels, fat or grease.
Vermicomposting with Worms
Vermicompost is much higher in nutrients than the compost from a regular backyard composter, and takes less time to break down. Worms are also relatively cheap to purchase making this a lower cost option if you’re homesteading on a budget. You can also use this method both indoors and outdoors. Like the two options above, you are limited in the types of food waste you can put into your compost. This means no meat, dairy, eggs, citrus peels, fat or grease.
Electric Smart Waste Appliances like Lomi Bloom
These appliances transform your food-waste into nutrient-rich plant-food at the push of a button. While they aren’t inexpensive, Lomi Bloom is able to break down large quantities of food waste quickly and easily with no physical strain of turning the compost, and it’s small enough to fit on your counter. You can also break down many of the food items that cannot be composted using traditional composting systems. This makes Lomi Bloom the best choice for composting for beginners and renters who might not have an outdoor space of their own.
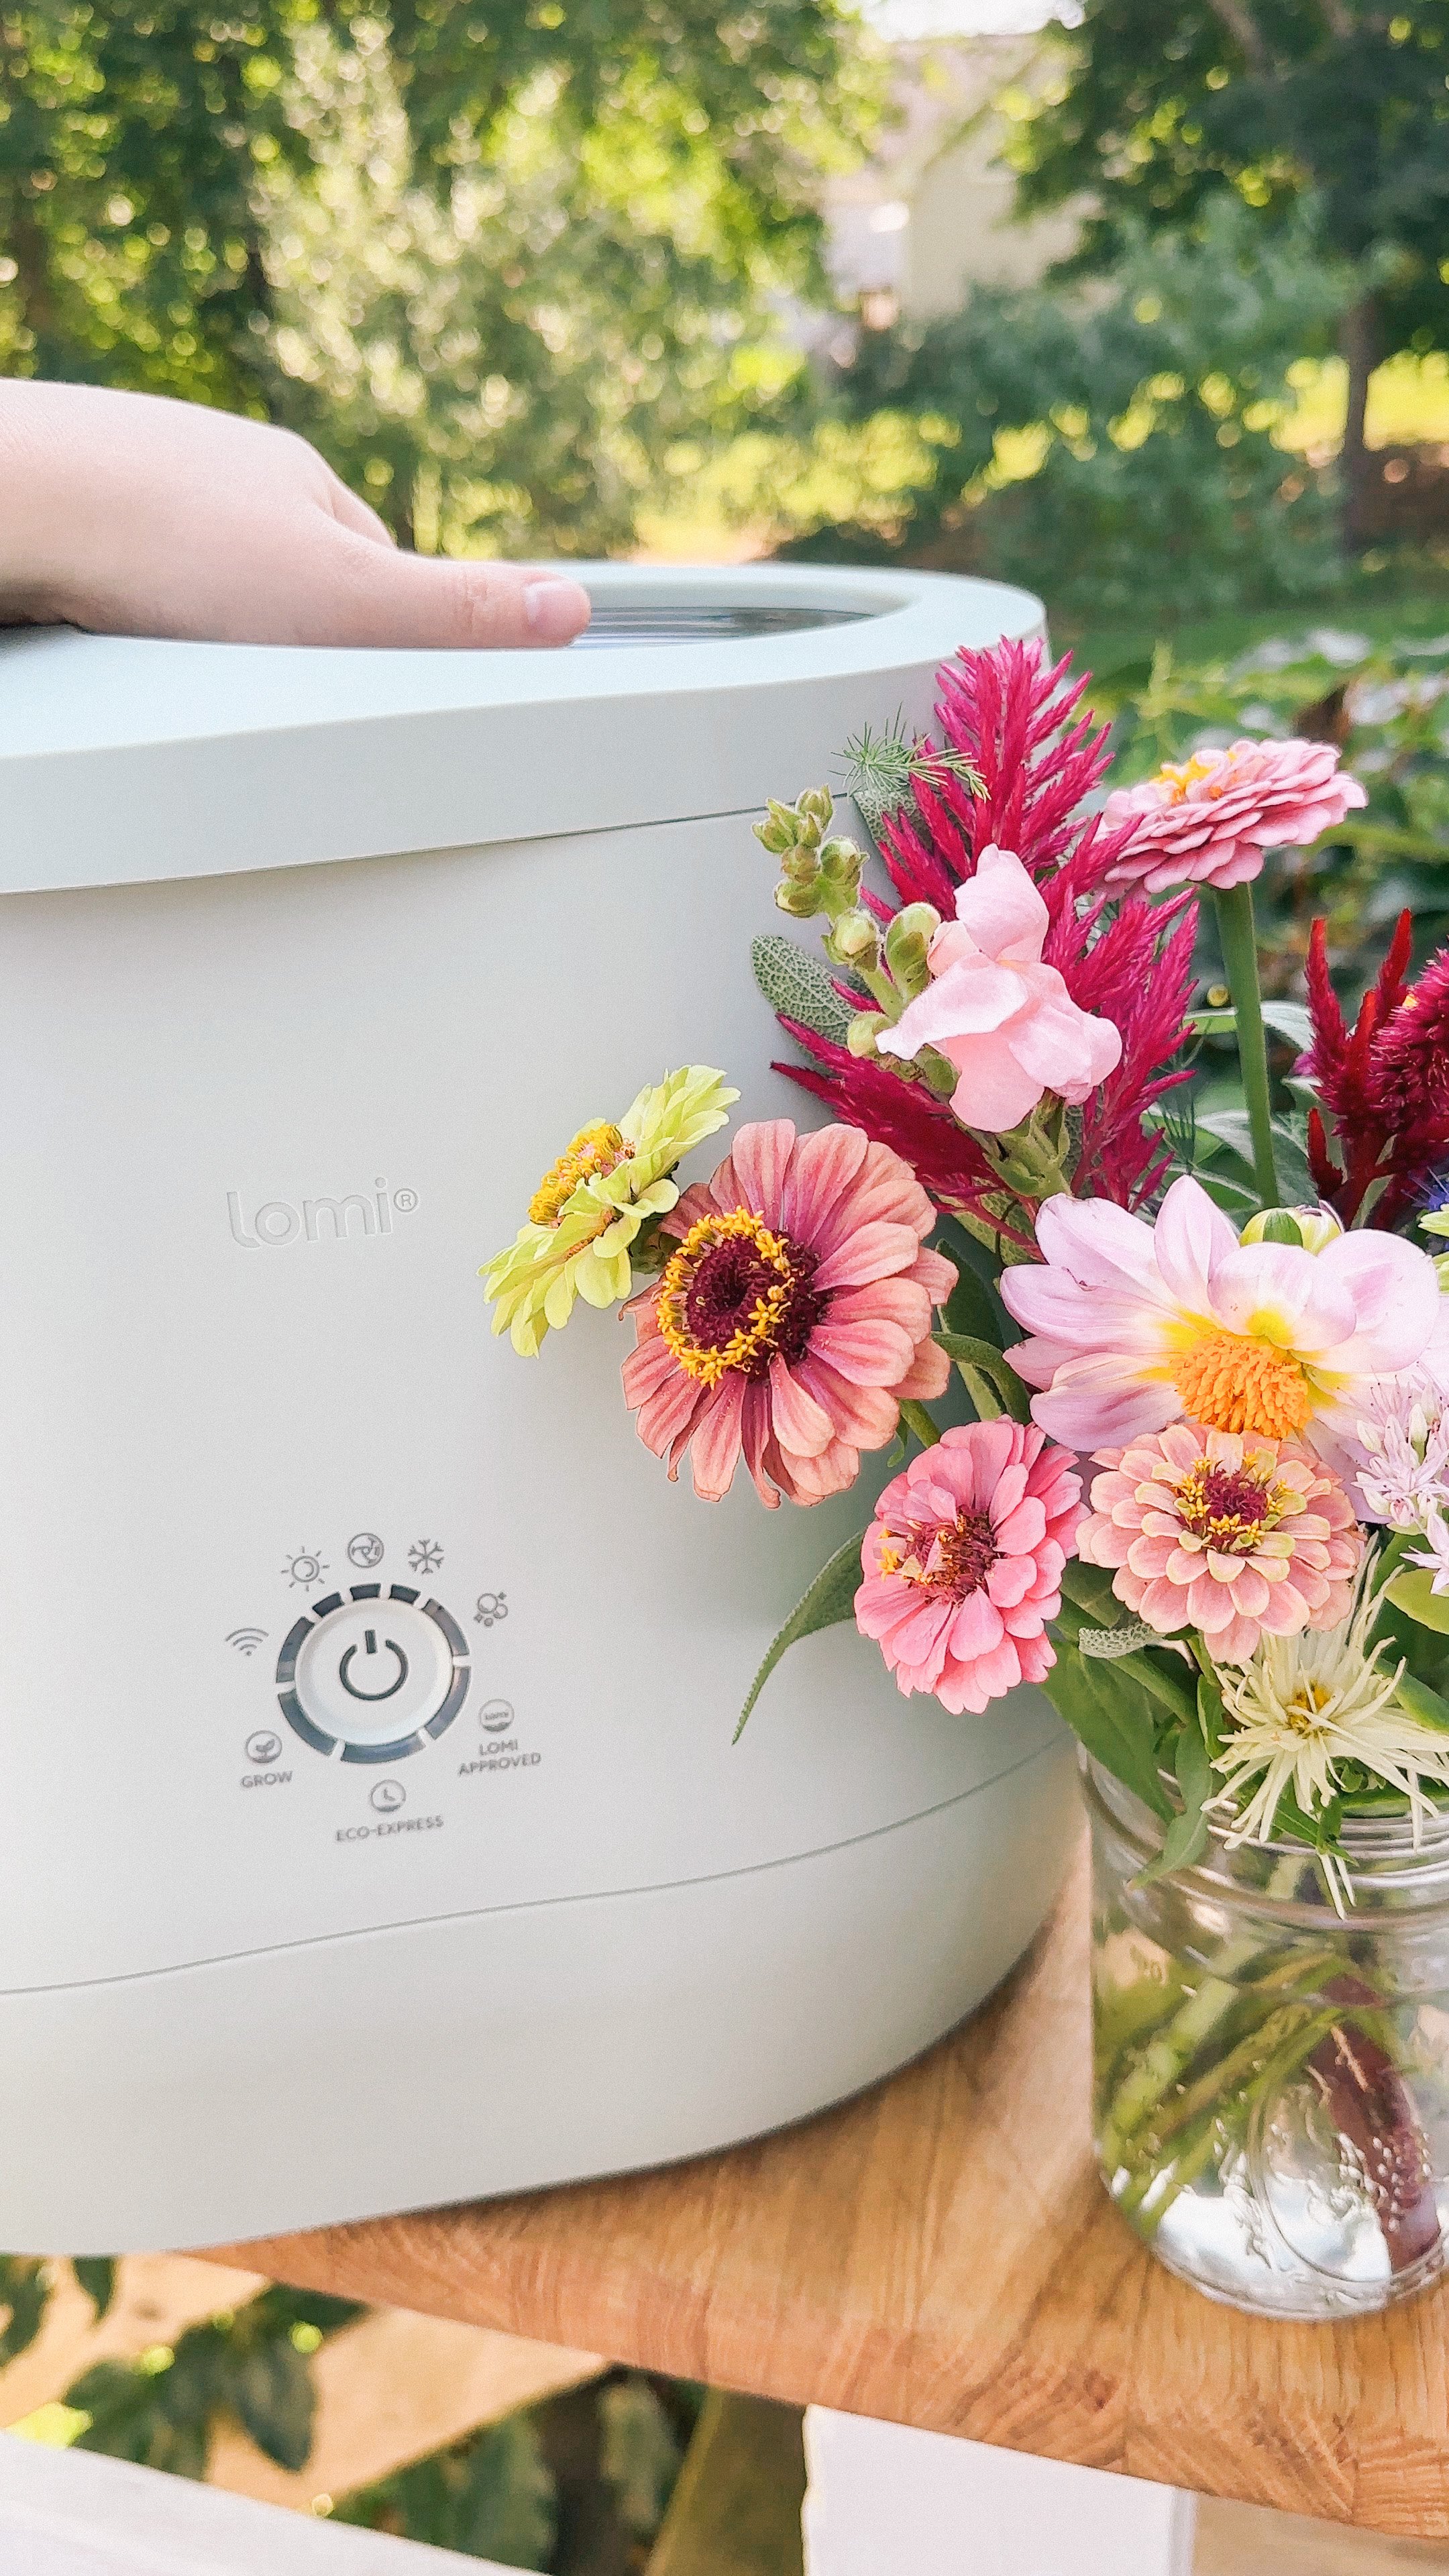
Lomi Bloom SmartWaste Appliance
Lomi Bloom is the best way to break down your food waste into nutrient rich Lomi Earth, ready to be incorporated into your garden soil or potted plants. Lomi Earth is a little different every time you run a cycle because it is composed of just your food waste (plus microbes and fungi from your LomiPod if you include that in the cycle). This diversity benefits your plants as they are exposed to a wide variety of beneficial organisms and minerals extracted from your food waste.
Pela, the company that created Lomi Bloom, calls the end product of Lomi Bloom nutrient-rich Lomi Earth instead of compost' or soil because both other terms have very specific qualities, including the amount of time it spent forming.
So how can a smart waste appliance reduce your carbon footprint? Pela did the research. With the help of third party audits, they found that despite the electricity consumed, Lomi Bloom can produce a net-lower carbon footprint than that same organic waste going to landfill.
Pela's primary goal is to improve the world's health by eliminating waste. They can't do that if the creation of Lomi Bloom negatively impacts the environment. So, they worked hard to ensure Lomi Bloom's production is carbon negative, and is proudly certified as a Climate Neutral company and B Corporation.
Did you know that 43% of food waste in the U.S. happens at the household level? The average American family loses $2,000 in food waste every year. Lomi wants to help you make some of that back… and feel a lot less guilty for what you throw out. Lomi Bloom not only reduces your waste footprint, it also rewards you for getting rid of your waste the right way and enables you to actually track your impact and get rewarded for it. We all create food waste, but now - Lomi Bloom turns your trash into cash with Lomi Rewards. Earn points every time you run a cycle + redeem for free products from Lomi + other great brands. Save money on expensive store-bought fertilizer, reduce your carbon footprint, and get rewarded for upgrading the way you deal with waste.
How Does Lomi Work?
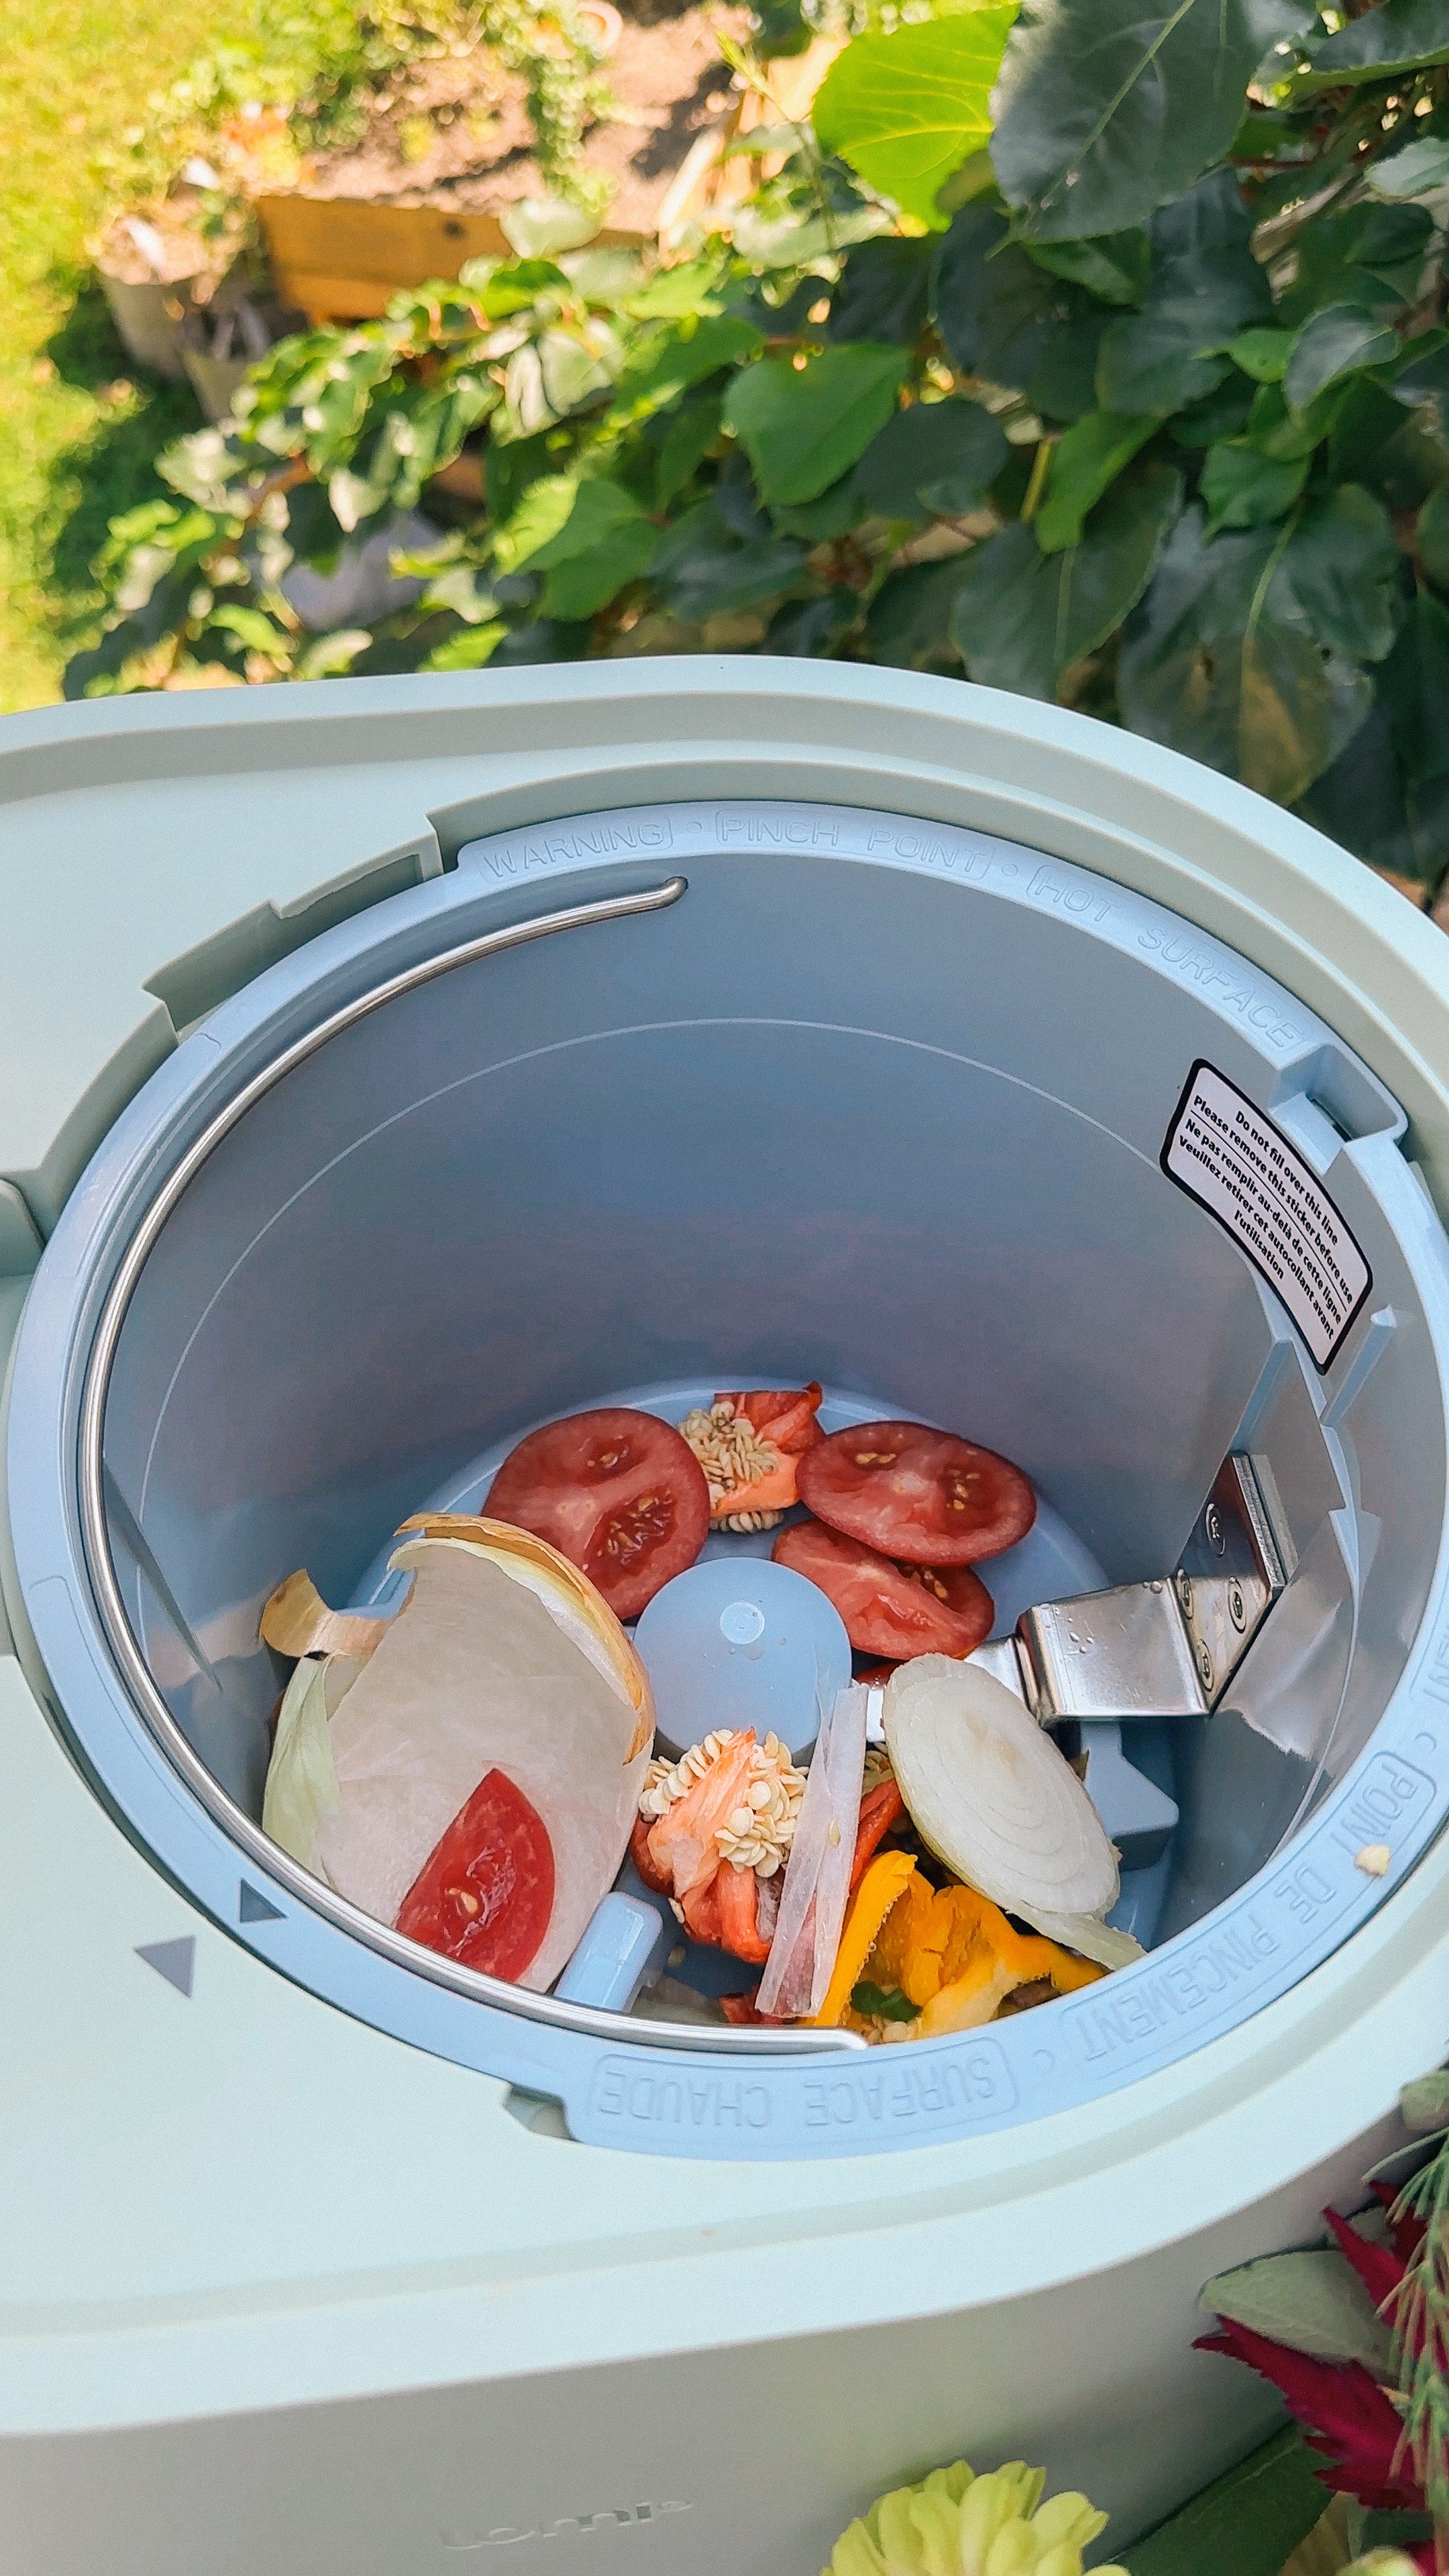
Lomi basically chops up the food into smaller bits by grinding it, then uses heat to remove any moisture - making it a breeze for tiny organisms to start breaking down the waste. Grinding also gives the compost some air, boosting oxygen and setting the stage for microbes that love oxygen.
Lomi Bloom Review - Is the Lomi Worth it?
Pela generously sent me my very own Lomi Bloom to try in exchange for my honest review, and I’m extremely impressed with what Lomi can do. Not only do I have a ton of vegetable and fruit cutoffs from the garden to compost, I have eliminated the struggle of stinky dairy and meat scraps sitting in the trash for longer periods of time causing me to have to replace the bag sooner. Since I cold compost outdoors already, I know firsthand just how much composting reduces my household waste and was frustrated that I still had food I needed to throw in the landfill. Lomi Bloom is easy to set up, and all of the packaging can be composted in Lomi Bloom when you’re done. I just added the included carbon filtering material to the two filter cartridges inside of Lomi, plugged it in and it was ready to run its first cycle.
Lomi Bloom is about the size of an air fryer, but since you’ll most likely use it every single day you probably won’t want to store it in a cabinet - so depending on how much counter space you have this may be an appliance that you need to move things around to make room for. Lomi Bloom also needs about 6-12 inches of space on all sides since it does warm up a small amount when running. I store mine in the least used corner of my counters and just pull it out to give it space on all sides while it runs overnight. The design of Lomi Bloom and the sage green color fits right in with most kitchens.
Review of Lomi composter
There are three modes on Lomi Bloom, all controlled by the universal power button making this super user-friendly. Here’s what Pela has to say about the three modes:
ECO EXPRESS:
This is the best mode if you’re looking for fast results and low energy consumption.
What can go in
Eco-Express mode is for food scraps and plant waste. Do not put bioplastics or compostable commercial goods and packaging in this mode.
What to do with the result
Toss it into your home compost or green bin. Or add more fresh food scraps & run a Grow mode to create nutrient-rich Lomi Earth for your houseplants, garden and lawn.
LOMI APPROVED:
This mode is your solution for Lomi Approved non-food compostable waste. With smart sensors that control grinding, heat and moisture, this mode breaks down Lomi Approved bioplastics and compostable products much faster than a traditional compost.
What can go in
Mix plenty of plant & food waste with Lomi Approved bioplastics and compostable products - they recommend a maximum of 10% non-food waste in each cycle.
What to do with the result
Toss it into your green bin.
GROW MODE:
Grow mode runs longest and at a lower temperature to create the highest quality Lomi Earth -- a natural fertilizer that’s exactly what your plants crave!
What can go in
Grow mode is for fresh fruit & vegetable scraps and plant waste. Do not put bioplastics or compostable commercial goods & packaging in Grow mode.
What to do with the result
Toss it into your home compost, green bin or garden at a 1:10 ratio with soil. For best results in your garden, add more fresh food scraps & run a Grow mode to create nutrient-rich Lomi Earth.
How Often To Run Lomi
I run Lomi Bloom about 2-3 times a week, always on Grow Mode unless I have bioplastics, packaging or processed/cooked foods. Lomi Bloom is quieter than most dishwashers and washing machines, so I find that running it overnight (which is when I usually start my dishwasher anyway) fits right into my routine. When the cycle is complete, Lomi Bloom beeps and then enters standby mode if you do not open within 30 minutes. I’ve been amazed by how transformed my food waste really is - a stinky pail of the worst moldy leftovers is turned into a dare I say pleasant smelling final product that is ready for the garden.
Is Lomi Bloom loud?
Lomi makes noise comparable to other small countertop appliances which is less than 60 dB. It’s around the same or less than a coffee maker or modern dishwasher.
Can I Run Lomi More Than Once Before Emptying?

You can run up to 3 cycles without emptying your bucket! In fact, adding Lomi Earth from the last cycle will improve the quality of the next cycle’s end product. Simply add more fresh food waste on top and start the next cycle! Just be sure to empty the bucket after 3 cycles because too much will strain the grinder.
How Much Energy Does Lomi Use?
Lomi uses between 0.6 to 1.0 kWh per cycle, depending on the mode and cycle time. Cycle times range from 5 hours to 20 hours. In comparison to other appliances, each Lomi's cycle uses roughly the same amount of power required to operate an oven for 15 minutes.
What to do About Lomi Bucket Residue?
Avoid adding too many high sugar foods to Lomi as that can result in sticky residue. Always add a diverse mixture of food waste in each cycle.
How To Clean Lomi Bloom?
To clean stuck residue, wash the Lomi bucket with hot soapy water or run a Cleaning cycle. Do not submerge Lomi in water. Only the bucket is dishwasher safe and can be submerged.
What are LomiPods and why do I need them?
LomiPods are microbial compost accelerators, activated by 50ml of added water. They are carefully tailored to enhance soil quality for your plants. Using a LomiPod increases the number of microbes in Lomi Earth.
My Lomi is squeaking, what can I do?
Avoid adding too many high sugar foods to Lomi as that can result in sticky build up under the grinder and causes a squeaky sound as it turns. If this occurs, simply soak the inside of the bucket with hot soapy water to loosen the residue, then wipe it away.
Does Lomi Bloom Have a Warranty?
Here’s what you need to know about the Lomi warranty: Lomi comes with a standard 1-year warranty. The warranty is non-transferable and proof of purchase is required to claim.
Before Lomi Bloom, I had resigned myself to the awful smell of my regular compost bin seeping into my kitchen. Lomi Bloom’s odor-proof design and its ability to break down a wider array of organic waste than most methods has been life changing, Bottom line: Nobody likes trash. If you’re ready to take out the trash less often, reduce kitchen odors and your carbon footprint Lomi Bloom offers a hassle-free 14 day trial so you can see just how great Lomi is for yourself!
Track your impact and get rewarded with Lomi Bloom - Click Here to Visit Lomi.com.


Fall Gardening 101: How to Plant a Thriving Vegetable Garden for the Cooler Months
Fall gardening is more limited, since not as many plants thrive in the colder weather of September, October or November. But the plants that are resilient enough to survive these colder temps are that much more gratifying to harvest. In this blog post, you’ll learn everything you need to know to plant a fall garden and keep your garden going as long as possible.

No one in a state that experiences all four seasons wants to think about fall and winter in the summer, but sometimes it pays to look ahead. If you’re wondering if it’s too late in the year to start a garden, or you’re noticing some gaps starting to form as your spring plantings reach the end of their harvestable life span, fall gardening is the answer. Gardening in zone 6, we don’t get to grow all year long unless we have cold frames, a green house or a hoop house - our season for a productive garden is from about May to October, and even within that limited season we have to contend with variable temperatures at the beginning and end of that time period. A fall garden is our final push to maximize the yield we can get in this limited time frame, as well as a second chance for beginner gardeners new to gardening to join in and get planting their first garden with easy to grow crops to start saving money and eating healthier.
Fall gardening is more limited, since not as many plants thrive in the colder weather of September, October or November. But the plants that are resilient enough to survive these colder temps are that much more gratifying to harvest. In this blog post, you’ll learn everything you need to know to plant a fall garden and keep your garden going as long as possible.
Types of vegetables that can be grown in the fall
Certain groups of vegetables thrive in the cooler temperatures of fall, and many even require that cooler weather in order to germinate properly. Some can survive temps as low as 20F degrees. Coincidentally, many of these are great options for beginners to grow if you’re just starting out. Fall vegetables are fast growing, since they need to reach maturity in a short amount of time before the cold of winter sets in fully, so you’ll be reaping the rewards of your garden quickly. They are usually pretty low maintenance too, so if you’re a beginner fall is the perfect time to start gardening.
Where to buy vegetable seeds
Botanical Interests is the only place I order vegetable seeds online. The quality is unmatched, they offer a wide variety of seeds and their customer service is excellent. I did about fifty percent transplants from the nursery in the garden this year and fifty percent direct sowed to avoid dealing with a seed starting setup this spring, and everything that I direct sowed in my garden this year came from Botanical Interests, and I had zero issues with germination. It doesn’t hurt that the seed packet illustrations are pretty enough to frame either. Of course, you can also get all the flowers and summer crops you’ll want for your garden too.
Here’s my top recommendations for planting your fall vegetable garden with picks and descriptions from Botanical Interests

Leafy greens
Many leafy greens germinate best in cooler temperatures. Wait to plant these until the heat of summer has fully passed for a quick harvest and you’ll be enjoying salads well into October (or add a DIY cold frame to your garden for fresh greens all winter long)
LETTUCE
From the Botanical Interests website:
Butterhead, also called Boston or Bibb, has soft, smooth leaves perfect for carb-free wraps.
Crisphead is your familiar iceberg, which perfectly complements a BLT sandwich.
Mesclun, literally means mixture, creating a diversity of texture and color. Mesclun is harvested when young, and perfect for a multitude of culinary dishes.
Leaf lettuce is soft, with a crisp rib and can be not only green, but red or red-tipped.
Romaine lettuce is upright with broad, stiff ribs—the classic ingredient in a crisp Caesar salad.
Summer Crisp, also called Batavia, forms a loose head with green or red leaves that are sweet and crisp.
SPINACH
'Bloomsdale' is an early 1800's, dependable, open-pollinated variety. For growing tender, baby greens in as little as 28 days, you can sow seeds just 1" apart. Very nutritious—lots of vitamins A and C and iron. Grows great in a container too!
SWISS CHARD
'Celebration' is a multi-colored chard that produces uniform plants with dark green, glossy leaves. Vibrant multi-colored petioles (stems) are various shades of pink, yellow, white, and orange.

Root vegetables
Root vegetables are sweetest and juiciest when harvested in cool weather. They usually prefer warmer temperatures to germinate, so you’ll want to get your seeds planted in August for a fall harvest. They tend to store for a long time in cold storage too, and certain crops like carrots can even be left in the frozen ground over the winter and harvested in the following year in early spring - the freeze makes them even sweeter!
CARROTS
Grown and eaten in Asia and Europe 1,000 years ago, these colorful carrots are available once again. Just like the popular orange carrots, red, purple, white, and yellow carrots contain plenty of vitamin A and other healthful nutrients. Carnival Blend carrots can also be harvested when only 3"-4" long for gourmet baby carrots.
RADISHES
'Round Black Spanish', also known as 'Noir Gros Rond d'Hiver', grown in the U.S. since the 1800s, is an extra large, winter radish that adds spiciness to raw or cooked dishes; spiciness declines when cooked. Winter radishes require a shortening day length and cool temperatures to mature the edible root; sow after mid-summer and into early fall. They can be stored for long periods.
'French Breakfast' has endured in gardens for over 100 years because of its wonderful, delicate flavor. This spring radish grows best during the cool periods of spring and fall but will also withstand some summer heat!
TURNIPS
Pure white and mild, 'Market Express' is a great baby turnip in salads, crudité trays, and pickling, as well as traditional cooked turnip dishes. The roots have a smooth texture and slightly sweet, fruity flavor that upgrades homegrown meals, and the greens are also delicious. Fast growing, enjoy 2" baby-sized turnips in only 30 days, or grow them to full size (4"–5") in just 40 days.
The globe-shaped roots of ‘Purple Top White Globe Turnips’ have purple shoulders above ground and are creamy-white below the soil level.
BEETS
Aside from the health benefits, which include significant amounts of fiber, potassium, folic acid, and vitamin C, beets come in many colors. 'Gourmet Blend' includes 'Detroit Dark Red' with deep red roots and delicious dark green tops, 'Chioggia' with interior rings of bright pink and white, and 'Golden' with bright yellow flesh.

Brassicas
Plants in the brassica family produce a form of antifreeze when exposed to cold temperatures that actually causes the plants to taste sweeter. I enjoy winter kale far more than summer kale - not to mention, there’s no cabbage moth pests in the winter chewing through every leaf before I have a chance to harvest it.
KALE:
'Red Russian', brought to North America in 1885, is sweet and tender all the time, making it excellent for mesclun, garnishes, and sautéing. The red veins, wavy margins, and foliage that resembles oak leaves make 'Red Russian' as attractive as it is delicious. Harvest baby greens in just 21 days.
BRUSSELS SPROUTS
‘Long Island Improved’ produce 1"–1½", blue-green orbs that look like tiny cabbage heads, and grow tightly and densely against the main trunk of the plant. The cluster of leaves at the top of the plant give it a palm-tree-like look. Long Island Improved was developed in the 1890s, quickly becoming the garden standard, and continues to be a dependable heirloom for home gardeners.
CAULIFLOWER
‘Snowball Y’ provides flavorful, 6" snow-white heads in just 70 to 80 days. The leaves naturally curl nicely around the heads providing self-blanching and protection from sun scald. Mature heads hold well in the garden, so they don't all have to be picked at once.
BROCCOLI
'Waltham 29' grows prolific side shoots and is specially adapted for cold tolerance. Freezes well. The 4"-6", blue-green heads are delicious raw or cooked.
Sprouting broccolis, like 'Burgundy', create one moderate to small main head, but the real show starts as it begins to produce generous side shoots. Purple broccolis are known for being quite tender, flavorful, and full of antioxidants, but in most cases also a bit fickle, needing cool temperatures–not 'Burgundy'; it's tolerant of a wider range of temperatures, which means a longer harvest period. Some gardeners pinch the first main floret off as soon as it is visible to encourage more abundant side shoots.
Garden Tip
Make sure to prepare your soil by top dressing your beds with fertilizer before you add new plants to your garden, as the soil is likely depleted from all the growth of the past few months. Pest pressure should be a lot lighter in your fall garden, and you won’t need to water as often since there won’t be as much heat drying out the soil. Fall gardening is an easy and fun way to extend your growing season, I hope you’ll give it a try!

Conserve Water and Create a Sustainable Garden Using Drought-Tolerant Plants and Rainwater Harvesting
Other than soil health, access to water in your garden is a crucial ingredient in growing food successfully, and with changing weather patterns and increased frequency of droughts due to climate change posing significant challenges to water resources, water conservation becomes even more critical in regions prone to drought to ensure the availability of water during dry periods.

The Cottage Peach is reader-supported. When you purchase through links on our site, we may earn an affiliate commission at no additional cost to you. All opinions are our own.
Other than soil health, access to water in your garden is a crucial ingredient in growing food successfully, and with changing weather patterns and increased frequency of droughts due to climate change posing significant challenges to water resources, water conservation becomes even more critical in regions prone to drought to ensure the availability of water during dry periods.
According to the United Nations, about 2.2 billion people worldwide lack access to clean drinking water, and around 4.2 billion people experience severe water scarcity during at least one month of the year, and agriculture is the largest consumer of freshwater globally, accounting for around 70% of total water usage. Plus, energy is required to extract, treat, and distribute water, while water is necessary for energy production, such as cooling thermoelectric power plants. The water-energy nexus refers to this interdependence of water and energy resources. Conserving water can help reduce energy consumption and greenhouse gas emissions.
What is water conservation in the garden?
There are many ways you can collect rainwater and conserve water in the garden. You can adopt water-wise landscaping techniques, such as sustainable landscape design, collecting and using rainwater for non-potable purposes, drip irrigation, ollas and xeriscaping - the practice of designing landscapes to reduce or eliminate the need for irrigation by incorporating drought tolerant plants.
What are the benefits of including drought-tolerant plants and rainwater harvesting systems in your garden design?
By utilizing plants that don’t require heavy watering and can survive drying out a bit, you can reduce runoff (precipitation that does not soak into the soil but instead moves on the surface and is lost to evaporation), conserve water, save money on water bills, reduce maintenance, and support a healthy ecosystem. This is a great passive way to increase the sustainability of your garden with little effort - all it takes is a bit of planning. Use the list of drought tolerant plants below to start planning.
How do rainwater barrels work?
A rainwater harvesting system utilizing barrels most commonly works by capturing rain coming down your gutters off of your roof. The water can then be accessed through a spigot or hose connected directly to the barrel. You can scale this concept up with an actual collection tank, and even hook it into your home’s greywater system.
What is the best rainwater harvesting barrel?
I use this 50 Gallon Capacity Flat Back Rain Barrel. It allows us to utilize natural resources and is linkable to other barrels for increased capacity using separately sold linking kit. This rain barrel collection system is resistant to rust, mold, mildew, and rotting and has a high quality brass spigot for hose hook-up, plus an included overflow spout helps drain excess water away. There is a screen to keep out debris, insects, animals, and children. It is made off BPA-free, FDA approved resin in the USA and it is 22" L x 23" W x 30" H. It is sturdy and built to last.
What are some other ways to conserve water in the garden?
The concept of using ollas as an irrigation system goes back thousands of years and has been used in countless cultures around the world. An olla watering system is basically any type of unglazed clay pot that is buried beneath the soil with only a small amount sticking up above the surface and filled with water. You can tell that a pot is unglazed because it will be that classic terracotta red color with no shiny finish, glaze or paint. The water then leeches out of tiny holes or “pores” in the unglazed clay and is pulled through the soil to the roots of your thirsty plants using a process called soil moisture tension. This functions much the same way as osmosis, in that the water is trying to equalize to a certain level of moisture within the soil. This means your soil will never become overwatered either - if the soil is moist, the water stays in the pot until it is needed. You can grab premade ollas here or Click here for full instructions on how to make your own.
DROUGHT TOLERANT PLANTS

Thyme
Appearance: Small, fragrant leaves on low-growing, spreading stems.
Size: Typically 4 to 8 inches tall and spreading up to 12 inches.
Uses: Culinary herb, medicinal properties, ground cover.
Olive Tree
Appearance: Evergreen tree with gray-green foliage and small, white flowers.
Size: Can reach up to 30 feet tall, but some cultivars are smaller.
Uses: Edible olives and oil, ornamental tree.
Fern-leaf Yarrow
Appearance: Feathery, fern-like leaves and clusters of yellow flowers.
Size: Typically 2 to 4 feet tall and wide.
Uses: Ornamental plant, cut flowers, attracts beneficial insects.
Hummingbird Mint
Appearance: Aromatic foliage with spikes of tubular flowers in various colors.
Size: Varies by species, typically 2 to 4 feet tall and 1 to 2 feet wide.
Uses: Ornamental plant, attracts pollinators, herbal tea.
Zinnia
Appearance: Showy, daisy-like flowers in a wide range of colors and sizes.
Size: Varies by cultivar, but generally 1 to 3 feet tall and wide.
Uses: Ornamental plant, cut flowers, attracts butterflies.
Aloe vera
Appearance: Rosettes of fleshy, spiky leaves with tall flower stalks.
Size: Typically 1 to 2 feet tall and wide.
Uses: Medicinal gel from the leaves, ornamental plant.

Purple Coneflower
Appearance: Large, showy flowers with cone-shaped centers and drooping petals.
Size: Usually 2 to 4 feet tall and 1 to 2 feet wide.
Uses: Medicinal herb, ornamental plant, attracts pollinators.
Beardtongue
Appearance: Tubular flowers in various colors, on tall stems with narrow leaves.
Size: Ranges from 1 to 4 feet tall, depending on the species.
Uses: Ornamental plant, some species used in traditional medicine.
Blanket Flower
Appearance: Brightly colored daisy-like flowers on long stems.
Size: Varies by species, typically 1 to 3 feet tall and wide.
Uses: Ornamental plant, attracts pollinators.
Yarrow
Appearance: Feathery foliage with flat-topped clusters of flowers in various colors.
Size: Generally 1 to 3 feet tall and wide.
Uses: Medicinal herb, ornamental plant, attracts beneficial insects.
Stonecrop
Appearance: Succulent leaves and clusters of star-shaped flowers.
Size: Varies by species, but generally low-growing and spreading, ranging from a few inches to 2 feet in height.
Uses: Ornamental plant, ground cover, some species have medicinal properties.
Rosemary
Appearance: Aromatic, needle-like leaves on woody stems with small blue flowers.
Size: Can grow 2 to 4 feet tall and wide.
Uses: Culinary herb, aromatic properties, traditional medicinal uses.

Agave
Appearance: Large succulent with sharp, spiky leaves arranged in a rosette shape.
Size: Can grow up to 6 feet tall and wide.
Uses: Edible flower stalks, medicinal properties in traditional herbal remedies.
Yucca
Appearance: Sword-like leaves forming a clump with tall flower spikes.
Size: Typically 2 to 3 feet tall and wide.
Uses: Edible flowers and fruit, soap-making from root fibers.
Prickly Pear Cactus
Appearance: Thick, succulent pads with spines and showy flowers.
Size: Various species, but commonly 3 to 6 feet tall and wide.
Uses: Edible fruit (prickly pear), medicinal properties in traditional medicine.
Lavender
Appearance: Fragrant, grayish-green foliage with spikes of purple flowers.
Size: Typically 1 to 3 feet tall and wide.
Uses: Culinary herb, essential oil production, herbal medicine.
Sage
Appearance: Gray-green leaves with purple-blue flowers on upright stems.
Size: Typically 1 to 2 feet tall and wide.
Uses: Culinary herb, medicinal properties in traditional medicine.
Rockrose
Appearance: Evergreen shrub with showy, papery flowers in various colors.
Size: Varies by species, generally 2 to 5 feet tall and wide.
Uses: Ornamental plant, aromatic properties in potpourri.
Maximizing Water Conservation in the Garden
If you’ve already implemented drought tolerant plants into your sustainable garden design and set up a rainwater harvesting system, the next thing you should consider is if there is anywhere that you can add mulch to your garden.
Mulch acts as a protective layer over the soil, reducing evaporation and slowing down water loss. It helps to keep the soil consistently moist by preventing water from quickly evaporating under the sun and wind. Mulch creates a barrier that inhibits weed growth. Weeds compete with garden plants for water, so by suppressing their growth, mulch helps reduce water loss by minimizing competition for moisture. It acts as an insulating layer, moderating soil temperature fluctuations. It keeps the soil cooler during hot weather, reducing water evaporation, and warmer during colder periods, promoting root health and water absorption, and helps to prevent soil erosion by reducing the impact of heavy rainfall on the soil surface. It absorbs and disperses the force of falling water, preventing runoff and allowing water to infiltrate the soil more effectively.
Organic mulches, such as compost, break down over time and improve the soil structure. This enhances the soil's water-holding capacity, allowing it to retain moisture for longer periods and reducing the need for frequent watering, and when water is applied to the garden, mulch helps to slow down the flow and absorption of water, preventing runoff. This allows the plants to utilize more of the water provided, reducing water waste.
To maximize the water-saving benefits of mulch, it is essential to apply an adequate layer (2 to 4 inches) around plants, leaving space around the stem to prevent moisture-related issues. Additionally, selecting organic mulch materials, such as wood chips, straw, or compost, provides the added advantage of improving soil health over time.
I encourage you to take action in the fight against climate change by incorporating these elements into your landscape design to save water, reduce your environmental impact, and create a healthier ecosystem!

Acupressure For Pain And Anxiety: Pranamat ECO Honest Review
When my arthritis spread to my spine last year, it was crippling. I lost sleep every night tossing and turning, completely unable to relax. This vicious cycle of pain leads to stress which releases cortisol, causing even more pain and discomfort. This wasn’t the kind of pain that would go away if I took enough anti-inflammatory pills, it was all encompassing to the point where I’d give up on sleep at 3 or 4 in the morning and just go lie on the couch until the sun rose. It’s hard for me to even type this, remembering how much time I spent crying and wishing for the pain to stop. It felt like my identity had been stripped away and all that was left was my pain. From the outside, I looked “too young to be sick”, but inside I was suffering.
In dark times like this, you learn very quickly that your vulnerability will be exploited by anyone who thinks they can turn your pain into profit. I’ve always been a conscious consumer and didn’t want to fall into any of these traps. But I’ve also always leaned towards the holistic side of things and wanted to find options for pain relief that aligned with my desire for natural alternatives while still providing proof of their effectiveness.
As you’ll see, the benefits of acupressure mats are widely studied and there is plenty of research to back up their claims. So I decided to give it a try. And what I found was life-changing. Or in my case, life-giving.
How does acupressure work?
The 10,000+ plastic spikes on the Pranamat ECO lotus flowers help to stimulate blood flow, increasing circulation, releasing muscle tension, opening narrowed blood vessels caused by tension that may result in headaches, spreading soothing heat, kick-starting cell regeneration required for healing and encouraging the body to suppress cortisol (the stress hormone) and release endorphins (a natural painkiller), resulting in a euphoric feeling.
What is acupressure vs acupuncture?
Both acupressure and acupuncture are holistic and drug-free approaches to health. Acupressure uses targeted non-invasive pressure points on the surface of the skin while acupuncture uses extremely thin needles set into the skin. Acupressure can be done at home to deliver an at home massage every day while acupuncture must be performed by a licensed practitioner.
How often should you do acupressure?
Pranamat recommends using your acupressure mat at least once a day for twenty minutes. You can start off at 5 or 10 minutes until you get used to the sensation since it can be quite intense!
Does acupressure Work for joint pain?
Yes, acupressure mats are excellent for relieving joint pain, and if you’re wondering if acupressure for back pain is effective, it is! The effectiveness of Pranamat ECO is clinically-evidenced. Two studies were funded by the European Union in 2014. In this study, 97% observed total muscle relaxation, improved posture, and a stronger-feeling spine, 93% observed a total elimination or significant reduction of back pain and 92% reported that they would continue to use Pranamat ECO.

The first part of the study consisted of rigorous laboratory testing. The team of doctors came to the conclusion that use of the Pranamat ECO acupressure mat:
Significantly increases the intensity of blood flow in the circulation of the skin;
Accelerates cell metabolism;
Reduces inflammation of the muscles and joints;
Reported elimination or dramatic reduction in pain.
In the second part of the study, they showed that after 30 days of using the Pranamat ECO acupressure mat patients experienced:
Improved oxygenation of tissues;
Improved muscle-tone;
Increased cell metabolism;
Improved physical and emotional health.
It’s clear that there are many acupressure benefits for both mental and physical health.
What is Pranamat ECO made from?
The inner padding of the Pranamat ECO acupressure mat is made from sustainable coconut fiber as a supportive filler that is naturally resistant to dust, mold and odor. The removable exterior is made of sustainable linen and uses bespoke natural dyes. All materials used in the Pranamat ECO are natural and ethically sourced, custom-made and have passed rigorous quality tests. The STANDARD 100 certificate independently awarded by OEKO-TEX® guarantees that Pranamat ECO is free from harmful substances and safe for intensive skin contact.
Is Pranamat ECO sustainable?
Pranamat ECO is the only acupressure mat made using energy from only renewable sources and all materials are zero waste and sourced locally. The coconut fiber filler is a by-product from the food industry. The 10,000+ pointed spines on the lotus flowers designed to increase blood and lymph flow from the very first minute of use are made from recyclable plastic that uses less energy and fresh water and produces fewer emissions. This recycled plastic is completely smooth and non-porous and utilizes special heat adhesion technology to attach the lotus flowers to prevent any exposure to toxic glues, acetone or chemical fumes. Even the packaging and user guide are made with recycled and biodegradable materials.

Is Pranamat ECO ethically manufactured?
This acupressure mat is produced by hand using ethical production methods in a creative, egalitarian and diverse work environment in Latvia.
Does acupressure help anxiety?
Yes, acupressure mats may help relieve anxiety. Clinical studies have shown that using Pranamat Eco for 30 days helps relieve stress, improves mood and general well-being.
Does acupressure affect blood pressure?
More research is needed, but one study suggests acupressure mats lower your blood pressure by stimulating blood circulation and relaxation.
How big is the Pranamat ECO?
The surface of the Pranamat ECO acupressure mat is larger than most acupressure mats, allowing it to cover your entire back. This acupressure mat measures 28.7 × 17.7 inches.
How fast does acupressure work?
I noticed the benefits of this acupressure mat within the first few minutes of the first massage, starting with a sensation of warmth in the skin. About ten minutes in, a deep sense of calm and peace rolls over me and quiets my mind.
Pranamat ECO Acupressure Mat Review
I’ll be honest; using the Pranamat Eco can be an intense experience at first. When I laid down on the acupressure mat for the first time, the tingling sensation was very strong and I had to take some deep breaths to settle in. At first, my skin felt very hot as the spikes pressing into my back increased my circulation, but after the first two or three minutes this heat transforms into a soothing warmth. If you’re nervous about using the mat directly on your skin the first time, you can try it while wearing a thin cotton t-shirt at first just to get used to it. But once the initial surprise subsides, you will find your mind and body relaxing dramatically. I suffer from back and joint pain due to my chronic illness as well as generalized anxiety, and the near-immediate effects I felt were a release of the muscle tension I hold all day every day in my body and a quieting of my mind. Usually my thoughts are going off in a million directions every minute, but after using the Pranamat ECO acupressure mat for twenty minutes I felt clear headed and calm. The more than I use my acupressure mat, the faster I am able to settle into that calm headspace. The initial sensation is less intense over time as your body adjusts (which doesn’t dull the benefits at all!) so I can truly lean into the experience right away.
I use my Pranamat ECO at night just before going to bed to combat insomnia so I can sleep deeply without interruption. Since acupressure has such a calming effect on my sleep routine, I am more energized and ready to take on the day the next morning.
I also like to keep my mat nearby while I’m working all day or reading in the evenings so that I can get a quick massage while I work or read. You can use this acupressure mat while laying down or place it in your desk chair. I also use the foot mat while sitting at my desk or cooking dinner to relieve foot pain and recharge.
Here’s the thing…there’s a lot of cheap knock-offs of the Pranamat ECO - and I’ve tried them! They don’t compare. It’s like the difference between sleeping on an air mattress and an actual bed. I wanted to share this because while it may seem like a simple thing to replicate (just add spikey bits to a piece of foam and fabric) there’s more going on in the construction of this mat than meets the eye, from the density of the inner coconut fiber mat to the thickness and shape of the lotus spikes. Most important to me is the fact that Pranamat has been awarded the STANDARD 100 certificate by OEKO-TEX®, which guarantees that Pranamat ECO is free from harmful substances - so important for a product that comes in intensive contact with your skin.

USE code 'thecottagepeach
for The best offer on Pranamat + a 5 year warranty and 30 day free trial!
Individual results may vary. Products mentioned and texts written on this website are not intended to diagnose, treat, cure or prevent any disease and do not replace medical advice. Advice on the treatment or care of an individual patient should be obtained through consultation with a physician or trained healthcare practitioner with access to examine the patient and/or is familiar with the patient's medical history.


![The Power of Nature: How To Make Infused Oregano Oil for Your Health and Wellness [Recipe]](https://images.squarespace-cdn.com/content/v1/60e85024dc86d643da81c96a/1682625337753-AFI1M6MRRMDQ5CBNY2TX/unsplash-image-Fl2Ki3_GZIU.jpg)


Caraway Home Non-toxic Cookware Review
I know, these days it feels like you can’t make it to lunchtime without learning that another household product that you’ve been using every day for your whole life is actually full of toxic chemicals. But this one is a big one, so I hope you’ll stick with me: There’s a very good chance if you have non-stick pots and pans that aren’t ceramic, they could be contaminating your food with toxic chemicals while you cook.
The Cottage Peach is reader-supported. When you purchase through links on our site, we may earn an affiliate commission at no additional cost to you. All opinions are our own. Products in this post were gifted.
I know, these days it feels like you can’t make it to lunchtime without learning that another household product that you’ve been using every day for your whole life is actually full of toxic chemicals. But this one is a big one, so I hope you’ll stick with me: There’s a very good chance if you have non-stick pots and pans that aren’t ceramic, they could be contaminating your food with toxic chemicals while you cook.
Here’s what Caraway Home has to say about toxins in your cookware potentially leaking into your food:
A popular material that has been used in the past in such non-stick cookware is Teflon. This synthetic chemical is also known as polytetrafluoroethylene (PTFE). Teflon is often used to coat a variety of products, including cookware, due to its frictionless qualities that provide a non-stick surface.
The issue with this material is that it uses perfluorooctanoic acid (PFOA) during its production. This chemical has been linked to numerous health conditions, including cancer, thyroid disorders, and more. Other chemicals, such as per-and polyfluoroalkyl substances (PFAS), are found in this material and can cause similar health issues as PFOA.
When cooking with non-stick cookware that has these chemicals, you run the risk of accidentally ingesting it. This can happen if the coating gets scratched, as it could flake off while in use and get consumed.
Additionally, when Teflon is heated over 570°F, it begins to break down, releasing the toxic chemicals into the air, which can then be consumed.
Now, most of us aren’t heating our pans to 570°F, but I’d wager that your pots and pans probably have a few nicks, chips and scratches in them - I know ours do. And while this exposure is happening in tiny amounts, there is still the potential for a negative compounding effect when you cook with Teflon coated products on a daily basis that can’t be ignored.
We’re all cooking from home more than we used to
Since the cost of, well, everything, just keeps going up, I know we aren’t the only ones trying to cook more from scratch to combat rising food costs and control our budgets. With more people cooking at home in recent years, the safety of our cookware is taking center stage. After all, what’s the point in spending extra on organic, locally grown produce if all the health benefits are going to be tainted by toxins leaching into your finished recipe? And maybe now that you’re cooking more food at home you’re noticing that that dented and scratched fry pan you’ve had since college isn’t really giving you the results you expect in the kitchen. The last thing we need with rising food prices is to waste perfectly good food simply because it cooked unevenly and burned on an old fry pan.
Is Caraway Home Cookware Easy To Clean?

Caraway home cookware is easier to clean than traditional pots and pans, since the ceramic coating forms a naturally slick frictionless surface that resists stuck on messes. The finish feels almost polished; it is so smooth. Personally, as someone with chronic illness and fatigue, I dreaded lifting clunky heavy cookware in the sink to scrub it forever, so finding a cookware set that is easy to clean makes a huge difference in how draining it is for me to wash and dry my dishes. It also reduces the amount of water and soap I need to use to clean my pots and pans - another win for the environment since any way we can reduce our consumption of packaged products like soaps is a small way we can help the earth.
The ceramic coating also cooks more evenly, meaning you are less likely to ruin your recipe by overcooking certain areas. Less burned food means less food waste too, making this an eco-friendly option for reducing food waste in the kitchen.
Is Caraway Home Cookware Really Non-Toxic?
Yes! Ceramic cookware is totally safe. Caraway home even offers access to their full testing reports showing the safety of their products. It really makes you wonder - if something as simple as ceramic is more effective than these leading companies using toxic products to coat their pans, why do Teflon coated pans even exist? I think we’ll be seeing the end of this kind of toxic cookware in our lifetime, now that so many better options like Caraway Home are available for cooking.
Is the Caraway Home Cookware Set Durable?
If you’re worried because the word ceramic makes it sound like this cookware may break easily, rest assured that ceramic cookware isn't actually made 100% of clay. The ceramic in these pots and pans is a durable multi-layered coating that is put on top of a metal core. We are far from gentle with our pots and pans and our cookware set still looks as good as the day that we bought it. Now, it’s still recommended that you treat your ceramic cookware with care. But that’s easy to do when you no longer have to aggressively scrub your pots and pans in order to remove burnt food residue!
What pots and pans are included in the Caraway Home Cookware Set?

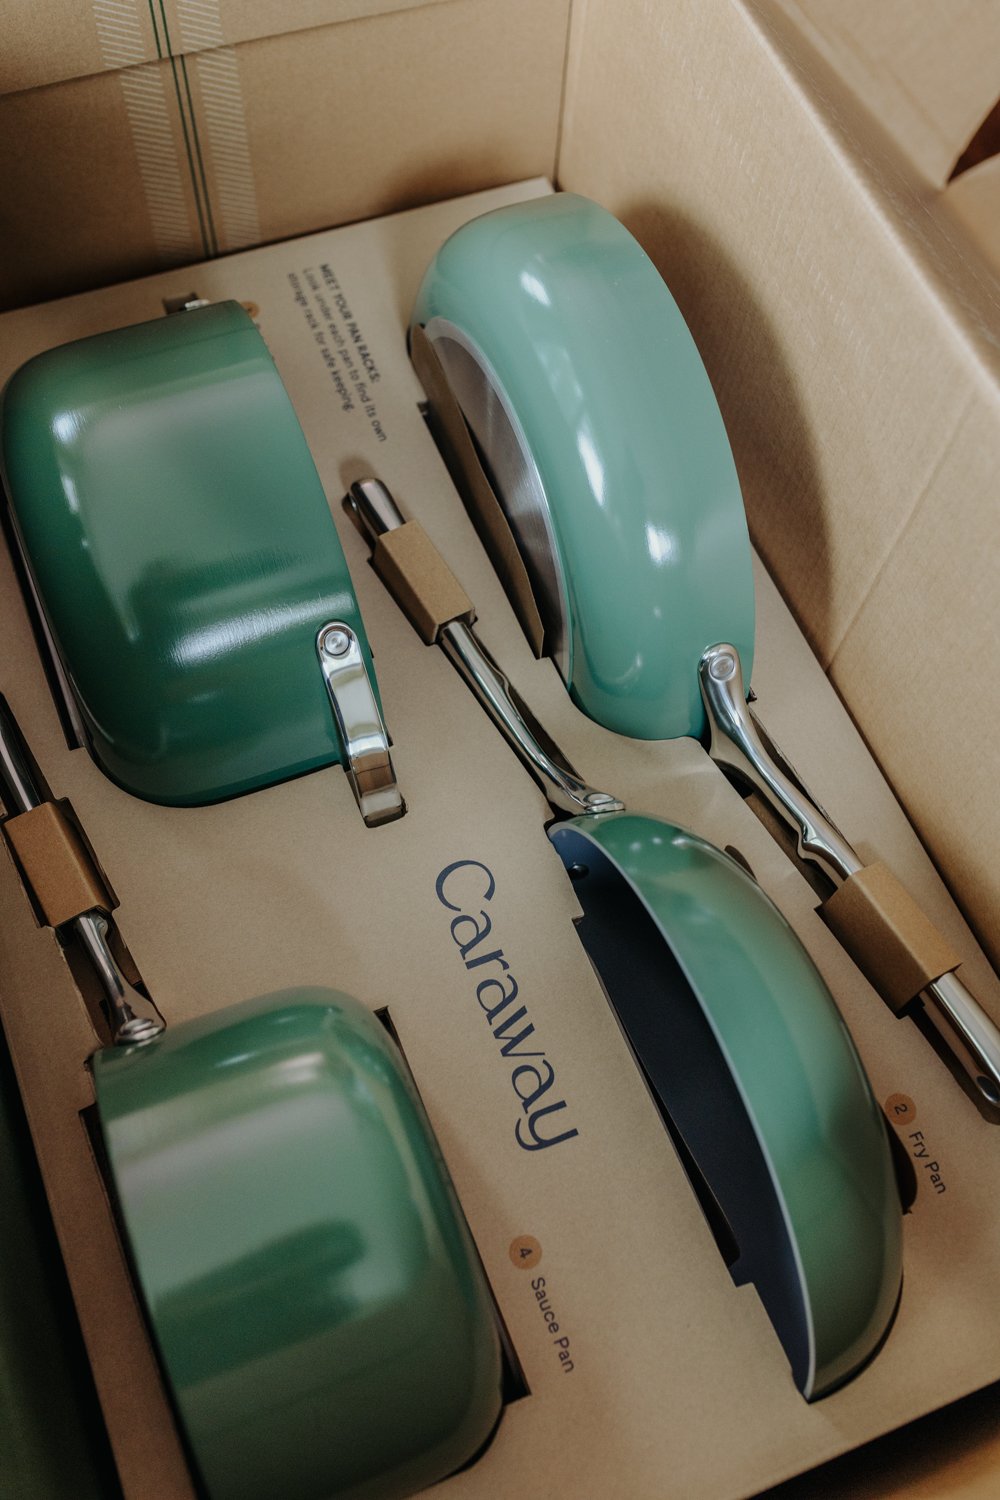
When you purchase the full set, you will receive the 10.5” fry pan, the 3 quart sauce pan, the 4.5 quart saute pan and the 6.5 quart dutch oven. You can also buy each piece individually if you want to build your collection over time. They just released minis of the fry and sauce pans too, which are perfect for smaller kitchen projects like easy-over eggs and gravy.
You can choose from a rainbow of colors to match your kitchen decor including cream, navy, sage, perracotta and marigold. I went with the sage for our kitchen since green is my favorite color and I love how earthy and neutral it is at the same time.
The full set also includes their custom magnetic pan rack and canvas lid holder, eliminating the frustration of trying to keep your pots and pans organized and separate while providing a beautiful system that can even be displayed on your countertop if you want. The canvas lid holder can be affixed anywhere - inside a cabinet door, on the side of your fridge or even on the outside of your end wall cabinet or walls.
Can you use Caraway Home Cookware on an induction stovetop?
Yes - Caraway pots and pans are cooktop agnostic, which means they will work on any type of stove - gas, electric, or induction! This was a big reason I wanted to make the switch, since once our electric range dies we plan to switch to an induction range for the environmental benefits, safety features and ease of cooking.
Caraway Home Cookware Review
After testing the Caraway Home Cookware set in my own kitchen (remember, we eat mostly from scratch vegetarian meals so we cook for almost every single meal) I can confidently say that Caraway offers the best non toxic cookware in 2022. These are really the best non-stick, non-toxic pans you can get.

We tested our pots and pans by cooking a wide array of dishes, from eggs for breakfast to skillet dinners. We even put them directly into the oven (they are oven-safe up to 550F), and found they were easier to clean and resulted in a more even cooking than the competition. That combined with the peace of mind I get knowing that my cookware isn’t contaminating my food has made these one of my top choices for cooking. The non-toxic frying pan gets the most use by far, since we can make such a huge variety of dishes with it. While the pans aren’t necessarily lighter than their competition, since it’s so easy to clean dishes are piling up in the sink far less often than they once did and I’m able to easily grab a pan for dinner than I already used once that day for breakfast without the dreaded sinking feeling you get when you remember you forgot to soak it in the sink.
I wasn’t sure I’d need them, but the magnetic pan rack and canvas lid holder have been an unexpected plus, since I no longer have to move a million other pans out of my way to get to the one I need. They slide easily from the rack with little additional effort, and easily fit into our space so I didn’t have to rearrange the entire kitchen to make them work. One small note - depending on the style of your cabinets, if there is a shelf that is flush with the front of the cabinet box that you are looking to hang your lid holder on you won’t be able to fully close the cabinet door. We solved this by trimming down the shelf, but there’s many other places you could hang your lid holder such as the end of a wall cabinet or on the side of your refrigerator.
Overall, if you’re ready to replace your toxic non-stick pots and pans with something safer I’d definitely recommend the Caraway Home Cookware Set. They also have a full line of bakeware including baking sheets, loaf pans and muffin tins, as well as a super cute tea kettle which I think would make the perfect housewarming gift. We’ll be using our set for years to come, and adding on to the collection as needed. I have a collection of recipes coming up that feature these pots and pans to get you inspired to get in the kitchen and get cooking! I’ll add those to the post below as they are published.
Click here to get your Caraway Home Non-Toxic Non-Stick Cookware Set today.
![Make This Safe Oil Lamp With a Mason Jar and Olive Oil [Tutorial]](https://images.squarespace-cdn.com/content/v1/60e85024dc86d643da81c96a/4b41f060-48ac-4a43-9513-da483e392f3b/December+2022+The+Cottage+Peach-8.jpg)
Make This Safe Oil Lamp With a Mason Jar and Olive Oil [Tutorial]
February’s of my childhood often are filled with dim memories of snow storms and subsequent power outages, leading to inevitable candlelight dinners cooked over the fireplace. The warmth and flicker of the various fires we had lit both small and large reign in my recollection of those times. I can still smell the matches burning off after being extinguished, the light smoke wafting through the air to settle on clothing and blankets. Despite the bitter weather outside and the temporary lack of electricity, we were never cold. We had hats, sweaters, blankets, and each other.
Nowadays like many others in this community I find solace in the light of a candle. The eternal dance of flame is grounding and comforting, a reassuring hand when things feel like they may never warm back up again. I’ve experimented with candle making of all kinds - dipped beeswax tapers, pillars and hand poured jars of soy wax to name a few. So it was about time to try my hand at perhaps the easiest DIY flame source you can create - the DIY mason jar oil lamp.
The Cottage Peach is reader-supported. When you purchase through links on our site, we may earn an affiliate commission at no additional cost to you. All opinions are our own.

While the days may be slowly but surely lengthening, we are still very much in the winter season here in New England. February’s of my childhood often are filled with dim memories of snow storms and subsequent power outages, leading to inevitable candlelight dinners cooked over the fireplace. The warmth and flicker of the various fires we had lit both small and large reign in my recollection of those times. I can still smell the matches burning off after being extinguished, the light smoke wafting through the air to settle on clothing and blankets. Despite the bitter weather outside and the temporary lack of electricity, we were never cold. We had hats, sweaters, blankets, and each other.
Nowadays like many others in this community I find solace in the light of a candle. The eternal dance of flame is grounding and comforting, a reassuring hand when things feel like they may never warm back up again. I’ve experimented with candle making of all kinds - dipped beeswax tapers, pillars and hand poured jars of soy wax to name a few. So it was about time to try my hand at perhaps the easiest DIY flame source you can create - the DIY mason jar oil lamp.
Olive oil lamps are ubiquitous at archaeological sites across the Mediterranean region. Unsurprisingly, the most common oil used in the Mediterranean region was olive oil. In 2022, a 2300 year old olive oil lamp was unearthed in the West Bank. Clay lamps that used oil as a fuel source appeared during the Bronze Age around the 16th century BC and were ubiquitous throughout the Roman Empire. Thanks to all this evidence, there’s reason to believe that oil lamps appeared at the very dawn of human history. But we don’t need to go back in time to make our own DIY oil lamp. In fact, this simple mason jar craft can be made in minutes using items you may already have at home.
How oil lamps work:
Floating wicks come in a pack with the floating portion separated from the wick. You’ll place the wick in the hole in the center of the floating disk piece with half the wick on each side of the disk. This way, when you place the wick in the oil lamp, the oil will be drawn up through the wick and be vaporized and burned by the flame.
Are oil lamps expensive?
Not at all. Since one tablespoon of oil can burn for two hours in your lamp, it is much cheaper than most candles. This is a great addition to your emergency supplies, as well as being a beautiful addition to your table. For storm prep, all you need to make sure you have is a pack of the floating wicks, some olive oil, a mason jar and water and you can keep your home safely lit without electricity during a power outage.
Are oil lamps safe?
The danger of oil lamps comes from the possibility of spilling. If the lamp were tipped over while burning, the spilled oil would all catch fire all at once on whatever surface it spilled onto. Thankfully, olive oil has a very high flash point which means it’s not super flammable. Plus, we’ll only be using a small amount of oil - the rest of the liquid in our mason jar will be water. If our DIY oil lamp tipped over, it should extinguish itself immediately. That said - it’s always important to practice fire safety around any type of open flame. Always burn within sight, keep away from pets and children and away from any flammable materials. Never move your oil lamp while still burning. I assume no responsibility for any damage that may occur due to misuse of your diy olive oil lamp.

How to make a DIY Mason Jar Olive Oil Lamp:
The options are endless when you make your own olive oil lamp, and you’ll find inspiration below for different ways to turn your lamp into beautiful mason jar decor. But let's cover the basics first!
Supplies:
Mason jar (any size, I used a pint jar)
Floating wicks
Olive oil
Water
Decorative items to submerge in the water
Instructions:
Fill your mason jar until there is about half an inch of empty space at the top
Add any decorative items that you can submerge in the water - just be sure not to choose anything that will float too close to the surface and disrupt the flow of oil to the wick.
Pour olive oil into the mason jar on top of the water until the oil layer is about a quarter inch thick
Gently place the floating wick on top of the oil surface, light and enjoy your olive oil lamp.
Ideas for how to decorate your mason jar olive oil lamp:
Christmas mason jar olive oil lamp
Red holly berries, pinecones, cranberries, vintage ornaments and evergreen clippings are great for the holiday season. Choose materials in natural shades of green, red and brown and play with mixing different textures.
Fall mason jar olive oil lamp
Fall foliage in bright oranges, reds and yellows can be suspended in the water. Better yet, replace the mason jar with a hollowed out mini pumpkin!
Winter mason jar olive oil lamp
Birch bark from fallen branches, acorn caps, evergreen clippings and even twigs will capture the chill months of winter in a cozy fashion.
Spring mason jar olive oil lamp
Fresh crocus blooms, dandelions, tulips, eggs and apple blossom branch clippings will all celebrate the season of growth and fertility.
Summer mason jar olive oil lamp
Embrace the season of abundance with fresh herbs from the garden like mint and basil, cherry tomatoes, sunflowers, lavender, fresh fruit and berries.
Beachy mason jar olive oil lamp
Bring the beach bonfire to you with sand, seashells and seaglass (responsibly sourced if you can’t obtain them yourself of course)
Citrus mason jar olive oil lamp
Exactly what it sounds like - but no need to dump a few lemons in chaotically. Shake things up with different shapes, sizes and a variety of citrus fruits including lemons, oranges or clementines (sliced or whole) and a bit of green with sliced cucumber rounds or fresh leaves.
Floral mason jar olive oil lamp
Celebrate whatever is growing most abundantly in your flower beds at the moment and suspend your favorite cut flower in your lamp - try hydrangea, poppies, bleeding heart, sweet pea, roses, peonies or lilies. You can leave them whole, or just use the petals.
Crystal mason jar olive oil lamp
Place your favorite crystals in your oil lamp - just be sure not to use crystals that can dissolve in water - As a general rule of thumb (with some exceptions), crystals ending with “ite” tend to dissolve in water. Try crystals like Clear Quartz, Rose Quartz, Amethyst, Smokey Quartz, Citrine, Agate, Carnelian, Rutilated Quartz, Jasper, Tiger's Eye, Aventurine or Moonstone.
Mason jar decor is one of my favorite ways to update our home decor, because we always have the jars on hand and they are such a great blank slate from which you can creatively experiment with little effort.