
BACKYARD GARDENING MADE SIMPLE
![How to Build a Bird Feeder [Tutorial]](https://images.squarespace-cdn.com/content/v1/60e85024dc86d643da81c96a/1674059559898-89P7CA2E2E9QRBF8WBHT/unsplash-image-_m66w5WWVO4.jpg)
How to Build a Bird Feeder [Tutorial]
Like many young people, I thought my grandpa might have some kind of magic. You see, he was one of those people who seemed to be friends with the birds in a way not many of us are. He could merely step out into his yard and with a few quick whistles summon all varieties of backyard birds to his palm or his shirt pocket, where they would enter into a conversation of chirps and intense eye contact that fascinated me. To be honest, looking back I’m still fairly certain that it was some sort of magic. Even through the rose colored glasses of childhood, I know deep in my bones that he understood something of nature that many people do not. Could he have known that these moments he spent with me and the birds, carving whistles from fallen horse chestnuts, would become a part of my own origin story as a naturalist? Far from an expert though I might be, he showed me what it meant to be a student of nature long before I grew my own garden or made my own companions in the rabbits and toads that keep me company as I sow, weed and water. I learned from him that all wildlife has value, no matter how small. That bird song deserves our attention. And of course, I learned that feeding birds is just plain fun.
Why have a bird feeder? Here’s some of the benefits of backyard birds in your yard:

The Cottage Peach is reader-supported. When you purchase through links on our site, we may earn an affiliate commission at no additional cost to you. All opinions are our own.
Like many young people, I thought my grandpa might have some kind of magic. You see, he was one of those people who seemed to be friends with the birds in a way not many of us are. He could merely step out into his yard and with a few quick whistles summon all varieties of backyard birds to his palm or his shirt pocket, where they would enter into a conversation of chirps and intense eye contact that fascinated me. To be honest, looking back I’m still fairly certain that it was some sort of magic. Even through the rose colored glasses of childhood, I know deep in my bones that he understood something of nature that many people do not. Could he have known that these moments he spent with me and the birds, carving whistles from fallen horse chestnuts, would become a part of my own origin story as a naturalist? Far from an expert though I might be, he showed me what it meant to be a student of nature long before I grew my own garden or made my own companions in the rabbits and toads that keep me company as I sow, weed and water. I learned from him that all wildlife has value, no matter how small. That bird song deserves our attention. And of course, I learned that feeding birds is just plain fun.
Why have a bird feeder? Here’s some of the benefits of backyard birds in your yard:
Pollination
Backyard birds do much of the same work as the insect pollinators we are all familiar with when it comes to spreading seed and supporting plant growth - both good and bad. For example, the reason you almost exclusively find poison ivy along fences and underneath trees is because birds eat the berries, digest them and then “plant” them while sitting on branches or fence posts.
Pest control
Birds eat bugs - the largest ones eat rodents too. Aside from the beloved garden worm, they also eat flies, ants, moths, aphids and ticks…and if you’re luckier than me, they’ll even help with your cabbage moth problem by eating the larvae before they have a chance to totally decimate your kale crop (ask me how I know)
Weed control

Birds eat seeds, including weed seeds! Birds can help manage invasive species that you do not want growing on the land with their snacking. This is also why it is so important not to completely clear-cut your dead garden for the fall and winter - leave it up as a vital food source for the local wildlife and cut back in the spring before new growth forms instead.
Conservation
Creating an environment that is inviting and safe for backyard birds offers us the chance to give back through conservation of these important species. The more trees and shelter your can provide throughout the land, the better for all your neighborhood birds (and other wildlife!)
Education
What better way to teach your children the importance of wildlife than to observe it in your own backyard, as I did as a child with my grandfather.
Bird song
I have yet to meet a person who doesn’t enjoy the warbling, chirping, sing-songing symphony of bird song in the summertime.
What is a bird feeder?
A bird feeder is some type of container hung from a high up spot and filled with bird food that allows birds to land and eat safely. A bird feeder can be made of many different things - read on for some of my favorite DIY bird feeder ideas!
So you want to know how to build a bird feeder. Thanks to decades of experience, I’ve made my fair share of zero waste bird feeders for free, with repurposed materials you probably have in your house right now. Here are some of my favorite DIY bird feeders you can make today:
Fruit string garlands: This is a simple bird feeder. Pop some popcorn the night before and leave it out so it gets a bit stale since it’s easier to thread this way. The next day, cut up various fruits (apples, oranges and blueberries work well) With a needle and thread, pierce through your fruit chunks and popcorn in an alternating pattern until you have a good length of garland. Simply drape your finished garland over a couple of branches and you’re done.
Empty can on its side: Create a bird feeder station by piercing a hole in the bottom of your empty tin can and thread a piece of sturdy twine all the way through the inside of the can, through the opening and the hole you created, making a large loop over the top. Secure the twine so that the can can lay on it’s side when hung and add a layer of birdseed to the “floor” of the can.
TP roll covered in peanut butter + seeds: Kids love this easy bird feeder! It’s a little bit messier, but easy and fun. Spread a thin layer of peanut butter over the exterior of the toilet paper roll. Pour your birdseed into a tray or baking sheet and then slowly roll the tube in the seeds to coat the outside with seed. Thread a piece of sturdy twine through the interior of the tube and secure, making a big loop from which to hang your TP roll!
Cookie cutter ornament bird feeder: Combine 2 envelopes of gelatin with ⅔ cups boiling water. Stir 2 cups of birdseed into this and press firmly into your cookie cutters. Use a toothpick to form a small hole that you can pass twine through to hang your ornament outside. Allow to dry overnight.
Pinecone bird feeder: Similar to the TP roll craft above, you’re going to spread a thin layer of peanut butter over the pine cone and roll in seeds on a tray. Securing a piece of twine may be a little trickier on this one - but just try and wrap it around the top of the pinecone and form a loop for hanging.
Hollowed out orange with toothpick ledges: Cut your orange in half and scoop out the inside. Save for a snack for later, or incorporate into the fruit garland idea above. Poke 8 holes evenly around the cut edge of the orange. Thread twine through 4 of these holes and have them meet at the top to form a hanging basket. Poke toothpicks in the remaining 4 holes to serve as ledges the birds can stand on. Fill the empty orange with seed and hang.
Egg carton: Take the lid off of an egg carton and poke holes in the four corners of the bottom piece. Thread twine through the four holes you just made to create hanging loops. Pour bird seed into the divots that the eggs would normally rest in and hang! I think this is the best bird feeder you can make with minimal effort.

It’s important to be mindful about choosing a bird seed blend that is meant for birds in your area when considering a bird feeder DIY. If possible, choose an organic variety to avoid exposing your bird neighbors to unwanted pesticides or other chemicals. Bird seed is the safest thing to feed your backyard birds. Here are some foods that aren’t safe for backyard birds:
Bread
Spoiled seed
Chips
Anything with sugar
Honey
Salt
Milk
How to keep squirrels away from bird feeders

Let’s be honest; you’re going to have a tough time finding any bird feeder that is completely squirrel-proof, and DIY bird feeders do not have any extra cages or protection on them to help in that regard. I accept that squirrels will probably take more than their fair share from the snack I create, but you can try a couple of things to deter squirrels from investigating your bird feeder: Switch up your seed to see if there’s a variety they aren’t interested in (squirrels do not like safflower seed, nyjer seed, and white proso millet), try mixing cayenne powder into your bird seed (birds are not sensitive to the heat of capsaicin but squirrels are!) keep the ground clean of spilled seed underneath the bird feeder and place your bird feeders away from trees.
Where to place a bird feeder
According to Yard Envy, you should hang your finished DIY bird feeder in a place where your visiting birds feel safe from predators. Avoid open and noisy areas and hang your bird feeders at eye level or a little above. Do not hang feeders too close to any place where squirrels can jump on them, or so low that they are within a cat's reach.
How to attract birds to your feeder
According to Wild Birds Unlimited, birds generally find their food by sight. Placing your feeder where it will be visible to them should decrease the time it takes for birds to start feeding. Sometimes sprinkling some seed on the ground or on top of the feeder will let the birds know that you are open for business.


![The Power of Nature: How To Make Infused Oregano Oil for Your Health and Wellness [Recipe]](https://images.squarespace-cdn.com/content/v1/60e85024dc86d643da81c96a/1682625337753-AFI1M6MRRMDQ5CBNY2TX/unsplash-image-Fl2Ki3_GZIU.jpg)

![7 Tips to Survive a Long Winter[Nature Activities]](https://images.squarespace-cdn.com/content/v1/60e85024dc86d643da81c96a/6de8ff70-4e24-4023-9bc0-ca25cc9357e1/PXL_20211209_122333855.jpg)
7 Tips to Survive a Long Winter[Nature Activities]
Winter is a fleeting season for some, but long here in the Northeast. Long enough to require that we adapt and find space in our routines for signals that pass the time, as well as ways to enjoy it for what it is.
New England winters force us to turn inward, to find ways to slog through the darkest days, to connect with nature when that connection is scarce.
How to Survive a Long Winter
Winter is a fleeting season for some, but long here in the Northeast. Long enough to require that we adapt and find space in our routines for signals that pass the time, as well as ways to enjoy it for what it is.
New England winters force us to turn inward, to find ways to slog through the darkest days, to connect with nature when that connection is scarce.

They feel like crunchy snow underfoot, stinging wind on your cheek, and the numbing cold in your fingertips, and sound like the patter of sleet on the windows, slush under car tires, and crackling fires.
There is a hush in the air with the sound of insects and busy birds gone from the land, for the time being.
I can smell the snow on the air, and see it building in the dense shapes of the clouds above.
Snow clouds always look a little bit different than regular clouds. There's a slight glow within the deep gray of them that promises nights when snow muffles the sounds outside, ice coats the roof and we say "winter is here" tucked in and insulated from the chill, mugs full of hot chocolate.
Living in a place where winter is the longest season of our year when I don’t particularly love winter has come with its challenges.
My arthritis always is worse during the winter months, leaving me struggling more often with pain and fatigue that limits my ability to enjoy many activities.
I’ve had to find new ways to pass the time - simple, small things that make the winter more enjoyable without pushing myself. But in a way winter has taught me an important lesson; it really is the little things which matter most, which bring us the most light and joy on our darkest days.
We forget this easily, living in a fast paced and unforgiving world that is constantly telling us we need more more more to be happy. Winter does not play this game. Winter knows that pausing and stepping back forces us to focus on the things that really matter in our lives.
We truly begin to absorb the lessons of slow living when winter arrives to wrap us in her embrace.
With winter being so long, finding ways to pass the time and survive this cold and grey season is essential. Here are my top tips for small ways to survive the long winter this year:
#1 Let’s Get Cozy: Snuggle Up
There are a few non-negotiables required to make a home cozy. The first, of course, is blankets. Lots and lots of blankets! I have a bit of a blanket obsession, to tell the truth. I want heavy blankets, wool blankets, knit blankets, and quilts. Having the choice of a few well made, well chosen and well loved blankets is one way I give myself a little gift, an opportunity to feel cared for.
I love to collect blankets from antique stores, thrift stores, and occasionally even friends’ houses, if they are feeling generous! And, of course, there’s not much nicer than knitting a blanket myself on long winter nights.
We drape blankets over every available surface, just in case a sudden chill takes hold. Every chair arm and couch back, plus the ends of our beds, is covered in blankets in the winter. A blanket ladder, cabinet, trunk or chest are some other great ways you can store or display your blanket collection.
Of course, if you find yourself with an overabundance of blankets, there are many people in need who would benefit from your donation, and animal shelters that need a cozy spot for their four legged friends to find a reassuring moment of peace. Although it may be hard to believe from what I’ve written thus far, I do think there is such a thing as too many blankets. The same goes for coats - don’t forget to dig through your coat closet each year and donate any well-loved pieces that you no longer need. No one should go cold in the winter and this is an easy way you can help.
#2 Add warmth with fire
A flame of some sort will instantly bring peace and warmth to your day. Any sort of flame will do. The flickering of a hand poured soy candle on your kitchen counter, a crackling fireplace filled with wood logs, a pellet stove with a glass front or simply some beeswax candles are all good places to start.
When the sun sets as early as three or four o’clock in the afternoon, the warmth of the light, the dancing shadows, and the opportunity to roast marshmallows are all absolutely necessary to a cozy winter. The ambiance of a flame cannot be matched - just be sure to follow all necessary safety precautions with any open flame in your home.
#3: Drink Your Tea
If you’re anything like me, you have an extensive collection of mugs waiting for you to use them in your cabinet. Embrace these colder months by making a habit of enjoying a cup of tea with your breakfast each morning, or before bed. Experiment with different flavors and types of tea, and even different sweeteners and milks. While I lean heavily on green tea with honey and lemon in the summer, in the winter months I prefer chai and rooibos and rich black teas with raw sugar and oat milk.
#4: Read a Book
What could be more reassuring than a stack of books? I set myself a reading challenge this year, but you don’t need to be so structured about it. If you’re having trouble finding time in your day to read, try to find even five or ten minutes at first - there’s nothing wrong with starting small.
Here are some of my favorite book recommendations from what I read this year to add to your own stack:
Wintering: the Power of Rest and Retreat in Difficult Times by Katherine May: I felt this one in my soul. If you are struggling, read this.
The Hidden Life of Trees by Peter Wohlleben: Read this book and you’ll never look at trees the same way again!
With the Fire On High by Elizabeth Acevedo: I bawled my eyes out reading this book. It isn’t even particularly sad, it’s just that she has a way of making you care about the characters.
Braiding Sweetgrass by Robin Wall Kimmerer: If you love nature, the outdoors, gardening, etc., this is a must read. On second thought, everyone should read this.
Anxious People by Fredrik Backman: This book has a fun twist at the end, and is written by one of my favorite authors. Check out his other books as well!
#5: Use your hands
In the summer it is my feet that guide my activity, padding through the garden barefoot feeling the earth, but in the winter, I lean heavily on my hands.
In winter I am drawn to different sensory experiences, which primarily revolve around fiber + cooking, to keep busy.
I work with my hands to keep my head busy and my heart full. I know this season too will pass, and my thoughts will turn from knit stitches to seedlings and a growing of a different kind. I don’t want to hold my breath until that happens, but rather, enjoy the now.
These pursuits make time stand still even as it seems to whirl past me faster and faster every season.
#6: Get Outside
There is lots to do outside in the winter but so often we forget that there’s no such thing as bad weather – just bad outfits. Gear up to go outside with some wool or fleece-lined leggings, a baklava, alpaca gloves and your favorite wool hat.
Dust of your sled from childhood and find a new hill to careen down, visit a new ice skating rink, take a walk in the woods with your field guide and hunt for animal tracks, put some birdseed on your deck and see what visitors you attract, hike a snow capped mountain or enjoy a quiet night beside a bonfire, wrapped up in one of those blankets you collected earlier and roasting marshmallows.
#7: Experiment in the kitchen
Nothing is more synonymous with winter cooking than baking. As our bodies crave richer foods to keep us warm through the winter season, I try to make a point to experiment in the kitchen with new recipes as well as old favorites. If you’re interested in a baking project, you could try making a spiced gingerbread with whipped cream, pumpkin cookies or sourdough bread. Make soup with whatever you have on hand and freeze some for those nights where you just can’t wait to eat another minute. Use seasonal ingredients such as potatoes, squash, apples, beets, brussel sprouts and carrots. Not every meal needs to be a fancy or extravagant preparation, but cooking from scratch allows you to work with your hands and maybe even learn something new.
Comment below and let me know what your winter essentials are!

Caring For Cast Iron Cookware
Cooking on cast iron is a traditional method that has stood the test of time. Some of the best dishes I’ve ever made have involved cast iron cookware. The timelessness of cast iron pans is outshone only by their innate quality. You would be hard pressed to break a cast iron pan. Consider this your ultimate guide to choosing, maintaining and cooking with cast iron.

The Cottage Peach is reader-supported. When you purchase through links on our site, we may earn an affiliate commission at no additional cost to you. All opinions are our own.
Cooking on cast iron is a traditional method that has stood the test of time. Some of the best dishes I’ve ever made have involved cast iron cookware. The timelessness of cast iron pans is outshone only by their innate quality. You would be hard pressed to break a cast iron pan. Consider this your ultimate guide to choosing, maintaining and cooking with cast iron.
What is Cast Iron?
There are two ways we make things from iron. One is to heat it and work it with tools, the product of which we call wrought iron. The other is to cast it. In casting, melted iron is poured into molds to form a solid piece, such as a frying pan.
Why Cook on Cast Iron?
There are five reasons just about everyone should have a cast iron pan if they are able:
Cast iron pans will outlive you.
Cast iron pans are virtually indestructible. There’s a reason you can easily find them at antique stores and garage sales. Even a rusty old cast iron pan can be revitalized with a bit of work. When handled properly, a cast iron pan can be handed down to generation after generation.
Cast iron handles heat.
A cast iron pan can go from the stovetop to the oven to the table. Cast iron pans can handle heat up to 600 degrees, so have no trouble in a kitchen oven.
Cast iron maintains heat.
Once a cast iron pan is hot, it stays hot. This makes it ideal for searing food, keeping dinner warm, and making pizza.
Seasoned cast iron is non-stick.
With proper care, you can build up layers which will develop into a slick, hard, non-stick surface. Seasoning a pan is not hard. I’ll explain how below.
How to Choose a Cast Iron Pan
The first decision to make is whether you want to buy an older, used pan or a brand-new one.
There are benefits and downsides to either choice.
Benefits of old cast iron pans:
Ecologically, an older pan is the obvious choice.

In the 1940s and earlier, cast iron pans were poured into sand-based molds. They were then polished to smooth their pebbly surface. Because of this, an older pan can be slighter more non-stick than a newer one. People will hunt hard to collect these ‘original’ pans.
A vintage pan may already be beautifully seasoned. It takes time to develop a cast iron pan’s non-stick surface. An old pan that’s been cared for properly is a real find.
Downsides of old cat iron pans:
A vintage cast iron pan will need work if it has been allowed to rust. This can be time-consuming.
An old pan may hair hairline cracks or be warped, so needs to be examined closely before purchasing.
Vintage cast iron, particularly Griswold pans, can be more expensive than buying new. (Griswold pans are thinner, which means they are lighter and take less time to heat up.)
Benefits of new cast iron pans:
A new cast iron pan may be more readily available.
There are very inexpensive options available for new cast iron pans, and there are new pans available that are lightweight and relatively well-seasoned. Field pans are some of the best lightweight cast iron pans you can buy.
Downsides to new cast iron pans:
In the 1950s, a much higher volume of pans was produced than had been in the past. In order to streamline the process, the final step of polishing the pans was dropped. This results in cast iron pans that have more of a pebbly surface. These newer pans can be seasoned to a really nice non-stick surface, but they will never be quite as non-stick as an older pan.
While new pans may be marketed as pre-seasoned, for the most part there will only be a couple of thin layers of seasoning.
Inexpensive new cast iron pans are much thicker, and therefore much heavier. They are also rougher and take longer to season.
A lighter, well-seasoned cast iron pan, like those from Field, come with a higher cost but many benefits to go along with it.
How to Cook in Cast Iron

When you first start using a cast iron pan, even a pre-seasoned one, you may find your food sticks to it. To avoid this, it’s best not to cook with high heat until your seasoning develops.
The more often you cook with oil or butter, the faster you’ll have a well-seasoned pan.
The handle of a cast iron pan can get as hot as the pan itself, so use quality potholders. Silicone sleeves to cover the handles are also available.
It is ok to use metal utensils on seasoned cast iron if that’s what you’ve got. Seasoning is not just a coating on the surface of the cast iron. It is chemically bonded to it. You may not want to scrape hard at your cast iron pan with a metal spatula, but using it in the normal course of cooking is fine.
Acidic foods like tomatoes and vinegar can break down your pan’s seasoning. Once your pan has developed a non-stick seasoning, you can use small amounts of these ingredients, but it’s best not to use large quantities or to simmer acidic dishes for long periods of time in cast iron.
How to Clean a Cast Iron Skillet
Cast iron pans have a bad reputation as being finicky and difficult to clean. You’ll hear that you should never use soap, for example.
It’s true that cast iron should not go in the dishwasher. But there is no harm in using a small amount of soap with a pot scraper or sponge to hand-wash your pan. The advice to not use any soap is from back when soap was a lot harsher.
If you’d rather not use soap, though, you can use coarse salt and warm water to scrub your pan clean.
It’s easiest to clean a cast iron pan while it is still warm from cooking. This is true of just about every kind of pan I’ve ever used.
There are two big no-no’s when cleaning cast iron pans. The first is soaking. Soaking a cast iron pan can cause it to rust. It’s possible to repair a rusted cast iron pan, but it is not a quick process.
The second is that you should never put a cast iron pan away wet. Any moisture can be a problem.
There is one (quick) extra step when cleaning a cast iron pan as opposed to other pans. Cast iron pans should be seasoned after each use.
How to Season Cast Iron
Seasoning cast iron is a process which bonds hot fat molecules to the iron to build up a smooth, non-stick surface. Seasoning also protects the iron from rust and corrosion.

Cast iron is porous and when heated, those pores expand, which makes it possible for the fats to incorporate themselves within the iron.
Cooking with oil plays a part in seasoning the pan, but for best results, you should season your pan after each use.
How to season cast iron after use:
After washing it, put your cast iron pan on a burner over high heat until any water has evaporated.
Once it is dry, spread a small amount of olive, vegetable, sunflower, or grapeseed oil in a very thin layer over the pan with a paper towel or rag. Keep in on the heat for a minute, but remove it before the oil on the pan begins to smoke. Let it cool, and it’s ready to be put away.
How to do a deep seasoning of cast iron pans:
When you first get a cast iron pan, and then 2 or 3 times a year thereafter, you should do a deeper seasoning of your pan. It’s a similar process to regular seasoning, but in this case, we bake the pan in the oven rather than heating it on the stovetop.
What you’ll need:
An oven
¼ teaspoon + ¼ teaspoon oil, divided
Paper towel or rag
Instructions:
Preheat your oven to 200 degrees.
Clean your pan as you would after use, as described above, and dry it by heating it on the stove.
Put your dry pan in the oven at 200 degrees for 10 minutes. This will ensure it is completely dry and also open the iron’s pores.
After 10 minutes, remove it from the oven and increase the oven’s heat to 300 degrees.
Use a clean rag or paper towel to rub ¼ teaspoon of oil onto the pan, using a circular motion.
Using a different, clean rag or paper towel, rub off the excess oil. When you’ve removed the excess, your pan will look dry and dull. It will look as though you have removed all the oil, but a very thin layer will remain, which is just what you want.
Repeat this oiling process on the handle and underside of the pan with the second ¼ teaspoon of oil.
Put the pan, upside-down, on the middle rack of your oven at 300 degrees.
Leave it for 10 minutes, then remove the pan from the oven and increase the heat to 400.
Once your oven is at 400 degrees, return your pan to the middle rack, and let it bake for 1 hour.
At the end of the hour, turn off the oven, but keep the pan in there for an additional hour.
It’s important the heat be consistent, so do not open the oven door during the final two hours of the process.
Cooking Pizza on Cast Iron

As someone who likes each tool to do more than one job, I’m not a huge fan of pizza stones. Luckily for me, cast iron is equally useful for cooking pizza as it is for cooking eggs.
Cast iron is incredibly strong and can withstand very high temperatures. A baking stone is more fragile, and is more apt to experience thermal shock than a cast iron pan.
Pizza develops a crispy, chewy, puffed up crust when cooked on an already heated surface. Because cast iron holds heat extremely well, it is perfectly suited to the job. Pizza can be cooked either in the cast iron skillet or on the bottom of it.
Recipe: Pizza Cooked on Cast Iron
What you need:
Pizza dough
Sauce
Cheese
Toppings
Oil
10-12” cast iron skillet
Instructions: Pizza Cooked on Cast Iron
Put your skillet, empty, into the oven.
Set the oven to 500 degrees.
After 10 minutes, the pan should be hot. Remove it from the oven.
Sprinkle the surface of the pan with cornmeal or flour, and then arrange your dough, being careful not to burn your fingers.
Brush the dough with olive oil and put it back in the oven until the dough bubbles. (You can skip this step and move straight to toppings if you want. It just improves the texture of the dough.)
Add your sauce, cheese, and toppings and cook until golden brown, about 15 minutes.


Mason Jar Gift Ideas
From the history of mason jars, to how to wrap your mason jar gift, this post is jam-packed with inspiration for food gifts, spa treats and transformations that will take your plain empty jar and turn it into a mini-ecosystem. Click to read!
The Cottage Peach is reader-supported. When you purchase through links on our site, we may earn an affiliate commission at no additional cost to you. All opinions are our own.
Mason jars can serve so many purposes. They’re the perfect blank slate for food, crafting, and gifts. Below you’ll find mason jar ideas for Christmas, Chanukah, birthday, or just-because gifts.
The History of the Mason Jar
Back when Mason jars were invented, they were made from a transparent, aqua glass. You can still find aqua mason jars at yard sales and antique stores. Because of their age, it’s probably best not to use them for canning, but they have lots of other uses. I like to use them as vases and oil lamps, or to hold dry food or craft supplies.
John Mason, who invented the jars in 1858, didn’t get a patent on the rubber ring he used to seal them until 10 years later, by which time lots of people were producing mason jars. In 1880, five brothers began producing them under the name of Ball Brothers Manufacturing. The rest, as they say, is history.
Antique Ball jars were made in a variety of colors and shapes, some of which are very valuable to collectors today.
As more and more jars became available, the American diet changed pretty dramatically, as people could eat canned fruits and vegetables year-round. Canning as an activity goes through periods of boom and bust, but Ball jars themselves are never out of style. They are a timeless staple.
Mason jars are made of tempered glass, making them not indestructible, but quite durable, which is why so many very old jars are easily found. While the antiques have their own charm, newer mason jars retain the mix of simplicity and usefulness that made the jars the instant hit they were.
At our house, we use antique Ball, Kerr, and Atlas mason jars as drinking glasses, fill them with leftover soup, arrange pretty things in them, and do lots and lots of canning.
DIY Mason Jar Gifts
Whether you want to craft a mason jar gift or create the perfect mason jar food gift, there are truly endless possibilities. Here are a few ideas to inspire your own creations.
Spa Mason Jar Gift
I recommend using a wide mouth canning jar for this gift, to better fit some fun and pretty self-care products.
These shampoo and conditioner bars from the Package Free shop would make a great foundation in the bottom of the jar. As would this Cocoa Butter Lotion Bar, also from Package Free. Add a refreshing peppermint lip balm, non-toxic nail polish and some reusable cotton face rounds for a DIY spa gift in a jar that will make a gift everyone can enjoy!
To top off your spa mason jar gift, consider using a natural loofah sponge on top of the lid.
Love Notes Mason Jar Gift
It is indeed the thought that counts. Come up with as many things as you can – big and small – that you love about your gift recipient, write them down, and stuff that mason jar tight. You could use handmade recycled paper, cut out into fun shapes, or even take it one step further with seed paper they can plant later for a garden gift that keeps on giving.
Snow Globe Mason Jar Gift
Here’s what you’ll need to make a dry mason jar snow globe:
Pint-sized mason jar and lid
Winter miniatures such as pinecones, repurposed old wooden ornaments, trees, snow-people, or other figurines
Non-toxic glue
Ribbon
Instructions:
Glue your collected miniatures to the inside of the mason jar lid. Once dry, screw your lid onto your mason jar. Turn the mason jar upside down and embellish the ring of the lid with your ribbon of choice.
Terrarium Mason Jar Gift
You can make a terrarium with a mason jar in its regular standing position, but I think the upside-down look is more interesting.
What you need to make a mason jar terrarium:
Moss
Very small plants (When purchasing plants, bring a mason jar lid with you to help in choosing the right size.)
Spray bottle with water
Optional additions are pebbles, acorns, tiny pine cones, shells, or other small materials found in nature
Instructions:
Wash your jar thoroughly and be sure to rinse it very well.
Remove your plant very carefully from its pot and moisten the soil with your spray bottle to prepare it for planting in the mason jar lid.
Compact the plant’s root ball with your hand. You may need to remove some soil. Your goal is to be sure it will fit on the inside of your mason jar lid and that all the roots will be covered in soil.
Place the plant on the inside of the lid. The soil should not overflow, and there should be a tiny bit of space around it for other materials.
Press moss around the edges of the soil, filling the space to the edge of the rim.
Add pebbles, an acorn, tiny pine cones, or shells if desired.
Now comes the hard part – placing the jar over the plants. Use one hand to hold the plant upright and guide the branches into the jar. With the other hand, lower the jar over the plant.
You can just place the jar on top of the lid, but if you’re a bit more daring, you can try to turn the jar onto the lid’s threads. This would make it easier to move around, but if you don’t screw it in you can just hold the lid and jar separately when moving the terrarium, and it will be a bit easier to lift the jar when the soil needs moistening.
Include a small card with these care instructions with your terrarium gift: “Terrariums do best with bright but indirect light, so they shouldn’t be kept in direct sun. The soil should be checked every few weeks, and should be kept moist, but not wet.”
Sugar Scrub Mason Jar Gift
Mix up a batch of your favorite sugar scrub and fill a mason jar with it! My personal favorite recipe is this Lavender Oat Scrub.
Candle Mason Jar Gift
Who doesn’t want a warm and cozy candle to keep them company through the long winter months? This is more of an advanced gift in a jar project since it requires a fair amount of supplies, but once you have everything you need it’s a fun weekend project that will leave your home smelling amazing! Choose a natural soy wax and phthalate free scents for a non-toxic gift.
Mason Jar Recipe Gifts
Soup in a mason jar
There are tons of incredible recipes for ready to cook soups you can serve your friends and family in the form of a mason jar food gift. Personally, I think an edible gift is one of the best kinds of gifts since it is zero waste and creates a personal experience for the recipient. Layering your ingredients creates an appealing visual effect that is sure to impress! Just be sure to include a tag (either printed or handwritten is fine!) attached to your gift with cooking instructions.
Cookies in a mason jar
If there’s anything better than soup in a mason jar, it’s cookies in a mason jar! The same guidelines apply here. You’ll want to find a recipe that is specifically made to fit inside of a mason jar so the ratios are correct. These mason jar food gift recipes only include the dry ingredients, so the recipient will just need to add whatever milk, eggs, butter or other perishable ingredients can’t be included in the recipe.
Wrapping Your Mason Jar Gifts
You can package your mason jar gift in a reusable gift bag, but here are some prettier options if you feel like getting creative:

Burlap:
Use a Burlap Ribbon to tie a simple bow around the mason jar, or use it to create a sleeve by securing a length of it around the jar with glue.
Tissue paper:
Place your jar on top of a piece of tissue paper, right in the center.
Bring the 4 corners of the tissue paper together above the jar, then gather the excess tissue paper in towards the jar and up.
Use ribbon or raffia to tie the tissue paper to the space between the jar and the lid.
Fabric:
Fabric can be used in just the way I described using tissue paper above, or can be used in the most classic of mason jar decorating methods by covering or replacing the flat part of the lid, underneath the lid’s ring.
To accomplish this, use pinking shears to cut a piece of fabric into a 5 ½ “ square.
Remove the ring from your mason jar, lay the fabric over the lid, and then twist your ring back onto the jar over the fabric. If you’d like to add a bit of dimension, simply place a bit of batting between the lid and the fabric before you secure it.
You can embellish this with a bow tied just below the ring of the lid.
Raffia:
Raffia and mason jars are made for each other. I like to wrap it around multiple times before tying it off.
Ribbon:
Natural, plastic-free ribbons are a great alternative. Use any ribbon or jute twine you like to secure a sprig of evergreen branches to the outside of the jar for a timeless gift accessory.
![Gift Ideas For Gardeners [GARDEN GIFT GUIDE]](https://images.squarespace-cdn.com/content/v1/60e85024dc86d643da81c96a/9fad99b7-b5e7-4975-96a5-aeacd3f2d643/Sept+2022+small-17.jpg)

Homemade Gifts For Everyone on Your List
Holiday waste is a huge problem, both for our budgets and the environment. Americans spent around $15.2 billion on unwanted holiday gifts in 2019, and 4% of them ended up in the trash. Think about it - how many trash bags have you probably filled with just wrapping paper in your life? A lot of it can’t be recycled or composted even if we wanted to because it uses shiny plastic coatings or glitter that won’t break down. This is a huge problem that we can easily avoid by simply changing some habits and using fabric or kraft paper wrapping instead. The plus side is fabric wrapping can be reused year after year and kraft paper is totally recyclable and compostable.
The Cottage Peach is reader-supported. When you purchase through links on our site, we may earn an affiliate commission at no additional cost to you. All opinions are our own.
Most everyone loves a handmade gift, and in these times of over-consumption it is more important than ever to be mindful in your gift giving this holiday season.
Holiday waste is a huge problem, both for our budgets and the environment. Americans spent around $15.2 billion on unwanted holiday gifts in 2019, and 4% of them ended up in the trash. Think about it - how many trash bags have you probably filled with just wrapping paper in your life? A lot of it can’t be recycled or composted even if we wanted to because it uses shiny plastic coatings or glitter that won’t break down. This is an issue that we can easily avoid by simply changing some habits and using fabric or kraft paper wrapping instead. The plus side is fabric wrapping can be reused year after year and kraft paper is totally recyclable and compostable.
That number doesn’t even include all of the wasted packaging and wrapping materials that end up in landfills. Each year Americans alone use 4.6 million pounds of wrapping paper valued at over seven billion dollars. Fifty percent of that wrapping paper ends up in a landfill. That's 2.3 million pounds of used wrapping paper clogging up landfills.
I know I’m not the only one who struggles after the holidays are over to try and absorb all my presents into our home and our lives. As much as I’m grateful for the thought, and know that I am privileged to be loved by so many people who want to express that love through gifts, it is a challenge when the gifts themselves don’t fit into my life. A handmade gift, however, will always bring me joy and be a useful addition to my home.
And who really enjoys the stress of holiday shopping? Dealing with shipping delays or crowded shopping centers isn’t my idea of a good time.
You can even take it one step further and choose to do experience gifts instead - this can be anything from paint night to skydiving, a museum membership, massage or a baking class. Experience gifts allow you to deepen your bond with the gift recipient and create lasting memories that you can look back on for years to come.
Whether you’re looking for DIY Christmas gift ideas, Chanukah gift ideas, zero-waste gift ideas, food gift ideas, or just the best homemade gift ideas out there for anyone on your list, you’ve come to the right place.
50 DIY gift ideas for everyone on your list
Candles - Making candles is as simple as melting wax, adding scent if desired, and setting a wick into the wax before it hardens. Throughout the year, collect containers suitable for candles. This could include jars or tins, things you bought food in or found at a thrift store. Candle Science is a great source for purchasing candle-making supplies. I like to use their Golden Bran 464 soy wax when I make candles.
Coasters: You can make coasters out of tiles or slices of wood. For instructions on making tile coasters with Mod Podge and paper, check out It All Started With Paint
Vanilla: To make homemade vanilla, simply slice vanilla beans down the middle and let them sit in vodka for a month. Distill into a pretty jar and tie a ribbon around the top.
Ornaments: You can make ornaments by doing small embroideries and framing them with mini embroidery hoops like these circles or these oval ones. Other ideas for ornaments are painting wood discs, or using colored air dry clay.
Calendula balm: Use homemade calendula oil to create a balm. Package it in an attractive tin.
Playlist: In the old days, making a mix tape for someone was a big deal, and the same is true these days of making a playlist. Take time to choose meaningful songs, and the recipient will feel the love.
Wreath: With a wreath form, some floral tape, and dried flowers, you can put together a beautiful wreath for any season.
Tea: Make your own teabags using cloth drawstring sachets and homegrown or purchased dried herbs. Mountain Rose Herbs is my first choice when buying herbs. If disposable tea bags aren’t for you, mix your desired herbs and gift them in a Ball mason jar with a pretty reusable lid.
Cookies: Who doesn’t want to get cookies? No one, that’s who. Package them in a compostable paper box or a reusable tin.
Plants: Take cuttings from your own houseplants, root, and pot up in a bowl, cup, or pot from the thrift store.
Cloth napkins: Use fabric scraps or repurposed fabrics to create cloth napkins
Beeswax wraps: Mountain Rose Herbs has instructions for how to make the very best beeswax wraps.
Rope baskets: Check out Happiness is Homemade for step-by-step instructions on making rope baskets, without sewing a stitch.
Hand warmers: Simply sew two pieces of fabric together to form the shape you want, then fill it with rice to make hand warmers that can be heated in the microwave.
Sugar scrub: Mix ½ cup coconut oil with ¼ cup sugar for a simple sugar scrub. Package it in a glass jar, like these from Mountain Rose Herbs.
Jelly: Homemade preserves are always appreciated! Get your Christmas gift-making done in summer and have more time for fun in December.
Peanut brittle: Peanut brittle can be made in the microwave, making it a great gift idea to do with kids.
Write a story or poem: Give a little piece of yourself by writing something just for them.
Bind a journal: Binding paper can be done by beginners. Check out Skill Share for instructions.
Knit a mug cozy: Ravelry hosts endless options of styles that are free to download.
Homemade game: Make a homemade board game. Think creatively – pretty pebbles make good pieces to move around the board, and sturdy cardboard can be used for the board itself.
Pendant: Make a pendant with polymer clay, and hang it on a pretty ribbon.
Macramé: A macramé hanging plant holder is a classic, and doesn’t need to be too complicated. Check out Sarah Maker’s simple tutorial.
Affirmation cards: Everyone could use some good thoughts to brighten their days. Use colored, blank index cards or pretty bits of decorative paper to share some.
Marbled greeting cards: Marbling paper is simple, fun, and only slightly messy.
Soap: You can make cold processed soap using lye, or create bars of soap with the melt and pour method, which uses a premade soap base.
Bookmarks: Use decorative or marbled paper and add ribbons, tassels, or other pretty bits and bobs.
Keychains: Drill a hole in a good-looking, small rock or a sanded tree branch to make your own keychains.
Scrunchie: Scrunchies are a great beginner sewing project.
Stenciled tote bag: A simple white tote, some paints, a stencil and a sponge are all that’s needed to make a custom tote bag.
Ring bowl: Make a small ring bowl using white air dry clay. Once it’s dry, paint it however you’d like.
Decorated glass: Use glass markers to decorate vases, glasses, or bowls.
Walking stick: Search out a stick of the right length, with a bit of a curve on one end. Sand until smooth and apply mineral oil.
Washi tape headbands: Check out The Crafting Chicks for instructions to make washi tape headbands.
Bath tea: For a relaxing gift, make Pumpkin and Princess’ bath tea.
No-sew flannel scarf: This no-sew flannel scarf is simple enough for anyone to make.
Lavender eye pillow: Sew two pieces of fabric together and fill with lavender buds for a soothing, sleepiness inducing eye pillow.
Seeds: Save seeds from your summer garden and package in homemade paper envelopes.
Pressed flower tray: Use craft glue to carefully apply your pressed flowers to a wooden tray. Arrange them in the way you’d like, then pick each flower up one at a time, brush it with glue, and put it back in position. When everything is placed, use Mod Podge to give it a clear finish.
Terrarium: Use a glass container and small plants and mosses to create a terrarium.
Recipes: Create a box of hand-written recipes to share.
Mittens: Use felted sweaters to make mittens by cutting to shape and sewing.
Chocolate covered spoons: Make delicious chocolate-covered spoons using this Betty Crocker recipe
Peppermint bark: All you need for this project is chocolate melted in the microwave and crushed up candy canes. Spread the melted chocolate on parchment paper and sprinkle with candy.
Butter: Impress someone with homemade butter. No one needs to know all you had to do was use a mixer to beat cream and add a little salt.
Decoupage soap: Count on Mod Podge to think of every possible item that can be decoupaged!
Hot chocolate bomb: Throw some chocolate their way with this recipe from One Good Thing.
Jersey knit bracelet: This is a neat way to repurpose t-shirts
Chalkboard coffee mug: Martha Stewart has a very simple idea for adding some individuality to a coffee mug.
What’s in my apothecary cabinet
HAVE YOU EVER MADE YOUR OWN TEA BLENDS?
Maybe you’re used to getting your tea in individual sachets from the grocery store. The idea of loose leaf teas sounds like something that only real tea connoisseurs would do.
But did you know that most of those little pre-packaged tea bags actually contain plastic?
You can’t even throw them in your compost because they won’t break down properly due to the plastic. And the heat from the water can release harmful compounds from the plastic tea bags into your cup.

The Cottage Peach is reader-supported. When you purchase through links on our site, we may earn an affiliate commission at no additional cost to you. All opinions are our own.
Why Keep an Apothecary?
Here’s the thing about an old jam cabinet full of dried plants: it may not seem like much, it may not even seem necessary, but for me it is essential, and here’s why:
An apothecary is a source of comfort: The herbs within an apothecary provide relief and warmth and the sense of being well cared for.
An apothecary heals: Maybe not best suited for your worst ailments, but a steady hand you can look to. A cup of calming chamomile tea for when you can’t sleep, calendula tea for inflammation and nerves, mint tea when you need a quick pick me up, and red raspberry leaf tea for cramps and more.
An apothecary increases your independence: In times when essential supplies may run short, as happens with pandemics and supply chain issues, having a stocked apothecary provides a backup. Stored correctly, these dried plants are rich in essential vitamins needed for survival.
The Healing Powers of Tea + Tisanes
What is the difference between tea and tisane? Tea comes from one specific plant, the Camellia sinensis plant. Tea is always caffeinated. Technically speaking, any other herbal plant matter steeped in hot water is a tisane. However, most of us use the word tea interchangeably, so that is how I will refer to all my herbal teas and tisanes here. While herbs can be used to make poultices, tinctures, and creams, their most common use today is as an ingredient for tea.
There is a medicinal tea for just about every common ailment, from headaches to fever, acne to stomach upset. Along with its medicine, tea offers us comfort, companionship, and ritual.
Cups of tea in the morning calm stiff and aching joints, wake up your groggy mind and bring comfort after a long night tossing and turning.
Cups of tea in the afternoon, when mom stops by and you talk about whether or not the world is ending, bring you back to the here and now and away from worrying about the what-ifs and the should-haves and the would-have-beens.
Cups of tea after dinner wash away the endless news articles and likes and comments and to-do lists and the never good enough feelings and the Sunday scaries and the imposter syndrome and the pandemic and the climate crisis and the political climate and the war, war, war.
Cups of tea in winter warm your hands and lift your spirits, both essential in the stretch of long, dark days.
Cups of tea filled with petals dried in last year’s garden sun, cups of tea to mend you and energize you and bring you closer together.
It’s never just a cup of tea.
Have you ever made your own tea blends?
Maybe you’re used to getting your tea in individual sachets from the grocery store. The idea of loose leaf teas sounds like something that only real tea connoisseurs would do.

But did you know that most of those little pre-packaged tea bags actually contain plastic?
You can’t even throw them in your compost because they won’t break down properly due to the plastic. And the heat from the water can release harmful compounds from the plastic tea bags into your cup.
This is true even of many “organic” tea brands that are available. Many tea companies will refuse to even tell you what materials are used in their tea bags, which is doubly concerning. If you can’t compost them, they’ll just end up polluting the landfills and taking decades to break down.
Making your own tea blends from scratch doesn’t need to be intimidating or difficult. You can start with the most basic ingredients and work your way up from there. Since I have a more extensive herbal library, I’ll be talking about my apothecary in depth - but don’t be afraid to start small at first.
The benefits of loose leaf tea are many - they are medicinal, and generally available in higher quality than pre-blended teas.
Once you get the hang of making your own tea blends, you can even mix up batches to give as handmade gifts for friends and family. Just pour your tea into a nice jar or other container and add a simple ribbon for a zero-waste gift that everyone will love.
Are Plants Good Medicine?
The use of herbs, berries, and spices as medicine and comfort goes back tens of thousands of years. Women gathered plants, experimented with them, and treated all manner of health conditions. They passed this wisdom from generation to generation, sometimes orally, and sometimes in the form of recipe books.
While male physicians did, at points, take an interest, conduct studies, and publish papers on the use of plants as medicine (without mentioning women or allowing them to become doctors themselves), somewhere along the way, this once-vital knowledge was stripped of its importance, as the work of women so often is.
Luckily, this information didn’t completely disappear. Women continued to teach their daughters. History (her story, to be more precise) was studied and old wisdoms brought together in books and finally to the internet, where it is available to educate any budding herbalist.
An Invitation for Ease
Close your eyes and picture this. You're standing in the kitchen of an old farmhouse with wooden windows and creaky floorboards underfoot.
The fire is crackling nearby, and the scent of woodsmoke lightly punctuates the stillness and chill of winter.
You wash the our your teapot in the sink and listen for signs of life outside your window. All is calm and silent as the first snowflakes begin to land on the earth outside and the ground is coated in a hard layer of permafrost.
The work you set out to do is done, and you are tucked away at home with the rest of the afternoon stretching out before you.
This is your invitation to find ease in your day. Pour yourself a cup of tea, and put your feet up for a while.
The Best Way To Learn Herbalism
If you’re ready to begin your herbalism journey I highly recommend enrolling as a student in one of the many online courses at Herbal Academy. Their fully digital classroom offers professional guidance in an easy to navigate format that is welcoming of students of all levels and backgrounds. Click here to learn more
learning herbalism: book recomendations
I can’t attest to any of these books personally since I exclusively utilize Herbal Academy’s blog, courses and textbooks for my own education, but they are popular within the herbalism community and may be a good place to begin your learning journey. Click the images below to shop.

What Herbs should you have in your apothecary?
This is by no means an exhaustive list, but here are some common plants I would start with when first building your apothecary:

Chamomile - for anxiety and stress, a cup of chamomile tea will quickly calm your nerves. Roman chamomile (the variety you want for tea) grows very easily from seed and each plant produces a large number of flowers.
Peppermint - for bloating, gas, and some abdominal pain, mint tea also has a soothing aroma. Mints grow so well you’ll want to plant peppermint in a place you’re happy to let it spread, or in a container.
Ginger - a powerhouse with antimicrobial properties and a huge range of health benefits. Combined with peppermint, it makes the perfect tea for any upset stomach. Ginger grows from pieces of the root, and prefers shade. In warm climates it can be outdoors year-round, but in cooler climates it should be grown in a pot and brought inside for the winter.
Red clover - used for menopausal symptoms, arthritis, psoriasis, and respiratory problems such as bronchitis. Red clover is thought by some to be a weed, but it can be used as a lawn replacement, a nitrogen-fixing cover crop, or groundcover.
Dandelion - used to stimulate digestion and calm hot flashes, among other things. Dandelions are, of course, happy to plant themselves for you!
Lemon balm - calming, and is used for headaches, cold treatment, and digestive issues. It has a lemony aroma and is a tasty addition to any tea. Lemon balm is a member of the mint family, and like its relatives will be happy to take over your garden. It spreads mostly by seed, so cutting it back before seeds form will keep it in check.
Calendula - antifungal and antimicrobial. Helps prevent infection and heal injuries to body tissues. Calendula is also known to have anti-inflammatory and antioxidant components, which might help to fight cancer, protect against heart disease, and ease muscle fatigue.
Echinacea - an immune-boosting herb that may help your immune system fight off incoming viruses or infection. Studies have confirmed that echinacea can shorten the duration of the common cold, lessen the severity of its symptoms or even prevent it.
Red Raspberry Leaf - excellent source of potassium. Red raspberry leaf contains useful antioxidants including vitamin E, tannins, and flavonoids. Can provide support during all phases of the menstrual cycle.
Yarrow - reduces inflammation, acts as an antispasmodic useful in treating Irritable Bowl Syndrome (IBS)
Oregano - if you can only start with one herb, let it be oregano. This powerful plant has antibacterial properties, anti-inflammatory properties, may protect against cancer, diabetes and depression. I have personally cured an ear infection with a simple routine of one drop of oregano oil in the affected ear two to three times per day.
Lavender - my personal favorite. A popular nervine, lavender has deeply calming properties much like chamomile.
HOW TO STORE DRIED HERBS
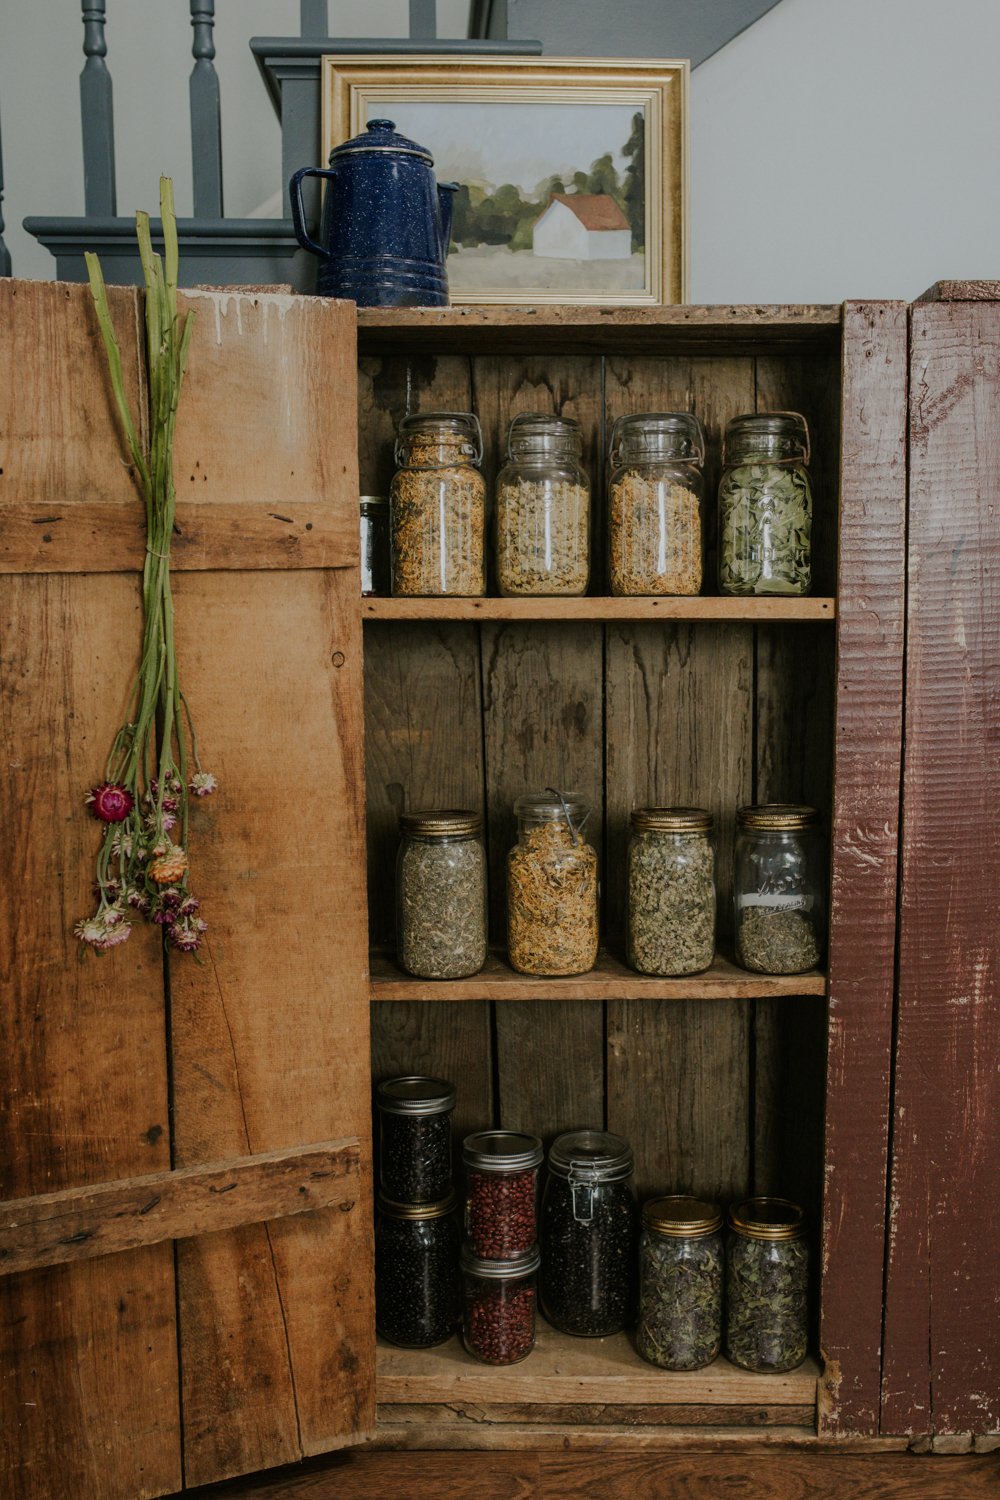
Storing dried medicinal herbs in your apothecary doesn’t need to be complicated. As a general rule you should store herbs in a cool, dry place out of direct sunlight, inside of airtight glass jars. These Mason jars are my favorite for storing herbs. The jars seen in the images in this post are antique, so you’ll need to hunt them down at the thrift stores!
Why should you store herbs out of direct sunlight?

Herbs are pretty delicate once dried, and in order to protect the active compounds within each plant that give them their healing qualities it is important to protect them from the elements. UV light from the sun can quickly break down the compounds within your dried herbs that make them so useful.
Why shouldn’t you store herbs in plastic?
There is the possibility that herbs stored in plastic can absorb some of the toxic chemicals present in the plastic itself over long term storage.
Handmade Zero Waste Tea Gift Idea
Most everyone loves a handmade gift, and in these times of over-consumption it is more important than ever to be mindful in your gift giving this holiday season. Americans spent around $15.2 billion on unwanted holiday gifts in 2019, and 4% of them ended up in the trash. That waste doesn’t even include all of the packaging and wrapping materials that end up in landfills. Each year Americans alone use 4.6 million pounds of wrapping paper valued at over seven billion dollars. Fifty percent of that wrapping paper ends up in a landfill. That's 2.3 million pounds of used wrapping paper clogging up landfills.
A handmade gift of tea is a thoughtful way to show someone that you care and provide them with a gift that they will be able to use over and over again. You can mix up three different blends and find a set of matching jars to give as a little tea sampler, or make up one big batch of tea and distribute into a larger mason jar like the rose tinted jars from Ball. You don’t even have to wrap your handmade tea gift in paper - just add a simple ribbon with some dried fruit, pinecones or cinnamon sticks tied alongside it. Or, you can add a special mug to your gift that you know the recipient will love. Pour your tea into a cloth drawstring bag and place inside of the mug with a cute stirring spoon.
Wondering what flavor of tea to choose for your handmade gifts? Pick something that you know everyone will love such as chamomile or mint and add your own flair to make it unique to your personality or that of the gift recipient. You can personalize your tea gift any way you like with different add-ins like chocolate chips, candied fruits or flavored sugars.
![Make This Easy + Natural Botanical Hand Salve [Recipe]](https://images.squarespace-cdn.com/content/v1/60e85024dc86d643da81c96a/b57698b0-de70-4101-afaf-7af57788237d/Herbal+Face+Steam+Recipe+by+The+Cottage+Peach-1.jpg)