
BACKYARD GARDENING MADE SIMPLE
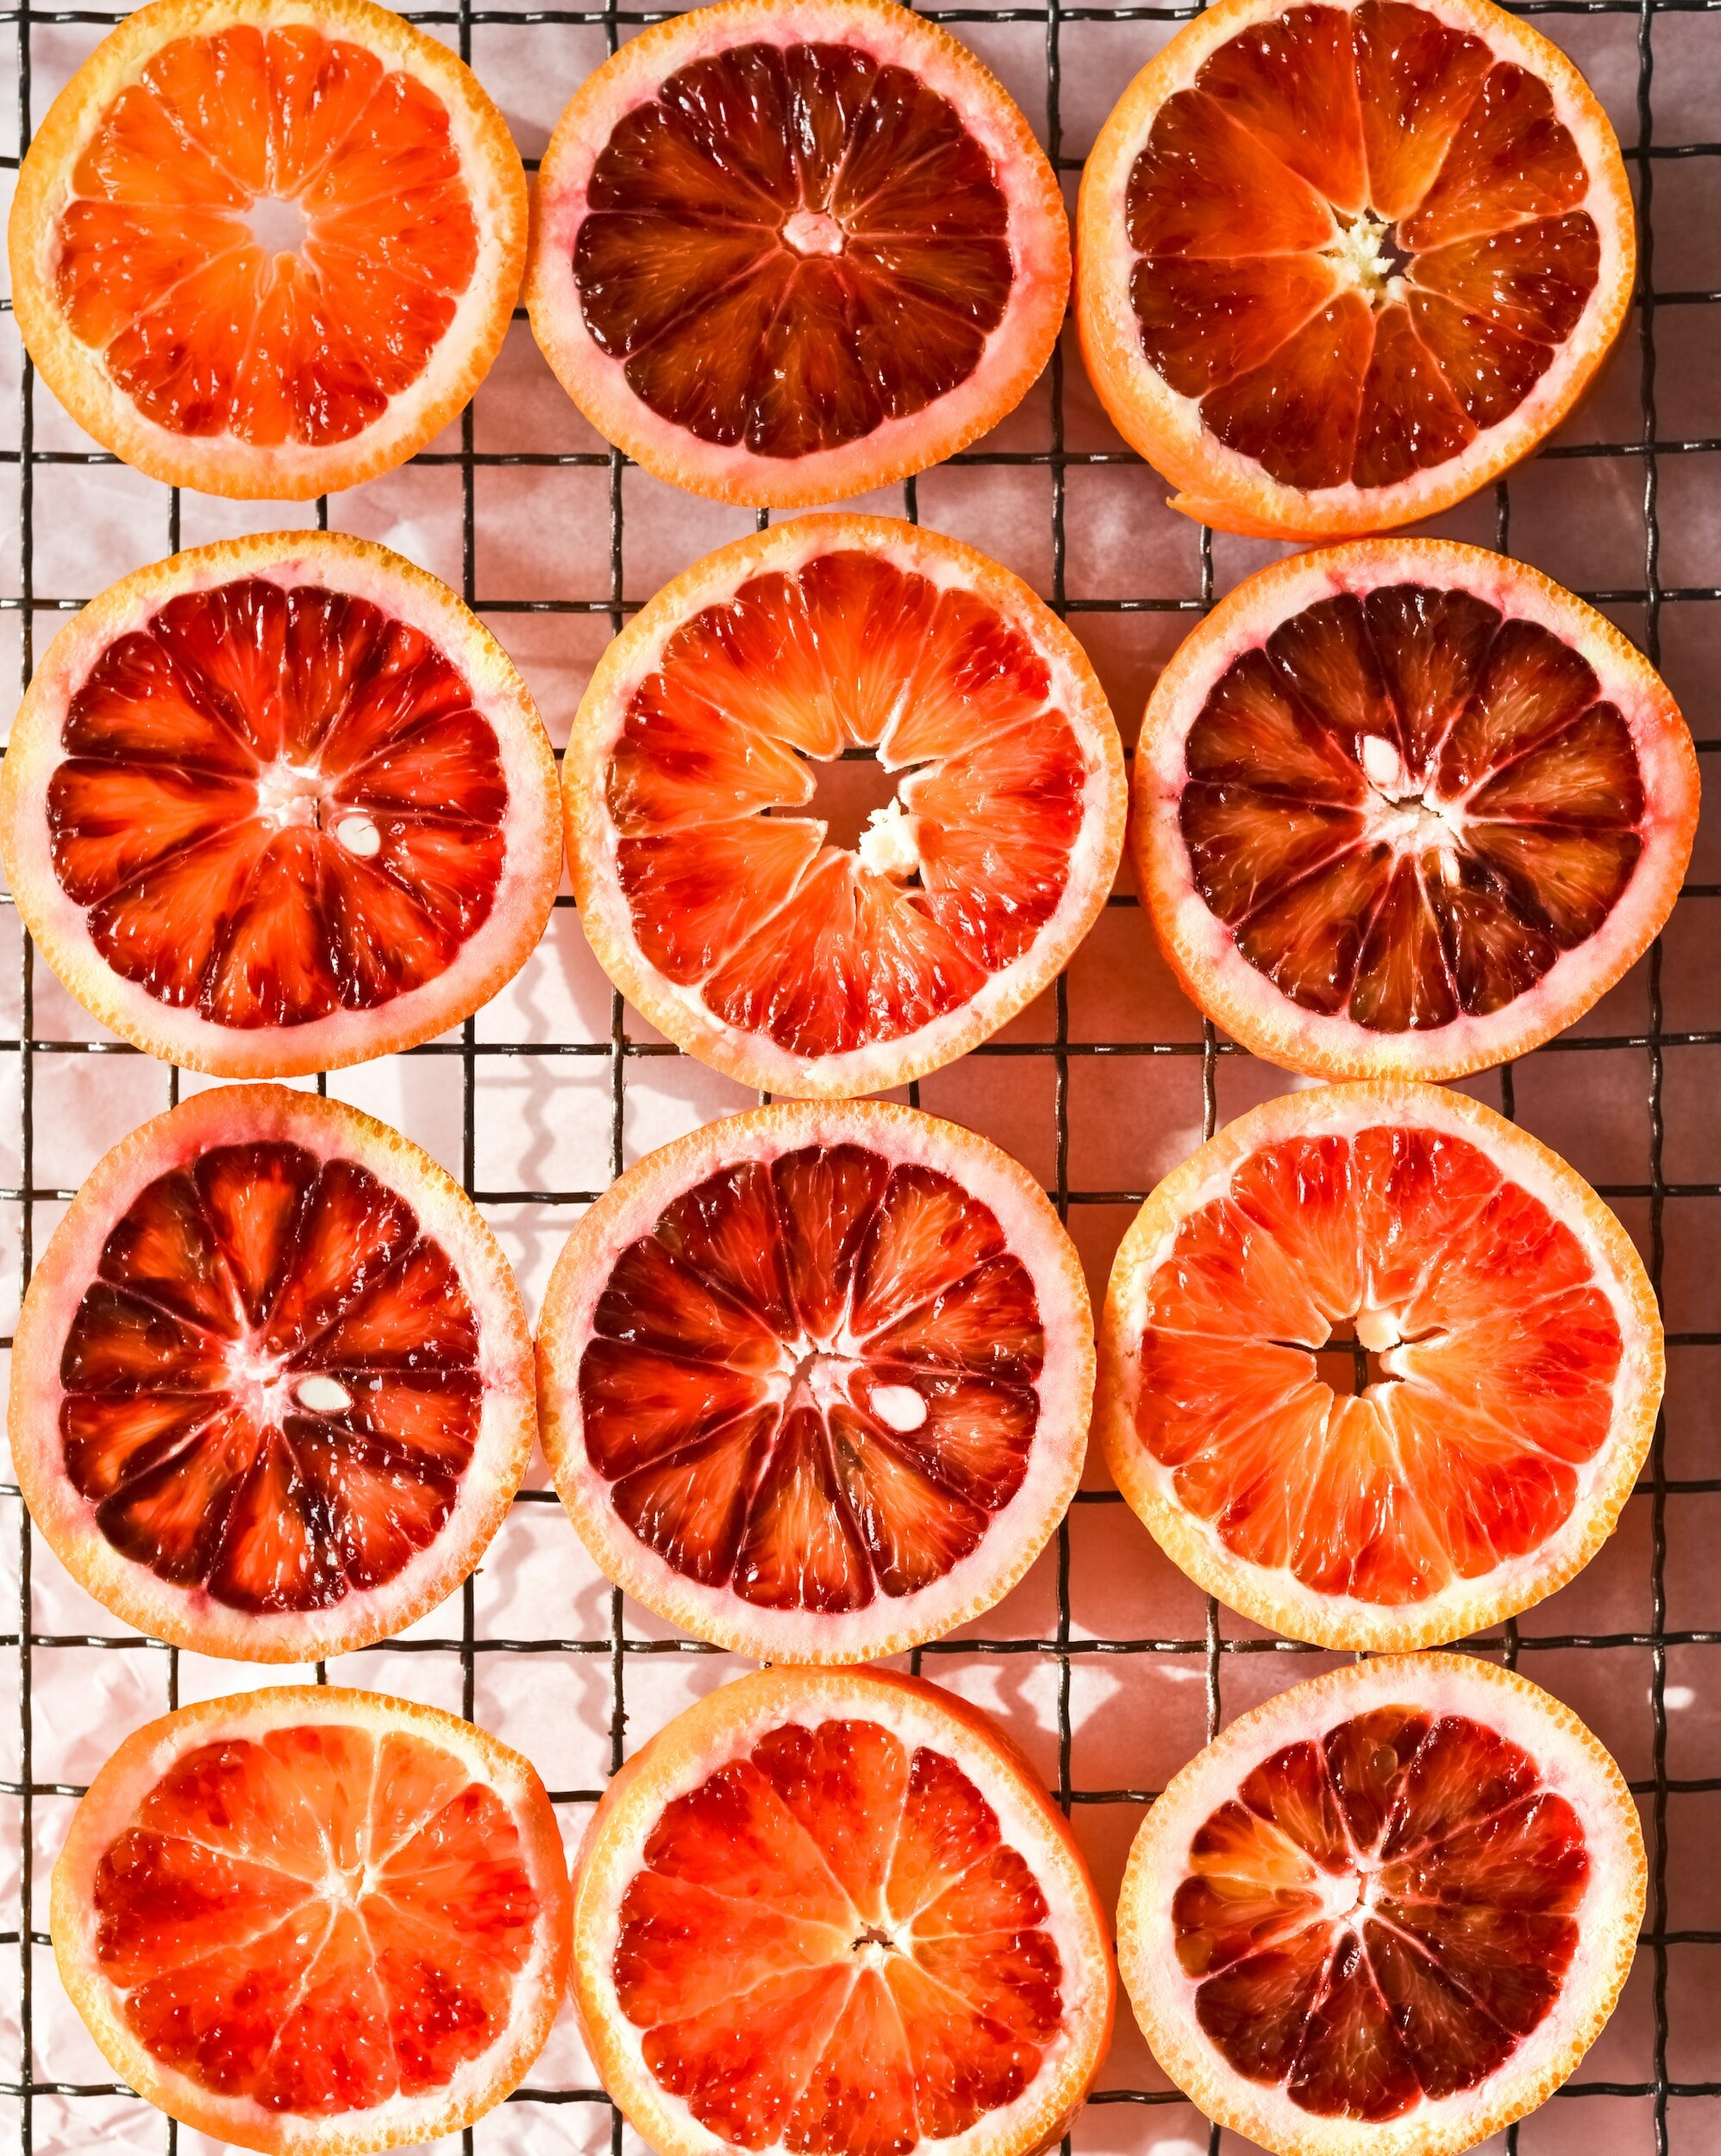
![Taste the Freshness: Garden to Table Garlic Scape Pesto [Recipe]](https://images.squarespace-cdn.com/content/v1/60e85024dc86d643da81c96a/1685124491791-T2P2WL9T6HWQJGW63DLT/PXL_20220617_153907513.PORTRAIT%281%29.jpg)
Taste the Freshness: Garden to Table Garlic Scape Pesto [Recipe]
One of the first ways I know that June has arrived is in the appearance of garlic scapes. Tiny white cloves planted way back in October have been waiting for this day to send their shoots high into the sky, the flowering stalks both otherworldly and beautiful as they twist and turn, narrow green tendrils dancing in the breeze that has yet to turn into the humid and stagnant air of full summer.
Garlic scapes aren’t something you can find in the grocery store, and while you may be able to find a single stall at your local farmers market that has them, their inventory will be short-lived. The season for scapes is small, a window of just a couple of weeks that adds to their novelty. Just another excellent excuse to grow them yourself as a side-effect of your garlic harvest.
June is the beginning of abundance in the garden, when our little acre reminds us she can support us with a never ending harvest of many kinds. I find myself taking breakfast, lunch and dinner outside as often as possible, breathing in the fresh air and listening to the birdsong while I ask myself how I got so lucky. Our little patch of earth has so much history hidden in its roots, but when summer begins again it is clear she knows precisely what she is doing when it comes to helping living things thrive.

Our neighbors grew up in our house, so we’ve been lucky enough to learn bits and pieces of what the land has accomplished in the past. This is how I know that the stone foundation of my home originally held up a beautiful chicken barn, and that rabbits were raised on the back lot. As we add our own stories to this history, I wonder too at the echoes of a less happy time before our even our neighbors came here, a time when lands were taken from the Wampanoag. How many feet have tread this earth before us and called it theirs? How much pain was inflicted on this very spot? Only the land remembers now.
One of the first ways I know that June has arrived is in the appearance of garlic scapes. Tiny white cloves planted way back in October have been waiting for this day to send their shoots high into the sky, the flowering stalks both otherworldly and beautiful as they twist and turn, narrow green tendrils dancing in the breeze that has yet to turn into the humid and stagnant air of full summer.
Garlic scapes aren’t something you can find in the grocery store, and while you may be able to find a single stall at your local farmers market that has them, their inventory will be short-lived. The season for scapes is small, a window of just a couple of weeks that adds to their novelty. Just another excellent excuse to grow them yourself as a side-effect of your garlic harvest.
There are two types of garlic you can plant; hard-neck or soft-neck. Soft-neck garlic does not produce scapes, so if you’re interested in trying this delicacy you’ll need to plant hard-neck varieties only. Hardneck varieties of garlic are divided into eight groups: Porcelain, Rocambole, Purple Stripe, Glazed Purple Stripe, Marble Purple Stripe, Asiatic, Turban, and Creole. Porcelain is considered the hardiest type of hardneck garlic and is highly recommended for novice gardeners in cold climates, producing big, beautiful bulbs with satiny white wrappers with a strong flavor. As I mentioned, you’ll need to do some planning ahead if you want to grow garlic. It needs to be overwintered, so you’ll plant it just before your first frost in the fall and then wait until the following summer to harvest the bulbs.
In the meantime, scapes offer a taste of what is to come - a preview of your garlic harvest that can help you to tolerate the long wait required when growing garlic. To me, it is a promise the land provides. Good things we grow are always worth the wait. And garlic scapes are one of the very best things of all.
I do like to devise as many ways as possible to extend our enjoyment of garlic scapes, and thankfully they are a versatile plant that makes it easy to preserve. I’ve tried just about every method imaginable, but by far my favorite way to use scapes is to make my garlic scape pesto recipe. This liquid gold is quickly scooped up by everyone who tries it, useful as more than just a pasta topping. It also stores incredibly well in this form, locking in the deliciously grassy and mild garlic flavor so that we can enjoy it as long as possible.
What are garlic scapes?
Garlic scapes are the flowering head of the hard-neck garlic plant.They are edible, and you want to cut them off the plant before they have a chance to flower so that your garlic bulbs can put their energy into the root instead, allowing the bulb to grow larger.
What month do you cut garlic scapes?
Garlic scapes are harvested in June, about a month before you harvest the garlic bulb. Garlic scapes twist into a corkscrew shape as they grow and ripen. You will know they are ready to pick when the scape has made almost one full twist. The flowering head should still be compact and small. You can pick them when they are smaller as well, you’ll just get a smaller yield. If you pick them later than this, they will be very tough to chew.
How do you cut garlic scapes for pesto?
The easiest way to cut garlic scapes is to snap them off at their natural breaking point with your fingers. You do not need clippers to harvest garlic scapes. Grab the scape close to the base where it meets the leafy part of the garlic bulb (leave the leafy bits intact) They will break off easily in your hand.
What part of garlic scapes do you eat?
You can eat the entire garlic scape. Some people prefer to remove the flowering head at the end, as it can get a little tough depending on how late you harvest them. For garlic scape pesto, it shouldn’t really matter since you are blending it up so I like to use the entire scape.
Do garlic scapes need to be cooked?
No, garlic scapes may be eaten raw or cooked.
What do garlic scapes taste like?
Garlic scapes are like the garlic cloves' more subtle, mild cousin. A light green crunch makes them a super fresh addition to salads and stir-fries.
What is the best thing to do with garlic scapes?
My favorite way to use garlic scapes is to make garlic scape pesto. It’s easy and freezes well. You can also chop it up and mix with cream cheese or butter for a flavorful spread, add to salads and stir fries and enjoy as a garden snack. I even put a little dollop with my cracker and cheese boards.
What does garlic scape pesto taste like?
Garlic scape pesto tastes like mild garlic with less spicy heat and a little bit of grassiness. You can control the acidity and flavor profile with the addition of high quality oils, cheese and nuts.
How long does garlic scape pesto last in the fridge?
With proper storage, garlic scape pesto can last up to 2 weeks in the fridge.
Can I freeze garlic scape pesto?
Yes, garlic scape pesto is an excellent way to preserve the fresh flavors of early summer for the whole year. You can freeze garlic scape pesto by filling an ice cube tray and placing in the freezer for individual portions, or freeze tablespoon size portions on a baking sheet, remove once fully frozen and place in a Stasher bag. I like to fill four ounce mason jars and freeze - just remember to leave room at the top of the jar as the pesto will expand slightly as it freezes.
Can you freeze garlic scapes raw?
Yes, garlic scapes may be frozen raw with no blanching required to enjoy all year long. They may also be dehydrated or dried and ground into a powder.
Are garlic scapes as healthy as garlic?
Yes, garlic scapes are healthy. Garlic scapes contain manganese, vitamin B6, vitamin C, and selenium.
What to use garlic scape pesto on
Garlic scape pesto is a super versatile ingredient to have in your fridge. Of course, it can be used on pasta, but one of my favorite ways to use it is as a spread on sandwiches or grilled cheese. You can also toss your vegetables in the pesto before roasting.
To make this garlic scape pesto recipe, you will need a food processor, blender or immersion blender to grind the scapes into a fine paste. I will break the scapes into smaller pieces before blending. They’re a pretty dry thing to put in a blender, so you’ll need to scrape down the sides a couple of times as you go. If you don’t have a blender you can finely chop the garlic scapes, but the effect will be slightly different and crunchier.
Supplies
Blender or immersion blender
Measuring cup
Tablespoon
Spatula
Jars for storage
Ingredients
2 cups garlic scapes (chopped)
1 cup sunflower seeds
1 cup basil
1 cup parmesan (grated)
1 cup olive oil
3 tbsp lemon juice
Salt and pepper to taste
Instructions
Grate the parmesan
Add all the ingredients to the food processor and blend until smooth
Taste and adjust the seasoning to your liking
Transfer to jars and store in the fridge for up to two weeks
Garlic Scape Pesto
Ingredients
- 2 cups garlic scapes (chopped)
- 1 cup sunflower seeds
- 1 cup basil
- 1 cup parmesan
- 1 cup olive oil
- 3 tbsp lemon juice
- Salt and pepper to taste
Instructions
- Grate the parmesan and roughly chop the garlic scapes
- Add all the ingredients to the food processor and blend until smooth
- Taste and adjust the seasoning to your liking
- Transfer to jars and store in the fridge for up to two weeks

Have you tried scapes?

![Elevate Your Drinks with Homemade Lavender Simple Syrup for Lavender Lattes and Mocktails [Recipe]](https://images.squarespace-cdn.com/content/v1/60e85024dc86d643da81c96a/1656014505449-DRB2M71VCU9EODGEHOND/PXL_20220620_150019269.PORTRAIT.jpg)
Elevate Your Drinks with Homemade Lavender Simple Syrup for Lavender Lattes and Mocktails [Recipe]
Indulging in a perfectly crafted beverage can transport us to a world of relaxation and bliss. Imagine sipping a fragrant lavender latte or savoring a refreshing lavender cocktail. Lavender adds a touch of elegance and tranquility to any drink, and creating your own lavender simple syrup allows you to infuse your beverages with the enchanting essence of this versatile herb. In this blog post, we will guide you through the process of growing and harvesting lavender, explore its aromatherapy benefits, delve into the various ways you can use lavender simple syrup, and provide a step-by-step recipe for creating this aromatic syrup hat will elevate your lattes, mocktails and cocktails to a whole new level.

Indulging in a perfectly crafted beverage can transport us to a world of relaxation and bliss. Imagine sipping a fragrant lavender latte or savoring a refreshing lavender cocktail. Lavender adds a touch of elegance and tranquility to any drink, and creating your own lavender simple syrup allows you to infuse your beverages with the enchanting essence of this versatile herb. In this blog post, we will guide you through the process of growing and harvesting lavender, explore its aromatherapy benefits, delve into the various ways you can use lavender simple syrup, and provide a step-by-step recipe for creating this aromatic syrup hat will elevate your lattes, mocktails and cocktails to a whole new level.
Growing and Harvesting Lavender
Lavender, with its beautiful purple blooms and soothing fragrance, is a delightful addition to any garden. To grow lavender, choose a sunny spot with well-draining soil. Plant the lavender seedlings or cuttings in the spring, ensuring they have enough space to grow and thrive. Lavender is challenging to grow from seed successfully - I recommend getting a few healthy plants from your local garden center and then propagating additional plants from cuttings. Once established, lavender thrives on a bit of neglect and should not require much in the way of watering as it is a drought tolerant plant.
Harvesting lavender is a task that requires careful timing. Wait until the flower buds have formed and are showing color but haven't fully opened. This is when the lavender's essential oils are at their peak. Plan your harvest for the early morning, before the sun can dry out the essential oils in the plant blooms. Using pruning shears or scissors, carefully snip the flower stems, leaving a few inches of green foliage on the plant to encourage regrowth.
Drying Lavender and Aromatherapy Benefits
After harvesting, it's time to dry your lavender. Gather small bundles of lavender stems and secure them with a rubber band or twine. Hang them upside down in a cool, dry place with good air circulation. This process allows the lavender to dry naturally while retaining its fragrance and vibrant color. Once the lavender is fully dried, you can gently remove the buds from the stems and store them in an airtight container.
Aside from its culinary applications, lavender is renowned for its aromatherapy benefits. The calming and soothing properties of lavender promote relaxation, reduce stress, and improve sleep quality. Infusing your drinks with lavender can add a touch of serenity to your day and enhance your overall well-being.
Using Lavender Simple Syrup in Your Favorite Drink
Lavender simple syrup is a versatile ingredient that can elevate a wide range of beverages. Here are a few easy ways to incorporate it into your drink repertoire:
Lavender Latte: Add a touch of sophistication to your morning routine by infusing your latte with lavender syrup. Combine freshly brewed espresso or strong coffee with steamed milk and a splash of lavender syrup. Top it off with a sprinkle of dried lavender buds for a visually stunning and aromatic treat.
Lavender Lemonade: On a hot summer day, there's nothing quite as refreshing as a lavender-infused lemonade. Mix freshly squeezed lemon juice, water, and lavender syrup to taste. Serve it over ice and garnish with a sprig of fresh lavender for an invigorating twist on a classic beverage.
Lavender Cocktail or Mocktail: Impress your guests with a sophisticated lavender cocktail. Combine lavender syrup, your choice of spirit (such as vodka or gin), a splash of fresh lemon juice, and ice in a shaker. Shake vigorously, strain into a chilled glass, and garnish with a lavender sprig or lemon twist. Sip and savor the floral notes of this elegant libation. For a simple mocktail, click here for my recipe.
Making Lavender Simple Syrup: A Step-by-Step Guide
To create your own lavender simple syrup, you’ll only need three ingredients. Just follow these easy steps:
Ingredients:
1 tablespoon dried lavender buds
1 cup sugar
1 cup water
Instructions:

In a small saucepan, combine the dried lavender buds, sugar, and water.
Place the saucepan over medium heat and bring the mixture to a gentle boil, stirring occasionally to dissolve the sugar. Let it boil for one minute.
Remove the saucepan from the heat and allow the mixture to steep for about an hour. This allows the lavender to infuse its delicate flavor and aroma into the syrup.
After steeping, strain the syrup through a fine-mesh sieve or cheesecloth into a clean jar or bottle.
Store the lavender simple syrup in the refrigerator for up to two weeks, or use immediately in your favorite beverages.
Homemade lavender simple syrup opens up a world of creative possibilities for your drinks. From lavender lattes to lavender-infused cocktails and mocktails, this fragrant syrup adds a touch of elegance and relaxation to every sip. By growing and harvesting your own lavender, you can create a truly unique syrup that captures the essence of this versatile herb. Whether you're seeking a moment of tranquility or looking to impress your guests, lavender simple syrup is a must-have ingredient in your drink repertoire. So, gather your lavender, embark on the journey of crafting this unique syrup, and enjoy the enchanting flavors and aromas that lavender brings to your favorite beverages.
![Refreshing Watermelon, Basil, and Feta Salad: A Summertime Favorite [Recipe]](https://images.squarespace-cdn.com/content/v1/60e85024dc86d643da81c96a/f7b99577-5747-42ab-af4c-ce5bfa039407/PXL_20220627_175610264.jpg)
Refreshing Watermelon, Basil, and Feta Salad: A Summertime Favorite [Recipe]
When it comes to capturing the essence of summer, few flavors can rival the vibrant combination of watermelon and basil. These two versatile ingredients have the power to elevate your meals, whether you prefer sweet or savory dishes. The unique blend of the sunshine sweetness of watermelon, the earthy aroma of basil, and the tang of lime juice creates a refreshing sensation that is perfect for the summer season. In this article, we will explore the joy of growing watermelon and basil in your garden, delve into the benefits of light and refreshing meals, and indulge in the nostalgia that these flavors evoke.

When it comes to capturing the essence of summer, few flavors can rival the vibrant combination of watermelon and basil. These two versatile ingredients have the power to elevate your meals, whether you prefer sweet or savory dishes. The unique blend of the sunshine sweetness of watermelon, the earthy aroma of basil, and the tang of lime juice creates a refreshing sensation that is perfect for the summer season. In this article, we will explore the joy of growing watermelon and basil in your garden, delve into the benefits of light and refreshing meals, and indulge in the nostalgia that these flavors evoke.
Growing Watermelon and Basil in Your Garden
Imagine strolling through your garden on a warm summer day, plucking a juicy watermelon and fragrant basil leaves straight from the vine. By growing these two ingredients in your own backyard, you not only gain access to the freshest produce but also experience the joy of nurturing and cultivating your own food.
Watermelons are a delight to grow, with their sprawling vines and large, vibrant fruits. To cultivate watermelons, you'll need a sunny spot in your garden with well-drained soil. Start by sowing the seeds or transplanting seedlings after the last frost. Ensure you provide enough space for the vines to spread out and trellis them if needed. Regular watering, fertilizing, and protection from pests will help you achieve a bountiful harvest.
Basil, on the other hand, is an aromatic herb that thrives in warm weather. Choose a location that receives at least six hours of sunlight daily and has well-drained soil. Basil can be grown from seeds or transplants, and with regular pruning, it will continue to flourish throughout the summer. Pinching off the flowers will encourage the plant to focus its energy on producing more leaves, allowing you to enjoy the distinct aroma and flavor of fresh basil in your recipes.
As the temperature rises and the sun shines brighter, our bodies crave lighter and more refreshing meals. Watermelon and basil offer the perfect combination of flavors to satisfy these cravings while providing numerous health benefits.
Watermelon is not only a delicious and hydrating fruit but also a nutritious addition to your diet. With its high water content, it helps keep you hydrated during the hot summer months. Moreover, watermelon is an excellent source of vitamins A and C, which support healthy skin and a robust immune system. Additionally, it contains lycopene, a powerful antioxidant known for its potential to reduce the risk of certain diseases. Incorporating watermelon into your meals can contribute to your overall well-being while tantalizing your taste buds.

Watermelon Feta Salad
Ingredients
- 5 cups cubed watermelon
- ⅓ cup crumbled feta cheese
- ⅓ cup torn mint or basil leaves
- Sea salt
- 2 tablespoons extra-virgin olive oil
- 3 tablespoons lime juice
- ½ garlic clove, minced
- ¼ teaspoon sea salt
Instructions
- Cube your watermelon and roughly chop your basil.
- Combine the salad ingredients in a bowl.
- In a small mason jar, add all the dressing ingredients and shake until well combined.
- Pour over the salad and enjoy!
Notes
This salad is best eaten fresh.
Basil, often referred to as the "king of herbs," brings its unique aroma and taste to any dish it graces. Beyond its delightful flavor, basil also offers several health benefits. It is rich in vitamins A, K, and C, as well as essential minerals like potassium and magnesium. Basil contains compounds with anti-inflammatory and antibacterial properties, which may promote overall health. Consuming basil can aid digestion, reduce inflammation, and provide a fresh burst of flavor to your summer meals.
One of the most remarkable aspects of watermelon and basil is their versatility. They can be incorporated into an array of recipes, ranging from light salads to refreshing beverages - watermelon can even be grilled!
Watermelon's natural sweetness lends itself beautifully to both sweet and savory plates, and basil's aromatic profile complements a wide range of dishes.
Summer is a season synonymous with nostalgia. The scents and flavors we associate with this time of year have the power to transport us back to cherished memories. Watermelon and basil evoke the essence of summer like no other flavors.
The juiciness of watermelon and the distinct aroma of basil can transport us to carefree childhood days, enjoying picnics and poolside gatherings. These flavors remind us of the simple pleasures of summer and evoke a sense of joy and relaxation. By incorporating watermelon and basil into our meals, we can recreate these cherished moments and celebrate the spirit of summer.
I’ll admit I was skeptical about combining the crisp sweetness of watermelon with salty crumbly feta and basil, but it’s safe to say it was love at first bite and it took everything in me to share the bowl with my family instead of finishing it off myself!
I think the secret is the lime juice in the dressing - the acidity really ties together all these different flavors to create a light and refreshing snack or side salad for your summer time meals.
This watermelon salad is a versatile addition to any summer meal. It pairs well with grilled meats, seafood, or as a refreshing side dish for picnics and barbecues. The combination of juicy watermelon, fragrant basil, and salty feta cheese creates a refreshing and tantalizing experience for your taste buds. Whether you're hosting a summer gathering or simply looking to elevate your daily meals, this watermelon salad is a delightful choice. Embrace the vibrant flavors of the season and enjoy the harmonious balance of sweetness, herbaceousness, and tanginess that this salad brings.

Refreshing Lavender Lemon Mocktail: An easy Non-Alcoholic Beverage [recipe
When it comes to enjoying a flavorful and refreshing beverage, mocktails offer a fun alternative to traditional cocktails. With their vibrant colors and enticing flavors, mocktails allow everyone to partake in the celebration, regardless of whether they consume alcohol or not. In this blog post, we will explore the world of mocktails and guide you through the process of creating a sensational Lavender Lemon Mocktail. From growing and harvesting lavender to the therapeutic benefits of this aromatic herb, we'll cover it all. Join us on this journey as we combine the delicate essence of lavender with the tangy zing of lemon to craft an easy non-alcoholic mixed drink that will captivate your taste buds.

When it comes to enjoying a flavorful and refreshing beverage, mocktails offer a fun alternative to traditional cocktails. With their vibrant colors and enticing flavors, mocktails allow everyone to partake in the celebration, regardless of whether they consume alcohol or not. In this blog post, we will explore the world of mocktails and guide you through the process of creating a sensational Lavender Lemon Mocktail. From growing and harvesting lavender to the therapeutic benefits of this aromatic herb, we'll cover it all. Join us on this journey as we combine the delicate essence of lavender with the tangy zing of lemon to craft an easy non-alcoholic mixed drink that will captivate your taste buds.
The origins of mocktails can be traced back to the early 20th century when the temperance movement gained momentum. This movement aimed to promote the abstention from alcoholic beverages, primarily driven by concerns over the negative social and health effects associated with alcohol consumption.
During the Prohibition era in the United States (1920-1933), the production, sale, and distribution of alcoholic beverages were banned. As a result, bartenders and mixologists had to find creative ways to cater to their patrons who still desired the experience of enjoying a well-crafted drink without the alcohol content.
During this time, mocktails, also known as "temperance drinks" or "soft cocktails," emerged as a popular alternative. Bartenders began experimenting with combinations of fruit juices, syrups, sodas, and other non-alcoholic ingredients to create flavorful and visually appealing beverages that could mimic the complexity and presentation of cocktails.
Mocktails became particularly popular in establishments such as speakeasies, where people gathered in secret to socialize and enjoy a drink in the midst of Prohibition. These non-alcoholic concoctions allowed individuals to partake in the convivial atmosphere while adhering to the restrictions imposed by the law.
Over the years, mocktails continued to evolve and gain popularity, especially as the culture of responsible drinking and wellness-conscious lifestyles became more prevalent. Today, mocktails have become a prominent feature in bars, restaurants, and social events, catering to a diverse range of preferences and dietary choices.
Mocktails offer an array of benefits, including providing non-drinkers and designated drivers with enjoyable and sophisticated beverage options. They also allow individuals to explore new flavors, experiment with creative combinations, and enjoy the social aspect of cocktail culture without the effects of alcohol.
In recent years, the mocktail trend has experienced a surge in popularity, with mixologists and bartenders showcasing their creativity by developing elaborate and innovative mocktail recipes. These non-alcoholic creations have become an integral part of the beverage industry, reflecting a shift towards inclusivity and providing a broader range of options for individuals seeking enjoyable alternatives to alcoholic drinks.
Whether enjoyed by those who prefer non-alcoholic beverages or by those choosing to moderate their alcohol consumption, mocktails have undoubtedly established themselves as a vibrant and enticing category within the world of mixed drinks, offering a refreshing and satisfying experience for all.
Growing and Harvesting Lavender
Before we delve into the recipe, let's start by understanding how to grow and harvest lavender, the star ingredient of our mocktail.
Lavender thrives in well-draining soil and plenty of sunlight. Plant lavender in your garden or in pots during the spring, and ensure it receives at least six hours of direct sunlight per day. As lavender grows, prune it to encourage bushier growth.
To harvest lavender, wait until the buds have developed color but haven't fully opened. Plan to harvest in the early morning, as this is when the essential oils are at their peak. Using sharp shears, cut the flower stems, leaving a few inches of green foliage on the plant to support regrowth. It's best to harvest lavender in the morning when the essential oils are most concentrated.
Drying Lavender and Aromatherapy Benefits
Once you have harvested your lavender, it's time to dry it. Gather small bundles of lavender stems and secure them with twine or a rubber band. Hang the bundles upside down in a cool, dry place with good air circulation. This process allows the lavender to dry naturally while retaining its color and fragrance. After about two to four weeks, the lavender will be fully dried and ready to use.
Aside from its fragrant floral flavor, lavender offers numerous aromatherapy benefits. The calming and soothing properties of lavender have been cherished for centuries. Its aroma promotes relaxation, reduces stress and anxiety, and aids in improving sleep quality. Incorporating lavender into your mocktail not only adds a pleasant taste but also enhances the overall experience with its therapeutic effects.
Mocktails vs. Cocktails: Understanding the Difference
Mocktails are non-alcoholic beverages that mimic the flavors and presentation of cocktails, making them suitable for everyone to enjoy. While cocktails typically include alcoholic spirits, mocktails rely on creative combinations of ingredients, such as fruit juices, syrups, and carbonated beverages, to deliver a captivating taste experience without the alcohol content. Mocktails offer a refreshing and elegant alternative for those who choose not to consume alcohol or prefer lighter options.
Do Mocktails Have Alcohol?
No, mocktails are specifically designed to be alcohol-free. This makes them a popular choice for individuals who want to abstain from alcohol or simply prefer non-alcoholic beverages.
Here's a step-by-step guide on how to make a mocktail:
Choose a Base: Start by selecting a suitable base for your mocktail. This can be a fruit juice, a flavored syrup, a non-alcoholic spirit, or a combination of these ingredients. The base will serve as the foundation of your mocktail, providing flavor and body.
Add Flavor Enhancers: To enhance the taste and complexity of your mocktail, consider adding flavor enhancers such as fresh fruits, herbs, spices, or bitters. These ingredients will elevate the flavor profile and add a touch of uniqueness to your creation. Experiment with combinations that complement your chosen base.
Sweeten to Taste: Depending on the ingredients used, you may need to add sweetness to balance the flavors. Use simple syrup, flavored syrups, agave nectar, honey, or other sweeteners of your choice. Start with a small amount and gradually adjust to achieve the desired level of sweetness.
Incorporate Texture: To add texture and visual appeal to your mocktail, consider including elements such as crushed ice, sparkling water, soda, or tonic water. These ingredients can provide a refreshing effervescence and a pleasing mouthfeel.
Mix and Shake: Once you have gathered all your ingredients, it's time to mix or shake them together. If your mocktail contains fruit juices or other ingredients that need blending, use a blender or a mixing glass to combine them thoroughly. For mocktails with added carbonation, gently stir to incorporate the bubbles without losing fizz. Alternatively, if your mocktail includes herbs or muddled ingredients, you can use a shaker to shake them with ice, allowing the flavors to meld.
Garnish and Serve: A garnish adds visual appeal and can enhance the aroma of your mocktail. Consider using fresh fruits, herbs, citrus twists, or even edible flowers to garnish your creation. Use your imagination to make your mocktail visually striking. Serve your mocktail in an appropriate glassware, such as a highball glass, Collins glass, or a stemmed glass, depending on the style of your mocktail.
Crafting the Lavender Lemon Mocktail
Now, let's dive into creating our Lavender Lemon Mocktail. Here's what you'll need:
Ingredients:
1 oz lavender simple syrup (click here for the recipe)
1 oz fresh lemon juice
1 oz seltzer or sparkling water
Ice cubes
Sliced lemon, for garnish
Lavender sprigs, for garnish
Instructions:
In a cocktail shaker, combine the lavender simple syrup, fresh lemon juice, and seltzer.
Add ice cubes to the shaker, ensuring they cover the liquid ingredients.
Secure the shaker lid tightly and shake vigorously for about 15 seconds. This will chill the mocktail and blend the flavors together.
Prepare a glass by adding a few ice cubes.
Strain the mocktail mixture into the glass, discarding any ice or solids left in the shaker.
Garnish the mocktail with a slice of lemon and a sprig of lavender for an exquisite visual appeal.
Serve your Lavender Lemon Mocktail immediately and enjoy.
Crafting a Lavender Lemon Mocktail allows you to experience the enchanting flavors of lavender in a non-alcoholic mixed drink. By growing and harvesting lavender, you can infuse your mocktail with the delicate essence of this versatile herb. The therapeutic benefits of lavender further enhance the overall enjoyment of this refreshing beverage. The combination of lavender simple syrup, fresh lemon juice, and sparkling water will transport your taste buds to a realm of exquisite flavors and invigorating aromas.
Mocktails offer a wide range of flavors, from fruity and tropical to herbal and citrusy. They often feature a combination of fresh fruit juices, flavored syrups, sparkling water, and creative garnishes. Mocktails allow everyone to enjoy the art of mixology, exploring unique combinations and experimenting with various ingredients to create tantalizing and visually appealing drinks. With vibrant colors, invigorating flavors, and a touch of elegance, mocktails bring a sense of celebration and enjoyment to any summer gathering. Whether it's a zesty Virgin Mojito, a tangy Watermelon Cooler, or a refreshing Berry Spritzer, these alcohol-free concoctions offer a burst of summer flavors and are perfect for sipping by the pool, at picnics, or during outdoor gatherings.
So, raise a glass and toast to the vibrant world of non-alcoholic mixed drinks, where every sip is a refreshing journey of taste and a celebration of the season.
![How to Grow and Harvest Basil for the Best Vegan Pesto - A Complete Guide [Recipe]](https://images.squarespace-cdn.com/content/v1/60e85024dc86d643da81c96a/60e4900a-b65c-48c5-ac22-48542e4c6197/PXL_20220706_174104891.jpg)
How to Grow and Harvest Basil for the Best Vegan Pesto - A Complete Guide [Recipe]
Pesto, a beloved Italian sauce, has gained popularity worldwide for its vibrant flavors and versatility. Traditionally made with ingredients like Parmesan cheese and pine nuts, pesto has become a staple in many kitchens. However, for those following a vegan lifestyle or looking to explore plant-based alternatives, a vegan basil pesto is a perfect choice. In this comprehensive guide, we'll delve into the art of making a vegan basil pesto, covering everything from growing and harvesting basil to the step-by-step process of creating the perfect vegan pesto sauce.

Pesto, a beloved Italian sauce, has gained popularity worldwide for its vibrant flavors and versatility. Traditionally made with ingredients like Parmesan cheese and pine nuts, pesto has become a staple in many kitchens. However, for those following a vegan lifestyle or looking to explore plant-based alternatives, a vegan basil pesto is a perfect choice. In this comprehensive guide, we'll delve into the art of making a vegan basil pesto, covering everything from growing and harvesting basil to the step-by-step process of creating the perfect vegan pesto sauce.
The Beauty of Basil
Basil, a fragrant and versatile herb, takes center stage in pesto. It is one of my favorite herbs to grow, and I grow at least 40 plants each summer, so I can make pesto in bulk and freeze it to get us through the winter. We go through a lot of pesto, but most people probably want at least 10 basil plants growing in their garden for using fresh and preserving. It is a great plant to grow on your deck, since the aroma is thought to repel mosquitos. Basil's history as a culinary herb is rich and diverse, with origins dating back to ancient times. Basil plants thrive in warm climates and can be easily grown in a garden or even in pots indoors. The process of growing basil is rewarding and relatively simple. Choose a sunny spot, provide well-drained soil, and water consistently. Harvesting basil involves picking the fresh leaves as needed, stimulating further growth. The distinct flavor profile and aromatic qualities of basil add a delightful character to vegan pesto.
How to grow and harvest basil
Growing and harvesting basil is a rewarding and relatively simple process. Whether you have a garden plot or a few pots on a windowsill, basil can thrive in various environments. Here's a quick step-by-step guide on how to grow and harvest basil:
Select the Right Variety: Choose a basil variety that suits your needs and growing conditions. Common varieties include Genovese basil (traditional basil used in pesto), Thai basil (with a hint of licorice flavor), and lemon basil (citrusy aroma). Consider factors such as taste preference and climate suitability.
Prepare the Soil: Basil prefers well-drained soil with a pH level between 6 and 7. If growing in a garden bed, loosen the soil and remove any weeds. Amend the soil with organic matter like compost to improve its fertility and drainage.
Planting Basil
Seeds: If starting from seeds, sow them indoors 6-8 weeks before the last frost date or directly in the garden after the danger of frost has passed. Plant the seeds ¼ inch deep and 10-12 inches apart. Once the seedlings have grown a few inches tall, thin them to allow proper airflow and prevent overcrowding.
Transplants: Alternatively, you can purchase young basil plants from a nursery and transplant them into your garden or containers. Ensure the plants are spaced 10-12 inches apart - nurseries often plant multiple seeds per cell pack, so if you see more than one stem, you'll want to separate those.
Provide Adequate Sunlight: Basil loves sunlight and requires at least 6-8 hours of direct sunlight each day. Place your basil plants in a sunny location, such as a south-facing window or a spot in the garden that receives ample sunlight.
Watering and Caring for Basil
Water: Basil requires consistent moisture, but be careful not to overwater. Water the plants deeply whenever the top inch of soil feels dry. Avoid wetting the foliage to prevent diseases.
Mulch: Applying a layer of organic mulch around the basil plants helps retain moisture, suppress weeds, and regulate soil temperature.
Fertilization: Basil is a relatively low-maintenance herb, but you can give it a boost by applying a balanced organic fertilizer once or twice during the growing season.
Pruning and Harvesting Basil
Pruning: Regularly pinch back basil plants just above a leaf node to encourage bushier growth and prevent flowering. This will help maintain a steady supply of fresh leaves.
Harvesting: Once the basil plants have grown to a height of 6-8 inches, you can start harvesting. Use clean, sharp scissors or pruners to cut entire stems just above a leaf node. This will encourage new growth from the lower nodes. Avoid removing more than one-third of the plant at a time to ensure its continued vitality.
To maximize your basil harvest regularly harvest the leaves, even if you don't immediately need them, to prevent flowering and encourage continuous leaf production. Harvest in the morning when the essential oils are at their peak for the best flavor and aroma.
If you have an abundance of basil leaves, consider preserving them by drying, freezing, or making basil-infused oils or pesto.
Going Vegan: Ingredients and Substitutions
To create a vegan basil pesto, it's essential to identify suitable substitutes for the traditional non-vegan ingredients. Traditional pesto includes Parmesan cheese, but for a vegan version, nutritional yeast or vegan Parmesan can be used as alternatives. These ingredients offer a cheesy flavor and texture that mimic the original. Additionally, pine nuts, a common pesto ingredient, can be replaced with various nuts such as cashews, almonds, or walnuts. These nuts not only provide a rich and creamy texture but also offer nutritional benefits. Other essential ingredients in vegan pesto include garlic, olive oil, and lemon juice, which add depth and brightness to the sauce.
The Perfect Vegan Pesto Recipe
Here's how to create the best vegan basil pesto:
Gather the ingredients: You'll need fresh basil leaves, nuts of your choice, garlic cloves, nutritional yeast or vegan Parmesan, lemon juice, olive oil, and salt.
Add the basil leaves, nuts, garlic, and nutritional yeast or vegan Parmesan to a food processor.
Process until the ingredients are well combined and finely chopped.
Slowly drizzle in the olive oil while the food processor is running until the mixture reaches a smooth and creamy consistency.
Add lemon juice and salt to taste, giving the pesto a final pulse to incorporate the flavors.
Taste and adjust the seasoning as needed.
Transfer the vegan basil pesto to a jar or container and store it in the refrigerator for up to a week, or freeze up to 2 months.
Flavorful Variations and Additions
While classic basil pesto is delightful on its own, there are endless possibilities for customization. Here are a few flavorful variations and additions you can explore:
Sun-Dried Tomato Pesto: Add sun-dried tomatoes to the basic recipe for a tangy and intense flavor.
Roasted Red Pepper Pesto: Blend roasted red peppers with the pesto ingredients for a smoky and sweet twist.
Herb-Infused Pesto: Experiment with incorporating other fresh herbs like parsley, cilantro, or mint to add complexity and unique flavors.
Greens Galore: Combine basil with other greens like spinach or arugula to create a vibrant and nutritious pesto variation.

Basil Pesto - Vegan + Nut Free
Ingredients
- 1/2 cup toasted pumpkin seeds
- 2 tablespoons lemon juice
- 2 garlic cloves
- 1/4 teaspoon salt
- 2 cups basil
- 1/3 cup olive oil, more for a smoother pesto
Instructions
- In a food processor, combine pumpkin seeds, lemon juice, garlic, salt, pepper, and pulse.
- Add the basil and pulse. With the food processor running, drizzle in the olive oil and pulse until combined.
Serving and Enjoying Vegan Basil Pesto
Once you've prepared the vegan basil pesto, here are some delicious ways to enjoy it:
Toss it with cooked pasta for a simple and satisfying meal.
Spread it on sandwiches or wraps for a burst of flavor.
Use it as a sauce for pizzas, bruschetta, or crostini.
Serve it as a dip for fresh vegetables or as a topping for roasted vegetables.
Incorporate it into marinades for grilled tofu, tempeh, or vegetables to infuse them with a savory herbaceous taste.
The Health Benefits of Vegan Basil Pesto
In addition to its delightful taste, vegan basil pesto offers several health benefits:
Basil is rich in antioxidants, vitamins A and K, and essential minerals like calcium and iron.
Nuts or seeds used in the pesto provide healthy fats, protein, and essential nutrients.
Olive oil, a key ingredient, is known for its heart-healthy properties and contains monounsaturated fats.
By choosing plant-based ingredients, vegan basil pesto becomes a wholesome addition to a balanced diet, supporting overall health and well-being.
Is pesto vegan?
Vegan pesto can be easily made by substituting non-vegan ingredients with suitable alternatives. Traditional pesto contains dairy products like Parmesan cheese, but using nutritional yeast or vegan Parmesan achieves a similar cheesy flavor without animal-derived ingredients.
My favorite vegan pesto recipe (no nuts)
Ingredients
1/2 cup toasted pumpkin seeds
2 tablespoons lemon juice
2 garlic cloves
1/4 teaspoon salt
2 cups basil
1/3 cup olive oil, more for a smoother pesto
Instructions
In a food processor or blender, combine pumpkin seeds, lemon juice, garlic, salt, pepper, and pulse. You can also use an immersion blender. Add the basil and pulse. With the food processor running, drizzle in the olive oil and pulse until combined.
Vegan basil pesto opens up a world of flavor for both herb enthusiasts and those embracing a plant-based diet. By following our detailed guide, you can master the art of making this vibrant and aromatic sauce. The versatility of vegan pesto allows you to unleash your creativity and explore endless possibilities. So, gather your fresh basil, blend up some delicious vegan pesto, and savor the incredible flavors that this plant-based delight has to offer. Enjoy the abundance of nutrients and the mouthwatering experience of the best vegan basil pesto recipe.
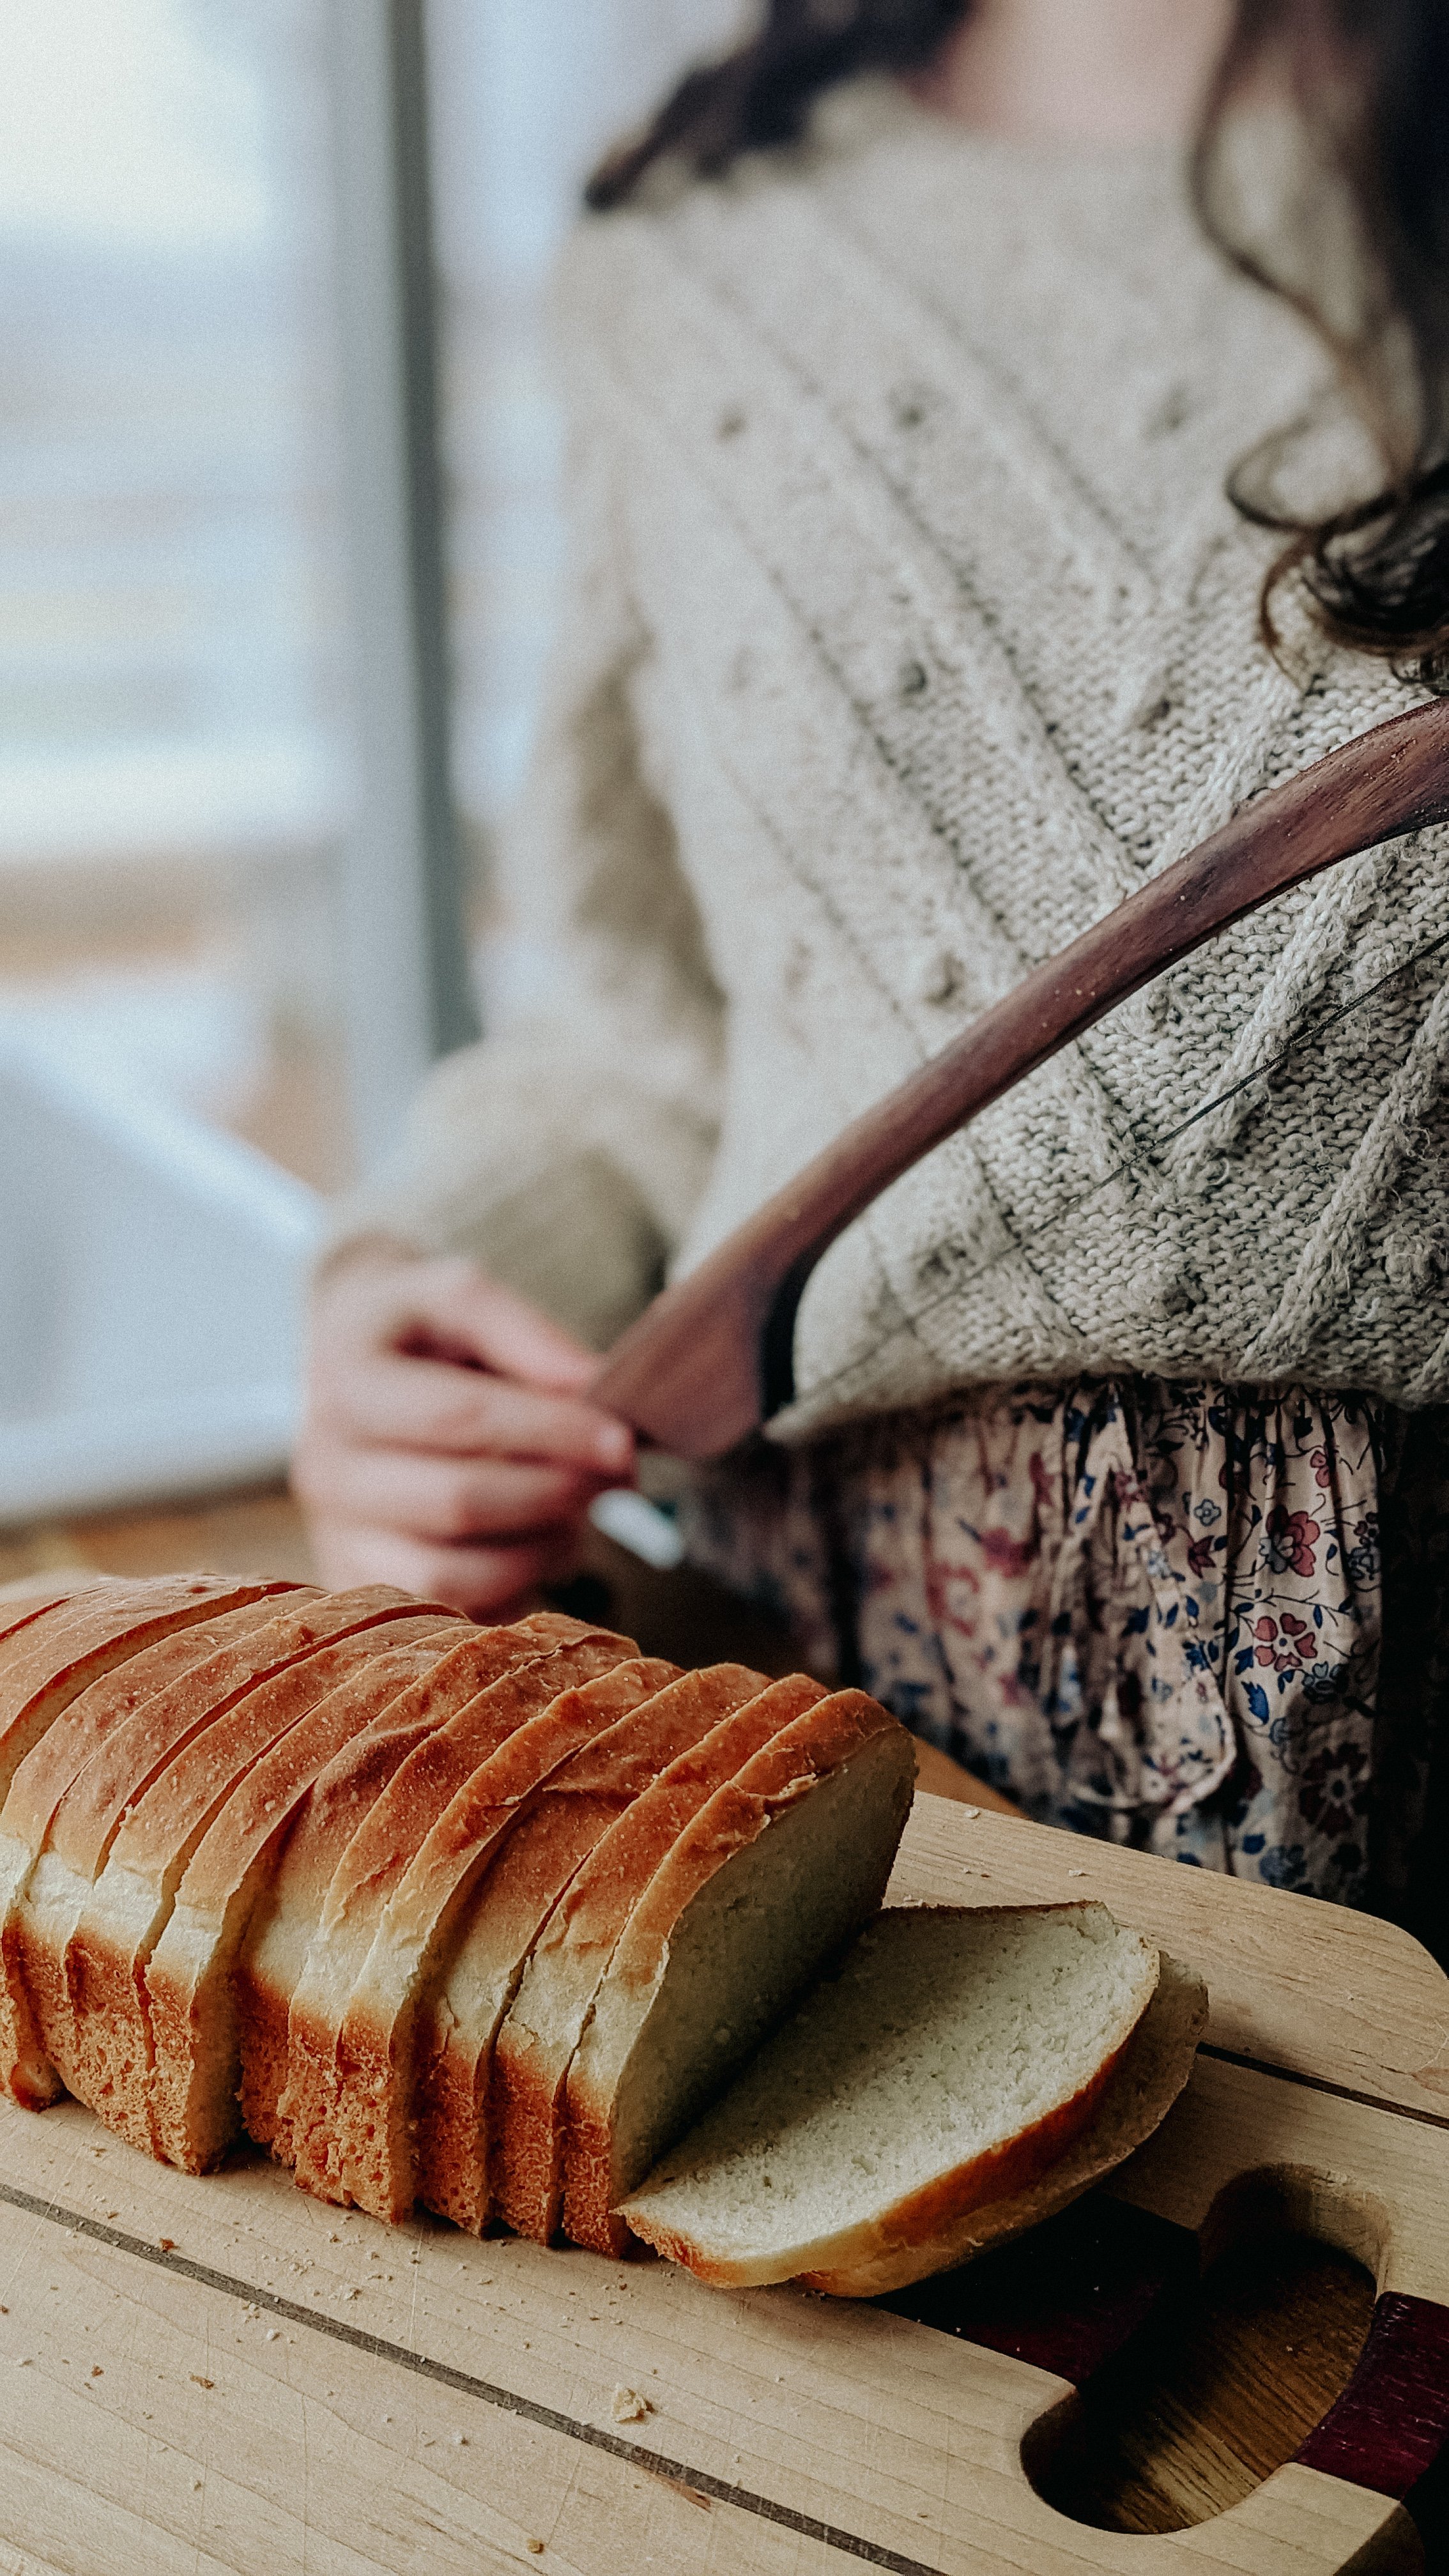
![Make Bread with NO Kneading Required [Recipe]](https://images.squarespace-cdn.com/content/v1/60e85024dc86d643da81c96a/0ae84a1b-0ddf-419f-a7e4-0d9087a8d8bd/PXL_20230120_190120755.PORTRAIT.jpg)
Make Bread with NO Kneading Required [Recipe]
Dear fresh baked bread,
I knew I first loved you before I had ever actually experienced you myself. From the moment I read Heidi for the first time as a child, I absorbed the imagery of a goatherd enjoying bread and cheese on the mountainside wrapped in a simple cloth with great excitement. Fresh bread became an elusive Thing that I knew I someday wanted to acquire, though it still did not occur to me in the era of Fruit Roll-Ups and Poptarts that fresh bread was something just anyone could make. Fresh bread had nooks and crannies to hold copious amounts of butter, a tough outer crust giving way to a soft and springy interior. Fresh bread was the stuff of dreams.
The Cottage Peach is reader-supported. When you purchase through links on our site, we may earn an affiliate commission at no additional cost to you. All opinions are our own.
Dear fresh baked bread,
I knew I first loved you before I had ever actually experienced you myself. From the moment I read Heidi for the first time as a child, I absorbed the imagery of a goatherd enjoying bread and cheese on the mountainside wrapped in a simple cloth with great excitement. Fresh bread became an elusive Thing that I knew I someday wanted to acquire, though it still did not occur to me in the era of Fruit Roll-Ups and Poptarts that fresh bread was something just anyone could make. Fresh bread had nooks and crannies to hold copious amounts of butter, a tough outer crust giving way to a soft and springy interior. Fresh bread was the stuff of dreams.
As I entered my teenage years, you became a real presence in my life, but I still saw your production as the domain of a skilled artisan with decades of experience. If I didn’t know better, I would have thought bread could only be made in the dark hours of morning, in a warm and quiet bakery commanded by a flour dusted, apron-clad master. Still, we were overjoyed at the discovery of another local bakery and enthusiastically paid for our loaves to be mixed, shaped and baked by another’s hand.
That all changed with no-knead bread. Simple to make and requiring just a handful of ingredients, suddenly my mother was filling our home with the unmistakable scents of that elusive bakery on a weekly basis. You materialized as a crusty, rustic loaf just like the ones I imagined from the books of my childhood. No knead dutch oven bread shattered my limiting belief that bread was reserved for an elite group of bakers and transformed fresh bread from a special treat into a daily occurrence. This easy bread opened the floodgates into a whole new world - one of yeast and gluten and eventually, sourdough.
And here is where we hit a rough patch in our love story. Beloved by the masses, sourdough and I just weren’t compatible. Like a mismatched couple, we disagreed a lot. I tried so hard to love you…but…I thought sourdough was too fussy. My dough rebelled, turning a toxic, angry pink color in my fridge. I tried again, only to lose my next starter to neglect once more. Sourdough and chronic illness aren’t very good friends. I couldn’t adhere to a regular baking schedule, and my dough couldn’t accept my inconsistency. When I could muster the energy (and courage!) to bake it, it failed more often than not, with texture issues I endlessly tried to remedy with more or less rise time, different kneading methods, and different ratios of water. Spending hours (days!) preparing a loaf of bread only to have it come out inedible was completely deflating. I was thoroughly turned off from baking bread by this experience. I slipped back into my limiting belief that bread - REAL bread, the bread I loved - could only be produced by a master (who was willing to waste hundreds of pounds of flour in the process of learning)
To be honest, I forgot about no knead bread for a few years. My mom’s baking phase had sputtered out, and I moved into my own place, and suddenly there wasn’t any fresh bread to be had any more. So thoroughly discouraged by my sourdough baking experience, I said to myself and others that I “just wasn’t a very good baker” and “didn’t enjoy baking bread”. I’ve always been the sort of person who picks the most complex project to learn how to knit, which often leads to an all-or-nothing mentality that can completely make or break my experience in learning anything new. This is a dangerous gamble that has led me to abandon more projects than I care to admit. I became aware that I have little patience for the hours of practice mastery requires. This was something I was determined to change about myself, little by little. I knew that to avoid discouragement I needed to start small.
“How about sandwich bread?” A small voice in my mind said.
“I do like sandwiches” I replied warily.
The first few loaves were just ‘meh’ - but ‘meh’ was infinitely better than ‘inedible brick of flour and water’...so I kept going.
The next batch was just a little bit better.
And the batch after that, near perfection.
Suddenly I had it - I had grasped onto a strand of knowledge, of understanding, that could carry me through the more complex recipes I wanted to try. I had started small, understood the principles, waited for it to click into place, and now there was a framework for taking the next step, and the one after that.
I could have danced across the kitchen with a loaf in each arm. I may have done just that.
Rolls came next. Dainty and cute, perfectly portioned and held under the tension of a glutenous web. Packed tightly together in a round pie tin they rose and baked under my supervision. In my excitement I could not wait for them to cool to begin pulling them apart at the seams, glazing the tops with honey and spreading thick pats of butter along the inside. It was the best roll I have had in my 30 years of life.
“But what about the no knead bread?” that little voice said.
I still had not remembered. But one fateful day when the relentless rain outside had my arthritic joints aching (a fact that I resented at 30, my bones protesting like that of an 80 year old) I found myself facing a conundrum - I wanted fresh bread, but kneading it was going to prove problematic.
I sometimes just stuff everything into my grandmother’s stand mixer when this is the case. It works just fine. But for some reason, today was different. Today I remembered the artisan no knead bread.
It’s an easy bread to bake, I promise. It won’t tire you out, or leave you disappointed. As far as bread recipes go, there is no mistaking this one for a flop. You can make no knead yeast bread at home this morning, and enjoy it with lunch tomorrow. This is a rustic loaf that goes well with soup, toasted and slathered with butter and then soaked into the soup itself to lap up all those deep flavors. I also enjoy it with a fried egg on top for breakfast, or transformed into french toast. The toppings you can add to bread are just about endless. Turn it into dessert with a layer of hazelnut spread, or cinnamon sugar and thick pats of fresh butter. Made into a grilled cheese with basil pesto and sliced tomato and a drizzle of balsamic vinegar it is the perfect small lunch for one.
The recipe we have always used in my house comes from Jim Lahey, owner of Sullivan Street Bakery. It was published in the New York Times and became one of the most popular recipes they ever published. Typically I try and share my own spin on things, but in this case the original stands so well on it’s own, no modification is needed.
Let’s get started.
No knead bread recipe from NYT Cooking:
3⅓ cups/430 grams all-purpose or bread flour, plus more for dusting
Generous ¼ teaspoon instant yeast
2 teaspoons kosher salt
Cornmeal or wheat bran, as needed
In a large bowl combine flour, yeast and salt. Add 1½ cups/345 grams water and stir until blended; dough will be shaggy and sticky. Cover bowl with plastic wrap. Let dough rest at least 12 hours, preferably about 18, at warm room temperature, about 70 degrees.
Dough is ready when its surface is dotted with bubbles. Lightly flour a work surface and place dough on it; sprinkle it with a little more flour and fold it over on itself once or twice. Cover loosely with plastic wrap and let rest about 15 minutes.
Using just enough flour to keep dough from sticking to work surface or to your fingers, gently and quickly shape dough into a ball. Generously coat a cotton towel (not terry cloth) with flour, wheat bran or cornmeal; put dough seam side down on towel and dust with more flour, bran or cornmeal. Cover with another cotton towel and let rise for about 2 hours. When it is ready, dough will be more than double in size and will not readily spring back when poked with a finger.
At least a half-hour before dough is ready, heat oven to 450 degrees. Put a 6- to 8-quart heavy covered pot (cast iron, enamel, Pyrex or ceramic) in oven as it heats. When dough is ready, carefully remove pot from oven. Slide your hand under towel and turn dough over into pot, seam side up; it may look like a mess, but that is OK. Shake pan once or twice if dough is unevenly distributed; it will straighten out as it bakes. Cover with lid and bake 30 minutes, then remove lid and bake another 15 to 30 minutes, until loaf is beautifully browned. Cool on a rack.