
BACKYARD GARDENING MADE SIMPLE
![Nature Activities for Winter: Snow Cream [Recipe]](https://images.squarespace-cdn.com/content/v1/60e85024dc86d643da81c96a/6720ab18-5211-4afe-8d88-3c7b20941ca5/PXL_20220107_170654271.jpg)
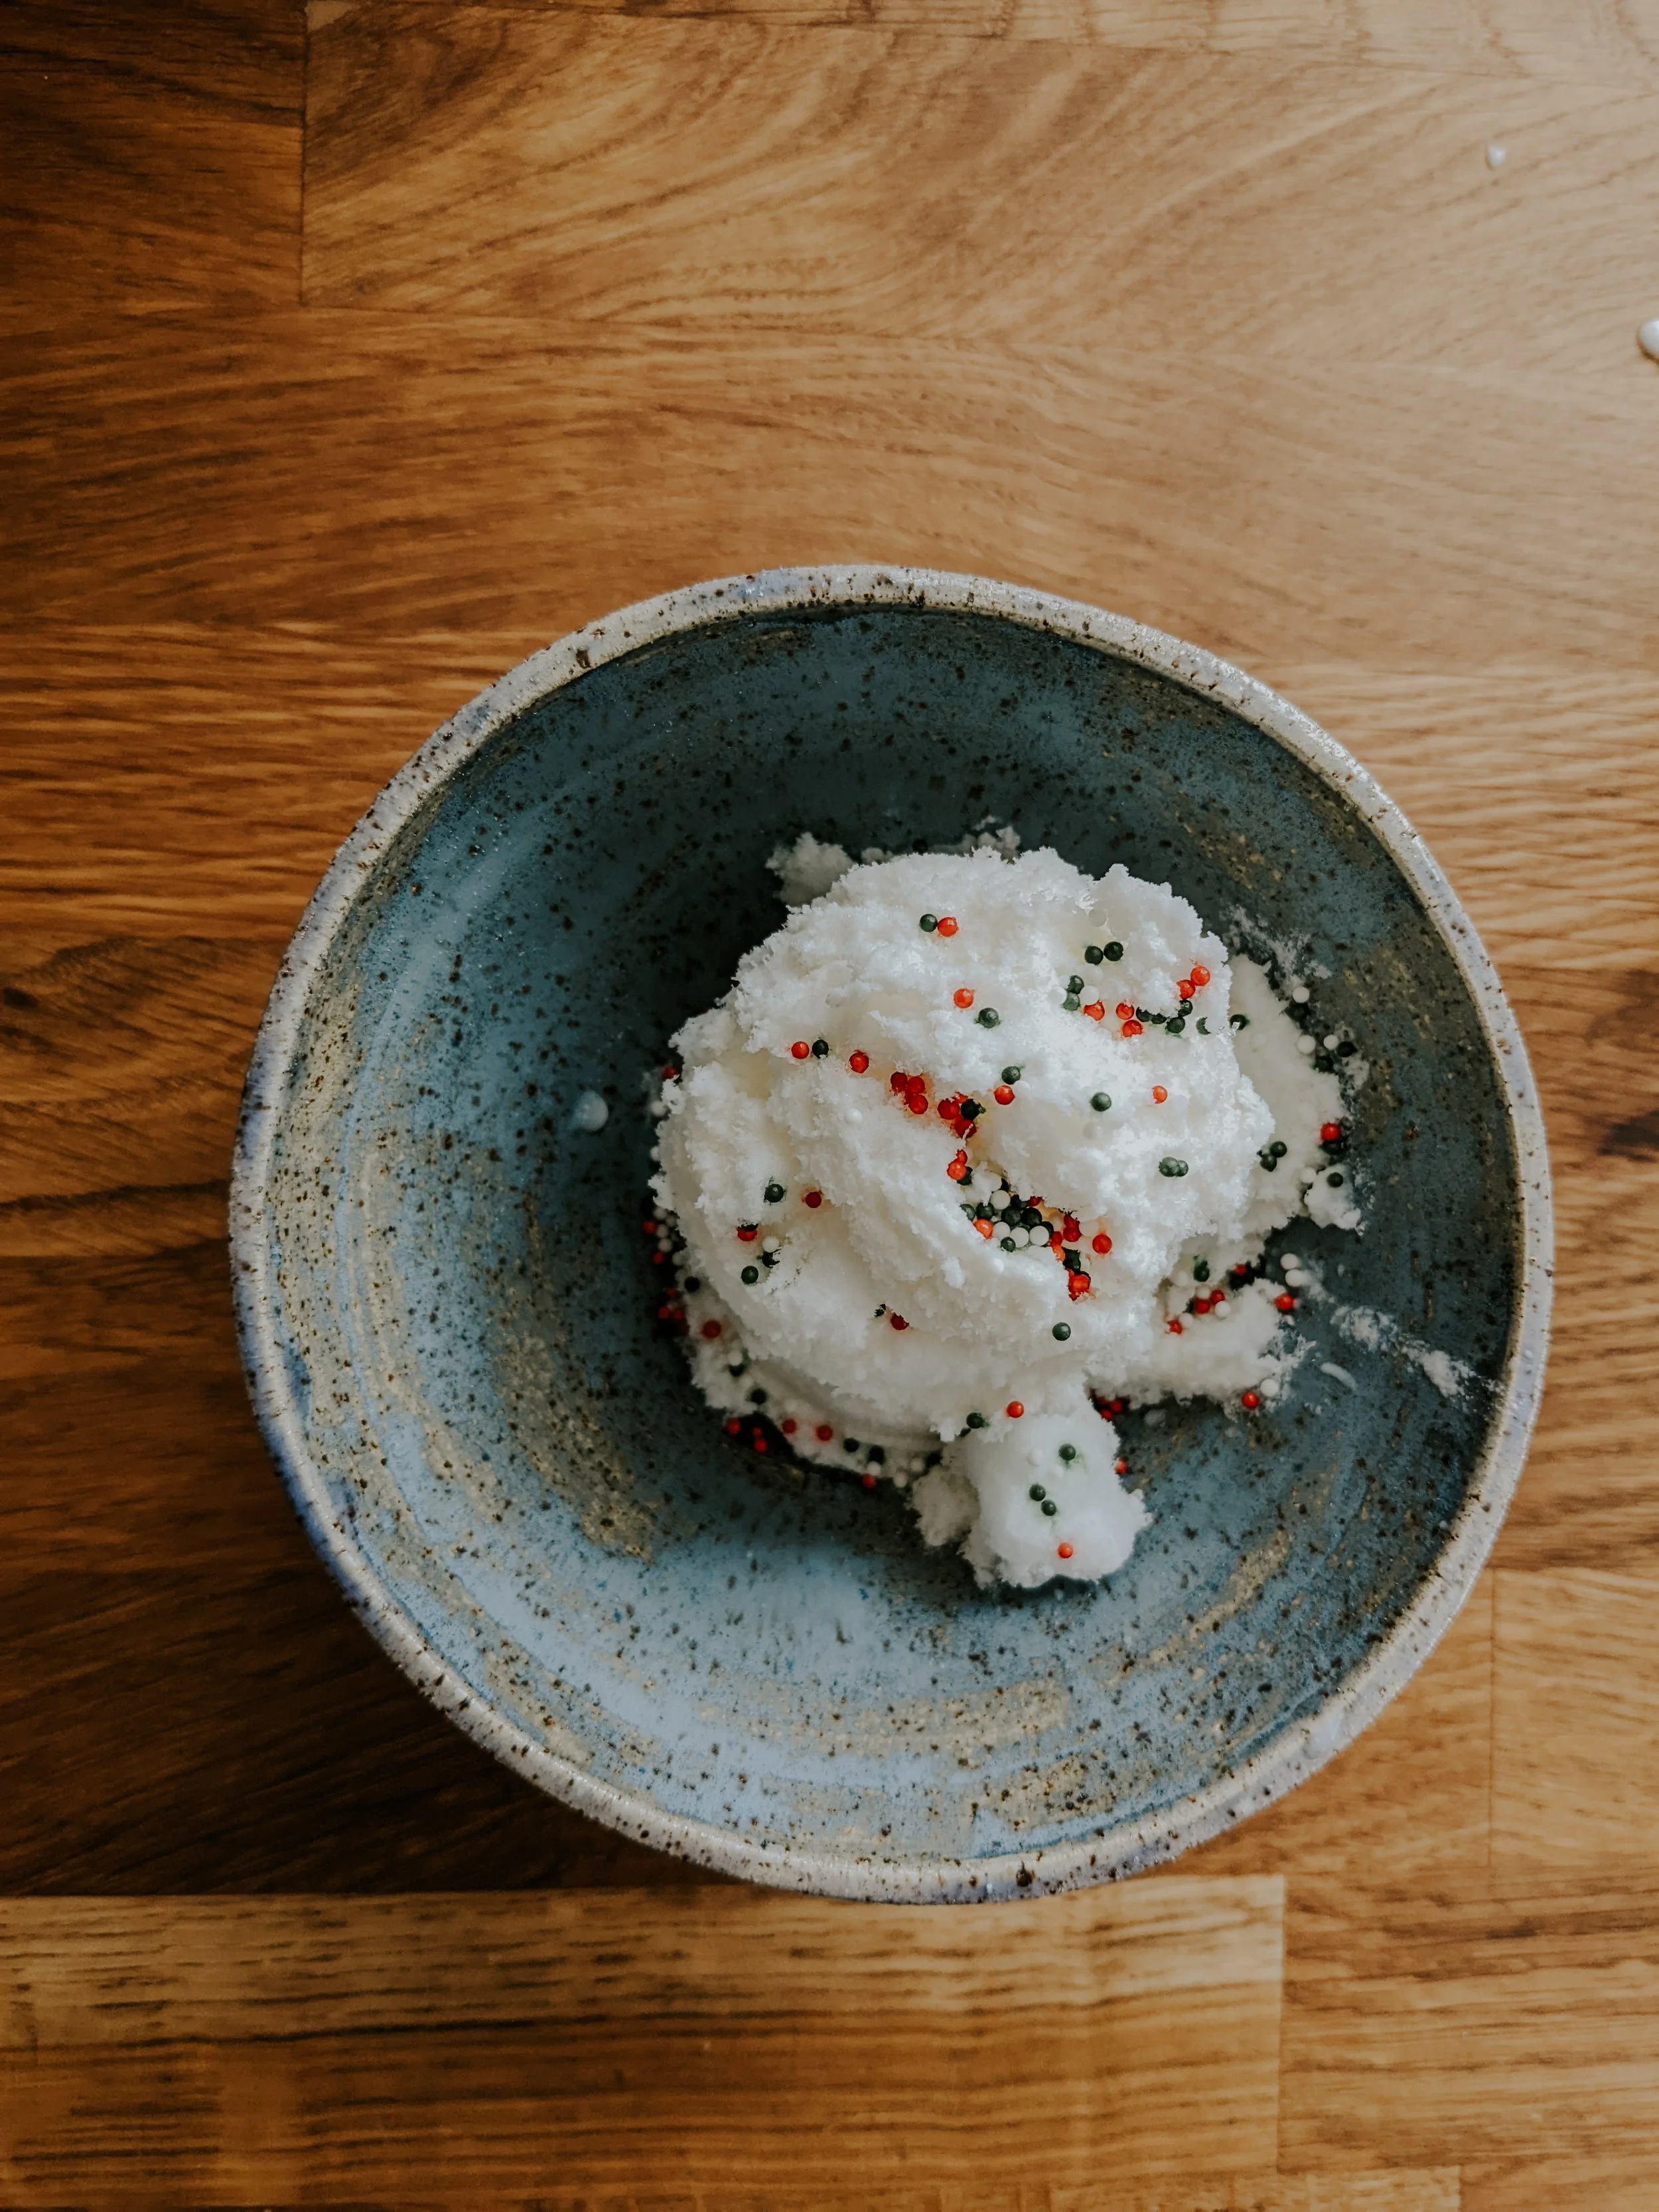
Nature Activities for Winter: Snow Cream [Recipe]
In the winter my scuffed up slippers are my constant companion, and I am always seeking out sources of external heat - much to my husband's dismay, that source is usually him. I like to pretend that his yelps as my icy toes are for comical effect, but the poor man puts up with a lot from me this time of year, my frozen appendages topping the list.
My body runs cold, so you might make the mistake of thinking that since I am always cold from my fingertips to my toes, I would avoid cold things at all costs. But no, I have one weakness, and it is ice cream. I’m told that it runs in the family, as evidenced by the sheer number of “ice cream breakfasts” I experienced as a child during sleepovers at my grandparents house. But how could I not enjoy ice cream all season long? I may be shivering from the internal cold of my own creation but I will not deny myself a dish of chocolate chip cookie dough or mint flavor ice cream, no matter how many degrees below zero it may be.
The Cottage Peach is reader-supported. When you purchase through links on our site, we may earn an affiliate commission at no additional cost to you. All opinions are our own.
In the winter my scuffed up slippers are my constant companion, and I am always seeking out sources of external heat, and stuffing my toes under the cat.
My body runs cold, so you might make the mistake of thinking that since I am always cold from my fingertips to my toes, I would avoid cold things at all costs. But no, I have one weakness, and it is ice cream. I’m told that it runs in the family, as evidenced by the sheer number of “ice cream breakfasts” I experienced as a child during sleepovers at my grandparents house. But how could I not enjoy ice cream all season long? I may be shivering from the internal cold of my own creation but I will not deny myself a dish of chocolate chip cookie dough or mint flavor ice cream, no matter how many degrees below zero it may be.
Here in New England, it’s important to know which ice cream shops stay open throughout the winter months - a short list to be sure, but an essential one. It is a unique sort of camaraderie that you share with others in line for ice cream on a chill January day, bundled up to your ears but clutching that cup or cone like your very life depends on it. Despite the lack of options for open ice cream stands in winter, the line is always short and I can quickly grab my treat and be on my way, whisking the cup-with-a-cone-on-top situation into the belly of my warm vehicle. But there is one type of ice cream that requires a very specific set of winter circumstances to be enjoyed, and that is the elusive Snow Cream.
If you’ll allow me to take you back to my childhood once again, let’s journey back in time to 1996; specifically Season Two, Episode Five of Little Bear (a children’s show with no known modern rival to match its particular blend of slow, simple outdoor living, whimsical and kind friends and adventure): Snowed in at the cabin. Emily’s grandmother teaches everyone how to make snow cream and they sing this cheery tune which still manages to worm its way into my subconscious every snowfall more than 25 years later:
“Whether the weather be cold,
Or whether the weather be hot,
We’ll weather the weather,
Whatever the weather,
Whether we like it or not”
Once winter has really truly settled in, I begin waiting, and watching, for the perfect circumstances to arrive. Fresh, fluffy snowfall is a requirement for this snow ice cream recipe, and it cannot be grown or bought. We are at mother nature’s mercy on this one, which makes the end result that much more special, a truly local and seasonal food. Of course it helps if you are snowed in and bored too, (maybe throw a power outage in there as well) looking for a way to pass the time that doesn’t involve card games or chucking wads of crumpled paper at each other and pretending you don’t know who’s at fault (other people do this too, right?!).

I may seem biased by my nostalgia but you’ll just have to take my word for it; snow cream lives up to the hype. It is winter magic in a bowl. It is all of the delights of the wonder of childhood manifested in physical form. Which is really just a pretty way of saying - it’s delicious. Simple. And you probably have everything you need to make snow ice cream in your house right now (well, except maybe the snow…but you can’t pick that up at the supermarket, so you’ll just have to watch the weather for that one)
How does something so crunchy and icy become a creamy, rich winter treat with only 5 ingredients? It’s not alchemy, though it may feel that way at times. This is an easy way to have your children’s eyes lighting up on a dreary winter day,
If you’re wondering how to make snow ice cream, my first recommendation is to watch Episode Five of that 1996 Little Bear epic because Emily’s grandma knows what’s up and will inspire you in ways I could never hope to achieve. But since this blog is *supposed* to be helpful, I’ll do my best to share the process here in my own words, with my own recipe for snow cream.
How to find the best snow to use for snow cream? Follow the same rules of foraging and keep away from areas near roadsides, buildings and any run-off areas. If you live in a polluted area, I’d suggest finding a friend in a more rural spot who wouldn’t mind sharing a bit of their snow. Try to time your “harvest” as soon after snowfall as possible in order to have the freshest, cleanest snow. Do not use snow that has footprints or animal prints in it. Most importantly of all: Never Eat Yellow Snow.
Snow cream is best made with heavy cream, but you can make snow cream with milk in a pinch as well. Vegan milk alternatives work, though personally I’d opt for the richest of the bunch - coconut cream. Really, snow cream is whatever your imagination says it can be, so any creamy liquid will do - I’d even try my hand a little tahini thinned with water if I was feeling experimental. The thing to remember about snow cream is that the ice portion (your snow) is literally just that - ice. It has no fat content on its own, which is what will transform this recipe into something truly rich and creamy like store-bought ice cream. So, the richer the better!
The next important ingredient is maple syrup. Can you use alternative sweeteners? Of course, this is your snow day after all. However, years of experience have taught me that maple syrup is the absolute best option for sweetening your snow cream dessert. There’s just something so earthy about maple syrup that pairs well with the fresh snow. But if you insist on coloring outside the lines on this one, try another deeply flavored sweetener like molasses, honey or brown sugar. This sweetness will give our snow cream the true dessert status it deserves.

Vanilla is added because snow is a blank slate, and we want to have a warm flavor to complement our cream of choice. You could also add any other flavorings you’d like to try now, like cocoa powder, cinnamon, peppermint or citrus. The beauty of this winter recipe is that you can make it as simple or complex as you like.
A pinch of salt will amplify the profile of your chosen flavorings, bringing them together in harmony - and before you decide to go rogue and skip this one, salt is not optional in my opinion. Just a small dash can make all the difference in your dessert tasting like the real thing.
And last but not least, we’ll add a bit of winter cheer via the most joyful ingredient in your pantry: sprinkles! Use whatever you have on hand, but I opted for a traditional red, green and white variety. Small pieces work best with the delicate texture of snow cream. I don’t know about you but personally I will take just about any excuse to add sprinkles to my desserts, they are just so bright and fun. You could go along with a holiday theme or just go for the classic rainbow variety and no one would complain!
You’ll also want a large, sturdy bowl (thick walls will keep the snow insulated from the warmth of your kitchen and prevent it from melting too quickly), a whisk, spoons and bowls. Use whatever you have on hand, no need to get fancy with it when this treat will be gobbled up in a quick moment (although I do find it extra special to serve snow cream out of cute enameled mugs)

Snow Cream
Ingredients
- 8 cups fresh snow
- 1/2 can coconut cream
- 1 tsp vanilla
- 2 tbsp maple syrup
Instructions
- Combine all ingredients and serve immediately
How to make snow ice cream recipe:
Gather your ingredients and supplies, except for the snow. You’ll want to work quickly once you have the snow inside for the best texture, as it melts rapidly and does not refreeze well. You can also chill your bowl outside prior to harvesting the snow to slow the melting process, or bundle up and make the entire recipe outdoors.
Combine the coconut cream, maple syrup, vanilla extract and in your large bowl with the whisk. You want all the ingredients to be fully combined before you gather your snow.
Head outside and scoop up your clean snow into another large bowl. Pour the liquid mixture over the snow, stirring as you pour until the snow cream is fluffy, not saturated completely with liquid.
Scoop into individual bowls and top with sprinkles, or freeze dried fruit. Enjoy immediately - this treat melts fast!


Recipe: Easy Vegetable soup
We all know soup is good for you, and a great source of comfort. But have you considered that soup may be the best thing you can make for yourself when you are in the midst of a chronic illness flare, when you have no energy? Here is why soup is the best food to make for people with limited energy:

The Cottage Peach is reader-supported. When you purchase through links on our site, we may earn an affiliate commission at no additional cost to you. All opinions are our own.
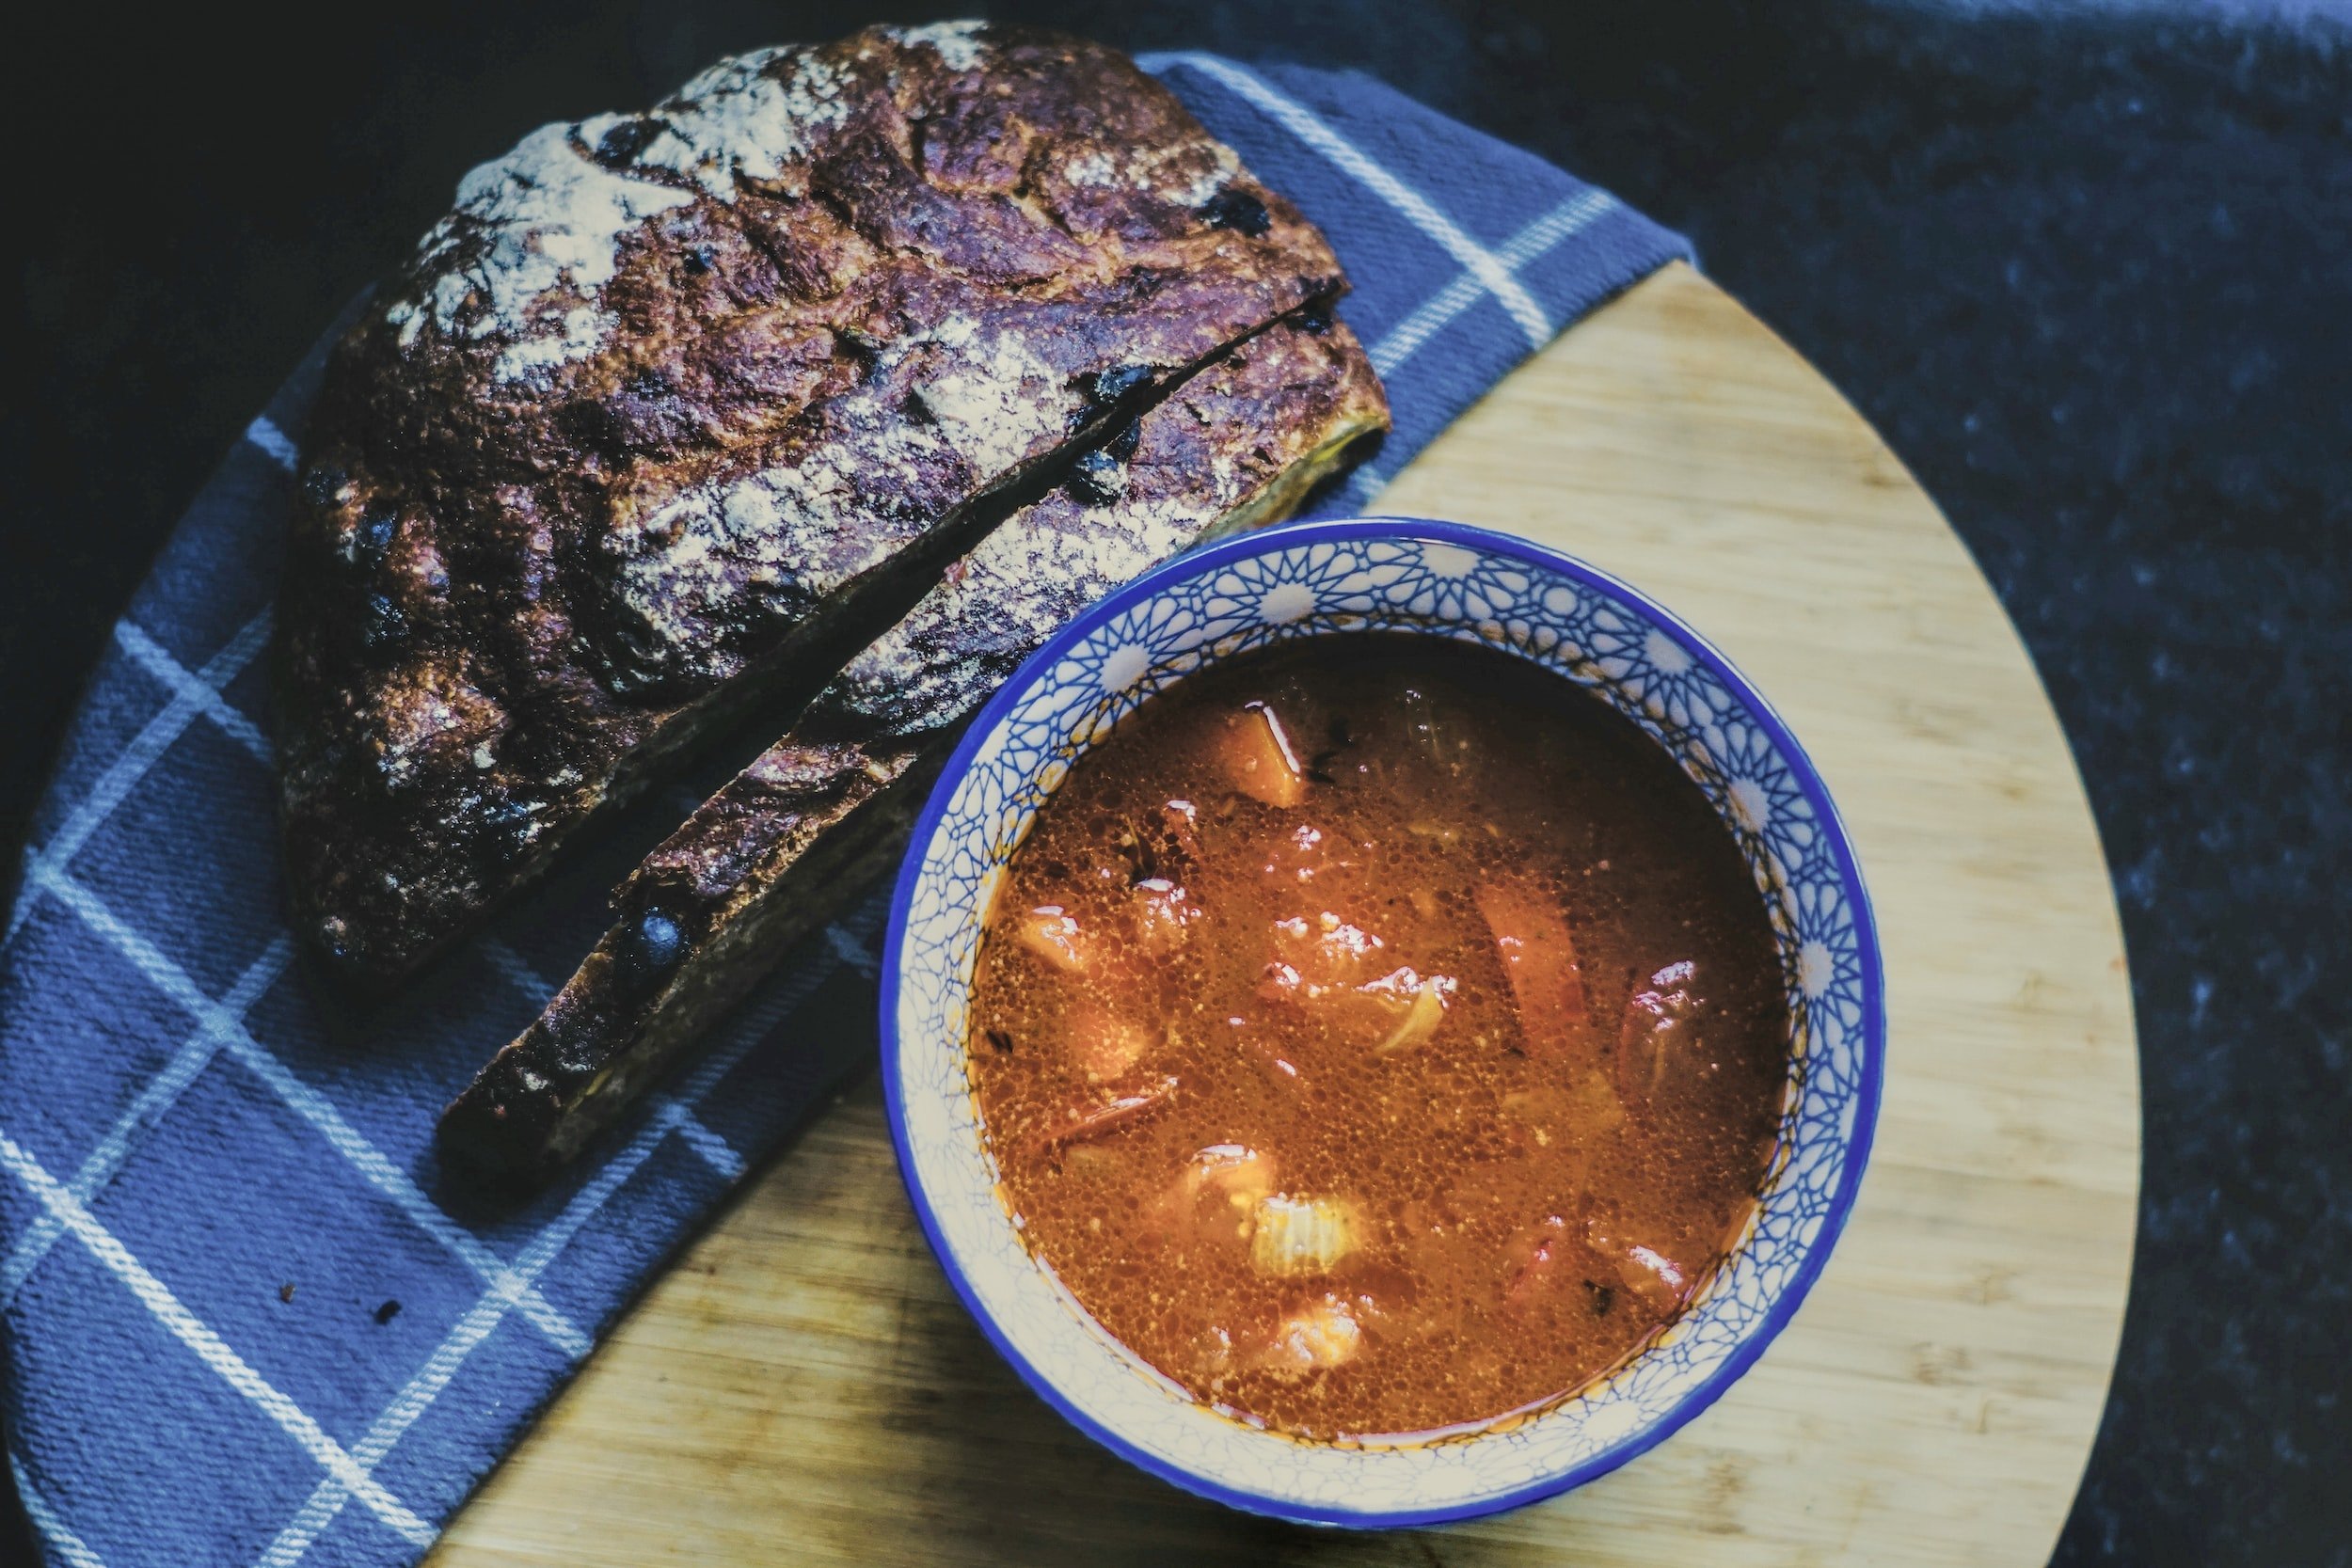
“To feel safe and warm on a cold wet night, all you really need is soup.” — Laurie Colwin
We all know soup is good for you, and a great source of comfort. But have you considered that soup may be the best thing you can make for yourself when you are in the midst of a chronic illness flare, when you have no energy? Here is why soup is the best food to make for people with limited energy:
It’s easy to make soup, you can just throw your ingredients into the pot, set the heat and sit down while it cooks. You only need to get up every so often to stir the pot. You can easily modify it to substitute ingredients and save yourself a trip to the store, and using frozen vegetables (which contrary to popular belief often have a very similar level of nutrition as fresh produce) will save you the trouble of chopping everything yourself.
There’s only one pan to clean. Less dishes filling up your sink means less precious energy expended. And who really enjoys doing dishes anyway?
You can make a big batch of soup all at once and freeze most of it for later in individual servings to save you time on days when you really don’t have the ability to cook anything at all. This is also an excellent time saver if you’re planning for dinner guests - save your energy for conversation by thawing out your soup the day of and have dinner ready to go with the turn of a dial.
Soup is easy on your stomach. Because everything is cooked low and slow for an extended period of time, your gut won’t have to work as hard to digest it. The nutrients within the soup are also more bioavailable, meaning your body can absorb more of the benefits more easily.
A scent that brings us home
The way the smells of soup fill a house easily brings us back to our childhood, and the comforting knowledge that our bowls will be filled by our loved ones without fail. I almost exclusively make soup in the fall and winter, as I find the aromas to be the perfect way to bring warmth to your kitchen and home in the cold and gray months. Plus, a bowl of soup functions as an excellent hand warmer!
Why should you saute soup ingredients first?
Many soup recipes begin with instructions to saute the vegetables and aromatic herbs first. It can be easy to dismiss this step thinking that these ingredients will cook through just fine since the soup will cook a long time once the liquids are added.
Here’s what Serious Eats has to say about sauteing vegetables: “Vegetables contain many different aromatic molecules trapped inside their cells. But the aromas you get from raw vegetables are quite different from those you get from cooked vegetables. In fact, the aromas you get from whole vegetables is even different from those that you get from vegetables that have been finely chopped, grated, or have otherwise had their cells ruptured. This is all due to reactions that take place between chemical precursors inside the vegetables cells. When those cells are ruptured, these precursors come into contact with each other and recombine into new compounds. Heat and time can increase the rate of these reactions, and indeed cause brand new ones to occur.”
Can you freeze vegetable soup?
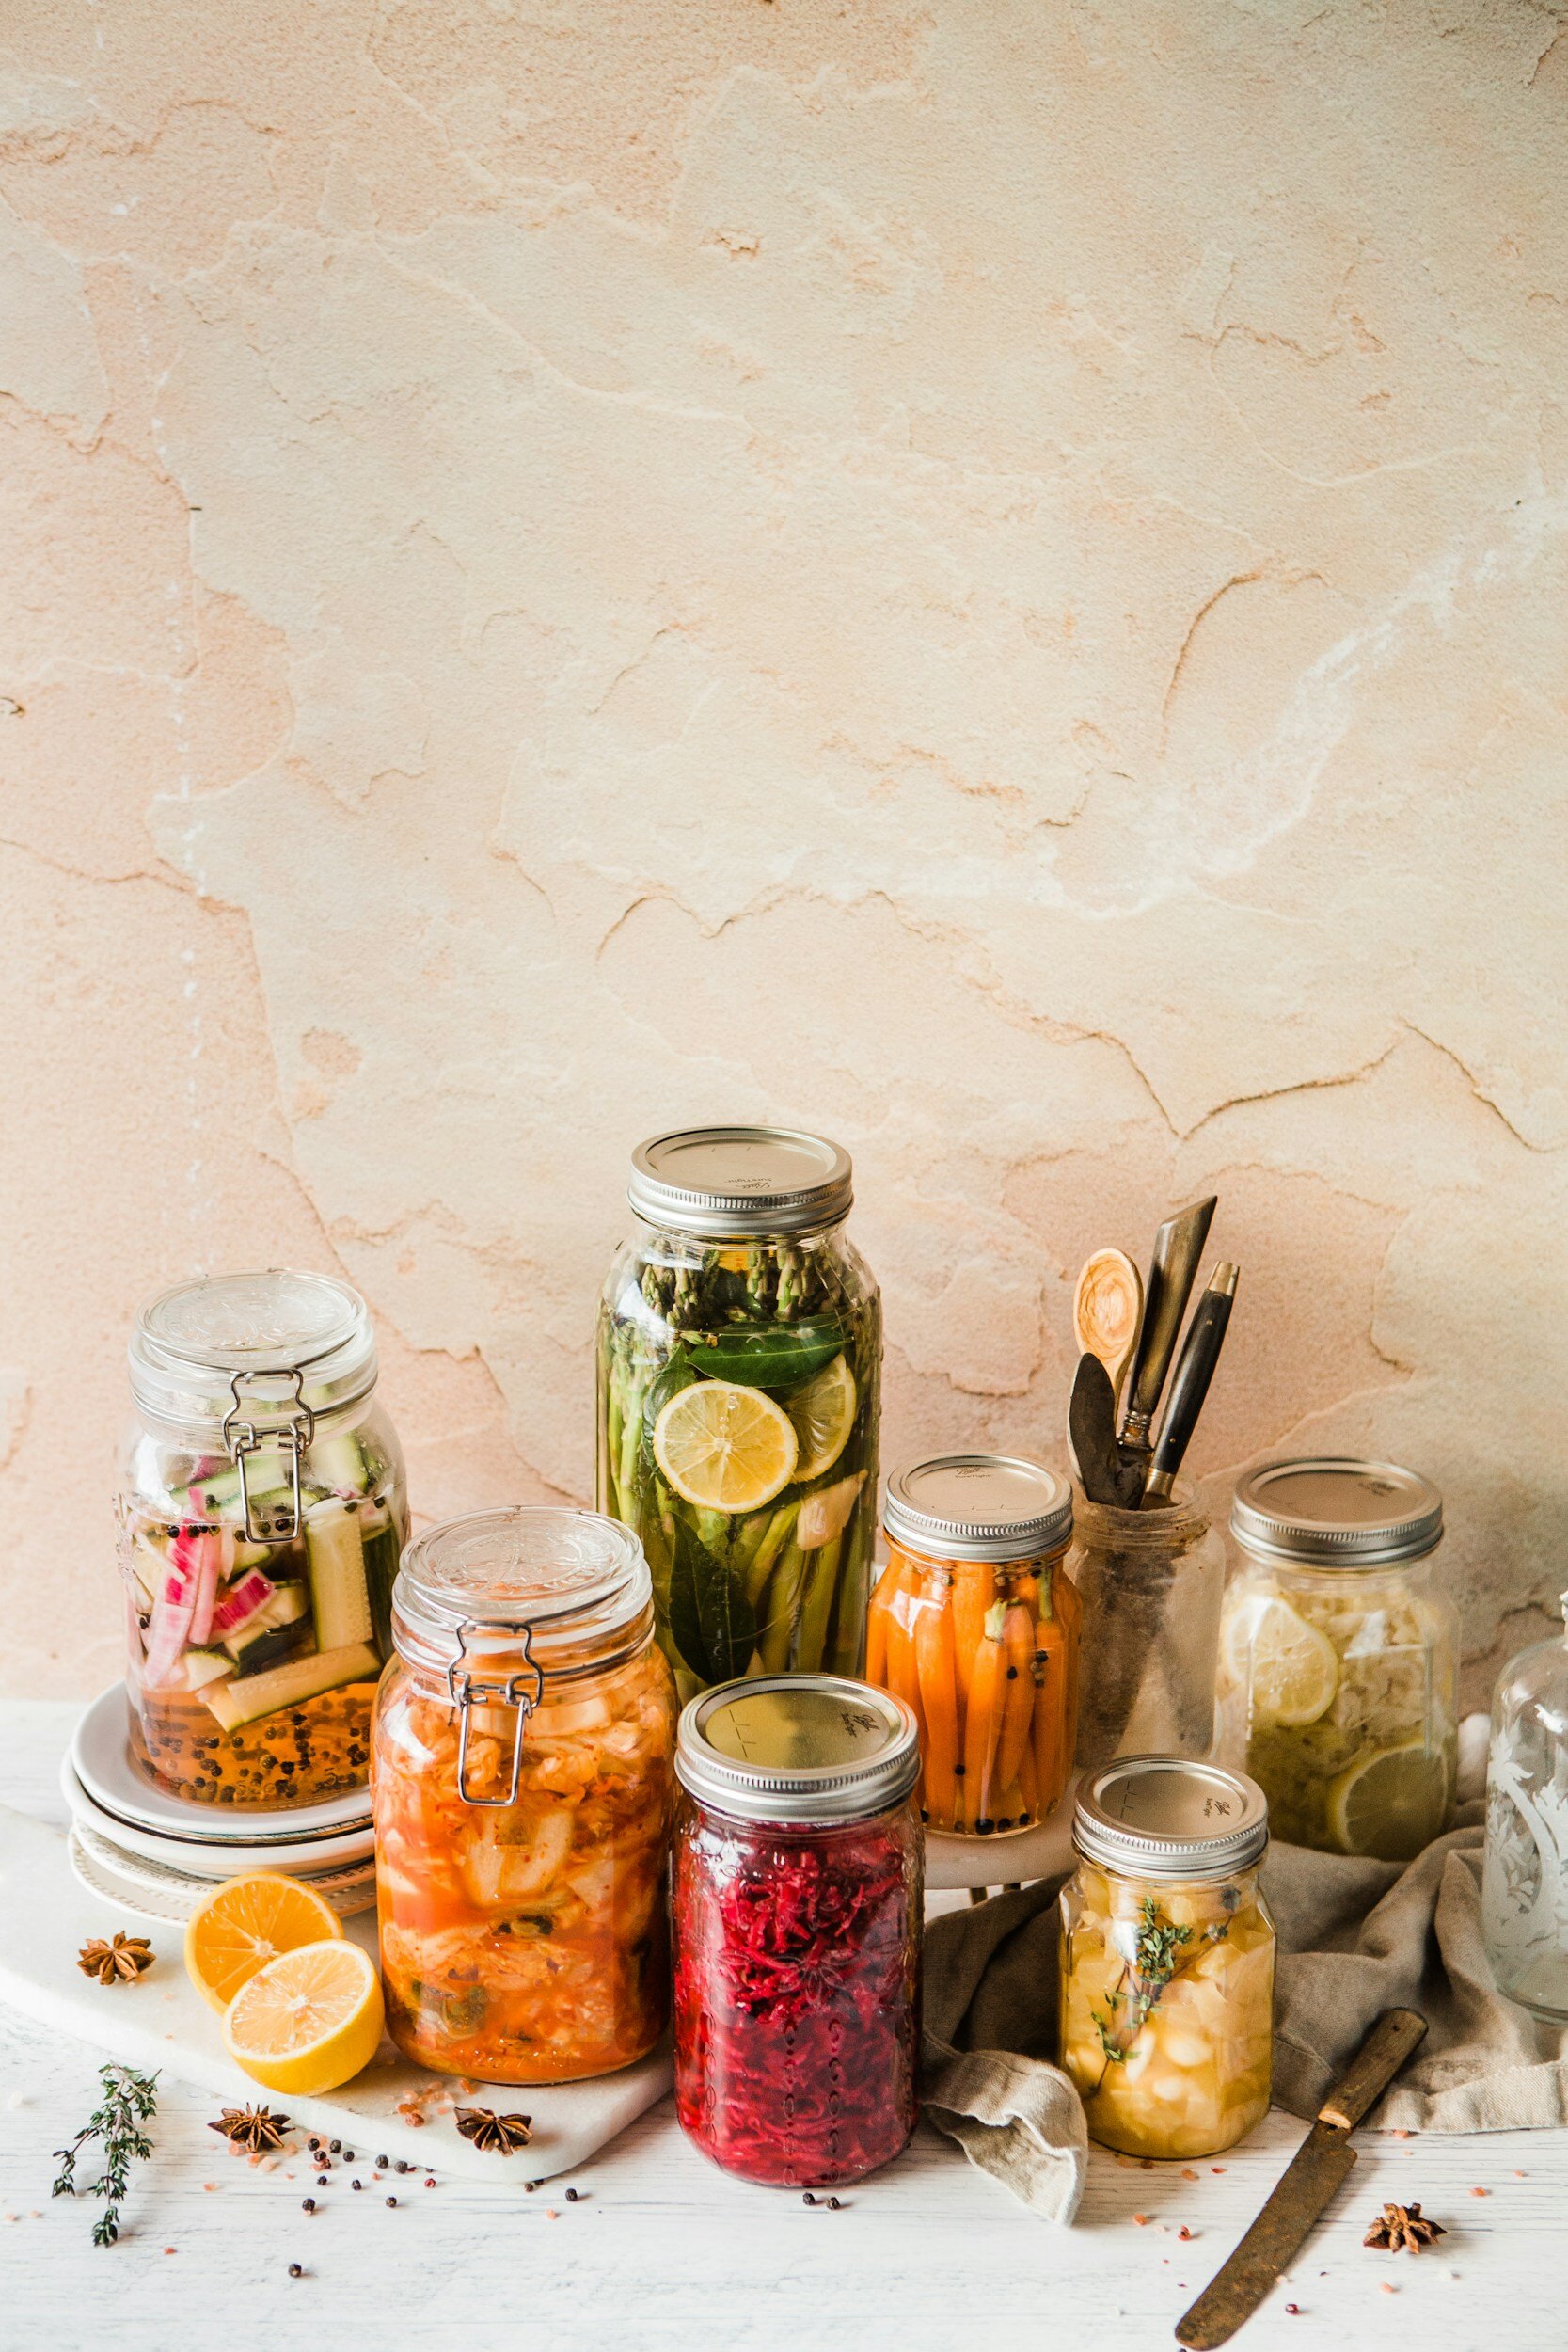
Yes, soup generally freezes very well. I prefer to ladle my leftover soup into mason jars for long term storage in the deep freezer. Make sure to leave at least an inch of headspace at the top of your jars since the liquid will expand as it freezes. You can store soup in the freezer for two to three months. Soups with dairy don’t always freeze as well or as long - about one month. To thaw, just move your mason jar to the refrigerator the night before you want to eat. Then you can pour your thawed soup into a sauce pan to reheat on the stove top.
How long will vegetable soup last in the fridge?
Soup can be stored in the fridge for five to seven days. I still prefer mason jars for storing soup in the fridge, since it’s easy to pour from. We have a large metal canning funnel that makes ladling the soup into the jars very simple. Be sure to label it too so you don’t lose track of it in the back of the fridge!
Can you make vegetable soup in advance?

Vegetable soup is great to have on hand for busy nights. You can meal prep your soup up to five days in advance and store it in the fridge for another time.
What kind of pot should you make soup in?
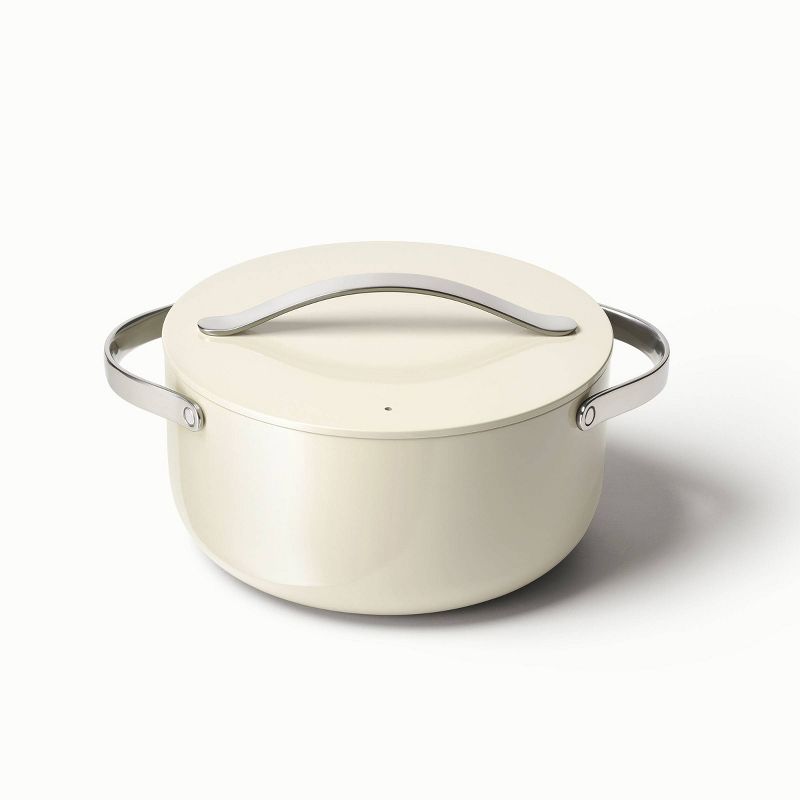
Soup is one of the larger batch meals we cook in our kitchen, and so I find myself reaching for our Caraway Home non-toxic 6.5 quart Dutch oven. It never fails to surprise me how quickly such a large pot can be filled once all your soup ingredients are added. Soup really is the best way to stretch your ingredients the farthest.
Is vegetable soup healthy?
There are many healthy soup recipes and vegetable soup in general is very healthy and a great vehicle for serving vegetables to picky eaters in particular. One thing that can make soup less healthy is when there is excessive sodium in the soup, which usually comes from the broth that has been used. Most processed vegetable broth as well as powders and cubes have extremely high levels of sodium to make up for the lack of other flavoring. You can make your own dry vegetable broth mix pretty easily by combining nutritional yeast, and powdered onion, garlic, tomato, carrot, salt and pepper and herbs. We personally use the Frontier Co-op Low Sodium Vegetable Broth Powder in all our soups including my vegetarian vegetable soup recipe and love it, but it is definitely more cost effective to make it from scratch yourself.
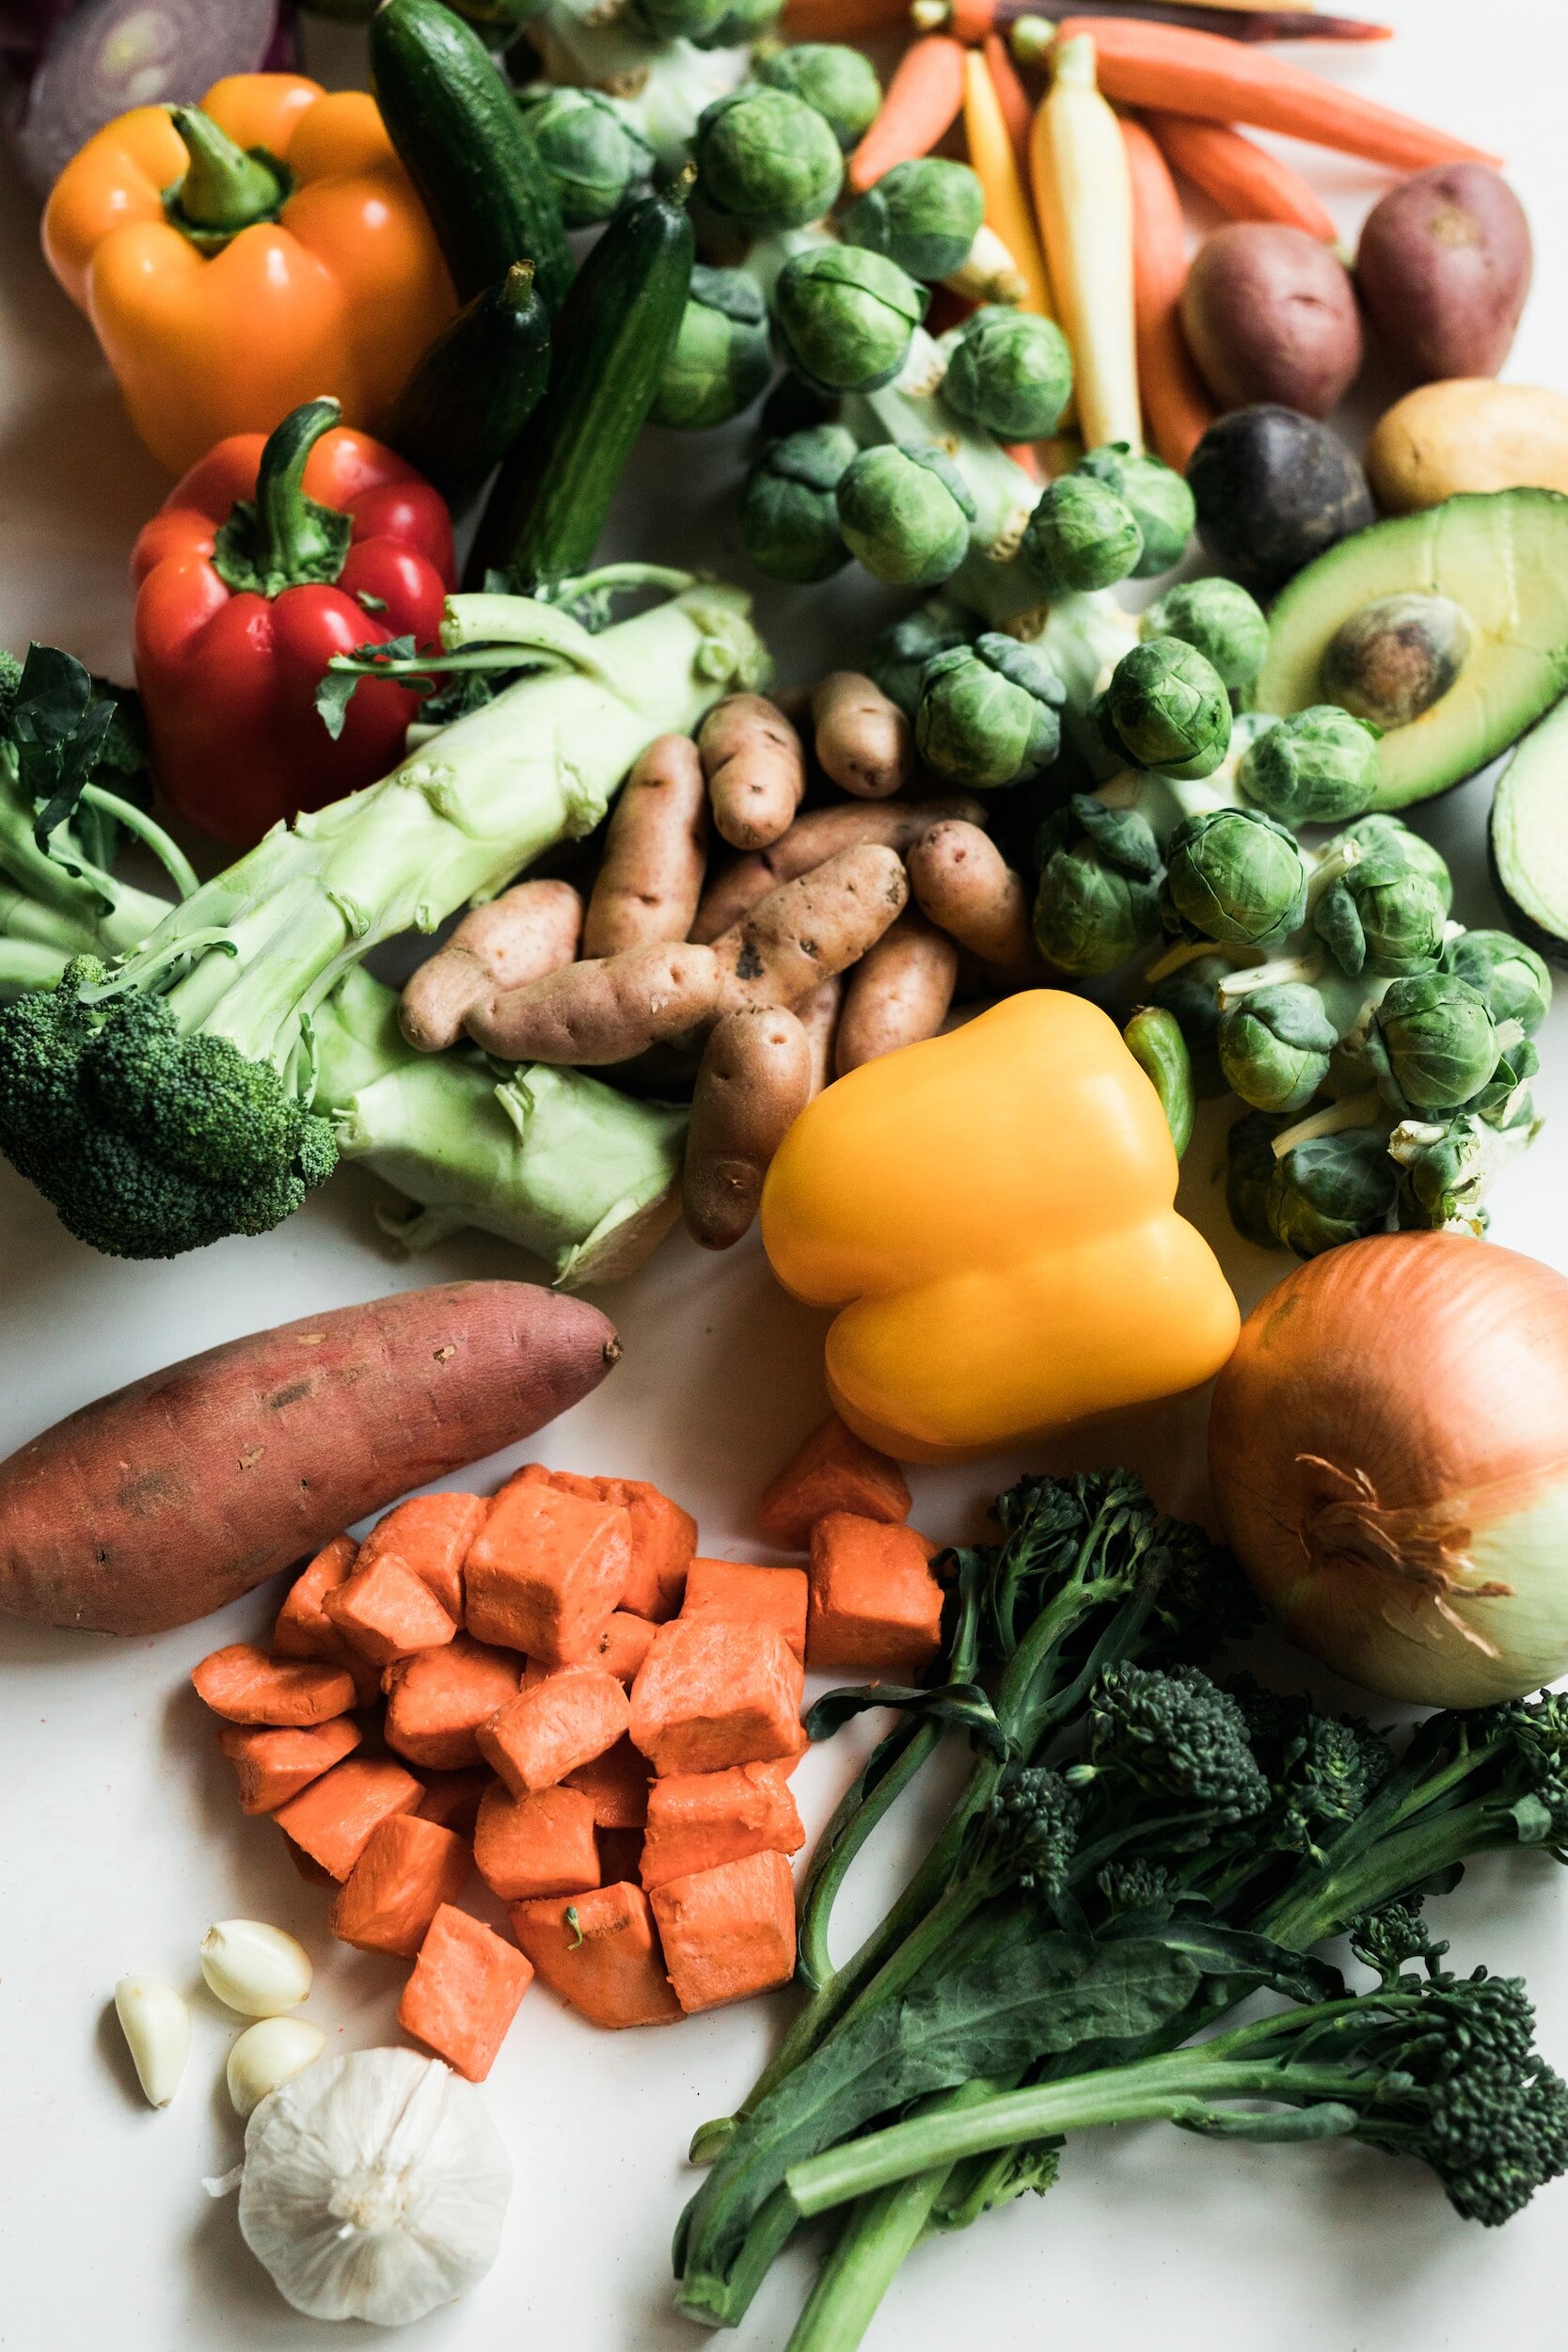
So what is the best way to make an easy soup recipe? The basics of soup making are the same, no matter what soup recipe you start from. You will heat your fat (I usually use olive oil) and add your toughest vegetables like carrots and potatoes first. Then your softer vegetables like onion and broccoli, peas and corn. Lastly, you’ll sautee your aromatics like herbs, spices and garlic for the shortest amount of time.
Once your vegetables are all softened you can go ahead and add any liquids - tomato paste, crushed tomatoes, broth. All this needs to simmer to allow the flavors to blend for thirty to sixty minutes depending on the specific soup recipe.
Really, once you understand the basic elements of soup making it is the best sort of recipe to begin experimenting with in the kitchen. Start with small modifications to a recipe you know and love, and move on to more complex changes. Once you’re comfortable with substitutions, you’ll probably have a good idea of what flavors go nicely with each other and can start developing recipes from scratch on your own. Soup is a fantastic first foray into recipe development for this reason.
My favorite easy soup recipe is my grandmother’s vegetable soup. Aside from the obvious nostalgia that comes with every spoonful, it makes a fantastic base from which you can modify and make the vegetable soup recipe your own. This is a tomato based soup, with grains for fiber and protein and a mix of vegetables that everyone will enjoy including onion, peas, carrots and corn. You can easily swap out the farro for a different grain of your choice, and add or subtract whatever vegetables you and your family enjoy. Plus, this is the perfect soup recipe when you are putting off making another grocery run because you can just throw whatever frozen veggie mix you have in the freezer in and call it a day!
My grandma always serves this soup with a big loaf of fresh challah bread, golden brown on the top and slightly sweet. Toasted with butter, I can’t imagine a meal that feels more like home to me. I can remember many cozy evenings as a child enjoying this soup with my family, and now that my grandma has moved to another country, I make this soup any time I miss her to bring her comforting and sometimes wild presence to our kitchen once again.
Since I’m always looking for easy vegetarian soup recipes and ideas, I wanted to share mine with you and encourage you to use it as a starting point to develop your own favorite vegetable soup! This is a modified version of my grandma’s recipe, made based on what we usually have on hand in our pantry on any given day. I hope you make this recipe your own, and share a bowl with the people you love this winter.
Grandma’s Easy Vegetarian Vegetable Soup Recipe
Easy Vegetable Soup
Ingredients
- 2 Carrots
- 1 Yellow onion
- ½ cup Peas
- ½ cup Corn
- 28oz Diced tomatoes
- 8oz Tomato sauce
- ½ cup Farro
- 4 cups vegetable broth
- Salt and pepper to taste
Instructions
- Saute the onion and carrot on medium heat until softened.
- Add all remaining ingredients and bring to a boil.
- Lower heat and simmer 40 minutes, partially covered.


Nutrition Facts
Calories
102.86Fat
0.67Sat. Fat
0.12Carbs
22.64Fiber
4.97Net carbs
17.68Sugar
6.97Protein
3.56Sodium
646.31Cholesterol
0
Recipe: Homemade Hot Chocolate
There is nothing quite so nostalgic and comforting as curling up for a cozy night by the fire in your wool socks to watch a holiday movie while clutching a mug of warm homemade hot chocolate. With the sun leaving us for the day earlier and earlier each day, finding ways to keep ourselves occupied in the evening hours can be challenging, and so we tend to fall back on the traditions of childhood to keep us awake until bedtime. But this is not a post about my bedtime routine, as much as I would like to lull us all to sleep with that tale! This is a post about the unimpeachable winter drink to top all winter drinks (eggnog lovers cover your ears!) hot chocolate

The Cottage Peach is reader-supported. When you purchase through links on our site, we may earn an affiliate commission at no additional cost to you. All opinions are our own.
There is nothing quite so nostalgic and comforting as curling up for a cozy night by the fire in your wool socks to watch a holiday movie while clutching a mug of warm homemade hot chocolate. With the sun leaving us for the day earlier and earlier each day, finding ways to keep ourselves occupied in the evening hours can be challenging, and so we tend to fall back on the traditions of childhood to keep us awake until bedtime. But this is not a post about my bedtime routine, as much as I would like to lull us all to sleep with that tale! This is a post about the unimpeachable winter drink to top all winter drinks (eggnog lovers cover your ears!) hot chocolate
Now, to be clear I’m not knocking a mug of nutmeg and nog - far from it. But hot chocolate is just on another level. The rich, creamy thick and warm liquid can have as much or as little depth of flavor as you like, depending on the chocolate used. My personal favorite is Mexican hot chocolate. We have a local chocolate company here in Massachusetts called Taza Chocolate that makes a perfectly portioned disk of chocolate with which to make yourself a mug full. At first, the experience is full of uncertainty - are you really supposed to put THIS much chocolate in one serving? But then as the chocolate melts and blends with your chosen milk and alchemy conspires to create the most spectacularly rich and thick molten treat you can imagine. This is not for the faint of heart, so you better love chocolate if you’re going to make your own. A drink this rich coats your mouth with the flavors of fermenting cacao bean, the acidity reminiscent of coffee, and the subtle sweetness of dark chocolate.
If this sounds like an experience you need to try, you can find Taza Chocolate in many health food stores or purchase online, this is not an affiliate link just love supporting local!
Hot chocolate also offers an endless array of options for flavoring and add-ins that are simple but can have a huge impact on the end result.
Add peppermint to lighten the overall flavor and add a festive touch
Add cinnamon and salt to bring out the different flavors in the cacao beans
Add caramel for the comforting sweetness of browned butter and sugar
Toppings are add-ins that compliment your hot chocolate drink, creating a full dessert experience in your mug.
I’m personally partial to the dandies vegan marshmallows for my hot chocolate garnish, but any marshmallow will do - I think hot chocolate is the only place those hard dried mini marshmallows have a chance to really shine.
Bump up the sweetness factor with a chocolate covered spoon or caramel dipped rim coated in sea salt.
Hook a candy cane over the side to keep your mug company and your breath minty.
Can you make hot chocolate with non-dairy milk?
Yes, and I do this myself as I can’t drink cow’s milk. After nearly a decade of trial and error, I can say with certainty that the best non-dairy milk to use when making homemade hot chocolate is without a doubt oat milk, since oat milk is usually richer and mimics whole milk best.
There’s no reason that vegan hot chocolate can’t be just as rich and delicious as hot chocolate made with cow’s milk. Try coconut milk, soy milk and almond milk too and see which one is your favorite.

Sourcing ethical cacao
Whether you decide to make peppermint hot chocolate, dark hot chocolate, caramel hot chocolate or plain I would urge you to consider the origins of your chocolate.
Cocoa and chocolate come from the cacao tree, which thrives in the rainforest.
According to Source Trace, on average cacao farmers earn less than $2 per day, an income much below the poverty line.
As per the latest report on cacao farming, close to two million children in the Ivory Coast and Ghana are engaged in child labor in hazardous conditions.
Also, cacao production is rising at an alarming rate – it has risen by 62% over the last two decades. This is a serious threat to Africa’s forest cover as farmers are choosing to expand their growing operations into rainforests and other patches of land. 40% of the cacao coming from the Ivory Coast can be traced back to being grown in protected lands.
The best way to tell if your cacao is ethically sourced is to buy from companies who share the origin of their cacao and practice fair or direct trade, utilizing third party verification to certify their claims. You should also look for transparency reports available on their website.
What is direct trade?
Currently, there is no industry standard for direct trade in the cacao industry. As one example, Taza created their own direct trade program which they are held accountable for by a third party company. Their program focuses on real relationships (they meet with the farmers whose cacao they are purchasing) quality (they only purchase USDA certified organic cacao) and fair wages.
The main way that direct trade is different from fair trade is that direct trade purchasers typically pay their farmers more than fair trade companies. Direct trade companies may pay a 15%-20% premium to their cacao farmers compared to similar fair trade companies. In exchange for this higher rate, these farmers are expected to produce a high quality, organic product and use production methods that lower the environmental impact of growing cacao trees.
So why should you make your homemade hot chocolate on the stovetop rather than the slow cooker? While I encourage you to utilize whatever cooking methods you need to in order to support your own body’s limitations, I consider the stovetop version to be an easy way to practice some mindfulness in my day. Warming your hot chocolate beverage on the stovetop forces you to pause and be present. Sometimes, coming off of autopilot is the best way to fully appreciate the beauty of winter in all its glory. So, pull up a chair if you need to and truly allow yourself to savor the experience - from the comforting scent of the chocolate to the invigorating scent of mint.
Of course, when you’re finished making my best hot chocolate recipe, the mug you choose to enjoy it in can be equally as important in determining how cozy of an experience you create. I like to put out an enticing array of handmade ceramic mugs for my guests to choose from, alongside a tray with add-ins like marshmallows and candy canes they can add as a garnish to their drink. Make this hot chocolate as the perfect refreshment for your cozy movie night with friends!

What’s the difference between hot chocolate and hot cocoa?
Hot chocolate refers to a decadent dessert drink made with real melted chocolate blended into a liquid, usually milk. Hot cocoa uses cocoa powder dissolved in milk or water and is generally lighter and thinner. While both can be delicious, today I’ll be sharing with you a recipe for homemade Mexican hot chocolate.
What is Mexican chocolate?
According to The Spruce Eats, “The craft of chocolate making can be traced back to 1900 BCE in Mesoamerica and in fact, it appears the way the Aztecs prepared it is similar to how Mexicans do today. The cacao beans are typically fermented, roasted, peeled, and then ground into a paste using either a metate, which is a traditional tool for hand-grinding materials or with a molino, a mill. Sugar is then mixed in and from here, cinnamon is traditionally added…Finally, the chocolate is worked into its final shape, which is most often a disc or log. This rustic presentation works perfectly since Mexican chocolate is still made by hand in many regions.”
How to make homemade chocolate recipe:
This hot chocolate recipe is so easy, and only requires a handful of ingredients. As with most simple recipes, the best way to dress it up is in the quality of the ingredients you choose. While we can all appreciate the nostalgia of the instant hot chocolate packets you can get at any supermarket, this Mexican hot chocolate recipe is a much richer, more decadent treat to warm you all the way through. You’ll just need a saucepan, your milk of choice, and a high quality chocolate like these disks from Taza to get started. From there it’s choose-your-own-adventure to add additional flavors and garnishes.
Mexican Hot Chocolate Recipe (modified from recipe by Taza Chocolate)
Mexican Hot Chocolate
Ingredients
- 2.7oz dark chocolate bar (The Taza chocolate disks are the perfect size)
- 2 cups milk, non-dairy or cow
- ¼ tsp vanilla extract
- 2 tbsp maple syrup
- Pinch of salt
Instructions
- Roughly chop or grate the chocolate and set aside.
- Heat two cups of milk in a small saucepan over medium heat to just below a simmer.
- Remove the milk from heat and add a pinch of salt.
- Slowly mix in the chocolate, stirring frequently until dissolved.
- When the chocolate is dissolved, return the mixture to the stove and re-warm over low heat.
- While the chocolate is warming, use a whisk or molinillo to froth the chocolate.
- When the chocolate is hot and frothy, remove from heat and serve.
Nutrition Facts
Calories
430.78Fat
24.13Sat. Fat
13.91Carbs
42.51Fiber
4.17Net carbs
38.34Sugar
32.97Protein
10.99Sodium
121.6Cholesterol
30.43
Vegan stuffed butternut squash recipe
Butternut squash is a really versatile ingredient. It can be roasted, stuffed, boiled, sautéed, mashed, or twice baked, and it’s delicious in both sweet and savory dishes. Whether you’re making pumpkin pie or beef stew, the sweet, nutty flavor of butternut is always a welcome addition.
The Cottage Peach is reader-supported. When you purchase through links on our site, we may earn an affiliate commission at no additional cost to you. All opinions are our own.
Why Eat Butternut Squash?

Many varieties of squash have been eaten for thousands of years, but butternut squash didn’t make it to grocery stores until the 1940’s. Since that time, it has become a staple of the American diet and a traditional Thanksgiving food.
Known as butternut pumpkin in Australia and New Zealand, butternut squash can be used to substitute for pumpkin when baking a pumpkin pie or pumpkin bread.
Butternut squash is a really versatile ingredient. It can be roasted, stuffed, boiled, sautéed, mashed, or twice baked, and it’s delicious in both sweet and savory dishes. Whether you’re making pumpkin pie or beef stew, the sweet, nutty flavor of butternut is always a welcome addition.
Butternut is not a stringy squash, which makes it useful for recipes that require a pureed squash, such as lasagna.
Is Butternut Squash Healthy?
Yes! Butternut squash is a low-calorie source of vitamin A, potassium, vitamin C, fiber, vitamin B-6, vitamin E, thiamin, niacin, folate, and manganese.
It aids in digestion, and is beneficial to our blood pressure, skin, and hair, among other things.
Is Butternut Squash a Vegetable?
Butternut squash is one of those fruits we call, and treat as, a vegetable. So while botanically speaking it is a fruit, in common usage it’s fine to refer to it as a vegetable.
How to Choose a Butternut Squash
The best time to buy butternut squash is from September to November, as it will be freshly harvested. If possible, visit your local farmer, but if that’s not an option for you, butternut squash is readily available in grocery stores.
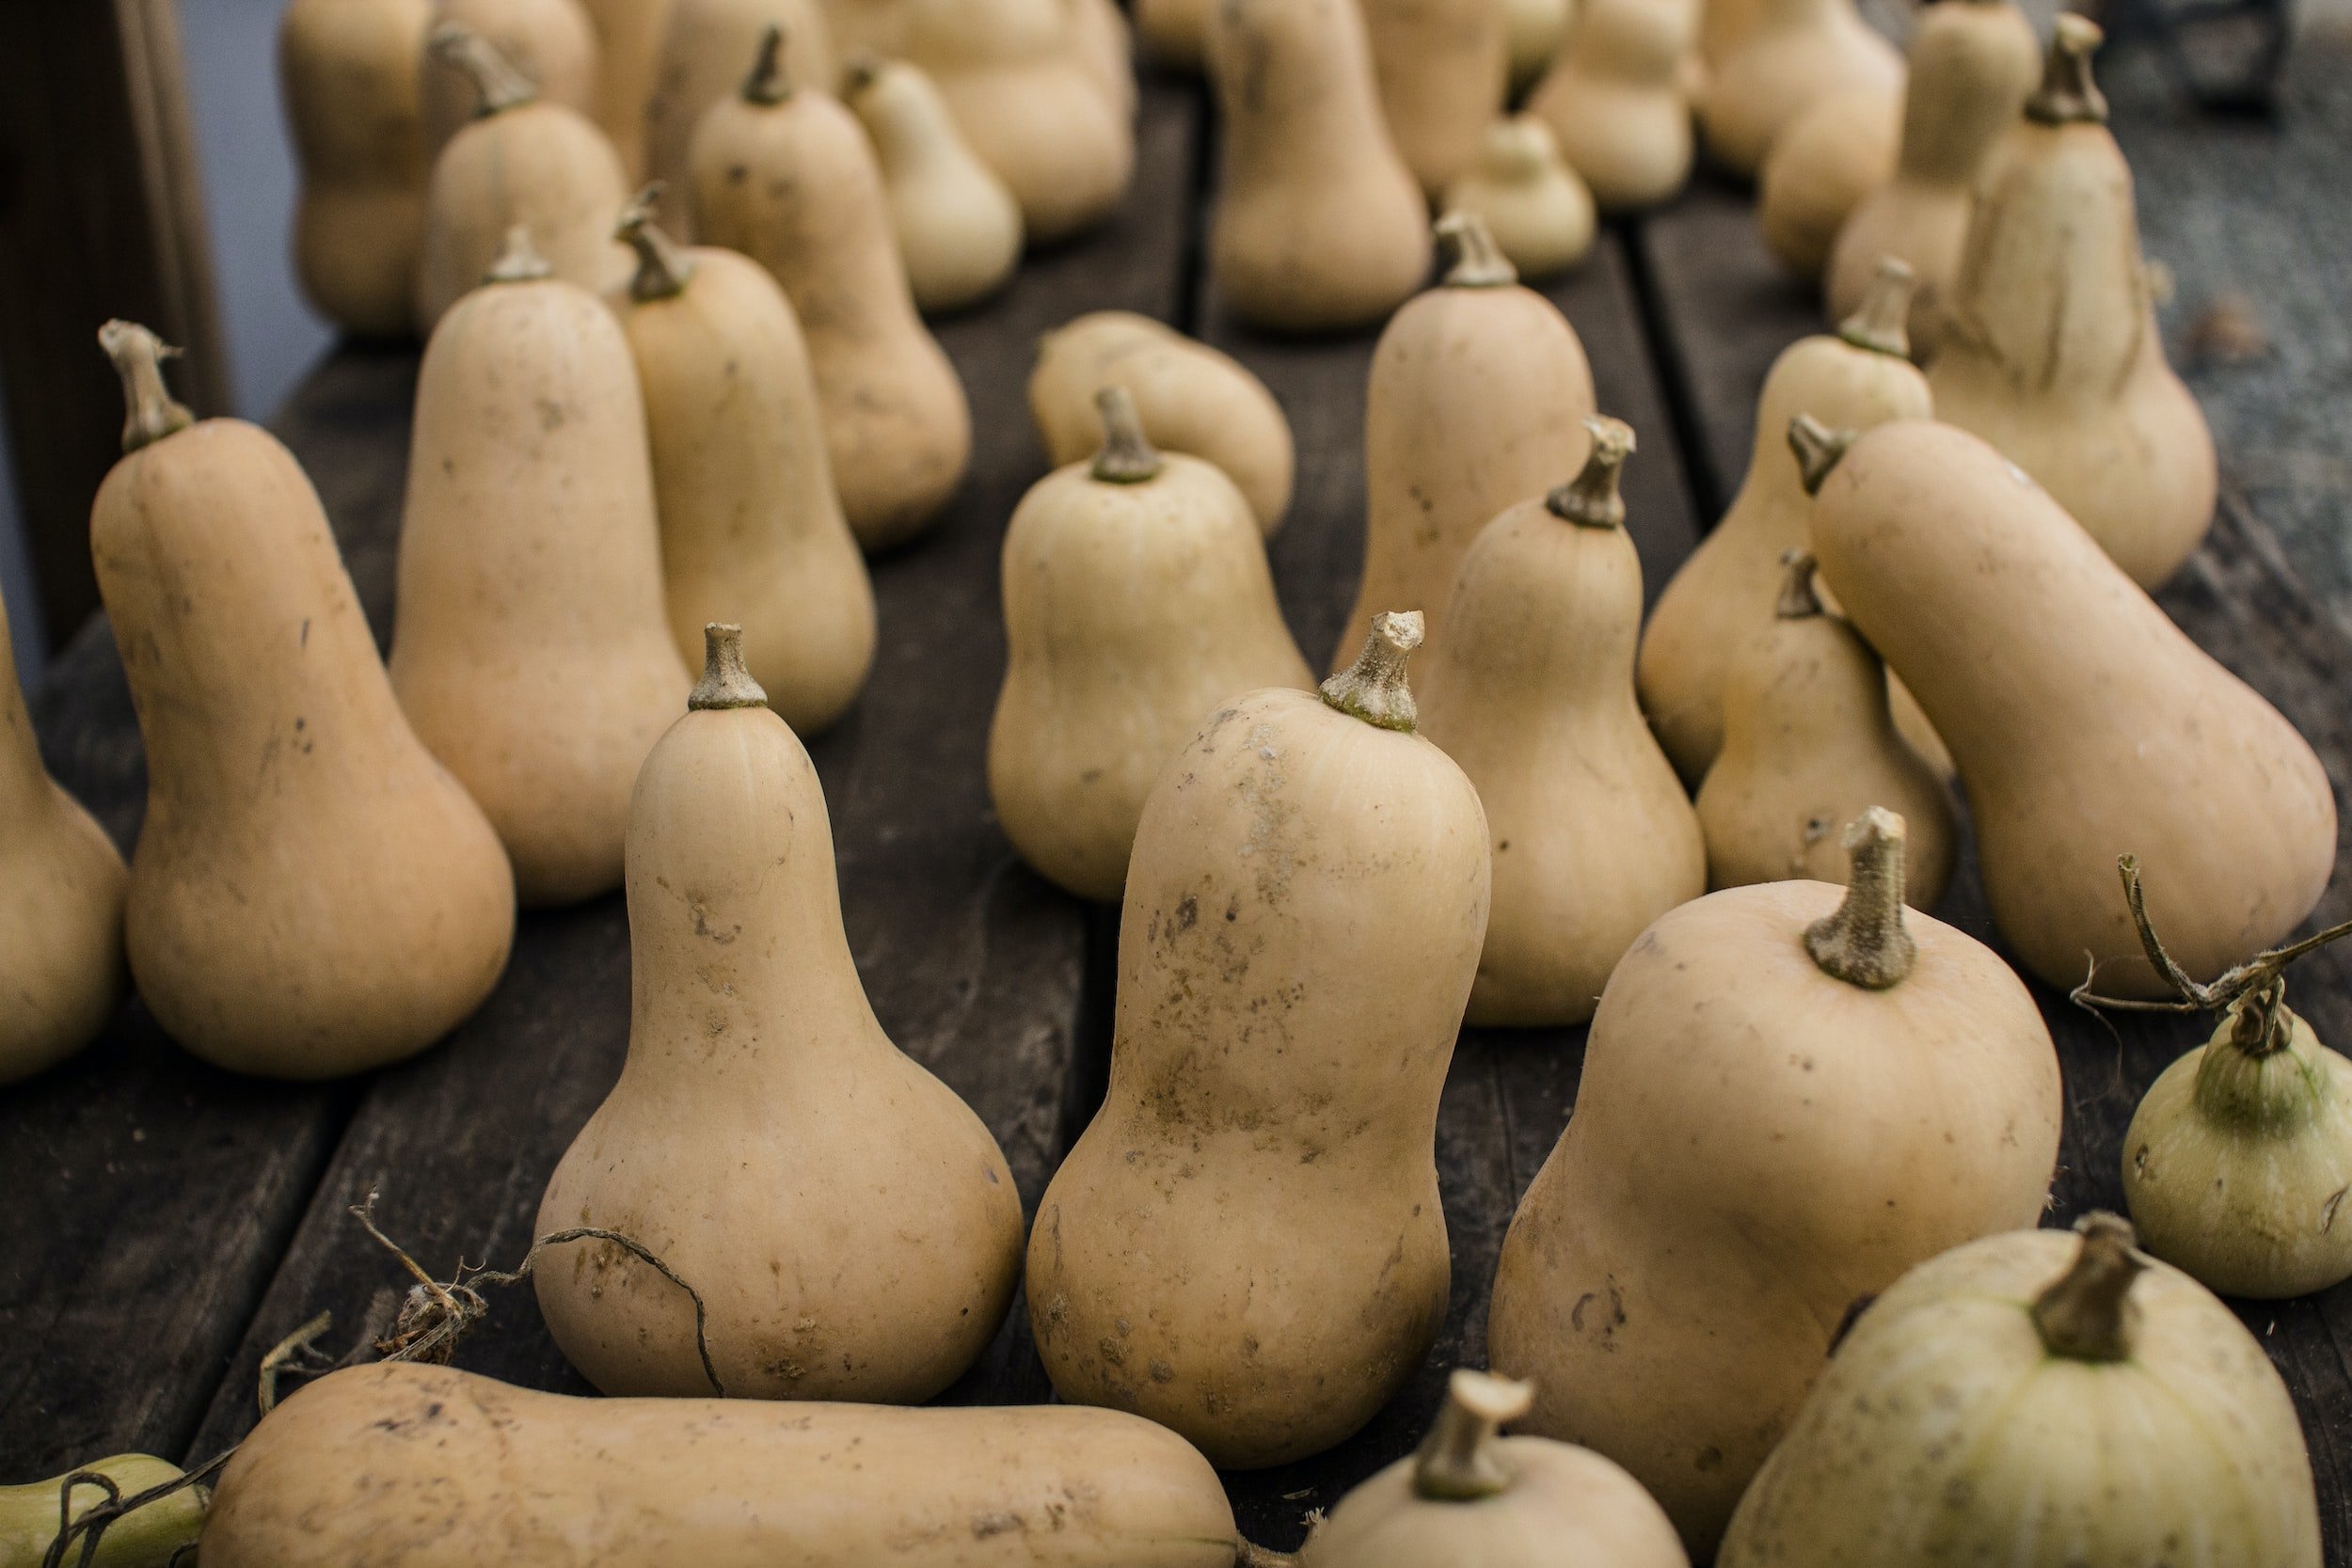
Butternut squash is peanut shaped, with beige skin and an orange interior.
When choosing a butternut squash, pick one that is heavy for its size and feels firm. Be sure it has a smooth, hard skin without any bruises or blemishes. The skin should not be easy to scrape with a fingernail.
The stem of the butternut squash should be dry and tan. If it’s not, it was picked too early and the flavor will be lacking.
If you’re buying butternut squash to use in a pumpkin pie recipe, keep in mind that one pound of butternut will yield about two cups of squash.
Pre-cut butternut squash is more expensive than buying a whole, un-cut butternut, but some people don’t have time, or are intimidated by the thought of peeling and chopping the squash themselves. While butternut squash is a bit trickier to peel, solely because of its shape, it is easy to get the hang of, and there are ways to make it an easier process.
How to Peel a Butternut Squash
There are three basic ways to peel a butternut squash.
Peeling a whole butternut squash
The first way is simply to use a sharp chef’s knife or peeler to remove the skin. To do so, cut off the bottom of the squash so it can sit flatly on your cutting board.
If you think the curve in the squash is going to cause you trouble, you can cut the neck from the curve and peel them separately.
If using a knife, hold the squash against the cutting board with one hand, and with the other slide the knife from the top to the bottom. You may remove a bit of butternut meat this way, but not so much as to be a problem. And the more you practice, the less you will lose.
Using a peeler is self-explanatory, I think! You may have better luck using shorter strokes than you would for a potato.
Microwaving a whole butternut squash for peeling
Microwaving a whole butternut squash can make it easier to peel.
To microwave butternut squash, first cut off the ends of the squash, then either make slits with a knife or poke it all over with a fork. This will allow steam to escape, which is important if you don’t want a messy explosion in your microwave.

Set the microwave for 3-5 minutes.
Let the squash sit for a minute or two to cool off a bit, then pull the skin away with a knife or your hands.
Boiling a whole butternut squash for peeling
To boil a whole butternut squash for peeling, put your squash in a large pot and cover it with water. Bring the water to a boil, and let it simmer for 4-5 minutes, until you can pull the peel away from the squash.
Can You Eat Butternut Squash Skin or Seeds?
All parts of a butternut squash are edible. The seeds can be eaten raw or roasted as you would pumpkin seeds. The skin is rich in vitamins and fiber.
Butternut skin can be a bit tough depending on how you cook it. The skin of a slow-cooked squash will be soft, but on a roasted squash it can become unappetizing.
The skin of butternut squash can also be a little bitter, but if prepared well, by slow-cooking and seasoning it, it will taste very similar to the squash itself.
If you peel your butternut squash, you can bake the peelings with olive oil and seasonings for a butternut chip.
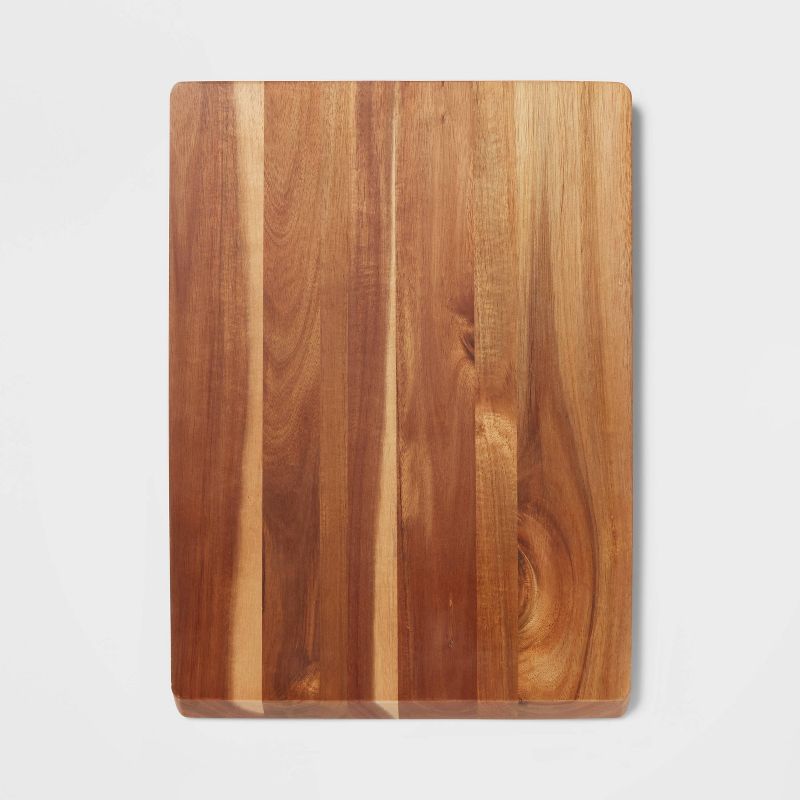
How to Cut a Butternut Squash
Once you have peeled your squash, place the cut, bottom edge on your cutting board and slice the squash in half lengthwise.
Use a metal spoon to scrape the seeds and any strings from the center of the squash.
You can then chop it to your desired size. Larger pieces will take longer to cook, of course. The important thing is that the pieces are consistent in size, so they will cook evenly.
How to Roast Butternut Squash
Roasting butternut squash will give it a much richer flavor than boiling it would.
To roast a butternut squash, you do not need to peel it. Simply cut it in half lengthwise, remove the seeds, and place the two halves of the squash on a cookie sheet.
If you want to add flavorings (brown sugar, butter, and a bit of vanilla is a favorite around here) put the squash cut-side up and fill the cup where the seeds were.
If you are roasting your butternut to puree or for the baked stuffed squash recipe below, place the cut sides down.
How to Store Butternut Squash
Butternut squash is harvested in the fall, but you can keep it throughout the winter very simply, or prep it to use in a few days' time.
Storing uncooked, peeled butternut squash:
If you’d like to prep your squash a few days before cooking with it, it will keep for 5 days in an airtight container in the refrigerator.
Storing whole butternut squash in a cool, dark spot:
The skin on butternut squash is fairly thick, which allows us to store it without refrigeration. Butternut squash stores best in a dark, dry place that’s about 50 degrees.
It can keep for months. To prolong that period, do not store them with any other fruits, as some fruits emit ethylene gas, which can cause rot.
Check your squash periodically to be sure no bruises or blemishes have appeared, and that the squash is still firm.
Freezing butternut squash:
Butternut squash can be frozen raw or cooked.
Freezing raw butternut squash:
While you can freeze it whole, it will be much easier to use with a bit of preparation before freezing.
Peel your butternut squash and remove the seeds. You can freeze the peeled halves, or chop your butternut into cubes. If you cut it into cubes, lay them on a cookie sheet in the freezer for 2 hours, then transfer to a freezer-safe, airtight container.
Freezing cooked butternut squash:
The best way to freeze cooked squash is to puree it first. Put your cooled puree in a freezer-safe, airtight container. Let the squash thaw in the refrigerator before using it.
Recipe: Vegetarian Baked Stuffed Squash

Vegan Stuffed Butternut Squash
Ingredients
- 1 cup cooked quinoa
- 1 Tbsp olive oil
- 1 package Beyond Beef
- 1 Tbsp soy sauce
- 2 cloves garlic, minced
- ⅓ cup cup sun dried tomatoes
- 2 cups loosely packed chopped swiss chard
- 1/2 cup roughly chopped pumpkin seeds (optional)
- 1 large butternut squash, halved lengthwise, seeds removed
- 1 Tbsp olive oil
- 2 Tbsp maple syrup
- 1/4 tsp ground cinnamon (optional)
- 1 healthy pinch sea salt
Instructions
- Preheat oven to 400F degrees
- Line your dutch oven with parchment paper
- Cut your butternut squash in half lengthwise.
- Remove the seeds with a sharp edged spoon or melon baller. Brush the squash with olive oil, maple syrup, cinnamon (optional), and salt. Place cut-side down in your Dutch oven.
- Bake squash for 15 minutes, then flip the squash over to cut-side up. Bake for another 30-45 minutes (sometimes more depending on the size of your squash), or until a knife easily pierces the thickest part of the squash.
- Sauté your cooked quinoa over medium heat to crisp and brown. Add half of the soy sauce. Remove from the skillet and set aside.
- To the still hot skillet add the beyond beef and the other half of the soy sauce. Sauté for 8-10 minutes, or until browned. Then add garlic, sun dried tomatoes, swiss chard and pumpkin seeds(optional) and sauté for another 1-2 minutes or until chard is just wilted. Add quinoa back to the pan and toss to coat. Set aside.
- Once your squash is roasted, place cut-side up in the Dutch oven and fill to the brim with quinoa filling. Then place back in the oven to roast for another 5 minutes.
- Top with optional chives/green onion and balsamic glaze.
- Store leftovers covered in the fridge for 4-5 days. Reheat in a 350F oven until hot.
Nutrition Facts
Calories
306.52Fat
12.39Sat. Fat
1.86Carbs
46.03Fiber
7.09Net carbs
38.95Sugar
14.37Protein
8.56Sodium
312.29Cholesterol
0.18
Recipe: Mulled Apple Cider
As the days of apple-picking fade away, local farm stands are still stocking their shelves with the rich taste of fall in the form of fresh pressed apple cider waiting to be transformed into a hot mulled cider beverage made for fall days. November is a time to begin intentionally seeking connection with family and friends, and oftentimes that connection comes over the stovetop, making mulled cider together as the warm scent of apples fills your home.

The Cottage Peach is reader-supported. When you purchase through links on our site, we may earn an affiliate commission at no additional cost to you. All opinions are our own. Products in this post were gifted.
Apple picking in our family often ends with us clutching blazing hot to-go cups of apple cider in an attempt to warm our numb fingertips while we sit between the apple trees, burning our tongues on the first sips impatiently taken before our mugs have a chance to cool. The bees are drawn to the sweet smell surrounding us and we listen to their buzzing song as we watch the people around us climb atop each other’s shoulders to reach the best apples at the very top of the tree.
As the days of apple-picking fade away, local farm stands are still stocking their shelves with the rich taste of fall in the form of fresh pressed apple cider waiting to be transformed into a hot mulled cider beverage made for fall days. November is a time to begin intentionally seeking connection with family and friends, and oftentimes that connection comes over the stovetop, making mulled cider together as the warm scent of apples fills your home.
How is apple cider different from apple juice?
According to Southern Living, “Apple cider is fresh, unfiltered, and often unpasteurized. It's also considered a seasonal drink and can be hard to find outside of the autumn months. Apple juice, on the other hand, is filtered and pasteurized, which gives it a longer shelf life, a sweeter taste, and a smoother texture.” so, it’s safe to say that apple cider is NOT the same as apple juice.
To me, there is no comparison between apple cider and apple juice. Apple juice is, at best, the bland counterpart of the richly flavored and fresh apple cider. I almost never keep apple juice in our refrigerator, but if apple cider were available year round I can almost guarantee a jug or two would find its way into my cart each time that I shop.
The taste of apple cider is much fuller and richer than apple juice. Apple cider tastes just like eating a whole apple, with a bit of extra tanginess from the oxidation process.
Why is apple cider brown?
Apple cider is brown because of enzymatic (polyphenol oxidase) reactions that occur in the presence of oxygen. Tiny apple solids floating in the juice turn color when exposed to air, giving cider that gorgeous caramel color and opaque look. Just like an apple begins to brown once it is cut, cider turns brown as the apples are pressed in the apple presser and are exposed to oxygen. This reaction also contributes to the depth of flavor that is present in apple cider.

On a related note, if you are slicing apples for a garnish tray to serve beside your mulled cider and need to keep them from browning before your guests have a chance to dig in all you need to do to keep your apples from turning brown is to soak the cut fruit in a saltwater solution (half a teaspoon of kosher salt per cup of water) for 10 minutes, then drain and store until ready to use. I promise you can’t taste any lingering saltwater flavor at all!
How is apple cider made?
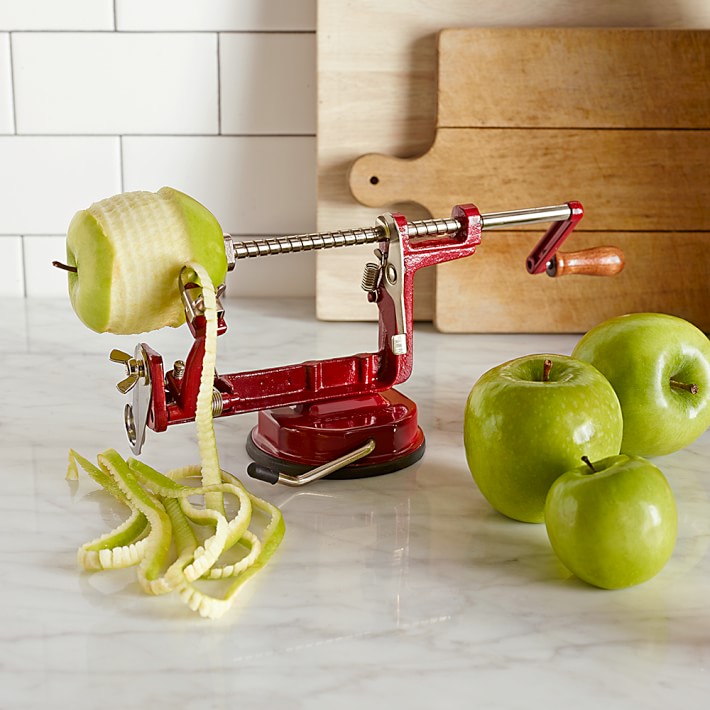
Traditionally, apple cider is made at your local orchard by pressing fresh apples in an apple press, which crushes the apples into a mash or pulp. There are a variety of different styles of apple presses, from small countertop units you can operate by hand to professional grade equipment used by larger operations.
Can you make apple cider at home?
Yes! Many people use their countertop juicing appliance to make fresh apple cider at home. Since the resulting product is unfiltered and unpasteurized, it is considered cider even though you are using a juicer to make it. If you don’t have a juicer, you can throw your chopped apples in a blender and then strain out the pulp using cheesecloth. To make hot apple cider just transfer the strained cider to a sauce pan and heat on medium low until warm.
Why should you buy local cider?
The reasons to purchase your apple cider from a local farm are endless. Your local farm will almost certainly carry apple cider in the fall, whether they have an orchard and press of their own or partner with another local farm that may be further afield. Farms rely on seasonal income from fall activities like hayrides and corn mazes to keep themselves afloat during the winter months when their income is severely reduced or eliminated completely, so supporting your local farm all the way up until their closing date by purchasing any items for your fall activities from them can be a great help. When we buy local produce and groceries, we can be certain that the products on the shelves are as fresh as can be and generally of a much higher quality than is available in the supermarket.
Mulled cider spices
My favorite thing to do with my local apple cider is to make a big pot of hot mulled cider on the stovetop. This not only results in a delicious drink to gather around and share with all of your friends and family, but fills the space with a warm and cozy aroma.
When I’m feeling too achy and fatigued to participate in more involved fall traditions and cooking, mulling cider is a mostly hands-off way I can celebrate the autumn season without draining myself of my limited energy. Since I’m always looking for ways to enjoy seasonal living while being mindful of my own limitations living with chronic illness, mulled apple cider is the perfect way to respect my capabilities.
Hot mulled apple cider is special, because we only get to enjoy it for a small window of time each season. Let this be a drink that opens the door to celebrating seasonal living this fall in your home. This scent experience can be enhanced by incorporating different combinations of spices and fruits into your spiced cider recipe. This is a case where more is definitely more, so don’t feel the need to hold back in creating your flavor combinations.
Some spices and fruits to consider using in your hot mulled cider beverage:

Whole cloves
Cinnamon sticks
Allspice berries
Fresh ginger
Star anise
Allspice
Nutmeg
Cardamom pods
Coriander
Oranges
Lemon
Cranberries
Apples
So why should you make mulled cider on the stovetop rather than the slow cooker? While I encourage you to utilize whatever cooking methods you need to in order to support your own body’s limitations, I consider the stovetop version to be an easy way to practice some mindfulness in my day. Simmering your hot apple cider on the stovetop forces you to pause and be present. Sometimes, coming off of autopilot is the best way to fully appreciate the brief beauty of fall in all its glory before it is time to move on to our long winter. So, pull up a chair if you need to, chop your fruits at the table while sitting down and truly allow yourself to savor the experience - from the fresh scent of citrus as your knife cuts into the rind, to the crunch of apples slicing.
Of course, when you’re finished making my best mulled cider recipe, the mug you choose to enjoy it in can be equally as important in determining how cozy of an experience you create. I like to put out an array of handmade ceramic mugs for my guests to choose from, alongside a tray with additional fruits they can add as a garnish to their drink. Make this mulled cider as the perfect refreshment for your Thanksgiving gatherings!
What does “mulled” mean?
To mull cider means to heat, sweeten, and flavor with spices for drinking. You can also mull ale, and wine. Changing the temperature of your beverage and adding spices increases the depth and complexity of flavor, as well as adding a warming element to bring coziness to your gathering.
How long does mulled cider keep?
You can cool and refrigerate your mulled cider for up to 3 days to be reheated another time. You should not keep it in a sealed bottle - since apple cider is usually not pasteurized it may ferment and cause the bottle to explode.
How to make mulled cider

Hot Mulled Apple Cider Recipe
Ingredients
- 1 gallon apple cider
- 2 Apples, sliced
- 1 Orange, sliced
- ½ Cup cranberries (fresh or frozen is fine)
- ½ cup maple syrup
- 2 tbsp lemon juice
- 4 cinnamon sticks
- 8 whole cloves
- 8 whole cardamom pods
- Large dutch oven or soup pot
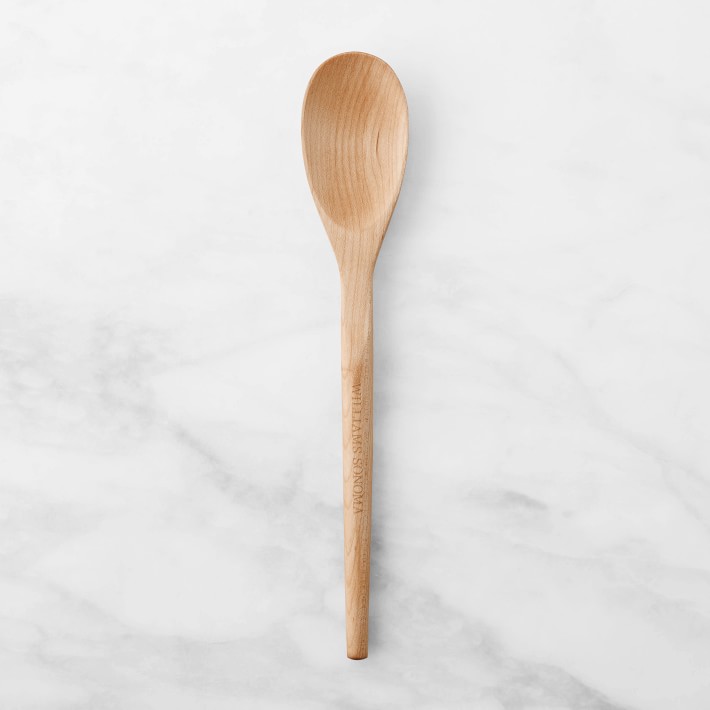
- Wooden spoon
- Knife
- Cutting board
Instructions
- Measure out your spices into the bottom of the Dutch oven and toast them on low for one minute to bring out the flavors, being careful not to burn.
- Slice the orange and apples.
- Add the fruit and apple cider to the Dutch oven and bring to a simmer. You don’t want to turn the heat too high as it may cause the cider to separate (this won’t affect the taste just the appearance)
- Cider can be mulled at a low temperature for up to 4 hours or at a simmer for about 1 hour, depending on your preference.
- Ladle into festive glasses or mugs and enjoy with fruit and cinnamon sticks to garnish!
Nutrition Facts
Calories
178.7Fat
1.16Sat. Fat
0.34Carbs
39.58Fiber
2.11Net carbs
37.45Sugar
32.13Protein
3.66Sodium
21.68Cholesterol
9.18
Easy Vegan Applesauce Recipe
WHY GO APPLE PICKING?
Aside from experiencing the perfect day, why go apple picking at a farm instead of buying apples at the grocery store? Taste is one reason. An apple from the grocery store is likely to be a year old.
Store-bought apples last so long because waxes and chemicals are applied by producers. Insecticides and fungicides are put on the apples to protect them from insects and bad bacteria, allowing the apples to stay ‘fresh’ when kept in cold storage.
In contrast, an apple picked from a tree on a sunny, cool day is a food unto itself.

The Cottage Peach is reader-supported. When you purchase through links on our site, we may earn an affiliate commission at no additional cost to you. All opinions are our own.
When I was a child, my parents got a group of friends together to go apple picking, and a tradition was born. For over 20 years we traveled to Honey Pot Hill Orchard in Stowe, Massachusetts. Honey Pot has 186 acres of orchard land, and has been run by the same family since 1926. Its trees are planted on rolling hills with wide lanes between them, and have orchard ladders leaning against them just waiting to be climbed.
We traveled the orchard in a pack, balancing on each other’s shoulders to reach the perfect apple far overhead, steadying ladders, and filling increasingly heavy bushel bags with more apples than they could reasonably hold.
We ran down hills and took pictures and laughed and smelled the unique-to-orchards, sweet aroma of fallen apples fermenting in the grass beneath the trees.
At the end of the day, we made our way through the hills to the farm store for a gallon of cider to drink and a gallon of cider to bring home, and to the bakery window where we bought bags and bags of cinnamon-sugar coated cider donuts.
We’d plop ourselves down on a grassy hill nearby to munch and drink and watch the people standing in the long line for donuts. Every visit was the perfect day.
Why Go Apple Picking?
Aside from experiencing the perfect day, why go apple picking at a farm instead of buying apples at the grocery store? Taste is one reason. An apple from the grocery store is likely to be a year old.
Store-bought apples last so long because waxes and chemicals are applied by producers. Insecticides and fungicides are put on the apples to protect them from insects and bad bacteria, allowing the apples to stay ‘fresh’ when kept in cold storage.
In contrast, an apple picked from a tree on a sunny, cool day is a food unto itself.
More importantly, we need farms and orchards. If we just buy fruits and vegetables from a grocery store, we may lose the remaining farms we have.
The majority of a farm’s income comes from seasonal activities. Apple picking with cider and donuts, pumpkin picking with hay rides and corn mazes, vegetable farms transformed in winter to sell Christmas trees and wreaths, these are the ways a farm survives.
When we fill a bushel bag and grab a gallon of cider, we are benefiting both the farm and ourselves, our environment and our culture.
Why Pick a Lot of Apples?
Nutrition and taste, of course, but also because apples are so versatile.

We can eat apples fresh, use them in pie or cake, make applesauce, or slice them into rings and dehydrate them for a crispy snack. We can make apple butter, add slices to a grilled cheese sandwich, and use them to create stamps for painting projects.
They can speed up the ripening of other fruits if we’re feeling impatient, help reduce inflammation when used as a face mask, and can even be used to make spooky shrunken heads to keep the kids entertained.
What Kinds of Apples Store Longest?
If you buy a few apples at the grocery store, you might keep them in a bowl on your counter or, to make them last a bit longer, store them in your refrigerator.
But if you have a large quantity that you want to eat over the course of a few months, a different storage solution is required.
The first two steps in storing apples that will last are done at the orchard. First, choose apple varieties that are crisp and tart, with thick skin.
Apple varieties that store well:
Granny Smith
Honeycrisp
Northern Spy
McIntosh
Fuji
Winesap
The second thing that should be done at the tree if you want to store apples long-term is to harvest them properly. Apples should be twisted from the branch, not pulled, and they need to be handled very carefully, like eggs, so they don’t develop bruises.
Choosing Which Apples to Store:
Once you’re back home, you want to choose the best of your apples to store.
Choose apples with stems. An apple without a stem is easier for microorganisms to enter, where they will cause the apple to decay.
Choose apples with no blemishes, soft spots, or bruises. A bruised apple will cause the apples around it to rot. Like they say, one rotten apple spoils the bunch.
Where to Store Apples
Traditionally, apples were stored, along with other fruits and vegetables, in a root cellar. Most people don’t have a root cellar these days, but we can look at what is valuable about a root cellar and mimic those conditions as best we can.
The fact that root cellars are dark and cold is what allows for a longer shelf-life for apples. Apples like a temperature above 32 degrees and below 38 degrees best. But we don’t need to have the ideal spot and temperature to keep apples for months.
An unheated basement, an attached garage where the temperature doesn’t fall below 32 degrees, or a closet in a cool room are all good spots to store your apples to extend their shelf-life.
How to Store Fresh-Picked Apples

Wrap each apple lightly in paper.
Gently layer the apples in a small wooden crate or cardboard box. Be careful not to bruise the apples or let them sit in direct contact with each other.
You’re going to want to check on your apples once a week to make sure there aren’t any that are bruised or rotting, so make it easy on yourself by spreading them out into a few different containers.
Alternatively, if you plan to store lots of apples regularly, you can purchase an apple storage rack.
Other Ways to Store Apples Long-Term
Apples can be frozen, although they will lose their crisp texture and will be better suited for use in apple pie or apple butter than for eating directly.
To freeze apples, cut them up, toss them with lemon juice, and pat them dry with a clean cloth. You can then put them directly into a freezer bag, or you can flash freeze them on a cookie sheet and move them to a freezer bag once they have frozen. Flash freezing minimizes the chance the fruit will stick together in a solid block.
Apples can also be canned using a water bath.
Why Make Homemade Applesauce?
Making homemade applesauce allows you to control both the taste and the texture of the sauce. Like your applesauce to be very smooth? Puree it. Like your applesauce lumpy? Just skip the puree.
Cinnamon, strawberries, maple syrup, vanilla bean, orange peel, even cayenne pepper – the flavoring options for applesauce are endless.
Making applesauce can also be an even longer-term way to store apples.
The Secret To Making the Best Applesauce
The number one best thing you can do to make the perfect applesauce is to use more than one kind of apple. Using two or more varieties adds a depth of flavor which you will not find at the store. Experiment with different variety combinations to find the ones you love the most.

Easy Vegan Applesauce
Ingredients
- 8 Apples (or as many or few as you’ve got)
- 1-2 TBSP Sugar (optional - I prefer raw sugar for this recipe)
- Splash of water (depending on your preferred thickness)
- Cinnamon, strawberries, maple syrup, vanilla bean, orange peel, even cayenne pepper – the flavoring options for applesauce are endless.
Instructions
- Cut the apples into chunks, peeled or not, depending on what you like.
- Put the cut up apples in a pot.
- At this point you can add a small splash of water to keep them from sticking to the pot before their juice starts to flow. Alternatively, you can watch them very carefully and stir them while they heat up.
- When the apples have made some juice, add sugar to taste.
- Cook on medium-high heat, stirring occasionally.
- If you find your apples are sticking to the bottom of the pan, turn down the heat and/or add a splash of water.
- When the apples are soft enough to break with the back of a spoon, remove the pot from the heat. For 8-10 apples, this might take about 10 minutes from when they begin to boil. For greater quantities, it will take a bit longer.
- Taste the sauce again and stir in more sugar if you’d like.
- If you want a smooth applesauce, puree it with an immersion blender.
- If you’d like a chunky applesauce, you can leave it as is, or smash it a bit with a fork or potato masher.
Notes
You can let your applesauce cool and store it in the fridge in an airtight container or jar.
If you’d like to extend its storage life, though, applesauce is the perfect food for a beginner to try canning.

Nutrition Facts
Calories
104.09Fat
0.36Sat. Fat
0.06Carbs
27.5Fiber
4.44Net carbs
23.06Sugar
21.21Protein
0.5Sodium
3.4Cholesterol
0How Many Apples Do I Need to Make Applesauce?
The great thing about this recipe is, it’s more of a formula. There is no set number of apples you need to make applesauce. You can make it with one apple or a hundred. (If you have a big enough pot!)
In general, it takes 8 medium-sized apples to fill a jar the size of the bigger jar (not the huge jar) available at the grocery store.
Easy Homemade Applesauce Recipe
This applesauce recipe is easy, vegan, and a great beginner recipe for kids and adults. I think it’s the best applesauce recipe, because it is so simple, and requires only 1 or 2 ingredients (depending on whether you want to sweeten it).
It gives you a base from which you can create your very own, favorite applesauce.
You can leave them unpeeled or peel your apples before chopping. Add your apples to the sauce pan and cook until soft.

How to Store Applesauce
You can let your applesauce cool and store it in the fridge in an airtight container or jar.
If you’d like to extend its storage life, though, applesauce is the perfect food for a beginner to try canning.
Ways to Use Applesauce
Applesauce can be used to flavor muffins, cakes, and breads.
It can also be used to replace oil in baking recipes, where it will add a bit of moistness to your bake.
Applesauce is a delicious and nutritious snack or dessert.
As the Brady Bunch taught us, applesauce is the perfect side dish for pork chops.
Warm applesauce is a nice topping for a sundae.
Applesauce on oatmeal is absolutely yum.
Traditionally, latkes are eaten with applesauce and sour cream.