
BACKYARD GARDENING MADE SIMPLE
![Is Herbal Academy Worth It? + Lavender Oat Scrub Recipe [Review]](https://images.squarespace-cdn.com/content/v1/60e85024dc86d643da81c96a/1e2b68ed-7192-42b7-9bcc-28c0a20c43bb/October+by+The+Cottage+Peach-65.jpg)
Is Herbal Academy Worth It? + Lavender Oat Scrub Recipe [Review]
Aside from its lovely scent, lavender’s anti-inflammatory, antimicrobial, and antifungal properties make it an incredibly useful plant for our skin.
It can soothe and calm skin, help fight acne, and even help heal minor cuts and burns. It is useful for rashes and skin irritations caused by medical conditions such as psoriasis, rosacea, and eczema. Some studies have shown that the antioxidants in lavender may even help to reduce wrinkles.
The Cottage Peach is reader-supported. When you purchase through links on our site, we may earn an affiliate commission at no additional cost to you. All opinions are our own.
Herbal Academy Botanical Skincare Course
This fall, Herbal Academy generously gifted me the opportunity to become a student and experience their Botanical Skincare Course. I have been passionate about using natural products in my skincare routine for many years now, and this was the perfect opportunity to take a deep dive into learning all about making my own DIY skincare products using natural ingredients.
What does the Herbal Academy Botanical Skincare course include?
The Botanical Skincare Course from Herbal Academy has everything you need to begin making your own natural skincare products at home. The course is separated into three units - unit one covers the anatomy and functions of the skin, providing a detailed but understandable scientific overview of exactly what and how our skin works. Some of this information will probably be common knowledge, but I found the included illustrations, charts and graphs extremely helpful.
Unit two covers skincare from the inside, offering a comprehensive holistic approach to skincare that went further than I expected a skincare course to go. But this is exactly what makes the Herbal Academy courses so special - rather than just throwing a bunch of great recipes your way and leaving you to fend for yourself, this unit really cements the importance of whole body care and all the ways that how we eat and live impact our skin health, with great tips for aiding digestion as well.
This unit also covered alternative wellness practices from other cultures including ayurveda and chinese medicine - these are of less interest to me personally, as I try to align my herbalism with my own celtic culture and avoid appropriating other cultures in my practice. I found it off-putting that the module on Chinese medicine in particular did not take the opportunity to feature an instructor from the Chinese community in the lesson - while the white male instructor seems to be very knowledgeable and qualified, I would have loved to see better cultural representation in this unit.
Unit three covers skincare recipe formulation and more of the technical creation of actual recipes. To be honest, I was so pleasantly surprised by how much the course included - for how small of an investment this course is, I would have been happy with just the content in unit three, so the other two units really felt like a huge bonus. You have access to the online coursework for one year after you activate it, but each unit offers the option to download a PDF version of all the content within the course to access indefinitely. The downloadable PDFs alone are over 600 pages of course material, so this one will keep you busy for a good long time!
Is the Botanical Skincare Course for beginners?
This course would be great for herbalists of all levels who are looking to expand their knowledge and explore natural skincare product creation. There is a good mix of basic to intermediate content.
Is Herbal Academy Worth It?
Yes, I feel Herbal Academy is definitely worth the investment. You can click here to enroll in the course. You’ll have the option to purchase the companion book alongside the course - I highly recommend you do so, as the book alone is packed with recipes that you’ll want to try during and after completing the course.
Since lavender is one of my favorite plants to grow and to work with, I decided to make the lavender oat scrub from the companion book that goes along with the course. You can purchase this book separately from the course, but together with the course you are able to really dive deep into the methods and skills needed to make your own non-toxic skincare products.
What Are the Benefits of Using Lavender on Your Skin?
Aside from its lovely scent, lavender’s anti-inflammatory, antimicrobial, and antifungal properties make it an incredibly useful plant for our skin.
It can soothe and calm skin, help fight acne, and even help heal minor cuts and burns. It is useful for rashes and skin irritations caused by medical conditions such as psoriasis, rosacea, and eczema. Some studies have shown that the antioxidants in lavender may even help to reduce wrinkles.
Lavender Essential Oil
Lavender essential oil has a long history as a medicinal treatment. It is important to make the distinction between lavender oil and lavender essential oil. Lavender oil is purely a scent, while lavender essential oil is what we want for medicinal or herbal usage.
Lavender essential oil is made by steaming dried lavender flowers. The heat of the steam releases the oils from the blooms.
Uses for Lavender Essential Oil
Aside from home uses, studies have proven that lavender essential oil can increase the effect of antiseptics commonly used to combat staph infections for patients who are having surgery.
At home, the antiseptic and anti-inflammatory properties of lavender essential oil can help cuts and burns heal faster and fight infection. It is very soothing for sunburn and insect bites, as well.
As an antifungal and anti-inflammatory, lavender essential oil can reduce the inflammation caused by eczema and help treat psoriasis, while helping to balance your skin’s moisture barrier.
One unexpected use for lavender essential oil is to prevent and treat acne. It may seem that adding oil to oily skin would be counter-effective, but lavender essential oil can help regulate your skin's oil production.
A common treatment for acne is to use a stripping product to remove oils from your skin. What happens when you do this is that your skin becomes too dry, and tries to compensate for that by making more oil. Pores become clogged, and combined with acne bacteria, you have the perfect environment for pimples.
Like these products, lavender essential oil can kill off the bacteria, but without drying out your skin and continuing the cycle of oil production. It is non-comedogenic, so it doesn’t clog your pores, and its anti-inflammatory properties help soothe any acne you do have.
Lavender essential oil is also useful as a hair product. Its antibacterial and antiseptic properties protect your scalp against bacteria, and it can help with dry scalp and dandruff. As a bonus, it is also believed to boost hair growth.
How to Use Lavender Essential Oil
Lavender essential oil should not be applied directly to your skin, because it may cause irritation.

For use as a skin cream, add it to your regular moisturizer or combine it with a carrier oil to create your own serum. Jojoba is a good carrier oil for most skin types. For dry skin, argan oil is very moisturizing, while for sensitive skin it might be best to go with rosehip oil.
To use your serum, apply 2-3 drops to problem areas.
To use lavender essential oil for acne, dilute it with carrier oil and apply it to your skin after washing your face.
You can also make a skin toner by mixing 2 or 3 drops of lavender essential oil with 1 teaspoon of witch hazel. Gently apply it to your face with a soft cloth or cotton ball.
To use lavender essential oil for dandruff, dilute the oil and scrub it into your scalp. You can wash it out after 10 minute or wrap your head in a towel and keep it on overnight.
For sunburn, combine lavender essential oil with aloe vera.
What Are the Benefits of Using Oatmeal on Your Skin?
Besides being a powerhouse of nutrition for our bodies, oatmeal is a great choice to use on our skin. People have used oats for centuries to treat rashes, eczema, and itchiness.
Oats are all natural, suitable for all skin types, inexpensive, and easy to acquire. Their amino acids, antioxidants, and fatty acids are all beneficial to our skin.
Using oatmeal on your skin can help it to maintain just the right pH, which is especially helpful for sensitive skin, and also provides your skin with vitamin E, which helps to retain moisture.
Oats work very well as an exfoliator, gently removing the dry outer layers of skin and working to remove the dirt and oil beneath, leaving your skin smooth and glowing. If used on the scalp, oatmeal can help to reduce dandruff.
Because it helps clear your pores, oatmeal is an effective option for helping to treat acne breakouts and reduce the redness they cause.
The starches in oatmeal help maintain your skin’s moisture barrier by attracting water to the skin, and the saponins have soap-like properties that make it an effective skin-cleanser. They were used for that purpose as far back as ancient Rome.
An oatmeal bath is a cooling way to calm skin inflamed by chicken pox or shingles, and its anti-inflammatory properties help to soothe itchiness. Along with itchiness, an oatmeal bath can also be helpful for sunburn, eczema, and psoriasis.
How to Use Oats for Your Skin
To use as a body cleanser, make lavender oat scrub from the recipe below.
For dry skin, use colloidal oats mixed with a bit of rose water. Colloidal oats are a finely-ground oat product. You can make your own by pulverizing or grinding oats yourself. Let it sit on your skin for 5-10 minutes, then rinse.
You can make a face mask with 2 parts oatmeal, 1 part honey, and a bit of rose oil. Leave the mixture on your skin for 10 minutes, then rinse.
To make an oatmeal bath, use water that is not too hot. (Heat can irritate skin.) Pour a cup of colloidal oatmeal under the faucet as it runs. If you don’t have colloidal oatmeal, you can put oats into a sock, tie it up, place it in the water, and swirl it around until the water looks milky.
If you are ready to give oats a try on your hair, mix finely-ground oats with your shampoo and wash as normal.
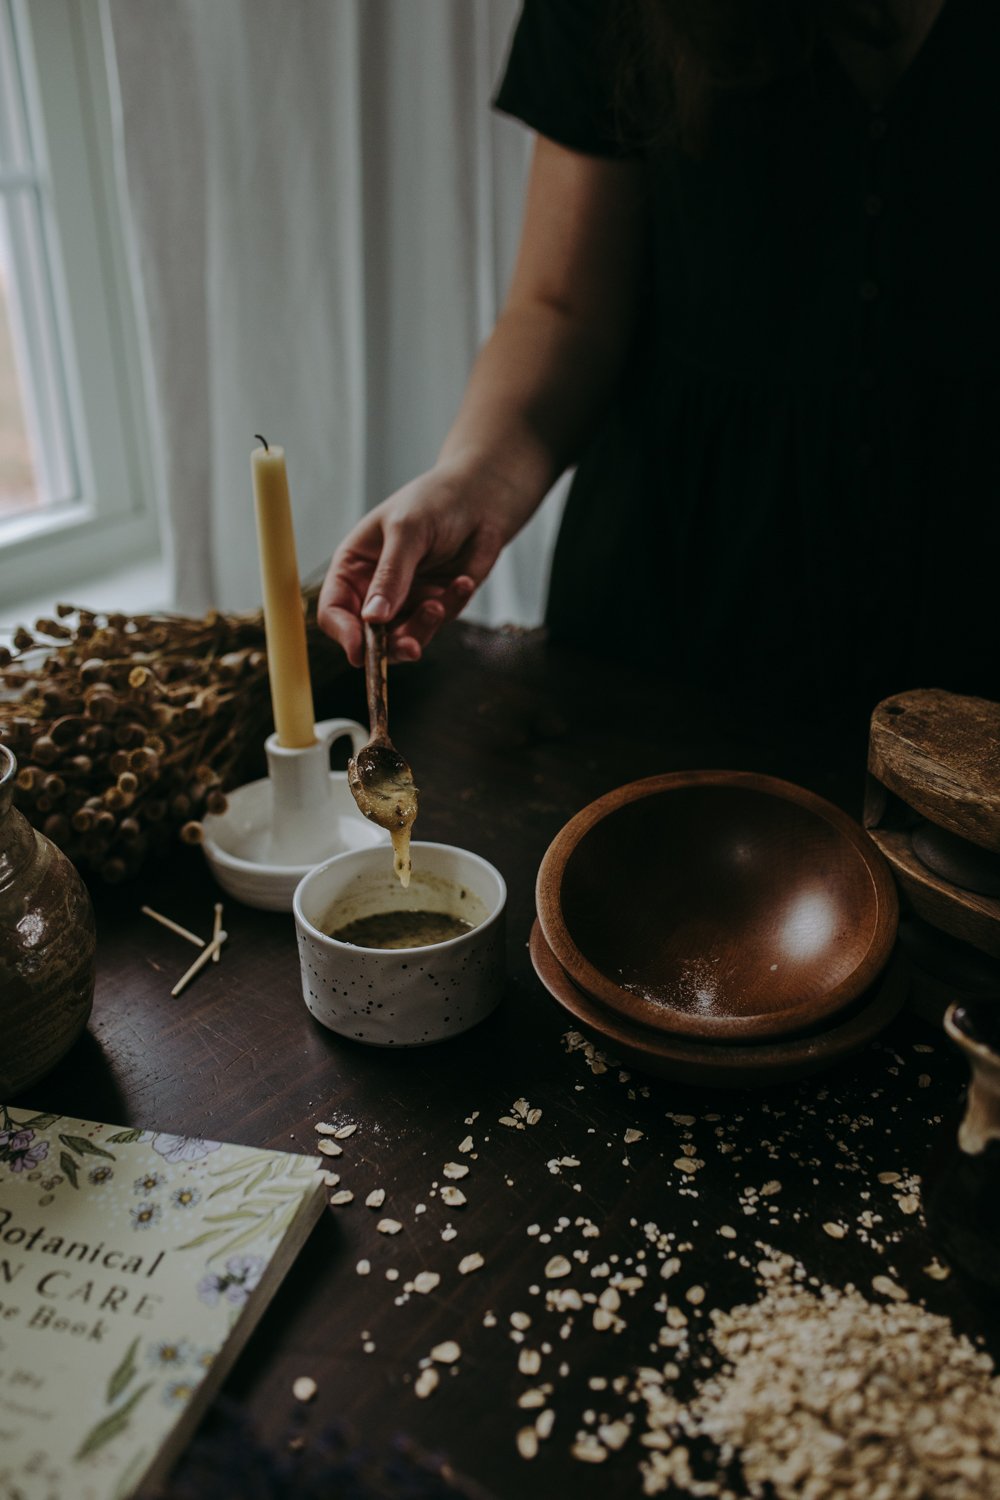
Lavender Oat Scrub Recipe
Lavender oat scrub is the perfect way to combine the benefits of the lavender and the oatmeal. It can be used as an all-over body scrub to exfoliate and moisturize your skin.
DIY Lavender Scrub
It is quite easy to make lavender oat scrub, which makes it a nice way to try your hand at herbal remedies, if you never have.
Mix some up for yourself, or gift a friend with their very own lavender oat scrub!

The recipe below is from Herbal Academy’s Botanical Skincare Recipe Book. The book is a great resource, with 194 all-natural recipes for body care products from an herbalist perspective. Click here to purchase it alongside the companion course for a fully immersive experience.
What You Need to Make Lavender Oat Scrub
1/4 cup oats
4 tsp sugar
2 tsp lavender buds
¼ cup jojoba oil
Lavender Oat Scrub Recipe
Directions:
Grind the oats, sugar, and lavender into a powder. (You can use a food processor, blender, spice grinder, or mortar & pestle.)
Combine the powder with the oil and stir well.
Using Lavender Oat Scrub
To use your lavender oat scrub, apply it to your skin and scrub in a circular motion.
Rinse off with luke-warm water and pat your skin dry.
Note: This body scrub can make your tub slippery, so be sure to wipe it down afterwards.
Click here to start your herbalism journey with Herbal Academy!


![The Power of Nature: How To Make Infused Oregano Oil for Your Health and Wellness [Recipe]](https://images.squarespace-cdn.com/content/v1/60e85024dc86d643da81c96a/1682625337753-AFI1M6MRRMDQ5CBNY2TX/unsplash-image-Fl2Ki3_GZIU.jpg)
![Make This Easy + Natural Botanical Hand Salve [Recipe]](https://images.squarespace-cdn.com/content/v1/60e85024dc86d643da81c96a/b57698b0-de70-4101-afaf-7af57788237d/Herbal+Face+Steam+Recipe+by+The+Cottage+Peach-1.jpg)
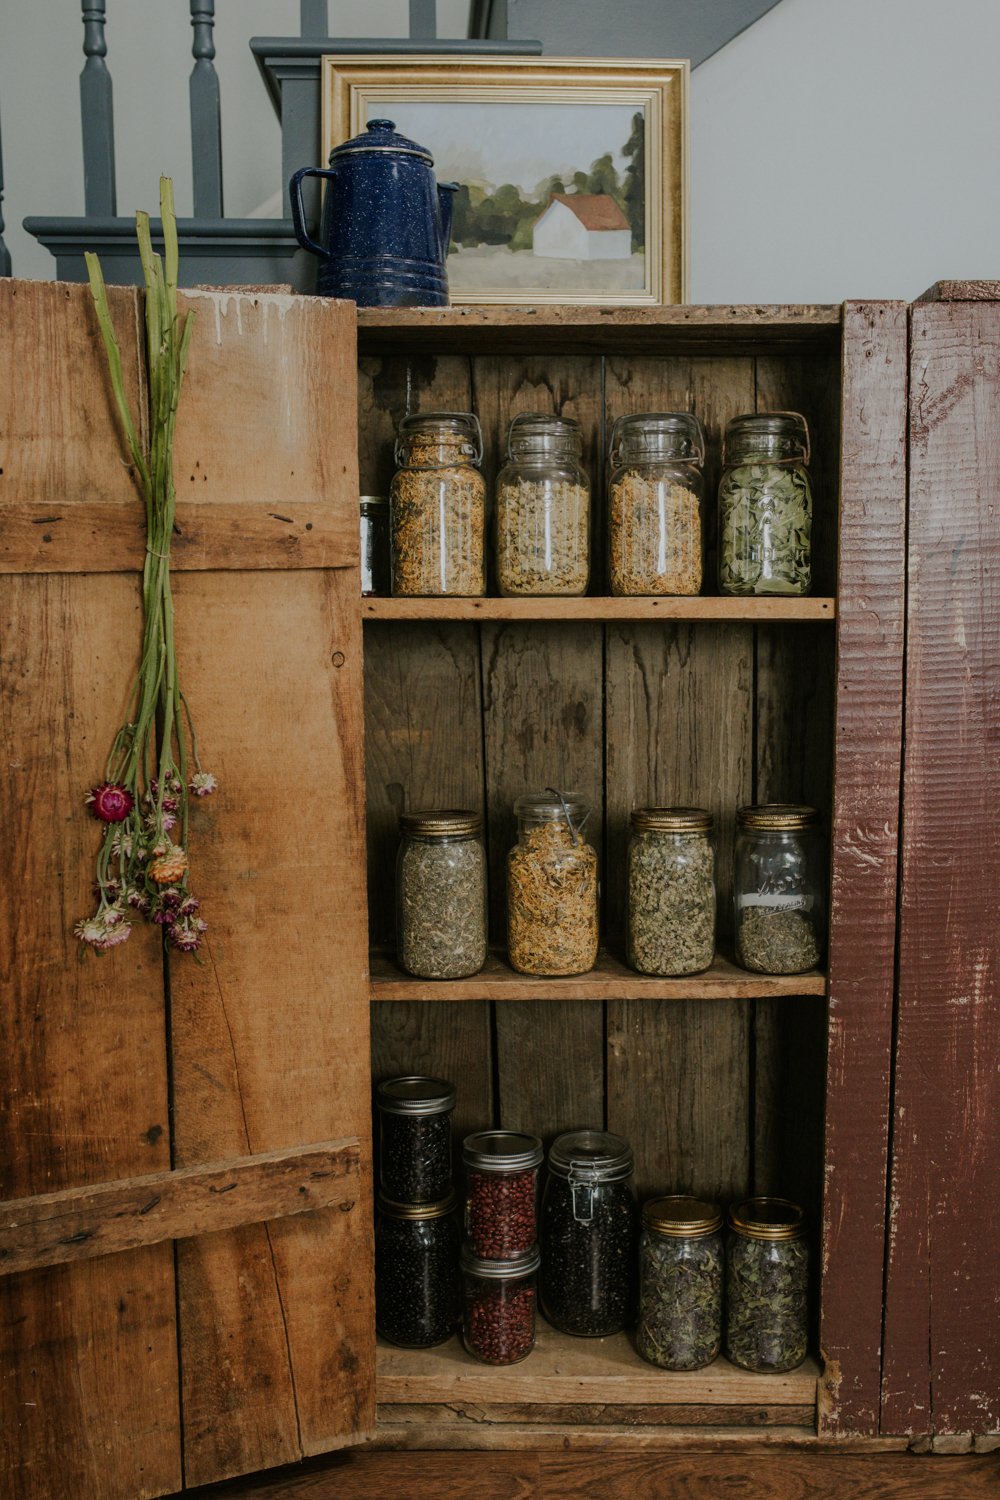
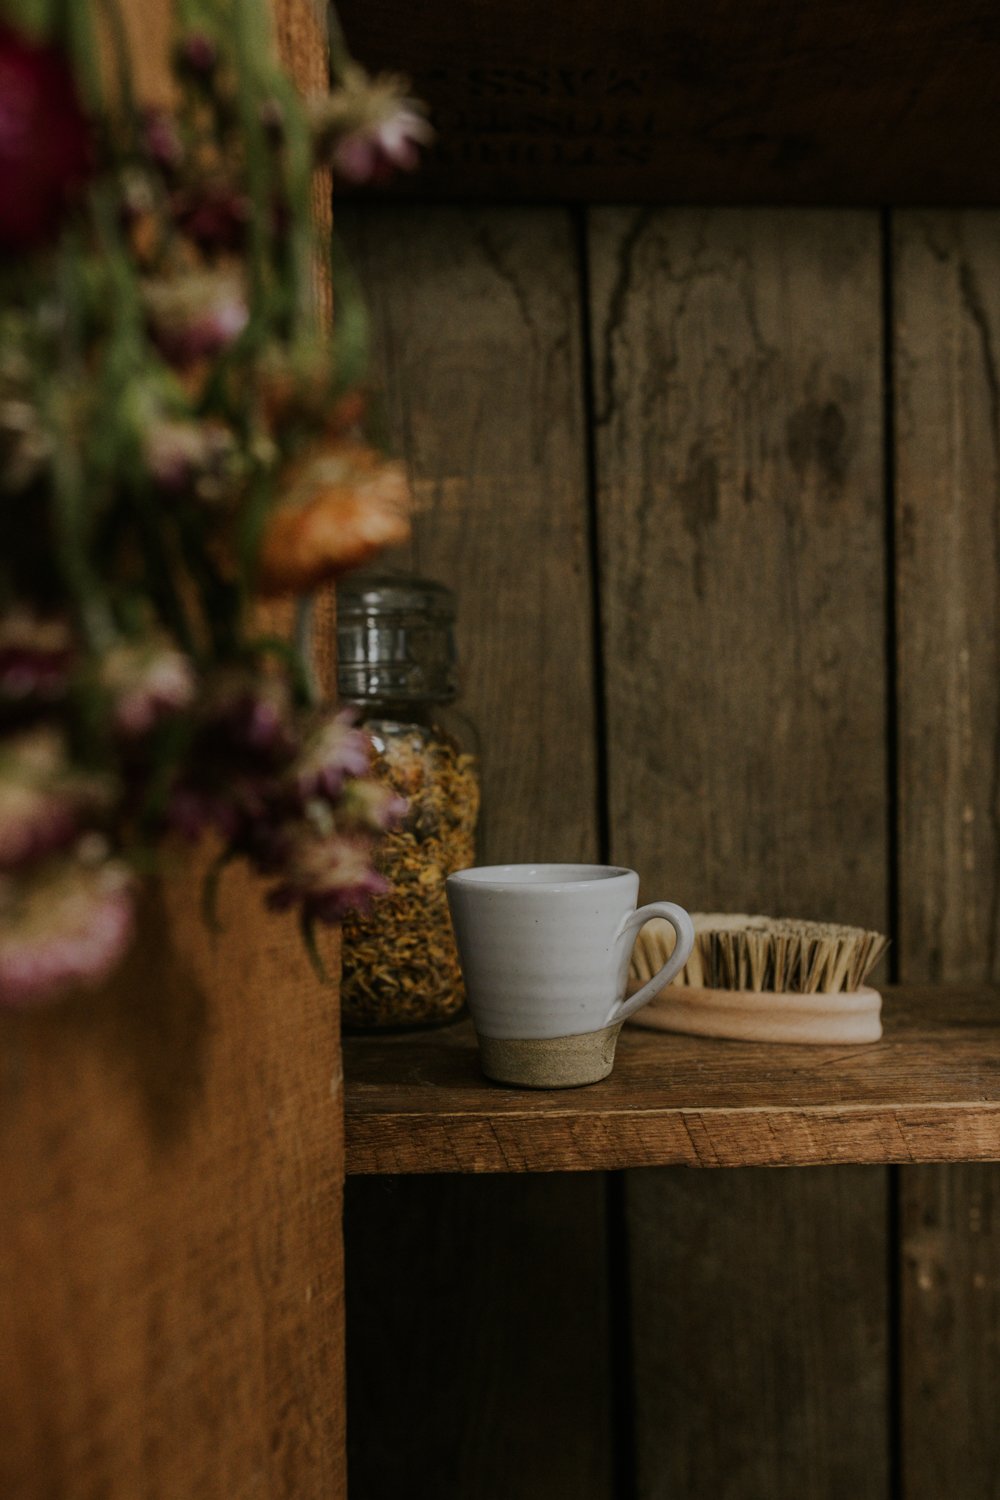
What’s in my apothecary cabinet
HAVE YOU EVER MADE YOUR OWN TEA BLENDS?
Maybe you’re used to getting your tea in individual sachets from the grocery store. The idea of loose leaf teas sounds like something that only real tea connoisseurs would do.
But did you know that most of those little pre-packaged tea bags actually contain plastic?
You can’t even throw them in your compost because they won’t break down properly due to the plastic. And the heat from the water can release harmful compounds from the plastic tea bags into your cup.

The Cottage Peach is reader-supported. When you purchase through links on our site, we may earn an affiliate commission at no additional cost to you. All opinions are our own.
Why Keep an Apothecary?
Here’s the thing about an old jam cabinet full of dried plants: it may not seem like much, it may not even seem necessary, but for me it is essential, and here’s why:
An apothecary is a source of comfort: The herbs within an apothecary provide relief and warmth and the sense of being well cared for.
An apothecary heals: Maybe not best suited for your worst ailments, but a steady hand you can look to. A cup of calming chamomile tea for when you can’t sleep, calendula tea for inflammation and nerves, mint tea when you need a quick pick me up, and red raspberry leaf tea for cramps and more.
An apothecary increases your independence: In times when essential supplies may run short, as happens with pandemics and supply chain issues, having a stocked apothecary provides a backup. Stored correctly, these dried plants are rich in essential vitamins needed for survival.
The Healing Powers of Tea + Tisanes
What is the difference between tea and tisane? Tea comes from one specific plant, the Camellia sinensis plant. Tea is always caffeinated. Technically speaking, any other herbal plant matter steeped in hot water is a tisane. However, most of us use the word tea interchangeably, so that is how I will refer to all my herbal teas and tisanes here. While herbs can be used to make poultices, tinctures, and creams, their most common use today is as an ingredient for tea.
There is a medicinal tea for just about every common ailment, from headaches to fever, acne to stomach upset. Along with its medicine, tea offers us comfort, companionship, and ritual.
Cups of tea in the morning calm stiff and aching joints, wake up your groggy mind and bring comfort after a long night tossing and turning.
Cups of tea in the afternoon, when mom stops by and you talk about whether or not the world is ending, bring you back to the here and now and away from worrying about the what-ifs and the should-haves and the would-have-beens.
Cups of tea after dinner wash away the endless news articles and likes and comments and to-do lists and the never good enough feelings and the Sunday scaries and the imposter syndrome and the pandemic and the climate crisis and the political climate and the war, war, war.
Cups of tea in winter warm your hands and lift your spirits, both essential in the stretch of long, dark days.
Cups of tea filled with petals dried in last year’s garden sun, cups of tea to mend you and energize you and bring you closer together.
It’s never just a cup of tea.
Have you ever made your own tea blends?
Maybe you’re used to getting your tea in individual sachets from the grocery store. The idea of loose leaf teas sounds like something that only real tea connoisseurs would do.

But did you know that most of those little pre-packaged tea bags actually contain plastic?
You can’t even throw them in your compost because they won’t break down properly due to the plastic. And the heat from the water can release harmful compounds from the plastic tea bags into your cup.
This is true even of many “organic” tea brands that are available. Many tea companies will refuse to even tell you what materials are used in their tea bags, which is doubly concerning. If you can’t compost them, they’ll just end up polluting the landfills and taking decades to break down.
Making your own tea blends from scratch doesn’t need to be intimidating or difficult. You can start with the most basic ingredients and work your way up from there. Since I have a more extensive herbal library, I’ll be talking about my apothecary in depth - but don’t be afraid to start small at first.
The benefits of loose leaf tea are many - they are medicinal, and generally available in higher quality than pre-blended teas.
Once you get the hang of making your own tea blends, you can even mix up batches to give as handmade gifts for friends and family. Just pour your tea into a nice jar or other container and add a simple ribbon for a zero-waste gift that everyone will love.
Are Plants Good Medicine?
The use of herbs, berries, and spices as medicine and comfort goes back tens of thousands of years. Women gathered plants, experimented with them, and treated all manner of health conditions. They passed this wisdom from generation to generation, sometimes orally, and sometimes in the form of recipe books.
While male physicians did, at points, take an interest, conduct studies, and publish papers on the use of plants as medicine (without mentioning women or allowing them to become doctors themselves), somewhere along the way, this once-vital knowledge was stripped of its importance, as the work of women so often is.
Luckily, this information didn’t completely disappear. Women continued to teach their daughters. History (her story, to be more precise) was studied and old wisdoms brought together in books and finally to the internet, where it is available to educate any budding herbalist.
An Invitation for Ease
Close your eyes and picture this. You're standing in the kitchen of an old farmhouse with wooden windows and creaky floorboards underfoot.
The fire is crackling nearby, and the scent of woodsmoke lightly punctuates the stillness and chill of winter.
You wash the our your teapot in the sink and listen for signs of life outside your window. All is calm and silent as the first snowflakes begin to land on the earth outside and the ground is coated in a hard layer of permafrost.
The work you set out to do is done, and you are tucked away at home with the rest of the afternoon stretching out before you.
This is your invitation to find ease in your day. Pour yourself a cup of tea, and put your feet up for a while.
The Best Way To Learn Herbalism
If you’re ready to begin your herbalism journey I highly recommend enrolling as a student in one of the many online courses at Herbal Academy. Their fully digital classroom offers professional guidance in an easy to navigate format that is welcoming of students of all levels and backgrounds. Click here to learn more
learning herbalism: book recomendations
I can’t attest to any of these books personally since I exclusively utilize Herbal Academy’s blog, courses and textbooks for my own education, but they are popular within the herbalism community and may be a good place to begin your learning journey. Click the images below to shop.

What Herbs should you have in your apothecary?
This is by no means an exhaustive list, but here are some common plants I would start with when first building your apothecary:
Chamomile - for anxiety and stress, a cup of chamomile tea will quickly calm your nerves. Roman chamomile (the variety you want for tea) grows very easily from seed and each plant produces a large number of flowers.
Peppermint - for bloating, gas, and some abdominal pain, mint tea also has a soothing aroma. Mints grow so well you’ll want to plant peppermint in a place you’re happy to let it spread, or in a container.
Ginger - a powerhouse with antimicrobial properties and a huge range of health benefits. Combined with peppermint, it makes the perfect tea for any upset stomach. Ginger grows from pieces of the root, and prefers shade. In warm climates it can be outdoors year-round, but in cooler climates it should be grown in a pot and brought inside for the winter.
Red clover - used for menopausal symptoms, arthritis, psoriasis, and respiratory problems such as bronchitis. Red clover is thought by some to be a weed, but it can be used as a lawn replacement, a nitrogen-fixing cover crop, or groundcover.
Dandelion - used to stimulate digestion and calm hot flashes, among other things. Dandelions are, of course, happy to plant themselves for you!
Lemon balm - calming, and is used for headaches, cold treatment, and digestive issues. It has a lemony aroma and is a tasty addition to any tea. Lemon balm is a member of the mint family, and like its relatives will be happy to take over your garden. It spreads mostly by seed, so cutting it back before seeds form will keep it in check.
Calendula - antifungal and antimicrobial. Helps prevent infection and heal injuries to body tissues. Calendula is also known to have anti-inflammatory and antioxidant components, which might help to fight cancer, protect against heart disease, and ease muscle fatigue.
Echinacea - an immune-boosting herb that may help your immune system fight off incoming viruses or infection. Studies have confirmed that echinacea can shorten the duration of the common cold, lessen the severity of its symptoms or even prevent it.
Red Raspberry Leaf - excellent source of potassium. Red raspberry leaf contains useful antioxidants including vitamin E, tannins, and flavonoids. Can provide support during all phases of the menstrual cycle.
Yarrow - reduces inflammation, acts as an antispasmodic useful in treating Irritable Bowl Syndrome (IBS)
Oregano - if you can only start with one herb, let it be oregano. This powerful plant has antibacterial properties, anti-inflammatory properties, may protect against cancer, diabetes and depression. I have personally cured an ear infection with a simple routine of one drop of oregano oil in the affected ear two to three times per day.
Lavender - my personal favorite. A popular nervine, lavender has deeply calming properties much like chamomile.
HOW TO STORE DRIED HERBS
Storing dried medicinal herbs in your apothecary doesn’t need to be complicated. As a general rule you should store herbs in a cool, dry place out of direct sunlight, inside of airtight glass jars. These Mason jars are my favorite for storing herbs. The jars seen in the images in this post are antique, so you’ll need to hunt them down at the thrift stores!
Why should you store herbs out of direct sunlight?

Herbs are pretty delicate once dried, and in order to protect the active compounds within each plant that give them their healing qualities it is important to protect them from the elements. UV light from the sun can quickly break down the compounds within your dried herbs that make them so useful.
Why shouldn’t you store herbs in plastic?
There is the possibility that herbs stored in plastic can absorb some of the toxic chemicals present in the plastic itself over long term storage.
Handmade Zero Waste Tea Gift Idea
Most everyone loves a handmade gift, and in these times of over-consumption it is more important than ever to be mindful in your gift giving this holiday season. Americans spent around $15.2 billion on unwanted holiday gifts in 2019, and 4% of them ended up in the trash. That waste doesn’t even include all of the packaging and wrapping materials that end up in landfills. Each year Americans alone use 4.6 million pounds of wrapping paper valued at over seven billion dollars. Fifty percent of that wrapping paper ends up in a landfill. That's 2.3 million pounds of used wrapping paper clogging up landfills.
A handmade gift of tea is a thoughtful way to show someone that you care and provide them with a gift that they will be able to use over and over again. You can mix up three different blends and find a set of matching jars to give as a little tea sampler, or make up one big batch of tea and distribute into a larger mason jar like the rose tinted jars from Ball. You don’t even have to wrap your handmade tea gift in paper - just add a simple ribbon with some dried fruit, pinecones or cinnamon sticks tied alongside it. Or, you can add a special mug to your gift that you know the recipient will love. Pour your tea into a cloth drawstring bag and place inside of the mug with a cute stirring spoon.
Wondering what flavor of tea to choose for your handmade gifts? Pick something that you know everyone will love such as chamomile or mint and add your own flair to make it unique to your personality or that of the gift recipient. You can personalize your tea gift any way you like with different add-ins like chocolate chips, candied fruits or flavored sugars.

Stovetop Elderberry Syrup Recipe
A pot of elderberry syrup simmering on the stovetop is a welcome sight and essential addition to our herbal apothecary. You won’t have any trouble getting your children to try this sweet and fruity syrup when they feel a cold coming on either, since it tastes just like candy!

The Cottage Peach is reader-supported. When you purchase through links on our site, we may earn an affiliate commission at no additional cost to you. All opinions are our own.
Elderberry season is drawing to a close, and my freezer is filled up with this useful fruit. I spent the late summer months periodically checking for ripeness, clipping each branch back as the berries and stems turned from green to deep purple. Elderberries can be a challenge to remove, leaving your hands stained purple with the juice. That’s why I place my bunches directly into the freezer after harvesting, whole - this way you can easily remove the frozen berries in one fell swoop and preserve them at peak freshness for winter cold remedies, sweet syrups and more. A pot of elderberry syrup simmering on the stovetop is a welcome sight and essential addition to our herbal apothecary. You won’t have any trouble getting your children to try this sweet and fruity syrup when they feel a cold coming on either, since it tastes just like candy!
What Are Elderberries?
Elderberries are edible, small, dark fruits which grow wild in much of North America and other areas of the world. The bushes they grow on are attractive, making them a great addition to a yard or garden.
The bark, leaves, and roots of elderberry plants are toxic to humans and pets. But beginning in June, elderberry bushes produce eye-catching white blossoms in flat, disc-shaped clusters of tiny flowers. These clusters grow as big as 10” in diameter. They are beautiful and fragrant, and are also edible. The flowers can be eaten raw or cooked.
Of course, you don’t want to harvest all of the flowers, because then your bush would not produce any berries.
In fall, the elderberries themselves are ready to harvest. They should not be eaten raw, as raw elderberries may cause nausea, vomiting, and digestive problems. Cooking the berries removes their toxic properties.
What Do Elderberries Taste Like?
Raw elderberries should not be eaten, but we’re not missing much. Some people call them flavorless, while others find them bitter and tart. They’re much tastier when cooked with other fruits or sweeteners.
Uses of Elderberry
Elderberries can be used to make medicinal syrup, cordial, jelly, sauces, and wine. Dried elderberries are tasty in baked goods, and also make a soothing tea.
Benefits of Elderberry Syrup
Elderberry has a very long history of use as a medicinal plant, dating back as far as ancient Egypt, where it was used to help heal burns. It has also been used as a diuretic. Indigenous peoples used elderberry to treat rheumatism and fever.
Elderberry syrup provides significant antioxidant effects. The antioxidants in elderberries boost the immune system, and along with the berries’ abundance of vitamins A, B, and C, help to fight off infections.
The syrup is also high in fiber, B vitamins, iron, and magnesium, and is an anti-inflammatory.
Elderberry Syrup for Colds, Coughs, and Flu
First, a note: People who have auto-immune issues may want to avoid elderberries, as boosting the immune system is only likely to make symptoms worse.
Both elderberry syrup and elderberry tea are good methods of delivery for elderberries’ many health benefits. Elderberry tea with a bit of honey and lemon juice is particularly soothing.
Studies have shown that elderberry syrup may help to treat fevers, headaches, coughs, body aches, and other symptoms of the flu and upper respiratory infections.
Growing Elderberries
Elderberry plants are different varieties of the Sambucus tree. They are perennial, meaning you plant them once and they continue to grow each year. They can grow as tall as 12’, so they need a large area. They may tolerate partial shade, but won’t produce as many berries there, so it’s best to plant them in full sun. They do fine in both wet and dry soils.
Elderberry bushes provide a small harvest after the second year of planting. In their third year, they are mature, and can produce a 10-12 pound harvest.
Elderberry plants will spread through suckers, but are easily controlled by mowing them down when they appear. Propagating elderberries is easily done through cutting or ground layering.
Propagating elderberry bushes by hardwood cutting
To propagate an elderberry by cutting, check your plant for new buds, which will likely appear in February. Not every cutting will take root, so plant more than one to increase your likelihood of success.
Choose branches about the thickness of a pencil, with two sets of buds, and cut above and below each set. Cut the branch at an angle on one end to make it easier to push into the soil.
Plant directly into the ground or into a pot. If you use a pot, you can cover the branch with a baggie, misting regularly to keep the soil moist. Alternatively, you can place your cuttings in water until they begin to develop roots.
Elderberry branches take 8-10 weeks to root. If successful, you will see growth in the spring.
Propagating elderberry bushes by ground layering
By layering branches, we can force them to develop roots while still attached to the parent plant. This way they will continue to receive food and water without effort on their part.
Instructions for ground layering elderberry plants:
Choose a flexible branch that is growing close to the ground.
Remove any leaves that are on the area you want to layer.
Make a small cut on the side of the branch that will touch the soil, about 1/3 of the way through the branch.
Cover that area in soil, and if necessary peg the branch to the ground.
As the branch grows, you can stake the end of it into an upright position, being careful not to disturb its new roots.
Once a good root system develops, you can cut the branch off of its parent and move it to your desired spot.
Harvesting Elderberries
Elderberry flowers should be picked on a warm, dry day. Snip behind the flowers to remove the entire cluster in one piece.
Clusters of berries should also be cut as one piece. Snip with pruning shear or snips where the base of the berries meets the stem.
To make it easier to remove the berries from the plant, spread the clusters of berries on a cookie sheet and freeze them for two hours before using your hands to loosen from the branches.
Eating Elderberry Flowers
Elderberry flowers can be eaten raw or cooked. They are the only part of the elderberry plant that is non-toxic.
The raw flowers are crunchy, with a subtle floral taste. They are one of the sweetest-tasting flowers, and are sometimes described as tropical or pear-like.
Fresh elderberry flowers can be added to a salad or used to make a dressing. Fresh or dried elderberry flowers can be used to make tea.

Preserving Elderberry Flowers and Fruit
How to dry elderberry flowers:
To dry elderberry flowers, spread them in a single layer in a dark dry place, or hang them by their stems in a cool, dark location.
How to dry elderberries:
Remove the berries from their stems and spread them in a single layer. Unless you live in a particularly dry and sunny environment, use a dehydrator or oven for best results.
Drying elderberries in a dehydrator:
Either remove the berries from the plant completely, or cut off the larger stems.
Spread the berries in a single layer on your dehydrator trays.
Run the machine for 12 hours at 135 degrees Fahrenheit.
Drying elderberries in the oven:
Spread the berries in a single layer on a parchment-covered cookie sheet, and place in the oven at your lowest setting (no more than 175 Fahrenheit). Cook for 12 hours, stirring occasionally.
How To Store Dried Elderberries
Store your dried elderberries in an airtight container in a cool, dark place. A Ball mason jar is a good option. For longer-term storage, you can vacuum seal the jar.
Making Elderberry Syrup
Elderberry syrup can be made with just four ingredients: dried berries, water, ginger, and honey.
Supplies:
Mesh strainer
Jar
The Best Elderberry Syrup Recipe

Stovetop Elderberry Syrup
Ingredients
- 1 cup dried elderberries
- 6 cups water
- ¼ ounce grated ginger
- 1 ½ cups raw honey
Instructions
- Bring the berries and water to a boil. Simmer for 30 minutes.
- Strain the berries, and return the liquid to the heat.
- Add ¼ ounce grated ginger. Simmer gently for 45-60 minutes, or until 2-3 cups of liquid remain.
- Remove from heat and allow to cool to room temperature.
- Stir in 1 ½ cups of raw honey.
Notes
To store your elderberry syrup, pour your syrup into an airtight bottle, label it, and refrigerate. Use within 2 months.


Storing Elderberry Syrup
Pour your syrup into a bottle, label it, and refrigerate. Use within 2 months.
Using Elderberry Syrup:
For medicinal use:
Take 2 teaspoons every 3 hours at the first signs of a virus.
Other uses:
Elderberry syrup can be used as a cordial, mixed with seltzer or water, or as a shrub for cocktails.
It can also be added to yogurt, pancakes or oatmeal for a tasty treat.
![Who can benefit from Calendula infused oil? [recipe]](https://images.squarespace-cdn.com/content/v1/60e85024dc86d643da81c96a/eaeeb259-c6c6-450f-8d9e-77227e20ac42/Sept+2022+small-5.jpg)
Who can benefit from Calendula infused oil? [recipe]
If you’re looking to dip your toes into herbal remedies, calendula infused oil is a safe and fun place to start. Calendula is related to marigolds and is sometimes called pot marigold - it has no toxic look-a-likes and is safe even in large doses, so you really can’t mess this up! We grow calendula in our garden as a border and it serves multiple purposes for us - it adds beauty and color, traps unwanted pests who might overwise eat our food crop, feeds the pollinators and provides a useful herb for drying that we can then make into a salve. Calendula is an annual but it readily self-seeds so you really only need to buy one packet and the next year they will come back all on their own, helping you to establish your garden beds and provide a resource for neighboring insects who you share your garden with.
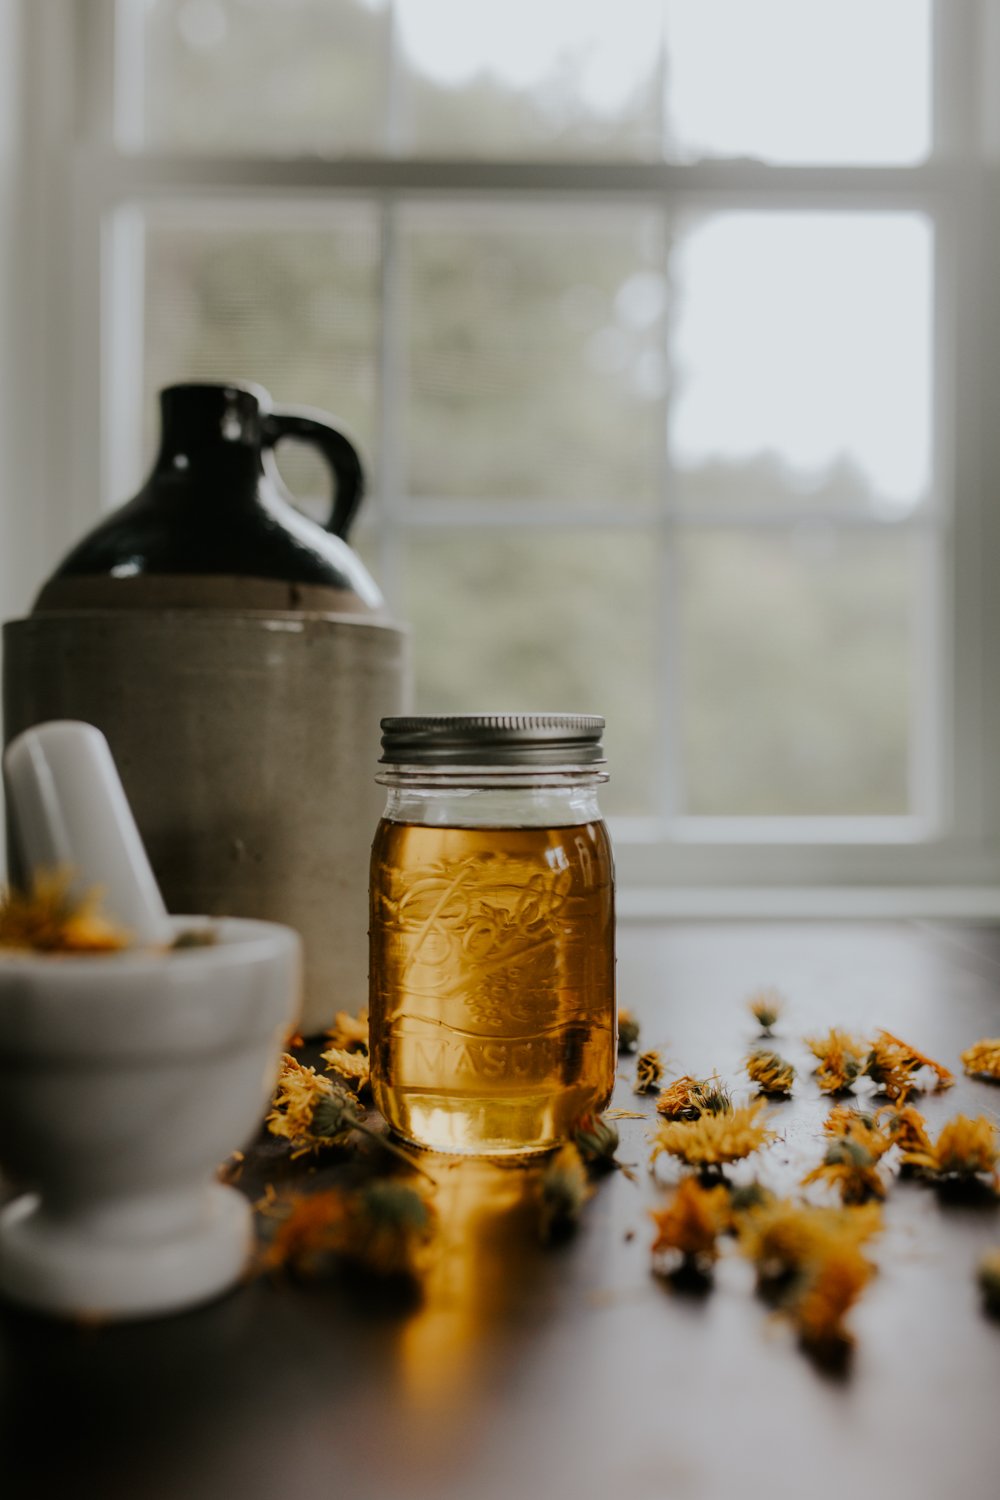
If you’re looking to dip your toes into herbal remedies, calendula infused oil is a safe and fun place to start. Calendula is related to marigolds and is sometimes called pot marigold - it has no toxic look-a-likes and is safe even in large doses, so you really can’t mess this up! We grow calendula in our garden as a border and it serves multiple purposes for us - it adds beauty and color, traps unwanted pests who might overwise eat our food crop, feeds the pollinators and provides a useful herb for drying that we can then make into a salve. Calendula is an annual but it readily self-seeds so you really only need to buy one packet and the next year they will come back all on their own, helping you to establish your garden beds and provide a resource for neighboring insects who you share your garden with.
So what are some calendula oil benefits? Calendula is…
Antifungal
Antimicrobial
Anti-inflammatory
Antioxidant
These properties and more are the reason people use calendula to prevent infection and heal injuries to body tissues, speed up wound healing time, and reduce scarring. In addition when used as part of a wound treatment it may reduce swelling and bruising and ease muscle fatigue. Calendula may also help in preventing or reducing acne. Calendula is used to relieve symptoms from dry skin conditions like eczema, psoriasis and diaper rash. There’s even a chance calendula could be used to fight cancer and protect against heart disease.
On a personal note, psoriatic arthritis doesn’t just affect my joints. It actually started for me as a skin condition with extremely dry itchy skin that cracks and flakes. I’ve felt so self conscious about my skin condition for so long, and want to normalize this struggle which so many of us with chronic illness go through. So often the more minor symptoms of our disease are tossed to the side as insignificant, but all these little insecurities add up. Needless to say this has been quite unpleasant, and a big reason that I began exploring natural remedies like this infused calendula oil was that I found my skin was really sensitive to the ingredients in most drugstore moisturizers and lotions. I wanted to find a way to make my own moisturizer that was simple and cost effective, and calendula oil was one of the very first DIY skincare products I made at home myself. I use my salve as a preventative product, as well as for acute flares. I just love really easy DIY projects like this one that anyone can do!

Calendula oil or salve makes a pretty great handmade holiday gift too! For the holidays last year I gave a tin of handmade calendula salve to every one of my friends tied up with a piece of twine and ribbon, and they all continue to rave about it and ask for more to this day.
Is Marigold the Same as Calendula?
Marigold and calendula belong to the same family, and both are edible. The active beneficial compounds are present in different amounts in each plant.
How to Use Calendula Oil
Calendula oil may be used on its own as a moisturizing oil, or blended into butters, creams, salves and lotions along with other ingredients like beeswax and shea butter. I make a simple beeswax salve with my calendula oil that can be used for burns, cuts, scrapes, bruises, rashes and dry skin. You can even incorporate it into your favorite salad dressing depending on what oil you use (make sure it’s food grade)
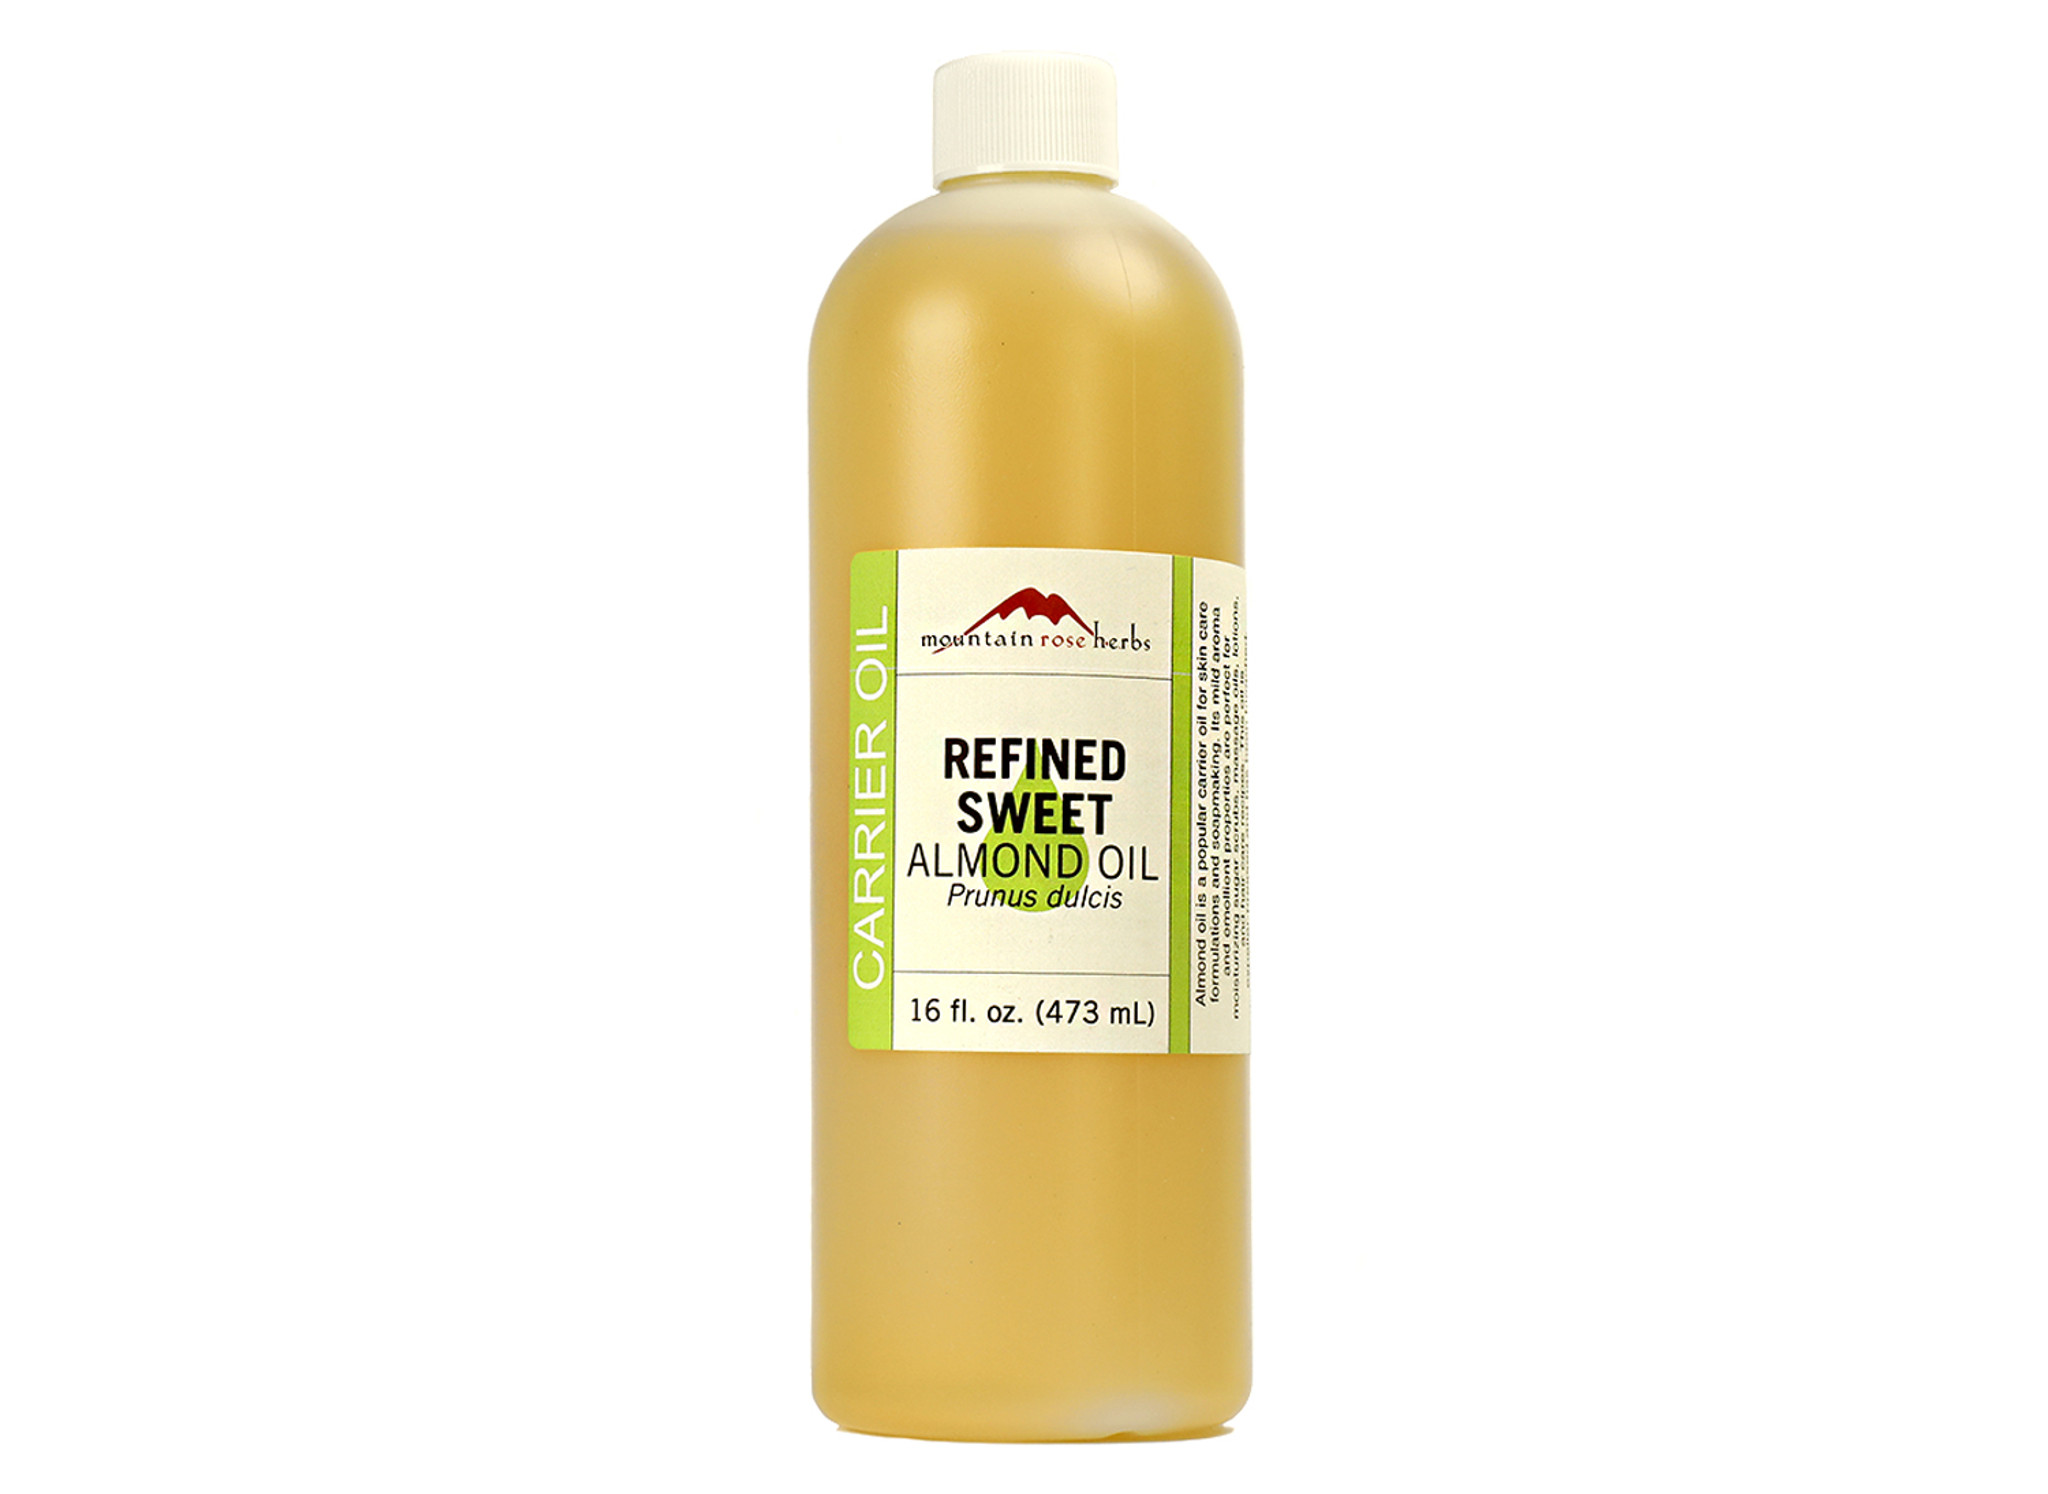
What Type of Oil is Best for Infusing Herbs?
You can use many different oils to infuse herbs depending on your preference, budget and intended use. I used sweet almond oil for this herbal oil infusion, but olive oil, grapeseed oil and apricot oil also will work as carrier oils safe for topical use. Olive oil is by far the cheapest and most easy to find, and has a longer shelf life, but sweet almond oil is affordable as well and has no smell, plus it includes vitamin E and K. Both are good options that I use regularly! I haven’t tried grapeseed or apricot oil myself.
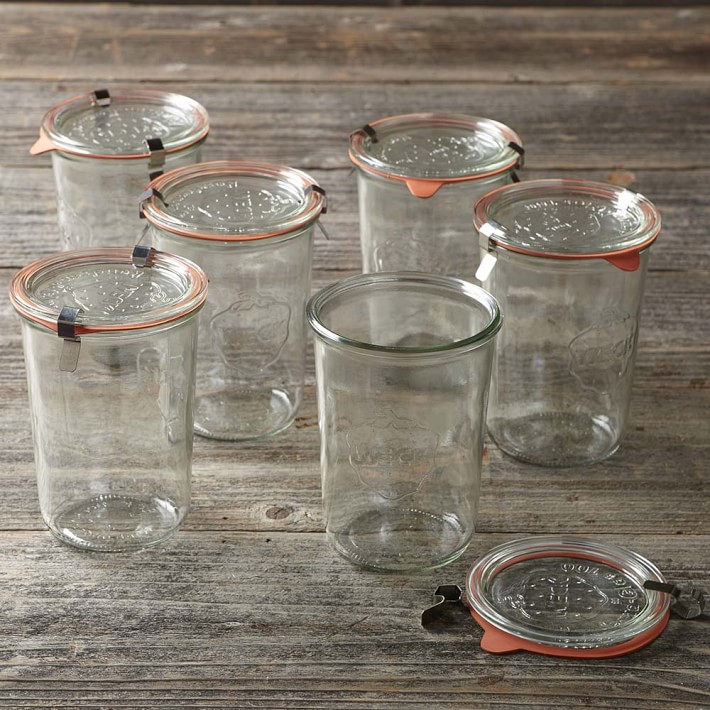
Best Container for Herbal Infusions
When infusing herbs in oil, you should always choose a plastic free container to avoid leaching any dangerous chemicals into your oil. I like to use a glass mason jar to infuse my oil since we always have so many extra on hand and they are durable and cheap, but if you don’t have somewhere dark you can store a clear jar, then a tinted glass jar or bottle is best to keep out sunlight, since UV rays can reduce the effectiveness and longevity of your infused oils.
Homegrown VS Store Bought Herbs

Store bought herbs don't just look different, they ARE different. So why are homegrown herbs better for you?
Think about the difference between a bagged, pre-chopped salad and the lettuce you picked up from the farmers market.
They're both still lettuce, but one is darker, fresher, and much more flavorful.
That flavor directly translates to compounds in the plant that are nutritionally dense. It tastes better because it's better for you! The older the produce is, the more those nutrients break down.
Herbs are the same way. When you get store bought herbs, there is almost no way to guarantee their freshness or quality. Yes, even dried herbs can be fresh! It's likely that if you're seeing faded colors or a lot of dust in your herbs indicating it's begun to break down, the beneficial compounds within the herbs themselves are not potent anymore.
Growing your own herbs or buying from a small herbalist shop is the best way to ensure the quality of your final herbal preparation. It also eliminates the great amount of waste and emissions involved in packaging and shipping herbs, since even though many herbs like calendula grow all over the country, when you purchase them from a large store they often come from overseas. If you can’t grow your herbs yourself or find a small local shop, I recommend purchasing from Mountain Rose Herbs.
How to Make Calendula Infused Oil
There are many ways to make an infused oil but my favorite is a simple folk method - this means we won’t be making any exact measurements. You’ll find that many herbalists employ a folk method for their skincare concoctions since accuracy in dosing is not generally a requirement unless taken internally.
To make an infused oil using the folk method, all you need to do is fill your mason jar about halfway with calendula flowers, then cover at least an inch above the herbs with your oil of choice. I usually end up filling the jar almost all the way to the top. Tap lightly on a solid surface to make sure there are no air bubbles trapped in the oil and place the infusing oil jar in a cool dark place such as a closet or pantry (somewhere out of direct sunlight) for about six weeks. You can regularly shake the jar to redistribute the oil, and you may notice that after the first day or two much of the oil has been absorbed into the dried herbs and you will need to add more to keep the flowers completely covered in oil. This is normal and to be expected.

Infused Calendula Oil
Ingredients
- Dried calendula flowers - about 1 cup
- Almond oil, grapeseed oil, apricot oil or olive oil - about 2 cups
Instructions
- To make an infused oil using the folk method, all you need to do is fill your mason jar about halfway with calendula flowers, then cover at least an inch above the herbs with your oil of choice.
- I usually end up filling the jar almost all the way to the top.
- Tap lightly on a solid surface to make sure there are no air bubbles trapped in the oil and place the infusing oil jar in a cool dark place such as a closet or pantry (somewhere out of direct sunlight) for about six weeks.
- You can regularly shake the jar to redistribute the oil, and you may notice that after the first day or two much of the oil has been absorbed into the dried herbs and you will need to add more to keep the flowers completely covered in oil. This is normal and to be expected.
- If you would rather not wait a full six weeks to have ready to use infused oil, you can speed up the infusion process using your stove top. Place your jar in a double boiler on your stove and simmer as low as possible for up to 3 hours.
- Your oil will be ready to use as soon as it cools, or you can wait a couple of weeks to allow your infusion to develop and grow stronger.
- You can also simmer your jar in a slow cooker for 3 hours the same way.
Notes
Some herbalists allow their oil to infuse on a sunny windowsill - personally I am against this method in most cases as it causes the oil to be exposed to large amounts of ultraviolet light which can break down the beneficial compounds. It may be fine if you plan to immediately move the jar to dark storage once it is done, or if you allow it to infuse only a couple of weeks on the windowsill before moving to a darker spot to finish infusing.

If you would rather not wait a full six weeks to have ready to use infused oil, you can speed up the infusion process using your stove top. Place your jar in a double boiler on your stove and simmer as low as possible for up to 3 hours. Your oil will be ready to use as soon as it cools, or you can wait a couple of weeks to allow your infusion to develop and grow stronger. You can also simmer your jar in a slow cooker for 3 hours the same way.
Some herbalists allow their oil to infuse on a sunny windowsill - personally I am against this method in most cases as it causes the oil to be exposed to large amounts of ultraviolet light which can break down the beneficial compounds. It may be fine if you plan to immediately move the jar to dark storage once it is done, or if you allow it to infuse only a couple of weeks on the windowsill before moving to a darker spot to finish infusing.
Ways to use calendula oil
After your oil is finished infusing, you can incorporate it into many different salves, balms, butters, creams and other skincare products. I hope this has shown you all the amazing benefits of calendula oil! It’s so easy to make an herb infused oil like this. I hope you’ll give it a try.