
BACKYARD GARDENING MADE SIMPLE

5 Tried-and-Tested Techniques for Preserving Your Garden Harvest
Preserving excess produce not only helps reduce food waste, but it also allows you to save money by avoiding buying produce out of season. With a little planning, you’ll even be able to create heat and serve convenience foods for busy nights when cooking isn’t an option, giving you healthy options to choose from. Additionally, preserving produce allows you to enjoy the fruits of your labor long after the growing season has ended. It's also a great way to ensure that you always have healthy, homegrown ingredients on hand for your favorite recipes.
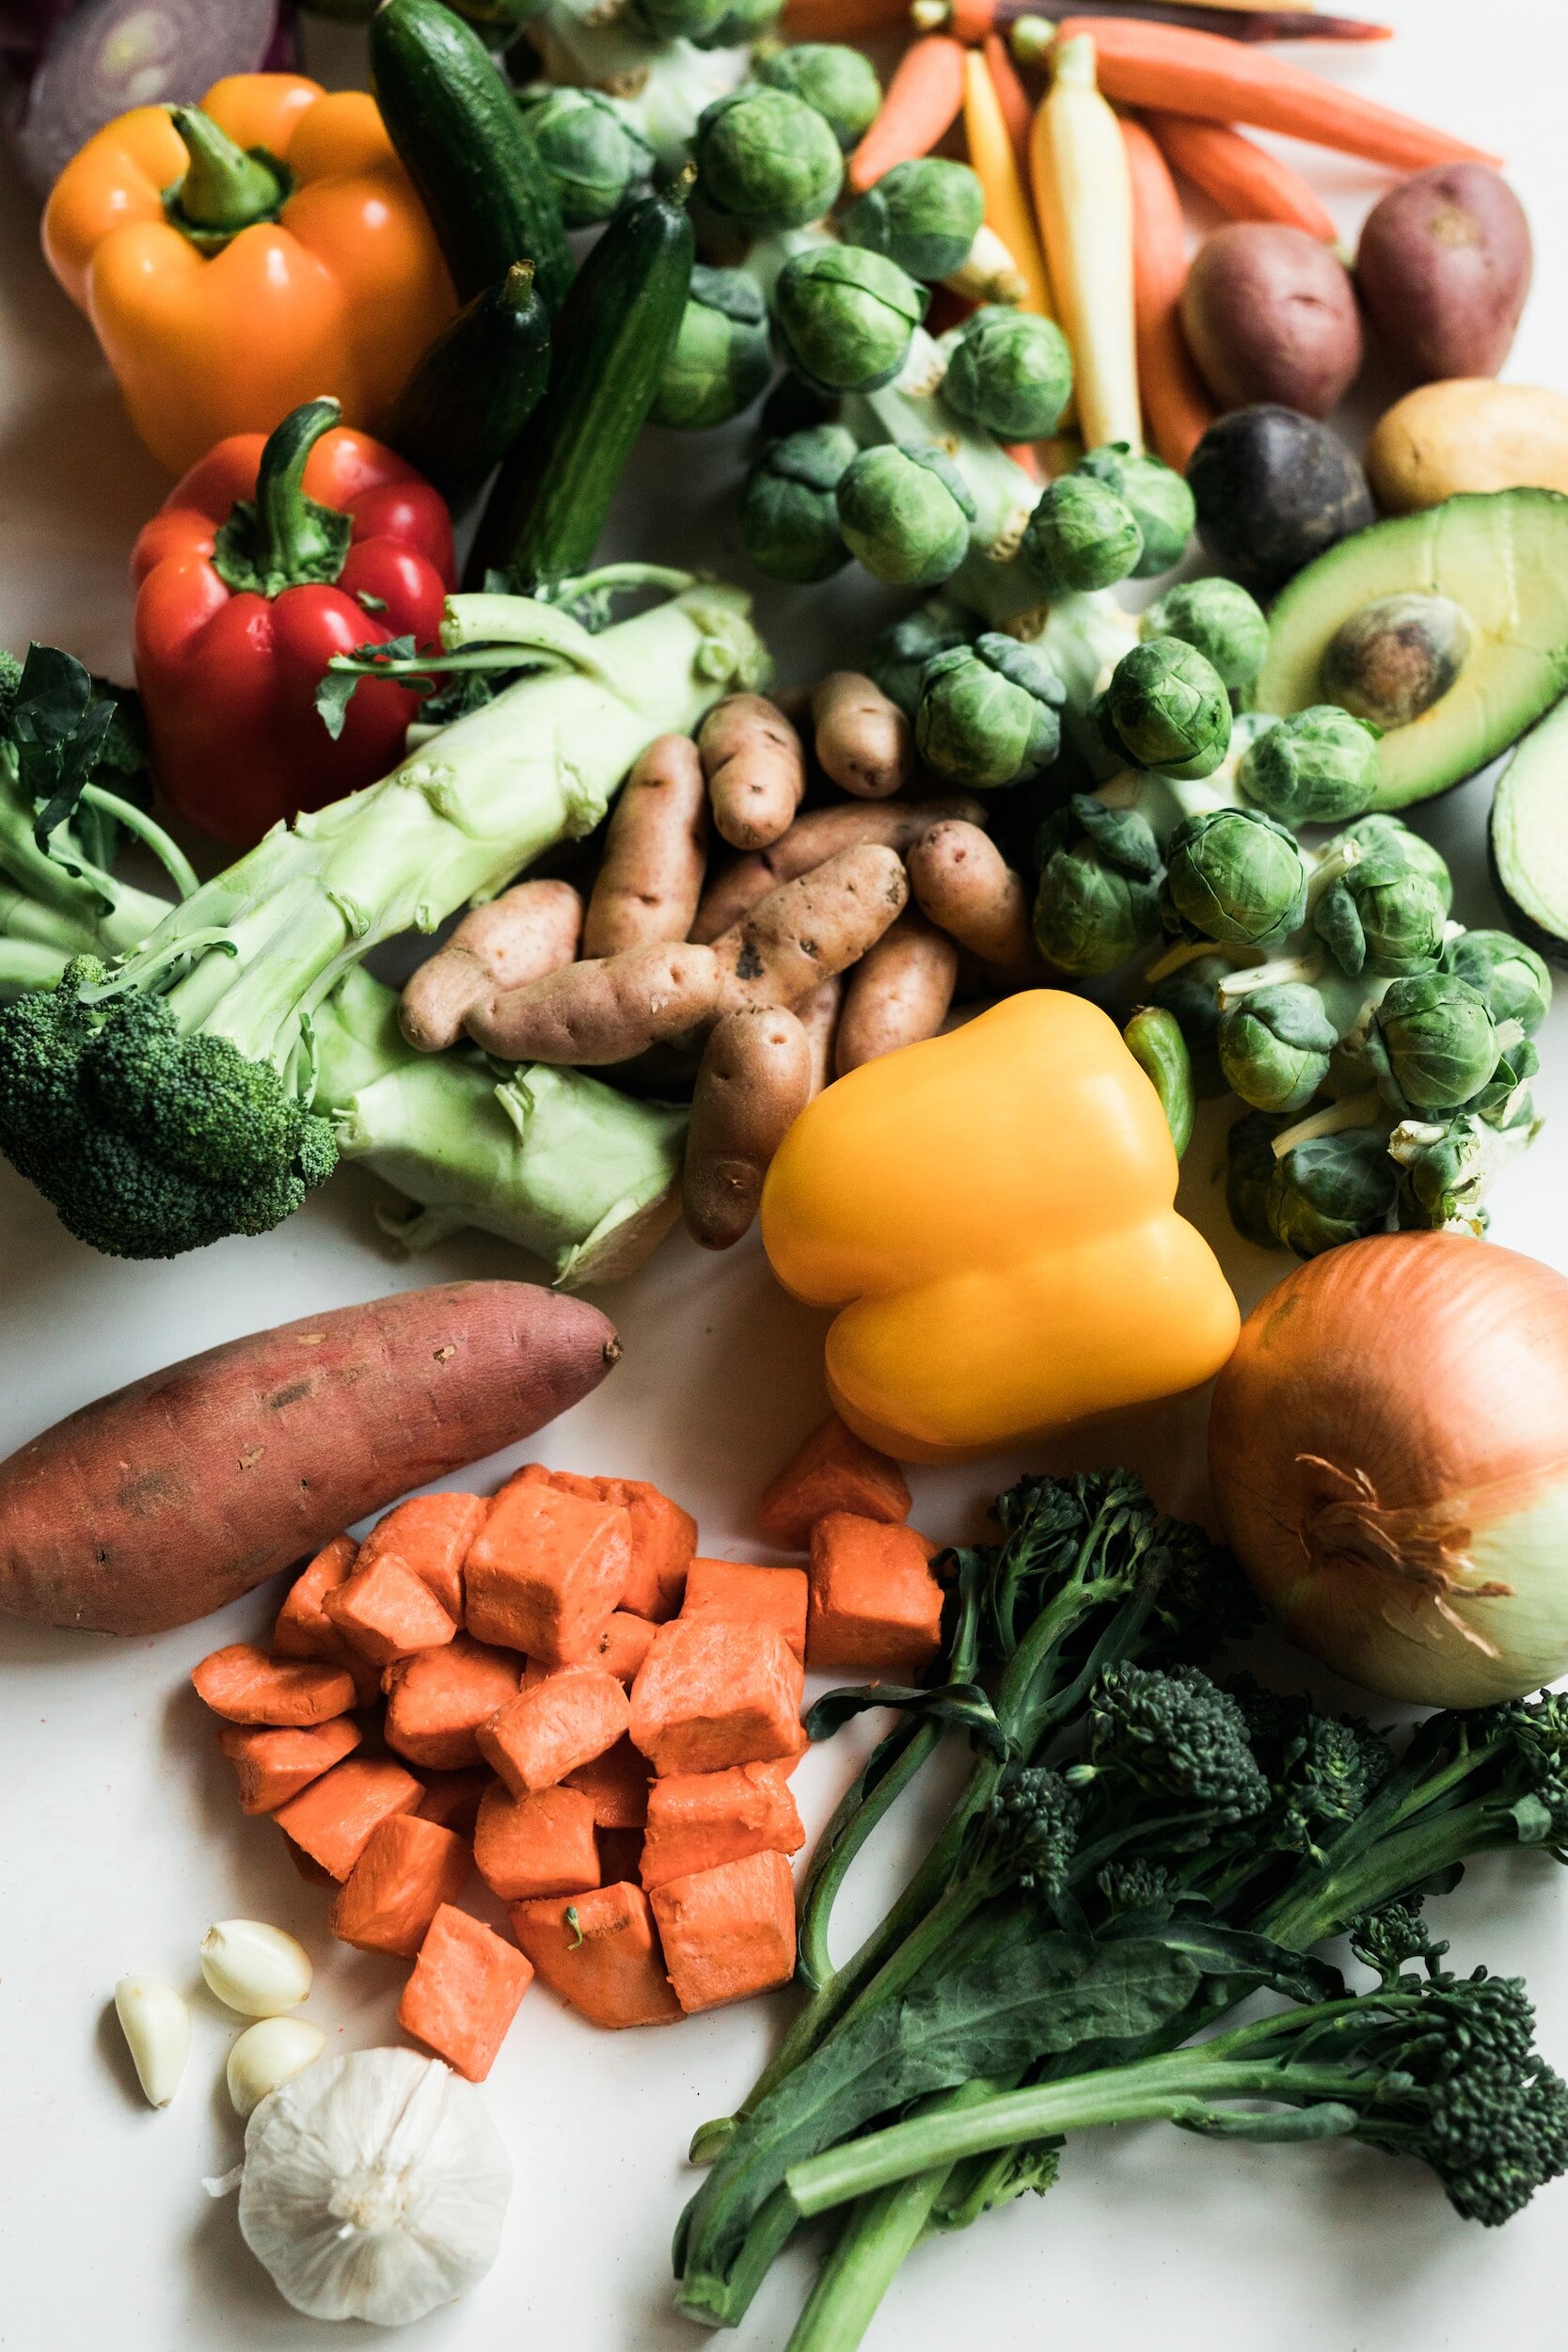
One of the best things about gardening is the daily access to fresh, nutritious fruits, vegetables, and herbs. However, in the height of summer it is easy to become overwhelmed by a harvest that is more than you can consume, so it's important to learn how to preserve excess produce for later use.

There are many different methods of preserving fruits, vegetables, and herbs, but today we’ll be covering canning, freezing, dehydrating, pickling, and fermenting. These preservation methods allow you to enjoy your homegrown produce all year round and reduce food waste. Food waste is a problem for several reasons. Firstly, it contributes to environmental issues such as greenhouse gas emissions, as uneaten food in landfills decomposes and produces methane gas. Secondly, it wastes valuable resources such as water, energy, and labor used in producing, transporting, and preparing the food. Thirdly, it contributes to food insecurity, as there are many people who do not have access to enough food. Finally, it is a waste of money for individuals and businesses, as they are essentially throwing away the money they spent on the food. By reducing food waste, we can help address these issues and create a more sustainable food system.
Preserving excess produce not only helps reduce food waste, but it also allows you to save money by avoiding buying produce out of season. With a little planning, you’ll even be able to create heat and serve convenience foods for busy nights when cooking isn’t an option, giving you healthy options to choose from. Additionally, preserving produce allows you to enjoy the fruits of your labor long after the growing season has ended. It's also a great way to ensure that you always have healthy, homegrown ingredients on hand for your favorite recipes.
This post will give you a broad overview of the different ways to preserve foods, but if you’re interested in diving deeper into the specifics, let me know in the comments which method you’d like to learn more about.
Canning Homegrown Food
Canning is a popular method of preserving fruits, vegetables, and even meats. Canning is a great way to preserve high-acid fruits such as berries, peaches, and apples, as well as tomatoes and some types of pickles. Low-acid foods such as green beans, corn, and meat require pressure canning to prevent the growth of harmful bacteria.
The basic process involves heating the food in a jar to kill bacteria and create a vacuum seal. This prevents spoilage and allows the food to be stored for long periods of time. To get started with canning, you will need a few pieces of equipment, including a water bath canner or pressure canner, canning jars, and lids.
To prepare fruits and vegetables for canning, it's important to start with fresh, ripe produce. Wash and trim the produce, removing any stems, leaves, or bruises. Follow a trusted recipe for the type of food you are canning, as different foods require different processing times and methods. The best resource for this is The National Center for Home Food Preservation. Once the food is packed into the jars, process them in a water bath canner or pressure canner according to the recipe instructions.
To store canned foods, keep them in a cool, dry place away from direct sunlight. Check the seals on the jars regularly to ensure they are still airtight. Canned foods can last for up to one year, but it's important to use them within a reasonable timeframe to ensure optimal flavor and quality.
Click here for my full guide to learn how to water bath can food.
Freezing Your Garden Produce

Freezing is a convenient and easy method of preserving fruits, vegetables, and herbs. Freezing is an excellent method for preserving vegetables that you plan to cook later, as well as fruits such as berries, peaches, and mangoes. Most vegetables and fruits can be frozen, but some may require blanching (briefly boiling and then cooling in ice water) before freezing to prevent enzyme action and maintain color and flavor.
The basic process involves blanching the produce to stop enzyme activity, then freezing it in airtight containers or bags. Freezing can preserve the flavor and nutrients of the produce for up to six months or longer, if you vacuum seal your bags.
To get started with freezing, you will need a few pieces of equipment, including a large pot for blanching, a colander, airtight containers or bags, and a freezer. A vacuum sealer is optional.
To prepare fruits and vegetables for freezing, start with fresh, ripe produce. Wash and trim the produce, removing any stems, leaves, or bruises. Blanch the produce by dipping it in boiling water for a brief period, then transferring it to ice water to stop the cooking process. Drain the produce in a colander, then pack it into airtight containers or bags, removing as much air as possible.
To store frozen foods, keep them in a freezer at 0°F or below. To thaw frozen foods, move them to the refrigerator to thaw slowly. Avoid thawing at room temperature or in the microwave, as this can lead to uneven thawing and loss of texture.
Click here for my full guide to learn how to ferment food.
Dehydrating Herbs and More
Dehydrating is a method of removing moisture from fruits, vegetables, and herbs to create shelf-stable, dried foods. Dehydrating is a great way to preserve fruits such as apples, bananas, and mangoes, as well as vegetables such as tomatoes, peppers, and zucchini. Herbs and spices can also be easily dried and stored.
The basic process involves slicing the produce, arranging it on a dehydrator tray, and allowing it to dry at a low temperature for several hours. You can also dehydrate at a low temperature in your oven, but this will take longer and use more energy.
To get started with dehydrating, you will need a dehydrator and a knife or mandoline for slicing the produce.

To prepare fruits, vegetables, and herbs for dehydrating, start with fresh, ripe produce. Wash and trim the produce, removing any stems, leaves, or bruises. Slice the produce into even pieces, then arrange it on a dehydrator tray. Follow the instructions for your specific dehydrator model, as drying times and temperatures may vary.
To store dehydrated foods, keep them in airtight containers or bags in a cool, dry place away from direct sunlight. Dehydrated foods can last for up to a year or longer, but it's important to use them within a reasonable timeframe to ensure optimal flavor and quality.
Click here for my full guide to learn how to dehydrate food.
Pickling Garden Picks
Pickling is a method of preserving fruits and vegetables in a brine made from vinegar, salt, and spices. The acidity of the vinegar helps to prevent spoilage and enhance flavor. Pickling is a great way to preserve cucumbers, beets, carrots, green beans, and other vegetables. Fruits such as peaches and pears can also be pickled.
To get started with pickling, you will need a few pieces of equipment, including a large pot for boiling the brine, canning jars, and lids.
To prepare fruits and vegetables for pickling, start with fresh produce. Wash and trim the produce, removing any stems, leaves, or bruises. Follow a trusted recipe for the type of food you are pickling, as different foods require different brine ratios and processing times. Once the food is packed into the jars, pour the hot brine over the top, leaving a small amount of headspace.
To store pickled foods, keep them in a cool, dry place away from direct sunlight. Pickled foods can last for several months, but it's important to use them within a reasonable timeframe to ensure optimal flavor and quality.

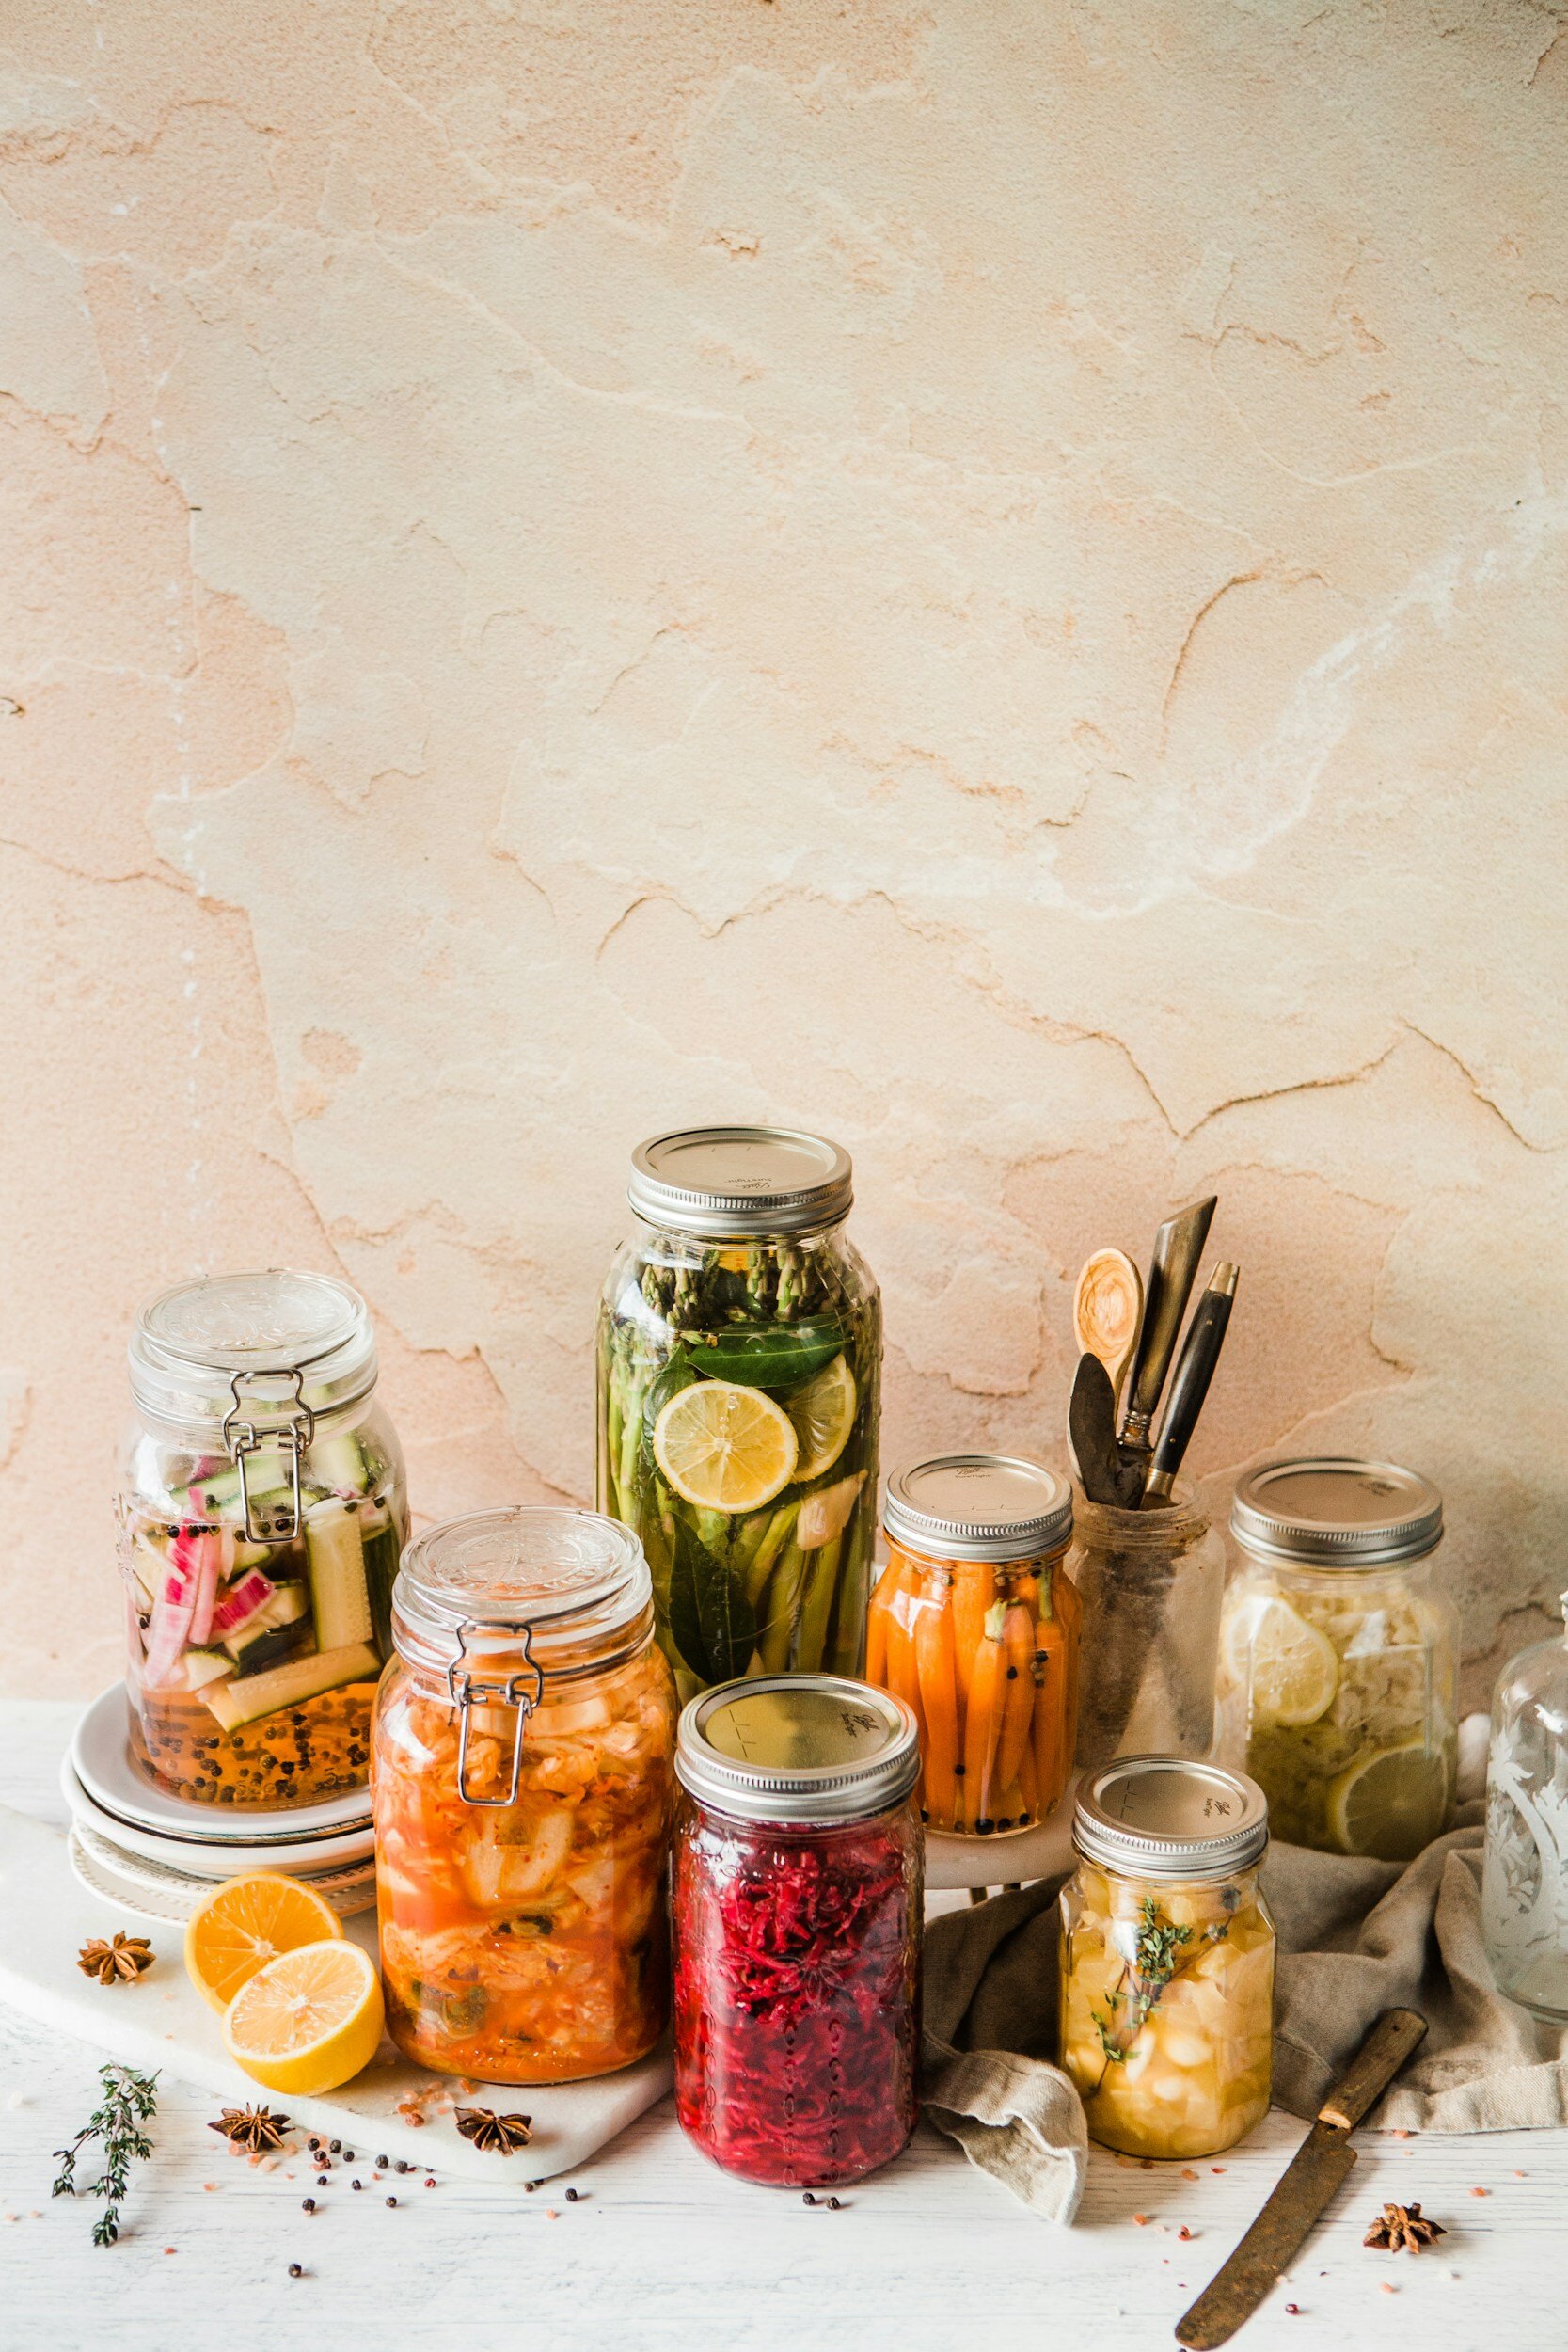
Fermenting for Health
Fermenting is a method of preserving fruits, vegetables, and even dairy products by allowing beneficial bacteria to grow and multiply. The bacteria convert sugars and starches into lactic acid, which gives fermented foods their tangy flavor and helps to prevent spoilage. Fermenting is a great way to preserve vegetables such as cabbage, carrots, and cucumbers, as well as fruits such as lemons and limes. Fermented foods such as sauerkraut, kimchi, and pickles are also great sources of beneficial probiotics.
To get started with fermenting, you will need a few pieces of equipment, including a fermentation crock or jar, weights, and an airlock.
To prepare fruits, vegetables, and herbs for fermenting, start with fresh produce. Wash and trim the produce, removing any stems, leaves, or bruises. Follow a trusted recipe for the type of food you are fermenting, as different foods require different salt ratios and processing times. Pack the food into a fermentation crock or jar, adding salt and any desired spices or seasonings. Place weights on top to keep the food submerged in the brine, then attach an airlock to allow gas to escape during fermentation.
To store fermented foods, keep them in a cool, dark place, such as a basement or refrigerator. Fermented foods can last for several months or longer, but it's important to use them within a reasonable timeframe to ensure optimal flavor and quality.
Growing and preserving your own food can feel overwhelming as you are getting started, and it can be difficult to know which preservation method is best for you. Each method has its own set of benefits and considerations, and the best method for you will depend on the type of food you are preserving, your energy levels and your personal preferences. Because of my chronic pain, I tend to avoid intensive projects like canning. My favorite method of preserving food is to freeze in vacuum sealed bags or jars in our chest freezer.
If time is short and your harvest basket is overflowing I’m willing to bet you’ll have no trouble convincing a neighbor to share in your bounty too! Some of the best friends are made over food.


![Taste the Freshness: Garden to Table Garlic Scape Pesto [Recipe]](https://images.squarespace-cdn.com/content/v1/60e85024dc86d643da81c96a/1685124491791-T2P2WL9T6HWQJGW63DLT/PXL_20220617_153907513.PORTRAIT%281%29.jpg)
Taste the Freshness: Garden to Table Garlic Scape Pesto [Recipe]
One of the first ways I know that June has arrived is in the appearance of garlic scapes. Tiny white cloves planted way back in October have been waiting for this day to send their shoots high into the sky, the flowering stalks both otherworldly and beautiful as they twist and turn, narrow green tendrils dancing in the breeze that has yet to turn into the humid and stagnant air of full summer.
Garlic scapes aren’t something you can find in the grocery store, and while you may be able to find a single stall at your local farmers market that has them, their inventory will be short-lived. The season for scapes is small, a window of just a couple of weeks that adds to their novelty. Just another excellent excuse to grow them yourself as a side-effect of your garlic harvest.
June is the beginning of abundance in the garden, when our little acre reminds us she can support us with a never ending harvest of many kinds. I find myself taking breakfast, lunch and dinner outside as often as possible, breathing in the fresh air and listening to the birdsong while I ask myself how I got so lucky. Our little patch of earth has so much history hidden in its roots, but when summer begins again it is clear she knows precisely what she is doing when it comes to helping living things thrive.

Our neighbors grew up in our house, so we’ve been lucky enough to learn bits and pieces of what the land has accomplished in the past. This is how I know that the stone foundation of my home originally held up a beautiful chicken barn, and that rabbits were raised on the back lot. As we add our own stories to this history, I wonder too at the echoes of a less happy time before our even our neighbors came here, a time when lands were taken from the Wampanoag. How many feet have tread this earth before us and called it theirs? How much pain was inflicted on this very spot? Only the land remembers now.
One of the first ways I know that June has arrived is in the appearance of garlic scapes. Tiny white cloves planted way back in October have been waiting for this day to send their shoots high into the sky, the flowering stalks both otherworldly and beautiful as they twist and turn, narrow green tendrils dancing in the breeze that has yet to turn into the humid and stagnant air of full summer.
Garlic scapes aren’t something you can find in the grocery store, and while you may be able to find a single stall at your local farmers market that has them, their inventory will be short-lived. The season for scapes is small, a window of just a couple of weeks that adds to their novelty. Just another excellent excuse to grow them yourself as a side-effect of your garlic harvest.
There are two types of garlic you can plant; hard-neck or soft-neck. Soft-neck garlic does not produce scapes, so if you’re interested in trying this delicacy you’ll need to plant hard-neck varieties only. Hardneck varieties of garlic are divided into eight groups: Porcelain, Rocambole, Purple Stripe, Glazed Purple Stripe, Marble Purple Stripe, Asiatic, Turban, and Creole. Porcelain is considered the hardiest type of hardneck garlic and is highly recommended for novice gardeners in cold climates, producing big, beautiful bulbs with satiny white wrappers with a strong flavor. As I mentioned, you’ll need to do some planning ahead if you want to grow garlic. It needs to be overwintered, so you’ll plant it just before your first frost in the fall and then wait until the following summer to harvest the bulbs.
In the meantime, scapes offer a taste of what is to come - a preview of your garlic harvest that can help you to tolerate the long wait required when growing garlic. To me, it is a promise the land provides. Good things we grow are always worth the wait. And garlic scapes are one of the very best things of all.
I do like to devise as many ways as possible to extend our enjoyment of garlic scapes, and thankfully they are a versatile plant that makes it easy to preserve. I’ve tried just about every method imaginable, but by far my favorite way to use scapes is to make my garlic scape pesto recipe. This liquid gold is quickly scooped up by everyone who tries it, useful as more than just a pasta topping. It also stores incredibly well in this form, locking in the deliciously grassy and mild garlic flavor so that we can enjoy it as long as possible.
What are garlic scapes?
Garlic scapes are the flowering head of the hard-neck garlic plant.They are edible, and you want to cut them off the plant before they have a chance to flower so that your garlic bulbs can put their energy into the root instead, allowing the bulb to grow larger.
What month do you cut garlic scapes?
Garlic scapes are harvested in June, about a month before you harvest the garlic bulb. Garlic scapes twist into a corkscrew shape as they grow and ripen. You will know they are ready to pick when the scape has made almost one full twist. The flowering head should still be compact and small. You can pick them when they are smaller as well, you’ll just get a smaller yield. If you pick them later than this, they will be very tough to chew.
How do you cut garlic scapes for pesto?
The easiest way to cut garlic scapes is to snap them off at their natural breaking point with your fingers. You do not need clippers to harvest garlic scapes. Grab the scape close to the base where it meets the leafy part of the garlic bulb (leave the leafy bits intact) They will break off easily in your hand.
What part of garlic scapes do you eat?
You can eat the entire garlic scape. Some people prefer to remove the flowering head at the end, as it can get a little tough depending on how late you harvest them. For garlic scape pesto, it shouldn’t really matter since you are blending it up so I like to use the entire scape.
Do garlic scapes need to be cooked?
No, garlic scapes may be eaten raw or cooked.
What do garlic scapes taste like?
Garlic scapes are like the garlic cloves' more subtle, mild cousin. A light green crunch makes them a super fresh addition to salads and stir-fries.
What is the best thing to do with garlic scapes?
My favorite way to use garlic scapes is to make garlic scape pesto. It’s easy and freezes well. You can also chop it up and mix with cream cheese or butter for a flavorful spread, add to salads and stir fries and enjoy as a garden snack. I even put a little dollop with my cracker and cheese boards.
What does garlic scape pesto taste like?
Garlic scape pesto tastes like mild garlic with less spicy heat and a little bit of grassiness. You can control the acidity and flavor profile with the addition of high quality oils, cheese and nuts.
How long does garlic scape pesto last in the fridge?
With proper storage, garlic scape pesto can last up to 2 weeks in the fridge.
Can I freeze garlic scape pesto?
Yes, garlic scape pesto is an excellent way to preserve the fresh flavors of early summer for the whole year. You can freeze garlic scape pesto by filling an ice cube tray and placing in the freezer for individual portions, or freeze tablespoon size portions on a baking sheet, remove once fully frozen and place in a Stasher bag. I like to fill four ounce mason jars and freeze - just remember to leave room at the top of the jar as the pesto will expand slightly as it freezes.
Can you freeze garlic scapes raw?
Yes, garlic scapes may be frozen raw with no blanching required to enjoy all year long. They may also be dehydrated or dried and ground into a powder.
Are garlic scapes as healthy as garlic?
Yes, garlic scapes are healthy. Garlic scapes contain manganese, vitamin B6, vitamin C, and selenium.
What to use garlic scape pesto on
Garlic scape pesto is a super versatile ingredient to have in your fridge. Of course, it can be used on pasta, but one of my favorite ways to use it is as a spread on sandwiches or grilled cheese. You can also toss your vegetables in the pesto before roasting.
To make this garlic scape pesto recipe, you will need a food processor, blender or immersion blender to grind the scapes into a fine paste. I will break the scapes into smaller pieces before blending. They’re a pretty dry thing to put in a blender, so you’ll need to scrape down the sides a couple of times as you go. If you don’t have a blender you can finely chop the garlic scapes, but the effect will be slightly different and crunchier.
Supplies
Blender or immersion blender
Measuring cup
Tablespoon
Spatula
Jars for storage
Ingredients
2 cups garlic scapes (chopped)
1 cup sunflower seeds
1 cup basil
1 cup parmesan (grated)
1 cup olive oil
3 tbsp lemon juice
Salt and pepper to taste
Instructions
Grate the parmesan
Add all the ingredients to the food processor and blend until smooth
Taste and adjust the seasoning to your liking
Transfer to jars and store in the fridge for up to two weeks
Garlic Scape Pesto
Ingredients
- 2 cups garlic scapes (chopped)
- 1 cup sunflower seeds
- 1 cup basil
- 1 cup parmesan
- 1 cup olive oil
- 3 tbsp lemon juice
- Salt and pepper to taste
Instructions
- Grate the parmesan and roughly chop the garlic scapes
- Add all the ingredients to the food processor and blend until smooth
- Taste and adjust the seasoning to your liking
- Transfer to jars and store in the fridge for up to two weeks
Have you tried scapes?

Recipe: Easy Vegetable soup
We all know soup is good for you, and a great source of comfort. But have you considered that soup may be the best thing you can make for yourself when you are in the midst of a chronic illness flare, when you have no energy? Here is why soup is the best food to make for people with limited energy:

The Cottage Peach is reader-supported. When you purchase through links on our site, we may earn an affiliate commission at no additional cost to you. All opinions are our own.
“To feel safe and warm on a cold wet night, all you really need is soup.” — Laurie Colwin
We all know soup is good for you, and a great source of comfort. But have you considered that soup may be the best thing you can make for yourself when you are in the midst of a chronic illness flare, when you have no energy? Here is why soup is the best food to make for people with limited energy:
It’s easy to make soup, you can just throw your ingredients into the pot, set the heat and sit down while it cooks. You only need to get up every so often to stir the pot. You can easily modify it to substitute ingredients and save yourself a trip to the store, and using frozen vegetables (which contrary to popular belief often have a very similar level of nutrition as fresh produce) will save you the trouble of chopping everything yourself.
There’s only one pan to clean. Less dishes filling up your sink means less precious energy expended. And who really enjoys doing dishes anyway?
You can make a big batch of soup all at once and freeze most of it for later in individual servings to save you time on days when you really don’t have the ability to cook anything at all. This is also an excellent time saver if you’re planning for dinner guests - save your energy for conversation by thawing out your soup the day of and have dinner ready to go with the turn of a dial.
Soup is easy on your stomach. Because everything is cooked low and slow for an extended period of time, your gut won’t have to work as hard to digest it. The nutrients within the soup are also more bioavailable, meaning your body can absorb more of the benefits more easily.
A scent that brings us home
The way the smells of soup fill a house easily brings us back to our childhood, and the comforting knowledge that our bowls will be filled by our loved ones without fail. I almost exclusively make soup in the fall and winter, as I find the aromas to be the perfect way to bring warmth to your kitchen and home in the cold and gray months. Plus, a bowl of soup functions as an excellent hand warmer!
Why should you saute soup ingredients first?
Many soup recipes begin with instructions to saute the vegetables and aromatic herbs first. It can be easy to dismiss this step thinking that these ingredients will cook through just fine since the soup will cook a long time once the liquids are added.
Here’s what Serious Eats has to say about sauteing vegetables: “Vegetables contain many different aromatic molecules trapped inside their cells. But the aromas you get from raw vegetables are quite different from those you get from cooked vegetables. In fact, the aromas you get from whole vegetables is even different from those that you get from vegetables that have been finely chopped, grated, or have otherwise had their cells ruptured. This is all due to reactions that take place between chemical precursors inside the vegetables cells. When those cells are ruptured, these precursors come into contact with each other and recombine into new compounds. Heat and time can increase the rate of these reactions, and indeed cause brand new ones to occur.”
Can you freeze vegetable soup?
Yes, soup generally freezes very well. I prefer to ladle my leftover soup into mason jars for long term storage in the deep freezer. Make sure to leave at least an inch of headspace at the top of your jars since the liquid will expand as it freezes. You can store soup in the freezer for two to three months. Soups with dairy don’t always freeze as well or as long - about one month. To thaw, just move your mason jar to the refrigerator the night before you want to eat. Then you can pour your thawed soup into a sauce pan to reheat on the stove top.
How long will vegetable soup last in the fridge?
Soup can be stored in the fridge for five to seven days. I still prefer mason jars for storing soup in the fridge, since it’s easy to pour from. We have a large metal canning funnel that makes ladling the soup into the jars very simple. Be sure to label it too so you don’t lose track of it in the back of the fridge!
Can you make vegetable soup in advance?

Vegetable soup is great to have on hand for busy nights. You can meal prep your soup up to five days in advance and store it in the fridge for another time.
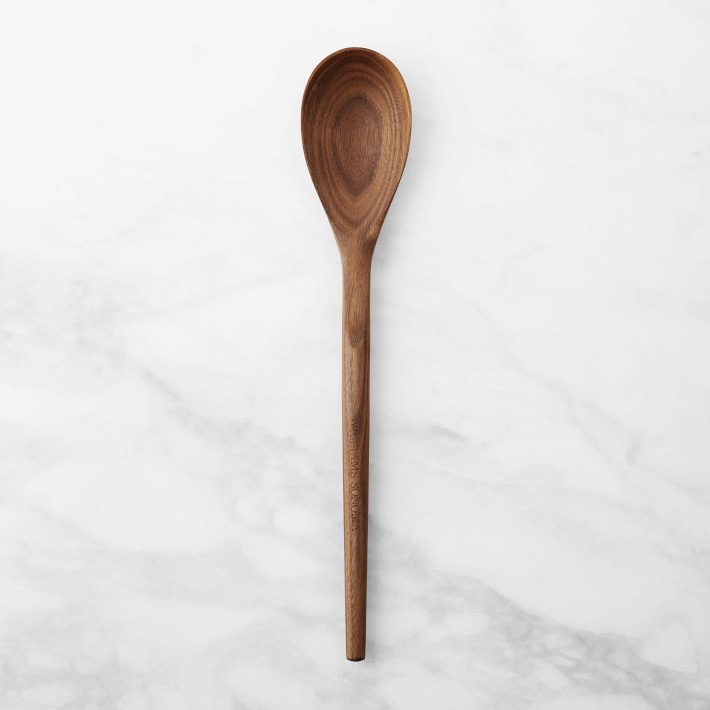
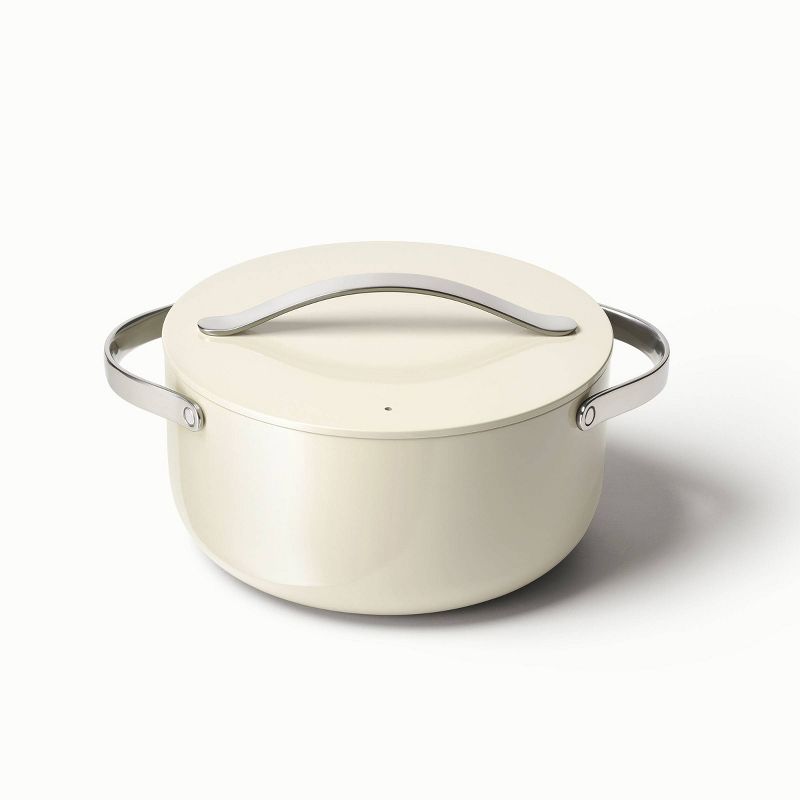
What kind of pot should you make soup in?
Soup is one of the larger batch meals we cook in our kitchen, and so I find myself reaching for our Caraway Home non-toxic 6.5 quart Dutch oven. It never fails to surprise me how quickly such a large pot can be filled once all your soup ingredients are added. Soup really is the best way to stretch your ingredients the farthest.
Is vegetable soup healthy?
There are many healthy soup recipes and vegetable soup in general is very healthy and a great vehicle for serving vegetables to picky eaters in particular. One thing that can make soup less healthy is when there is excessive sodium in the soup, which usually comes from the broth that has been used. Most processed vegetable broth as well as powders and cubes have extremely high levels of sodium to make up for the lack of other flavoring. You can make your own dry vegetable broth mix pretty easily by combining nutritional yeast, and powdered onion, garlic, tomato, carrot, salt and pepper and herbs. We personally use the Frontier Co-op Low Sodium Vegetable Broth Powder in all our soups including my vegetarian vegetable soup recipe and love it, but it is definitely more cost effective to make it from scratch yourself.
So what is the best way to make an easy soup recipe? The basics of soup making are the same, no matter what soup recipe you start from. You will heat your fat (I usually use olive oil) and add your toughest vegetables like carrots and potatoes first. Then your softer vegetables like onion and broccoli, peas and corn. Lastly, you’ll sautee your aromatics like herbs, spices and garlic for the shortest amount of time.
Once your vegetables are all softened you can go ahead and add any liquids - tomato paste, crushed tomatoes, broth. All this needs to simmer to allow the flavors to blend for thirty to sixty minutes depending on the specific soup recipe.
Really, once you understand the basic elements of soup making it is the best sort of recipe to begin experimenting with in the kitchen. Start with small modifications to a recipe you know and love, and move on to more complex changes. Once you’re comfortable with substitutions, you’ll probably have a good idea of what flavors go nicely with each other and can start developing recipes from scratch on your own. Soup is a fantastic first foray into recipe development for this reason.
My favorite easy soup recipe is my grandmother’s vegetable soup. Aside from the obvious nostalgia that comes with every spoonful, it makes a fantastic base from which you can modify and make the vegetable soup recipe your own. This is a tomato based soup, with grains for fiber and protein and a mix of vegetables that everyone will enjoy including onion, peas, carrots and corn. You can easily swap out the farro for a different grain of your choice, and add or subtract whatever vegetables you and your family enjoy. Plus, this is the perfect soup recipe when you are putting off making another grocery run because you can just throw whatever frozen veggie mix you have in the freezer in and call it a day!
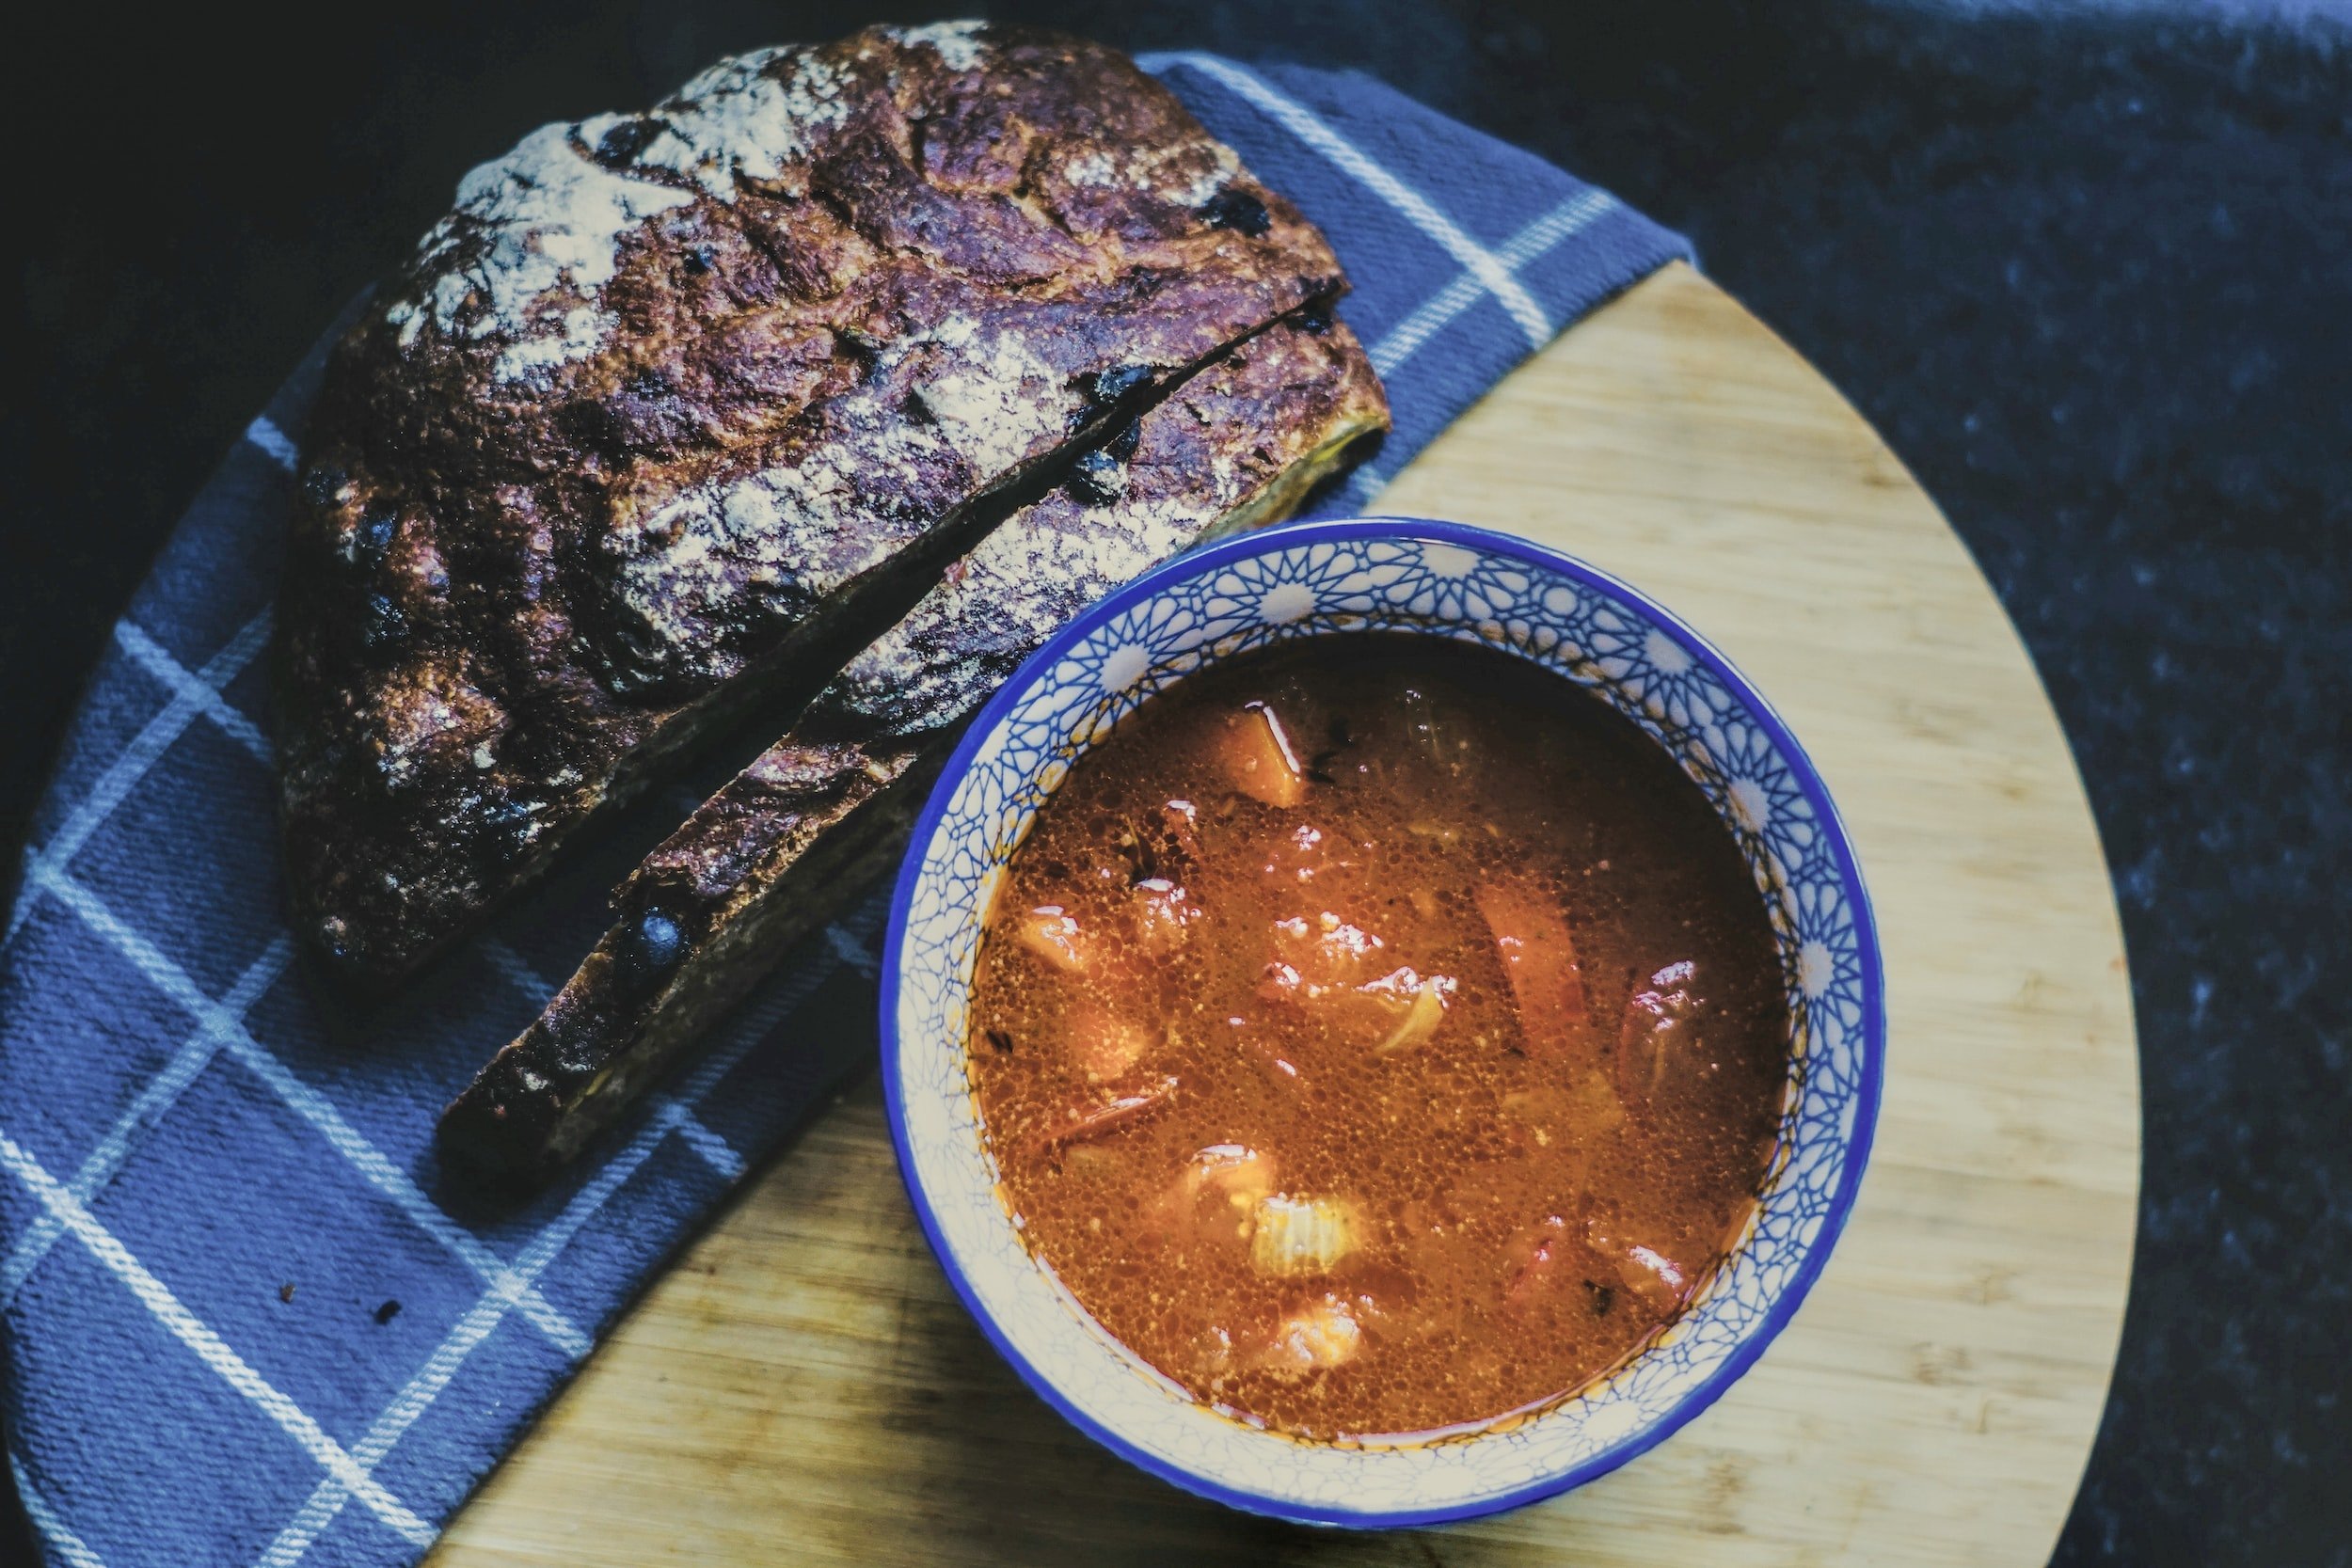
My grandma always serves this soup with a big loaf of fresh challah bread, golden brown on the top and slightly sweet. Toasted with butter, I can’t imagine a meal that feels more like home to me. I can remember many cozy evenings as a child enjoying this soup with my family, and now that my grandma has moved to another country, I make this soup any time I miss her to bring her comforting and sometimes wild presence to our kitchen once again.
Since I’m always looking for easy vegetarian soup recipes and ideas, I wanted to share mine with you and encourage you to use it as a starting point to develop your own favorite vegetable soup! This is a modified version of my grandma’s recipe, made based on what we usually have on hand in our pantry on any given day. I hope you make this recipe your own, and share a bowl with the people you love this winter.
Grandma’s Easy Vegetarian Vegetable Soup Recipe
Easy Vegetable Soup
Ingredients
- 2 Carrots
- 1 Yellow onion
- ½ cup Peas
- ½ cup Corn
- 28oz Diced tomatoes
- 8oz Tomato sauce
- ½ cup Farro
- 4 cups vegetable broth
- Salt and pepper to taste
Instructions
- Saute the onion and carrot on medium heat until softened.
- Add all remaining ingredients and bring to a boil.
- Lower heat and simmer 40 minutes, partially covered.

Nutrition Facts
Calories
102.86Fat
0.67Sat. Fat
0.12Carbs
22.64Fiber
4.97Net carbs
17.68Sugar
6.97Protein
3.56Sodium
646.31Cholesterol
0
Vegan stuffed butternut squash recipe
Butternut squash is a really versatile ingredient. It can be roasted, stuffed, boiled, sautéed, mashed, or twice baked, and it’s delicious in both sweet and savory dishes. Whether you’re making pumpkin pie or beef stew, the sweet, nutty flavor of butternut is always a welcome addition.
The Cottage Peach is reader-supported. When you purchase through links on our site, we may earn an affiliate commission at no additional cost to you. All opinions are our own.
Why Eat Butternut Squash?

Many varieties of squash have been eaten for thousands of years, but butternut squash didn’t make it to grocery stores until the 1940’s. Since that time, it has become a staple of the American diet and a traditional Thanksgiving food.
Known as butternut pumpkin in Australia and New Zealand, butternut squash can be used to substitute for pumpkin when baking a pumpkin pie or pumpkin bread.
Butternut squash is a really versatile ingredient. It can be roasted, stuffed, boiled, sautéed, mashed, or twice baked, and it’s delicious in both sweet and savory dishes. Whether you’re making pumpkin pie or beef stew, the sweet, nutty flavor of butternut is always a welcome addition.
Butternut is not a stringy squash, which makes it useful for recipes that require a pureed squash, such as lasagna.
Is Butternut Squash Healthy?
Yes! Butternut squash is a low-calorie source of vitamin A, potassium, vitamin C, fiber, vitamin B-6, vitamin E, thiamin, niacin, folate, and manganese.
It aids in digestion, and is beneficial to our blood pressure, skin, and hair, among other things.
Is Butternut Squash a Vegetable?
Butternut squash is one of those fruits we call, and treat as, a vegetable. So while botanically speaking it is a fruit, in common usage it’s fine to refer to it as a vegetable.
How to Choose a Butternut Squash
The best time to buy butternut squash is from September to November, as it will be freshly harvested. If possible, visit your local farmer, but if that’s not an option for you, butternut squash is readily available in grocery stores.
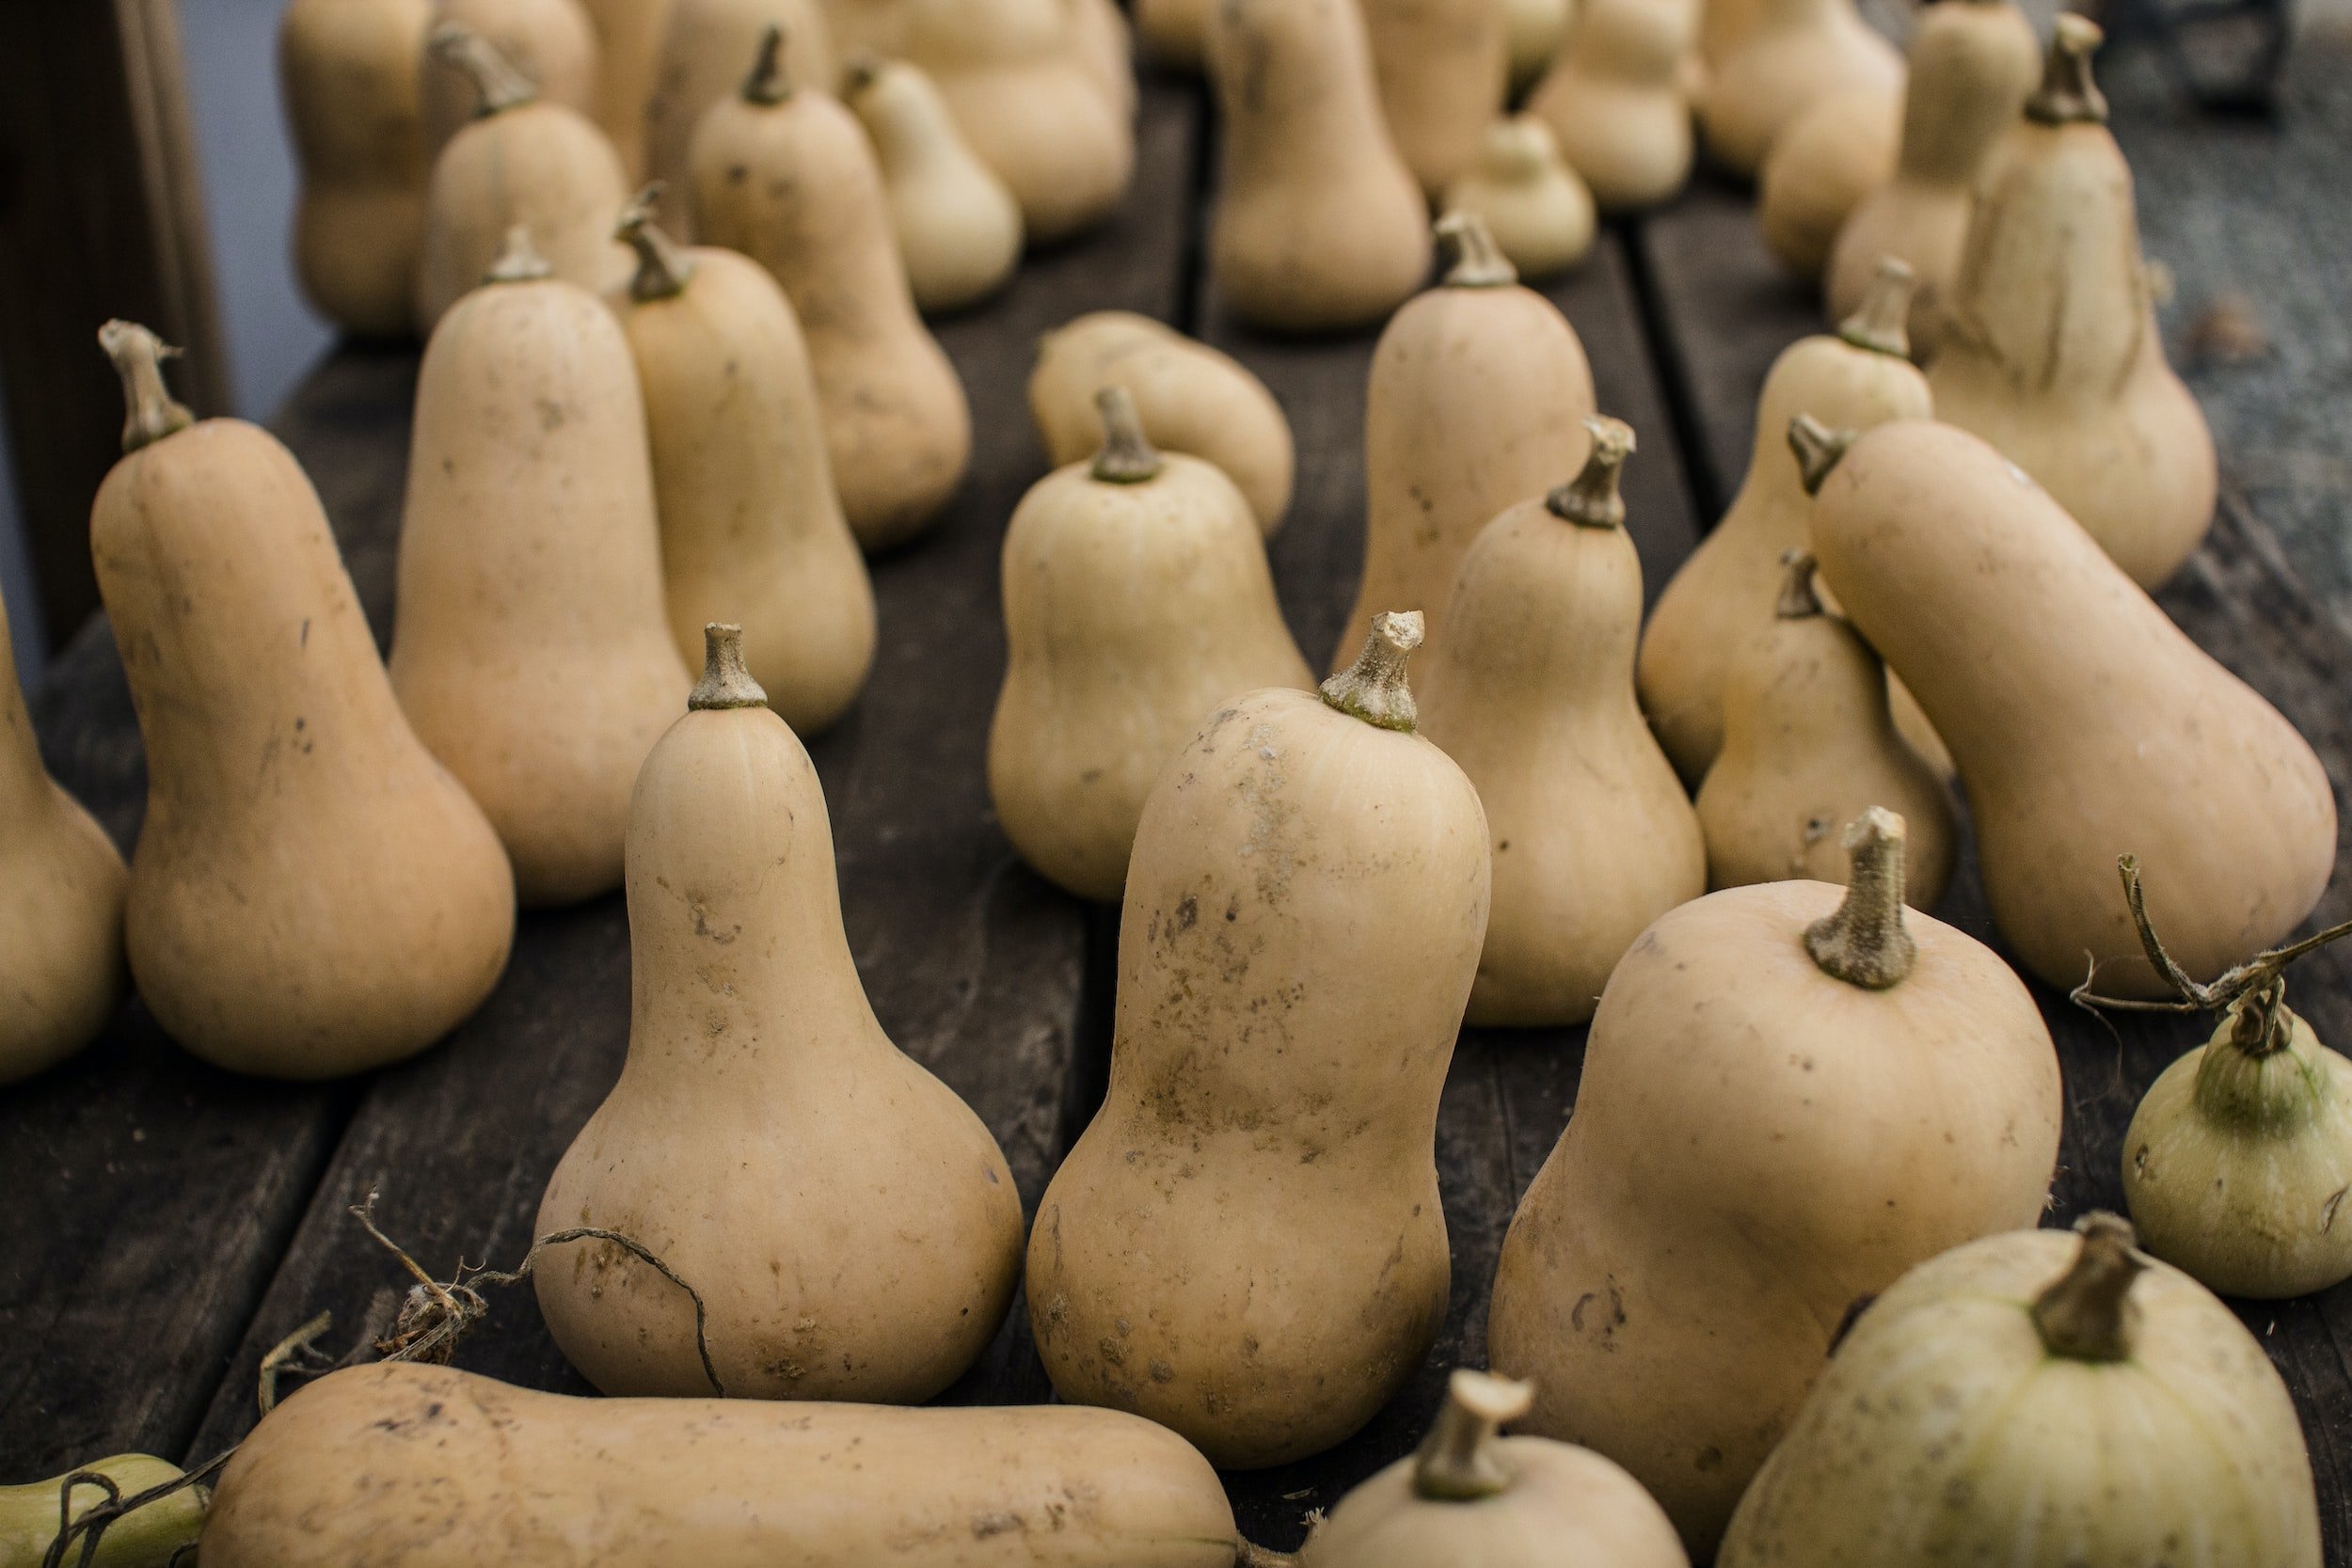
Butternut squash is peanut shaped, with beige skin and an orange interior.
When choosing a butternut squash, pick one that is heavy for its size and feels firm. Be sure it has a smooth, hard skin without any bruises or blemishes. The skin should not be easy to scrape with a fingernail.
The stem of the butternut squash should be dry and tan. If it’s not, it was picked too early and the flavor will be lacking.
If you’re buying butternut squash to use in a pumpkin pie recipe, keep in mind that one pound of butternut will yield about two cups of squash.
Pre-cut butternut squash is more expensive than buying a whole, un-cut butternut, but some people don’t have time, or are intimidated by the thought of peeling and chopping the squash themselves. While butternut squash is a bit trickier to peel, solely because of its shape, it is easy to get the hang of, and there are ways to make it an easier process.
How to Peel a Butternut Squash
There are three basic ways to peel a butternut squash.
Peeling a whole butternut squash
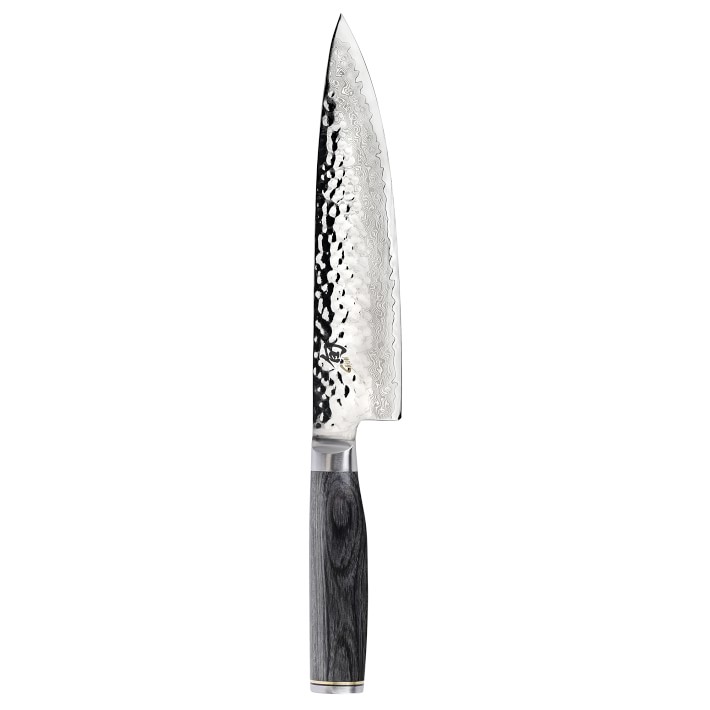
The first way is simply to use a sharp chef’s knife or peeler to remove the skin. To do so, cut off the bottom of the squash so it can sit flatly on your cutting board.
If you think the curve in the squash is going to cause you trouble, you can cut the neck from the curve and peel them separately.
If using a knife, hold the squash against the cutting board with one hand, and with the other slide the knife from the top to the bottom. You may remove a bit of butternut meat this way, but not so much as to be a problem. And the more you practice, the less you will lose.
Using a peeler is self-explanatory, I think! You may have better luck using shorter strokes than you would for a potato.
Microwaving a whole butternut squash for peeling
Microwaving a whole butternut squash can make it easier to peel.
To microwave butternut squash, first cut off the ends of the squash, then either make slits with a knife or poke it all over with a fork. This will allow steam to escape, which is important if you don’t want a messy explosion in your microwave.

Set the microwave for 3-5 minutes.
Let the squash sit for a minute or two to cool off a bit, then pull the skin away with a knife or your hands.
Boiling a whole butternut squash for peeling
To boil a whole butternut squash for peeling, put your squash in a large pot and cover it with water. Bring the water to a boil, and let it simmer for 4-5 minutes, until you can pull the peel away from the squash.
Can You Eat Butternut Squash Skin or Seeds?
All parts of a butternut squash are edible. The seeds can be eaten raw or roasted as you would pumpkin seeds. The skin is rich in vitamins and fiber.
Butternut skin can be a bit tough depending on how you cook it. The skin of a slow-cooked squash will be soft, but on a roasted squash it can become unappetizing.
The skin of butternut squash can also be a little bitter, but if prepared well, by slow-cooking and seasoning it, it will taste very similar to the squash itself.
If you peel your butternut squash, you can bake the peelings with olive oil and seasonings for a butternut chip.
How to Cut a Butternut Squash
Once you have peeled your squash, place the cut, bottom edge on your cutting board and slice the squash in half lengthwise.
Use a metal spoon to scrape the seeds and any strings from the center of the squash.
You can then chop it to your desired size. Larger pieces will take longer to cook, of course. The important thing is that the pieces are consistent in size, so they will cook evenly.
How to Roast Butternut Squash
Roasting butternut squash will give it a much richer flavor than boiling it would.
To roast a butternut squash, you do not need to peel it. Simply cut it in half lengthwise, remove the seeds, and place the two halves of the squash on a cookie sheet.
If you want to add flavorings (brown sugar, butter, and a bit of vanilla is a favorite around here) put the squash cut-side up and fill the cup where the seeds were.
If you are roasting your butternut to puree or for the baked stuffed squash recipe below, place the cut sides down.
How to Store Butternut Squash
Butternut squash is harvested in the fall, but you can keep it throughout the winter very simply, or prep it to use in a few days' time.
Storing uncooked, peeled butternut squash:
If you’d like to prep your squash a few days before cooking with it, it will keep for 5 days in an airtight container in the refrigerator.
Storing whole butternut squash in a cool, dark spot:
The skin on butternut squash is fairly thick, which allows us to store it without refrigeration. Butternut squash stores best in a dark, dry place that’s about 50 degrees.
It can keep for months. To prolong that period, do not store them with any other fruits, as some fruits emit ethylene gas, which can cause rot.
Check your squash periodically to be sure no bruises or blemishes have appeared, and that the squash is still firm.
Freezing butternut squash:
Butternut squash can be frozen raw or cooked.
Freezing raw butternut squash:
While you can freeze it whole, it will be much easier to use with a bit of preparation before freezing.
Peel your butternut squash and remove the seeds. You can freeze the peeled halves, or chop your butternut into cubes. If you cut it into cubes, lay them on a cookie sheet in the freezer for 2 hours, then transfer to a freezer-safe, airtight container.
Freezing cooked butternut squash:
The best way to freeze cooked squash is to puree it first. Put your cooled puree in a freezer-safe, airtight container. Let the squash thaw in the refrigerator before using it.
Recipe: Vegetarian Baked Stuffed Squash

Vegan Stuffed Butternut Squash
Ingredients
- 1 cup cooked quinoa
- 1 Tbsp olive oil
- 1 package Beyond Beef
- 1 Tbsp soy sauce
- 2 cloves garlic, minced
- ⅓ cup cup sun dried tomatoes
- 2 cups loosely packed chopped swiss chard
- 1/2 cup roughly chopped pumpkin seeds (optional)
- 1 large butternut squash, halved lengthwise, seeds removed
- 1 Tbsp olive oil
- 2 Tbsp maple syrup
- 1/4 tsp ground cinnamon (optional)
- 1 healthy pinch sea salt
Instructions
- Preheat oven to 400F degrees
- Line your dutch oven with parchment paper
- Cut your butternut squash in half lengthwise.
- Remove the seeds with a sharp edged spoon or melon baller. Brush the squash with olive oil, maple syrup, cinnamon (optional), and salt. Place cut-side down in your Dutch oven.
- Bake squash for 15 minutes, then flip the squash over to cut-side up. Bake for another 30-45 minutes (sometimes more depending on the size of your squash), or until a knife easily pierces the thickest part of the squash.
- Sauté your cooked quinoa over medium heat to crisp and brown. Add half of the soy sauce. Remove from the skillet and set aside.
- To the still hot skillet add the beyond beef and the other half of the soy sauce. Sauté for 8-10 minutes, or until browned. Then add garlic, sun dried tomatoes, swiss chard and pumpkin seeds(optional) and sauté for another 1-2 minutes or until chard is just wilted. Add quinoa back to the pan and toss to coat. Set aside.
- Once your squash is roasted, place cut-side up in the Dutch oven and fill to the brim with quinoa filling. Then place back in the oven to roast for another 5 minutes.
- Top with optional chives/green onion and balsamic glaze.
- Store leftovers covered in the fridge for 4-5 days. Reheat in a 350F oven until hot.
Nutrition Facts
Calories
306.52Fat
12.39Sat. Fat
1.86Carbs
46.03Fiber
7.09Net carbs
38.95Sugar
14.37Protein
8.56Sodium
312.29Cholesterol
0.18
Stovetop Elderberry Syrup Recipe
A pot of elderberry syrup simmering on the stovetop is a welcome sight and essential addition to our herbal apothecary. You won’t have any trouble getting your children to try this sweet and fruity syrup when they feel a cold coming on either, since it tastes just like candy!

The Cottage Peach is reader-supported. When you purchase through links on our site, we may earn an affiliate commission at no additional cost to you. All opinions are our own.
Elderberry season is drawing to a close, and my freezer is filled up with this useful fruit. I spent the late summer months periodically checking for ripeness, clipping each branch back as the berries and stems turned from green to deep purple. Elderberries can be a challenge to remove, leaving your hands stained purple with the juice. That’s why I place my bunches directly into the freezer after harvesting, whole - this way you can easily remove the frozen berries in one fell swoop and preserve them at peak freshness for winter cold remedies, sweet syrups and more. A pot of elderberry syrup simmering on the stovetop is a welcome sight and essential addition to our herbal apothecary. You won’t have any trouble getting your children to try this sweet and fruity syrup when they feel a cold coming on either, since it tastes just like candy!
What Are Elderberries?
Elderberries are edible, small, dark fruits which grow wild in much of North America and other areas of the world. The bushes they grow on are attractive, making them a great addition to a yard or garden.
The bark, leaves, and roots of elderberry plants are toxic to humans and pets. But beginning in June, elderberry bushes produce eye-catching white blossoms in flat, disc-shaped clusters of tiny flowers. These clusters grow as big as 10” in diameter. They are beautiful and fragrant, and are also edible. The flowers can be eaten raw or cooked.
Of course, you don’t want to harvest all of the flowers, because then your bush would not produce any berries.
In fall, the elderberries themselves are ready to harvest. They should not be eaten raw, as raw elderberries may cause nausea, vomiting, and digestive problems. Cooking the berries removes their toxic properties.
What Do Elderberries Taste Like?
Raw elderberries should not be eaten, but we’re not missing much. Some people call them flavorless, while others find them bitter and tart. They’re much tastier when cooked with other fruits or sweeteners.
Uses of Elderberry
Elderberries can be used to make medicinal syrup, cordial, jelly, sauces, and wine. Dried elderberries are tasty in baked goods, and also make a soothing tea.
Benefits of Elderberry Syrup
Elderberry has a very long history of use as a medicinal plant, dating back as far as ancient Egypt, where it was used to help heal burns. It has also been used as a diuretic. Indigenous peoples used elderberry to treat rheumatism and fever.
Elderberry syrup provides significant antioxidant effects. The antioxidants in elderberries boost the immune system, and along with the berries’ abundance of vitamins A, B, and C, help to fight off infections.
The syrup is also high in fiber, B vitamins, iron, and magnesium, and is an anti-inflammatory.
Elderberry Syrup for Colds, Coughs, and Flu
First, a note: People who have auto-immune issues may want to avoid elderberries, as boosting the immune system is only likely to make symptoms worse.
Both elderberry syrup and elderberry tea are good methods of delivery for elderberries’ many health benefits. Elderberry tea with a bit of honey and lemon juice is particularly soothing.
Studies have shown that elderberry syrup may help to treat fevers, headaches, coughs, body aches, and other symptoms of the flu and upper respiratory infections.
Growing Elderberries
Elderberry plants are different varieties of the Sambucus tree. They are perennial, meaning you plant them once and they continue to grow each year. They can grow as tall as 12’, so they need a large area. They may tolerate partial shade, but won’t produce as many berries there, so it’s best to plant them in full sun. They do fine in both wet and dry soils.
Elderberry bushes provide a small harvest after the second year of planting. In their third year, they are mature, and can produce a 10-12 pound harvest.
Elderberry plants will spread through suckers, but are easily controlled by mowing them down when they appear. Propagating elderberries is easily done through cutting or ground layering.
Propagating elderberry bushes by hardwood cutting
To propagate an elderberry by cutting, check your plant for new buds, which will likely appear in February. Not every cutting will take root, so plant more than one to increase your likelihood of success.
Choose branches about the thickness of a pencil, with two sets of buds, and cut above and below each set. Cut the branch at an angle on one end to make it easier to push into the soil.
Plant directly into the ground or into a pot. If you use a pot, you can cover the branch with a baggie, misting regularly to keep the soil moist. Alternatively, you can place your cuttings in water until they begin to develop roots.
Elderberry branches take 8-10 weeks to root. If successful, you will see growth in the spring.
Propagating elderberry bushes by ground layering
By layering branches, we can force them to develop roots while still attached to the parent plant. This way they will continue to receive food and water without effort on their part.
Instructions for ground layering elderberry plants:
Choose a flexible branch that is growing close to the ground.
Remove any leaves that are on the area you want to layer.
Make a small cut on the side of the branch that will touch the soil, about 1/3 of the way through the branch.
Cover that area in soil, and if necessary peg the branch to the ground.
As the branch grows, you can stake the end of it into an upright position, being careful not to disturb its new roots.
Once a good root system develops, you can cut the branch off of its parent and move it to your desired spot.
Harvesting Elderberries
Elderberry flowers should be picked on a warm, dry day. Snip behind the flowers to remove the entire cluster in one piece.
Clusters of berries should also be cut as one piece. Snip with pruning shear or snips where the base of the berries meets the stem.
To make it easier to remove the berries from the plant, spread the clusters of berries on a cookie sheet and freeze them for two hours before using your hands to loosen from the branches.
Eating Elderberry Flowers
Elderberry flowers can be eaten raw or cooked. They are the only part of the elderberry plant that is non-toxic.
The raw flowers are crunchy, with a subtle floral taste. They are one of the sweetest-tasting flowers, and are sometimes described as tropical or pear-like.
Fresh elderberry flowers can be added to a salad or used to make a dressing. Fresh or dried elderberry flowers can be used to make tea.

Preserving Elderberry Flowers and Fruit
How to dry elderberry flowers:
To dry elderberry flowers, spread them in a single layer in a dark dry place, or hang them by their stems in a cool, dark location.
How to dry elderberries:
Remove the berries from their stems and spread them in a single layer. Unless you live in a particularly dry and sunny environment, use a dehydrator or oven for best results.
Drying elderberries in a dehydrator:
Either remove the berries from the plant completely, or cut off the larger stems.
Spread the berries in a single layer on your dehydrator trays.
Run the machine for 12 hours at 135 degrees Fahrenheit.
Drying elderberries in the oven:
Spread the berries in a single layer on a parchment-covered cookie sheet, and place in the oven at your lowest setting (no more than 175 Fahrenheit). Cook for 12 hours, stirring occasionally.
How To Store Dried Elderberries
Store your dried elderberries in an airtight container in a cool, dark place. A Ball mason jar is a good option. For longer-term storage, you can vacuum seal the jar.
Making Elderberry Syrup
Elderberry syrup can be made with just four ingredients: dried berries, water, ginger, and honey.
Supplies:
Mesh strainer
Jar
The Best Elderberry Syrup Recipe

Stovetop Elderberry Syrup
Ingredients
- 1 cup dried elderberries
- 6 cups water
- ¼ ounce grated ginger
- 1 ½ cups raw honey
Instructions
- Bring the berries and water to a boil. Simmer for 30 minutes.
- Strain the berries, and return the liquid to the heat.
- Add ¼ ounce grated ginger. Simmer gently for 45-60 minutes, or until 2-3 cups of liquid remain.
- Remove from heat and allow to cool to room temperature.
- Stir in 1 ½ cups of raw honey.
Notes
To store your elderberry syrup, pour your syrup into an airtight bottle, label it, and refrigerate. Use within 2 months.


Storing Elderberry Syrup
Pour your syrup into a bottle, label it, and refrigerate. Use within 2 months.
Using Elderberry Syrup:
For medicinal use:
Take 2 teaspoons every 3 hours at the first signs of a virus.
Other uses:
Elderberry syrup can be used as a cordial, mixed with seltzer or water, or as a shrub for cocktails.
It can also be added to yogurt, pancakes or oatmeal for a tasty treat.


![The Power of Nature: How To Make Infused Oregano Oil for Your Health and Wellness [Recipe]](https://images.squarespace-cdn.com/content/v1/60e85024dc86d643da81c96a/1682625337753-AFI1M6MRRMDQ5CBNY2TX/unsplash-image-Fl2Ki3_GZIU.jpg)
![Make This Easy + Natural Botanical Hand Salve [Recipe]](https://images.squarespace-cdn.com/content/v1/60e85024dc86d643da81c96a/b57698b0-de70-4101-afaf-7af57788237d/Herbal+Face+Steam+Recipe+by+The+Cottage+Peach-1.jpg)

How to Make Healthy Homemade Granola (Recipe)
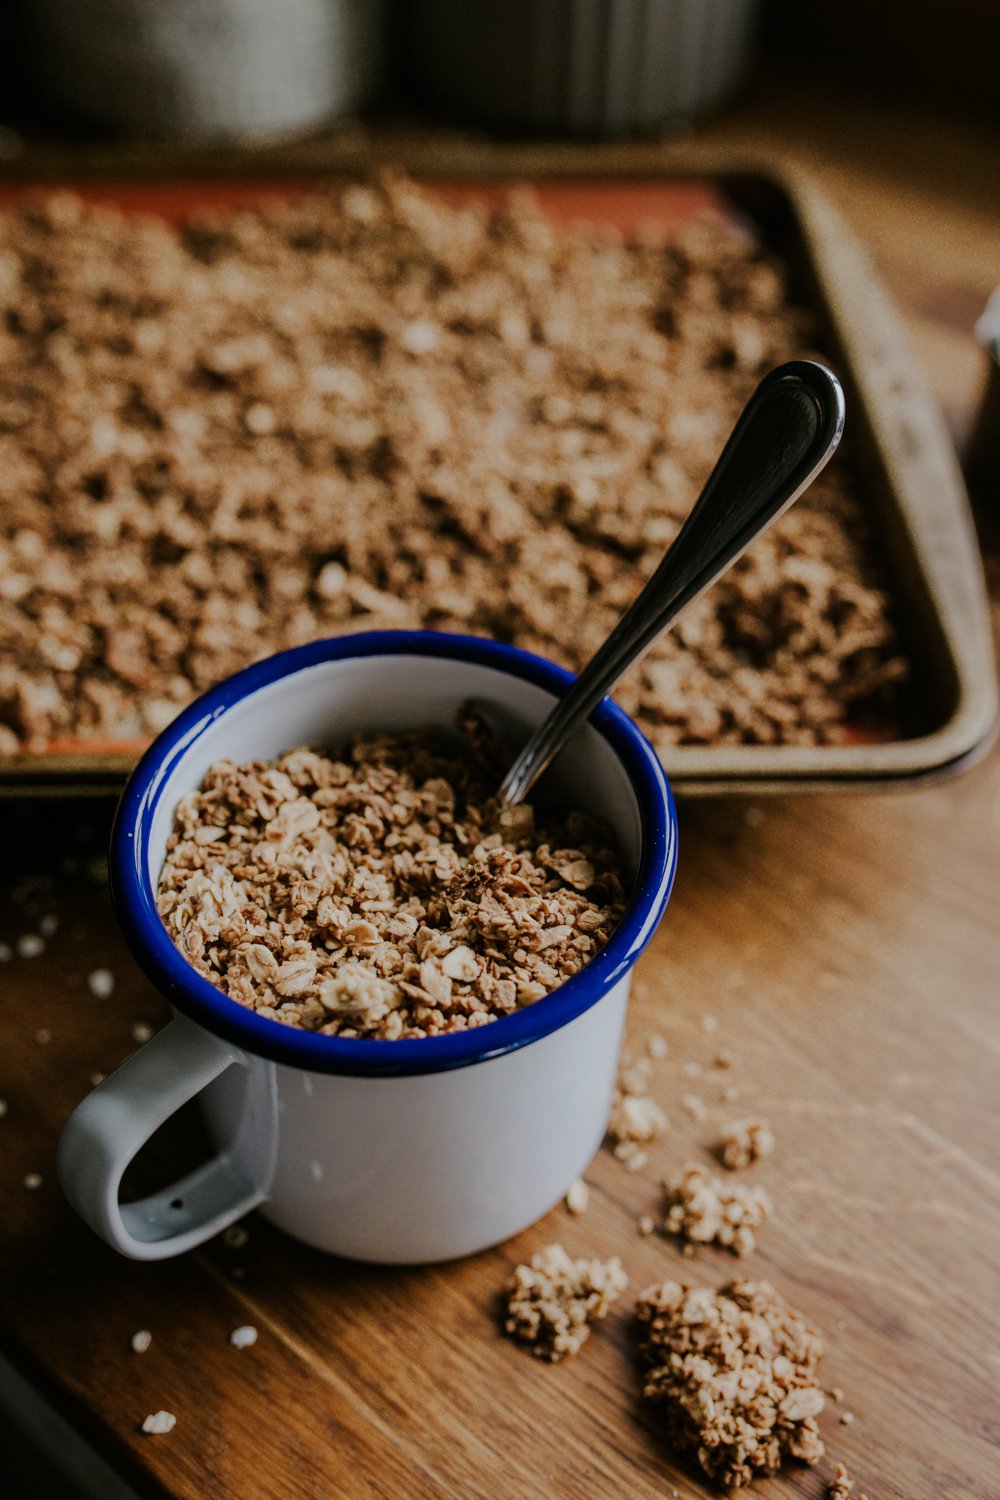
There’s something about the smell of warm granola cooking in the oven, earthy and sweet, that means home to me. When I was a kid I would smell it from up in my room, and I could just picture my mom mixing it up, spreading it on baking sheets, and tending the oven to pull it out at just the right time. She even made sure to leave a few big chunks for me not broken up, just how I liked it. I’m lucky in that we were never without fresh granola - as soon as my mom noticed the jar getting low, she would quickly pop another batch in the oven to fill up the jar all over again.
There’s something about the smell of warm granola cooking in the oven, earthy and sweet, that means home to me. When I was a kid I would smell it from up in my room, and I could just picture my mom mixing it up, spreading it on baking sheets, and tending the oven to pull it out at just the right time. She even made sure to leave a few big chunks for me not broken up, just how I liked it. I’m lucky in that we were never without fresh granola - as soon as my mom noticed the jar getting low, she would quickly pop another batch in the oven to fill up the jar all over again.
Now I keep a never-ending supply of granola on my own kitchen counter to fill my own house with the aroma of earth and sweetness and home. There really is nothing quite so comforting as the scent of warm granola cooling on the stovetop! You can mix up the flavors to complement the season with cinnamon and pumpkin seeds in the fall, pecans and allspice in the winter, apricots and almonds in the spring, and dried raspberries and blueberries in the summer. Granola also makes a great personalized zero waste edible homemade gift for the holidays - just pop your favorite blend of granola in a mason jar with a cute wooden lid and add some twine and a ribbon for a thoughtful, edible gift everyone will love.
Granola is my favorite mid-afternoon snack with berries and oat milk, and the best thing to bring on a day hike in the woods. What could be more satisfying than sitting down with a Stasher bag filled with granola after a long and strenuous hike in nature? It’s the perfect filling snack.
Why Make Homemade Granola?
There are plenty of tasty granolas available to buy, so why take the time to make your own?
The granola you find at stores is expensive, and making it yourself is much less so. You’ll also have complete control over the ingredients you choose, and won’t add any more packaging to our overburdened planet. And granola is so easy to make!

Homemade granola is healthy, delicious, vegan, and gluten-free (check your oatmeal’s packaging to be sure it is not processed in a factory that also processes products with gluten). It’s also completely customizable.
There’s no need to ever make exactly the same granola twice. Once you’ve mastered the basic method for making homemade granola, you’ll have a feel for it and can begin to make substitutions in oils and sweeteners, and try out additional ingredients.
The basic ingredients of granola are rolled oats, sweetener, oil, and salt. That’s it. And it tastes amazing!
As the main ingredient of the recipe, whole grain oats deliver lots of health benefits and are very filling. They’re anti-inflammatory, both inside the body and to the skin, which is why they’re often used in baths to soothe inflammatory conditions such as eczema.
But why stop at four ingredients when there are other delicious and nutritious foods you can add to take your granola up a level?
Delicious Add-Ins for Granola
The best part about granola is making it your own with different spices, fruits, nuts, seeds and sweeteners. It would be impossible to list all the delicious add-ins you could include in your homemade granola recipe, but here are some ideas to get you started:
Spices:
Cinnamon
Nutmeg
Allspice
Ginger
Nuts and seeds:
Both nuts and seeds provide protein, fiber, healthy fats, and other vitamins, magnesium, and other nutrients. Walnuts, chia, and flax seeds are great sources of plant-based omega-3 fatty acids.
Nuts can be used whole, or you can break them up if you want them to be more integrated into the granola. Mix and match what you’d like, and use it in place of 1 cup of the oatmeal.
Sunflower seeds
Sesame seeds
Pumpkin seeds
Chia seeds
Ground flax seed
Almonds
Pecans
Walnuts
Dried fruit:
In some ways, dried fruits are even better for you than fresh. They contain more fiber and antioxidants which can help lower your chances of developing heart disease, some kinds of cancer, and diabetes.

Raisins
Cranberries
Dates
Apricots
Fig
Banana chips
Cherries
Shaved coconut
Candied orange peel
Flavorings:
Peanut or almond butter
Molasses
Orange zest
Chocolate chips
Cacao nibs
Vanilla
Applesauce
Substitutions for a Homemade Granola Recipe
Experimenting with different oils and sweeteners can take the flavor of your granola in different directions.
Oils:
You can completely replace the vegetable oil with other edible oils, or add a dollop of butter to your oil of choice.
Vegetable oil
Coconut oil
Olive Oil
Butter
Sweeteners:
I love the flavor of maple syrup, and the inflammation-reducing antioxidants, zinc, magnesium, potassium, and calcium that come along with it. But different sweeteners can make a huge difference to the flavor, and also the texture, of your granola.
A crunchy granola is a great option, but if you’d like a chewy granola you could try substituting the maple syrup with honey, for example.
Maple syrup
Honey
Agave
Molasses

Simple Vegan Granola
Ingredients
- 5 cups rolled oats, or 4 cups oats and 1 cup nuts
- ½ cup dark brown sugar
- 1 cup pure maple syrup
- 4 Tablespoons vegetable oil
- 2 pinches of salt
Instructions
- Preheat your oven to 300°F
- Mix the ingredients in the order listed, stirring between each, until well combined.
- Spread the granola in an even layer on the baking sheets.
- Bake for 15 minutes, then stir it around a bit.
- Bake for 10 minutes and stir it again.
- Bake 10 more minutes, and you’re done.
Notes
Customize this simple vegan granola recipe by adding your favorite dried nuts and seeds or fruits and switching up the oil and sugar.
Nutrition Facts
Calories
138.29Fat
3.49Sat. Fat
0.61Carbs
24.98Fiber
2.69Net carbs
23.54Sugar
14.18Protein
2.24Sodium
35.8Cholesterol
0Recipe: Homemade Healthy Granola
Supplies:
2 baking sheets lined with Silpat or parchment paper
A spoon or spatula
A large mixing bowl
Ingredients:
5 cups rolled oats, or 4 cups oats and 1 cup nuts
½ cup dark brown sugar
1 cup pure maple syrup
4 Tablespoons vegetable oil
2 pinches of salt
Instructions:
Preheat your oven to 300 degrees.
Mix the ingredients in the order listed, stirring between each, until well combined.
Spread the granola in an even layer on the baking sheets.
Bake for 15 minutes, then stir it around a bit.
Bake for 10 minutes and stir it again.
Bake 10 more minutes, and you’re done.
Tips for Making Granola
Keep an eye on the granola for the last 10 minutes. Ovens vary, and there’s a short line between done and slightly burned.

The more granola you make, the better you’ll be at judging when it’s ready. You are looking for toasty and golden brown. It may feel a bit soft when you first remove it from the oven. If that happens and you’re not sure if it’s done, take a taste-sized bit out of the oven, let it sit for 1 minute, and then try it.
If you are adding other ingredients, you may need to adjust the amount of oil you use. Many granola recipes will suggest you use equal amounts of oil and sugar. I find that to be too oily. Aim for your oats to be coated, but not soggy with oil.
You can adjust the amount of salt, but don’t remove it completely. The salt enhances each flavor, and helps to bring them all together.
If you’d like your granola to be clumpy rather than loose, press it down with a spatula or the back of a spoon after you’ve done your last stir, and then again when you take it out of the oven.
If you add dried fruit while the granola is still warm, then press it down, that will also help hold the granola together. If you’d like it looser, add the fruit after the granola has cooled. If you’d like it to cook with the granola, only add it for the last 10 or 15 minutes.
If adding nut butter, melt it slightly and combine it with the maple syrup. Vanilla should also be added to a liquid, so that it will coat the oats more evenly.
Chocolate chips can be added after the granola has cooled, or while it’s slightly warm if you’d like it to melt into the oats a bit.
Mistakes to Avoid When Making Granola
If you put an uneven amount of granola on each baking sheet, they will cook at different rates. Be consistent with the amount of granola on each of the baking sheets, so both will cook at the same speed.
Make sure your layer of granola does not thin out around the edges. It is easy to burn granola, and thinner areas will cook much faster.
Coconut shavings burn easily. Don’t add them until the last stir if you’d like them toasted, or after the granola is out of the oven if you’d like them untoasted.
Storing Homemade Granola
Store your granola in an airtight container. It looks pretty in a glass jar on the counter, but a Ziploc will also do.
If you make a large batch, you can store some in the freezer to thaw for later use.
How to Use Granola
Granola is a great snack on it’s own, but there are also tons of ways to use it as an ingredient with other foods:
Ways to use granola
As cereal, in milk or kefir with berries and chocolate chips
On yogurt with a sliced banana
As a crunchy top for muffins or apple cake
On ice cream
Defrost frozen berries in a bowl, then add yogurt and granola for a delicious breakfast
On pancakes with maple syrup
On a salad